Menhirs of Power: Difference between revisions
Jump to navigation
Jump to search
mNo edit summary |
The Jonster (talk | contribs) all links done |
||
| (14 intermediate revisions by 5 users not shown) | |||
| Line 1: | Line 1: | ||
{{ | {{RHRLevel | ||
| name = Menhirs of Power | | name = Menhirs of Power | ||
| image = [[File: | | image = [[File:Menhirs-of-Power.png|center|class=sprite|Menhirs of Power]] | ||
| preceded by = [[Sulphurous Sea]] | | preceded by = [[Sulphurous Sea]] | ||
| followed by = [[Pit of Endless Fire]] | | followed by = [[Pit of Endless Fire]] | ||
| | | murfysscore1 = 12000 | ||
| lums = | | murfysscore2 = 26000 | ||
| cages = | | murfysscore3 = 42000 | ||
| lums = 98 | |||
| cages = 4 | |||
}} | }} | ||
The '''Menhirs of Power''' is the eleventh level in ''[[Rayman: Hoodlums' Revenge]]''. It is a unique level, because the player needs to collect various runes scattered through the level. | |||
==Description== | |||
[[Rayman]] will have to collect five runes. But before that can be done, [[Rayman]] needs to find and free [[Globox]], as he is trapped in a small area blocked by a gate. After finding [[Globox]], the two must switch back and forth to reach the runes. Once all five runes are collected and brought to their corresponding menhirs, then the two can go to the exit. The level itself is a sort of a maze, with many [[Hoodlum]] enemies almost everywhere. The menhirs are in the middle of the map, and the exit is at the upper right of the map. | |||
[[File:Menhirs-of-Power-(All-runes).png|frame|left|The menhirs once all the runes have been brought to them.]] | |||
{{clear}} | |||
[[File:RaymanHoodlumsRevengeEU - 10.png|thumb|left|800px|The level]] | |||
{{clear}} | |||
==Screenshots== | |||
<gallery widths="240px" heights="160px" class="sprite"> | |||
RHR 99.png|[[Murfy]] telling [[Rayman]] that [[Globox]] is trapped. | |||
RHR 100.png|The [[switch]] that opens the gate where [[Globox]] is trapped. | |||
RHR 101.png|[[Rayman]] now with [[Globox]]. | |||
RHR 102.png|The first rune. | |||
RHR 103.png|The second rune. | |||
RHR 104.png|The third rune. | |||
RHR 105.png|The fourth rune. | |||
RHR 106.png|The fifth and final rune. | |||
</gallery> | |||
==External links== | ==External links== | ||
*[ | *[https://www.youtube.com/watch?v=depBgdxGP40 Menhirs of Power playthrough at YouTube (Part 1/3)] | ||
*[ | *[https://www.youtube.com/watch?v=ljUedc6NQAU Menhirs of Power playthrough at YouTube (Part 2/3)] | ||
*[ | *[https://www.youtube.com/watch?v=iYxXFPRu9Ao Menhirs of Power playthrough at YouTube (Part 3/3)] | ||
{{RHRWorlds}} | {{RHRWorlds}} | ||
[[pl:Menhirs of Power]] | |||
[[Category:Places from Rayman: Hoodlums' Revenge]] | [[Category:Places from Rayman: Hoodlums' Revenge]] | ||
Latest revision as of 23:13, 31 October 2023
| Menhirs of Power | |
|---|---|
 | |
| ← Sulphurous Sea | Pit of Endless Fire → |
      
| |

| |

| |
     
|
 
|
The Menhirs of Power is the eleventh level in Rayman: Hoodlums' Revenge. It is a unique level, because the player needs to collect various runes scattered through the level.
Description
Rayman will have to collect five runes. But before that can be done, Rayman needs to find and free Globox, as he is trapped in a small area blocked by a gate. After finding Globox, the two must switch back and forth to reach the runes. Once all five runes are collected and brought to their corresponding menhirs, then the two can go to the exit. The level itself is a sort of a maze, with many Hoodlum enemies almost everywhere. The menhirs are in the middle of the map, and the exit is at the upper right of the map.
.png)

Screenshots
-
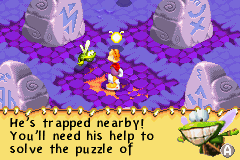
-
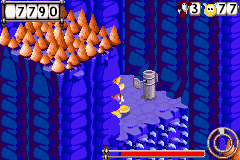
-

-
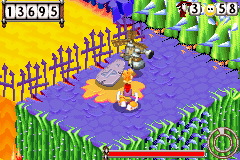 The first rune.
 -
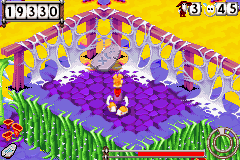 The second rune.
 -
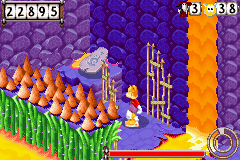 The third rune.
 -
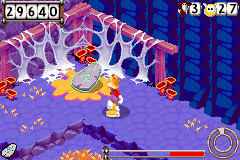 The fourth rune.
 -
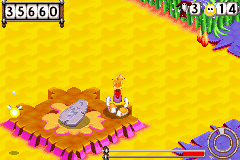 The fifth and final rune.


External links
- Menhirs of Power playthrough at YouTube (Part 1/3)
- Menhirs of Power playthrough at YouTube (Part 2/3)
- Menhirs of Power playthrough at YouTube (Part 3/3)