Sulphurous Sea: Difference between revisions
Jump to navigation
Jump to search
Hunchman801 (talk | contribs) mNo edit summary |
The Jonster (talk | contribs) replacing all the links |
||
| (15 intermediate revisions by 9 users not shown) | |||
| Line 1: | Line 1: | ||
{{ | {{RHRLevel | ||
| name = Sulphurous Sea | | name = Sulphurous Sea | ||
| image = [[File: | | image = [[File:Sulphurous-Sea.png|center|class=sprite|Sulphurous Sea]] | ||
| preceded by = [[Land of the Livid Dead (Rayman: Hoodlums' Revenge)|Land of the Livid Dead]] | | preceded by = [[Land of the Livid Dead (Rayman: Hoodlums' Revenge)|Land of the Livid Dead]] | ||
| followed by = [[Menhirs of Power]] | | followed by = [[Menhirs of Power]] | ||
| | | murfysscore1 = 10000 | ||
| lums = | | murfysscore2 = 15000 | ||
| cages = | | murfysscore3 = 22000 | ||
| lums = 63 | |||
| cages = 0 | |||
}} | }} | ||
The '''Sulphurous Sea''' is the second bonus level in ''[[Rayman: Hoodlums' Revenge]]''. It can be unlocked by collecting 16 [[Murfy]] stamps. | |||
The | ==Description== | ||
The level starts out in a similar area from the [[Land of the Livid Dead (Rayman: Hoodlums' Revenge)|Land of the Livid Dead]]. [[Rayman]] first reaches the [[Throttle Copter]] then lands on a raft. The raft can be freely steered on the large body of lava. Different paths can be taken to collect [[Jewel|gems]] and defeat enemies. Three [[switch]]es scattered in the level will need to be activated to eventually open the gate that leads to the exit. | |||
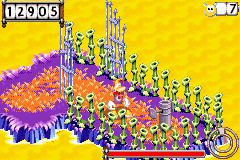
[[File:RaymanHoodlumsRevengeEU - 19.png|thumb|left|800px|The level]] | |||
{{clear}} | |||
==Screenshots== | |||
<gallery widths="240px" heights="160px" class="sprite"> | |||
RHR 91.png|The [[Throttle Copter]] can. | |||
RHR 92.png|[[Rayman]] on the raft. | |||
RHR 93.png|One of the paths lead to groups of high scoring [[Jewel|gems]]. | |||
RHR 94.png|One of the [[switch]]es in the level. | |||
RHR 95.png|A gate that can be opened by activating a [[switch]]. | |||
RHR 96.png|Another [[switch]]. | |||
RHR 97.png|An [[Armed Spinneroo]]. | |||
RHR 98.png|The [[switch]] that will open the gate to the exit. | |||
</gallery> | |||
==External links== | |||
*[https://www.youtube.com/watch?v=P3c72fvRwGw Sulphurous Sea playthrough at YouTube (Part 1/2)] | |||
*[https://www.youtube.com/watch?v=PsATP7r3s_A Sulphurous Sea playthrough at YouTube (Part 2/2)] | |||
{{RHRWorlds}} | {{RHRWorlds}} | ||
[[ | [[pl:Sulphurous Sea]] | ||
[[Category:Places from Rayman: Hoodlums' Revenge]] | [[Category:Places from Rayman: Hoodlums' Revenge]] | ||
Latest revision as of 23:12, 31 October 2023
| Sulphurous Sea | |
|---|---|
 | |
| ← Land of the Livid Dead | Menhirs of Power → |
The Sulphurous Sea is the second bonus level in Rayman: Hoodlums' Revenge. It can be unlocked by collecting 16 Murfy stamps.
Description
The level starts out in a similar area from the Land of the Livid Dead. Rayman first reaches the Throttle Copter then lands on a raft. The raft can be freely steered on the large body of lava. Different paths can be taken to collect gems and defeat enemies. Three switches scattered in the level will need to be activated to eventually open the gate that leads to the exit.

Screenshots
-
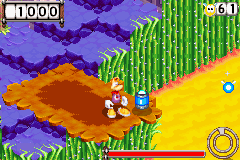 The Throttle Copter can.
 -
 Rayman on the raft.
 -
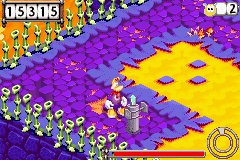
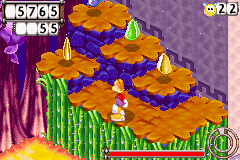 One of the paths lead to groups of high scoring gems.
 -
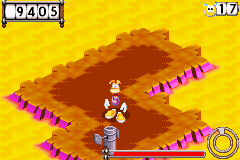 One of the switches in the level.
 -
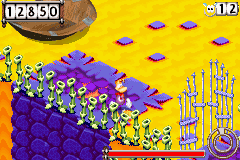 A gate that can be opened by activating a switch.
 -
 Another switch.
 -
 An Armed Spinneroo.
 -
 The switch that will open the gate to the exit.


