Bog of Murk (Rayman: Hoodlums' Revenge): Difference between revisions
Replaced content with "File:Betilla RO.png" |
m Reverted edits by Tp88 (talk) to last revision by Hunchman801 |
||
| Line 1: | Line 1: | ||
[[File: | {{Template:RHRLevel | ||
| name = Bog of Murk | |||
| image = [[File:RHR-Bog-of-Murk.png|center|class=sprite|Bog of Murk]] | |||
| preceded by = [[Rivers of Murk]] | |||
| followed by = [[Begoniax Bayou]] | |||
| murfysscore = 26000 | |||
| lums = 76 | |||
| cages = 6 | |||
}} | |||
* ''This article is about the level in [[Rayman: Hoodlums' Revenge]]. For the level in [[Rayman 3: Hoodlum Havoc|Rayman 3]], see [[the Bog of Murk]].'' | |||
The '''Bog of Murk''' is the seventh level in ''[[Rayman: Hoodlums' Revenge]]''. The player controls [[Globox]], who must rescue five [[Teensie]]s in order to push a hard [[switch]] that will allow him to exit the area. This is the second level in the game in which the player plays as [[Globox]] instead of [[Rayman]]. | |||
==Description== | |||
[[File:RHR-Bog-of-Murk-(Teensies).png|frame|left|class=sprite|[[Globox]] and the five [[Teensie]]s.]] | |||
The exit is blocked by a closed gate, and there is [[switch]] close by it. But this switch will be deactivated if no one is on it, so [[Globox]] will have to search the area looking for 5 [[Teensie]]s to put enough weight on the switch to make the gate open. While [[Globox]] is searching for the [[Teensie]]s, he will encounter with [[Hoodmonger Soldier]]s, which can be only be defeated if [[Globox]] is under the effects of [[plum juice]]. Once all 5 [[Teensie]]s are on the switch, [[Globox]] can go to the exit. | |||
{{clear}} | |||
==Screenshots== | |||
<gallery widths="240px" heights="160px" class="sprite"> | |||
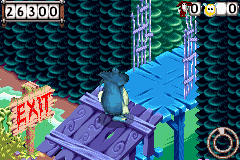
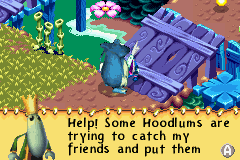
File:RHR 60.png|A [[Teensie]] telling [[Globox]] that the [[Hoodlum]]s captured other [[Teensie]]s. | |||
File:RHR 61.png|Other gates can be opened by activating [[switch]]es. | |||
File:RHR 62.png|One of the captive [[Teensie]]s. | |||
File:RHR 63.png|Switches are useful in opening gates where the [[Teensie]]s are at. | |||
File:RHR 64.png|Another one of the captive [[Teensie]]s. | |||
File:RHR 65.png|Many [[Hoodmonger Soldier]]s guard close to the [[Teensie]]s. | |||
File:RHR 66.png|[[Plum juice]] barrels can be used to defeat the [[Hoodmonger Soldier]]s. | |||
File:RHR 67.png|Once all [[Teensie]]s are on the switch, [[Globox]] can go to the exit. | |||
</gallery> | |||
==External links== | |||
*[http://www.youtube.com/watch?v=OZ4vDWwjdjk Bog of Murk playthrough at YouTube (Part 1/2)] | |||
*[http://www.youtube.com/watch?v=IxJMctYW9ko Bog of Murk playthrough at YouTube (Part 2/2)] | |||
{{RHRWorlds}} | |||
[[pl:Bagna Mroku (Rayman: Hoodlums' Revenge)]] | |||
[[Category:Places from Rayman: Hoodlums' Revenge]] | |||
Revision as of 02:30, 13 August 2018
| Bog of Murk | |
|---|---|
 | |
| ← Rivers of Murk | Begoniax Bayou → |
    
| |
|
| |
|
| |
     
|

|
- This article is about the level in Rayman: Hoodlums' Revenge. For the level in Rayman 3, see the Bog of Murk.
The Bog of Murk is the seventh level in Rayman: Hoodlums' Revenge. The player controls Globox, who must rescue five Teensies in order to push a hard switch that will allow him to exit the area. This is the second level in the game in which the player plays as Globox instead of Rayman.
Description
.png)
The exit is blocked by a closed gate, and there is switch close by it. But this switch will be deactivated if no one is on it, so Globox will have to search the area looking for 5 Teensies to put enough weight on the switch to make the gate open. While Globox is searching for the Teensies, he will encounter with Hoodmonger Soldiers, which can be only be defeated if Globox is under the effects of plum juice. Once all 5 Teensies are on the switch, Globox can go to the exit.
Screenshots
-
-
 Other gates can be opened by activating switches.
 -
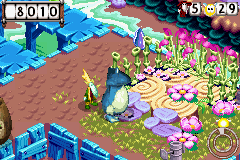 One of the captive Teensies.
 -
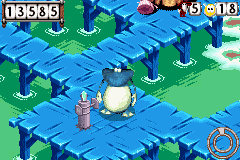 Switches are useful in opening gates where the Teensies are at.
 -
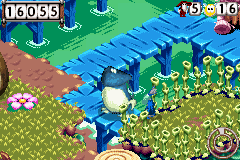 Another one of the captive Teensies.
 -
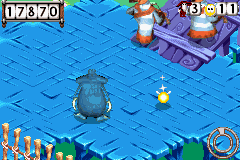 Many Hoodmonger Soldiers guard close to the Teensies.
 -
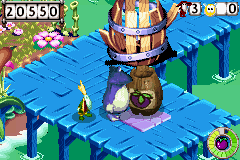 Plum juice barrels can be used to defeat the Hoodmonger Soldiers.
 -