Clearleaf Forest (Rayman: Hoodlums' Revenge): Difference between revisions
Hunchman801 (talk | contribs) No edit summary |
Hunchman801 (talk | contribs) m clean up |
||
| Line 1: | Line 1: | ||
{{ | {{RHRLevel | ||
| name = Clearleaf Forest | | name = Clearleaf Forest | ||
| image = [[File:RHRClearleafForest.png|center|class=sprite| | | image = [[File:RHRClearleafForest.png|center|class=sprite|Clearleaf Forest]] | ||
| preceded by = [[The Fairy Council (Rayman: Hoodlums' Revenge)|The Fairy Council]] | | preceded by = [[The Fairy Council (Rayman: Hoodlums' Revenge)|The Fairy Council]] | ||
| followed by = [[Clearleaf Falls]] | | followed by = [[Clearleaf Falls]] | ||
| Line 13: | Line 13: | ||
* ''This article is about the level in ''[[Rayman: Hoodlums' Revenge]]''. For the level in ''[[Rayman 3: Hoodlum Havoc|Rayman 3]]'', see [[Clearleaf Forest]].'' | * ''This article is about the level in ''[[Rayman: Hoodlums' Revenge]]''. For the level in ''[[Rayman 3: Hoodlum Havoc|Rayman 3]]'', see [[Clearleaf Forest]].'' | ||
'''Clearleaf Forest''' is a level in ''[[Rayman: Hoodlums' Revenge]]''. | '''Clearleaf Forest''' is a level in ''[[Rayman: Hoodlums' Revenge]]''. At the beginning, [[Roméo Patti|Romeo]] runs towards [[Rayman]] to tell him various, relatively useless things. This is the first level to come after the tutorial stage, [[The Fairy Council (Rayman: Hoodlums' Revenge)|the Fairy Council]]. It precedes the not to be confused with differently named third level, [[Clearleaf Falls]]. | ||
[[File:RaymanHoodlumsRevengeEU - 01.png|thumb|left|800px|The level]] | [[File:RaymanHoodlumsRevengeEU - 01.png|thumb|left|800px|The level]] | ||
| Line 25: | Line 25: | ||
==Screenshots== | ==Screenshots== | ||
<gallery | <gallery widths="240px" heights="160px" class="sprite"> | ||
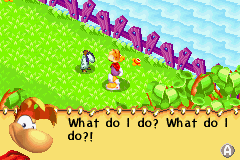
RHR 8.png|The start of the level, where [[Roméo Patti|Romeo]] talks to [[Rayman]]. | |||
RHR 16.png|The [[piranha]]s make their debut in [[Rayman: Hoodlums' Revenge|Hoodlums' Revenge]]. | |||
RHR 9.png|A [[Ninja Crab]]. | |||
RHR 10.png|This [[switch]] could prove to be very useful. | |||
RHR 11.png|A [[cage]]d [[Teensie]]. | |||
RHR 12.png|An incorrect [[Teensie]] head-shot. | |||
RHR 13.png|This gate needs to be opened some way. | |||
RHR 14.png|The [[exit sign]] showing the way out. | |||
</gallery> | </gallery> | ||
Revision as of 15:08, 24 September 2023
| Clearleaf Forest | |
|---|---|
 | |
| ← The Fairy Council | Clearleaf Falls → |
      
| |

| |
 
| |
     
|
 
|
- This article is about the level in Rayman: Hoodlums' Revenge. For the level in Rayman 3, see Clearleaf Forest.
Clearleaf Forest is a level in Rayman: Hoodlums' Revenge. At the beginning, Romeo runs towards Rayman to tell him various, relatively useless things. This is the first level to come after the tutorial stage, the Fairy Council. It precedes the not to be confused with differently named third level, Clearleaf Falls.

Description
When Rayman enters the level, Romeo runs to him, and gives information that Globox is captured at the Bog of Murk. He doesn't give a whole lot more helpful information, and then he goes away. Now, Rayman will have to get past the forest, avoiding the dangerous bodies of water, while having to activate switches scattered in the level to advance and get to the exit. Murfy doesn't appear in this level, as Rayman have learned the basics (again) at the Fairy Council. The piranhas make their return with the same attack form as they had in Rayman 2 and Rayman 3. Like the previous level, the Slapdash, the Ninja Crab, and the Podocrocks appear in this level.
Screenshots
-
-
 The piranhas make their debut in Hoodlums' Revenge.
 -
 A Ninja Crab.
 -
 This switch could prove to be very useful.
 -

-
 An incorrect Teensie head-shot.
 -
 This gate needs to be opened some way.
 -
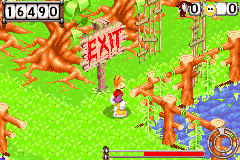 The exit sign showing the way out.


