Infernal Machine: Difference between revisions
No edit summary |
m Minor improvements |
||
| Line 12: | Line 12: | ||
==Description== | ==Description== | ||
[[File:The_Infernal_Machine.PNG|frame|left|class=sprite|The Infernal Machine itself]] | [[File:The_Infernal_Machine.PNG|frame|left|class=sprite|The Infernal Machine itself.]] | ||
Once [[Rayman]] enters the level, [[Murfy]] flies to him to tell the hero that the [[Hoodlum]]s are able to now clone the body of [[Reflux]] with the power of [[plum juice]]. [[Murfy]] then gives some directions on how to defeat the machine. In order to defeat it, [[Rayman]] needs to press a button, and quickly run towards the lowered pillar. On top of this pillar lays a [[Laser-Washing Powder|can]] which grants [[Rayman]] a [[Heavy Metal Fist|super fist]], which allows him to damage the various components of the machine. There are two [[Red Lum]]s that [[Rayman]] can collect, as the machine fires barrels at him which are relatively difficult to avoid. Also, barrels roll at various places, which [[Rayman]] also has to avoid. Once all components are destroyed, [[Murfy]] appears again to tell [[Rayman]] nearly the same news he said at the beginning of the level. After the conversation, the level will end. | Once [[Rayman]] enters the level, [[Murfy]] flies to him to tell the hero that the [[Hoodlum]]s are able to now clone the body of [[Reflux]] with the power of [[plum juice]]. [[Murfy]] then gives some directions on how to defeat the machine. In order to defeat it, [[Rayman]] needs to press a button, and quickly run towards the lowered pillar. On top of this pillar lays a [[Laser-Washing Powder|can]] which grants [[Rayman]] a [[Heavy Metal Fist|super fist]], which allows him to damage the various components of the machine. There are two [[Red Lum]]s that [[Rayman]] can collect, as the machine fires barrels at him which are relatively difficult to avoid. Also, barrels roll at various places, which [[Rayman]] also has to avoid. Once all components are destroyed, [[Murfy]] appears again to tell [[Rayman]] nearly the same news he said at the beginning of the level. After the conversation, the level will end. | ||
| Line 20: | Line 20: | ||
==Screenshots== | ==Screenshots== | ||
<gallery widths="240px" heights="160px"> | <gallery widths="240px" heights="160px"> | ||
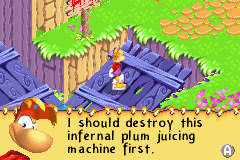
File:RHR 28.png|The beginning of the level, where [[Murfy]] talks to [[Rayman]] about the Infernal Machine | File:RHR 28.png|The beginning of the level, where [[Murfy]] talks to [[Rayman]] about the Infernal Machine. | ||
File:RHR 30.png|[[Rayman]] can't leave without defeating the machine | File:RHR 30.png|[[Rayman]] can't leave without defeating the machine. | ||
File:TheInfernalMachineFiringPlums.png|The Infernal Machine firing [[plum]]s at Rayman | File:TheInfernalMachineFiringPlums.png|The Infernal Machine firing [[plum]]s at Rayman. | ||
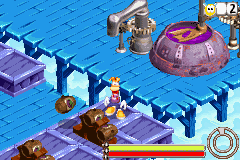
File:RHR 32.png|This pillar that has the [[Heavy Metal Fist]] can needs to be lowered | File:RHR 32.png|This pillar that has the [[Heavy Metal Fist]] can needs to be lowered. | ||
File:RHR 33.png|These barrels that shoot [[plum]] barrels need to be destroyed | File:RHR 33.png|These barrels that shoot [[plum]] barrels need to be destroyed. | ||
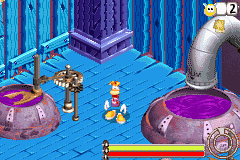
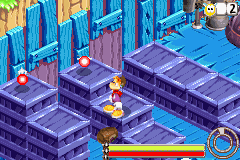
File:RHR 31.png|This [[switch]] will lower the pillar that has the [[Heavy Metal Fist]] can | File:RHR 31.png|This [[switch]] will lower the pillar that has the [[Heavy Metal Fist]] can. | ||
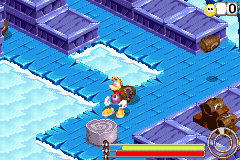
File:RHR 34.png|These [[Red Lum]]s can be useful if [[Rayman]] is getting beat up | File:RHR 34.png|These [[Red Lum]]s can be useful if [[Rayman]] is getting beat up. | ||
File:HeavyMetalFistRHR.png|The [[Heavy Metal Fist]] in ''[[Rayman: Hoodlums' Revenge]]'' | File:HeavyMetalFistRHR.png|The [[Heavy Metal Fist]] in ''[[Rayman: Hoodlums' Revenge]]''. | ||
</gallery> | </gallery> | ||
Revision as of 02:40, 2 June 2017
| The Infernal Machine | |
|---|---|
 | |
| ← Clearleaf Falls | Vertiginous Riddle → |
The Infernal Machine is the fourth level in Rayman: Hoodlums' Revenge. Rayman fights the first boss of the game; a machine which makes plum juice, with which the Hoodlums plan to resurrect Reflux.
Description

Once Rayman enters the level, Murfy flies to him to tell the hero that the Hoodlums are able to now clone the body of Reflux with the power of plum juice. Murfy then gives some directions on how to defeat the machine. In order to defeat it, Rayman needs to press a button, and quickly run towards the lowered pillar. On top of this pillar lays a can which grants Rayman a super fist, which allows him to damage the various components of the machine. There are two Red Lums that Rayman can collect, as the machine fires barrels at him which are relatively difficult to avoid. Also, barrels roll at various places, which Rayman also has to avoid. Once all components are destroyed, Murfy appears again to tell Rayman nearly the same news he said at the beginning of the level. After the conversation, the level will end.
Screenshots
-

-
 Rayman can't leave without defeating the machine.
 -
 The Infernal Machine firing plums at Rayman.
 -
 This pillar that has the Heavy Metal Fist can needs to be lowered.
 -
 These barrels that shoot plum barrels need to be destroyed.
 -
 This switch will lower the pillar that has the Heavy Metal Fist can.
 -
-


