The Bog of Murk: Difference between revisions
Hunchman801 (talk | contribs) mNo edit summary |
|||
| (29 intermediate revisions by 10 users not shown) | |||
| Line 1: | Line 1: | ||
{{ | {{R3Level | ||
| name = The Bog of Murk | | name = The Bog of Murk | ||
| image = [[ | | icon = Mnu mara.png | ||
| preceded by = [[Clearleaf Forest]] | | image = [[File:TheBogofMurkPC.jpg|center|320px|The Bog of Murk]] | ||
| followed by = [[The Land of the Livid Dead (Rayman 3)|The Land of the Livid Dead]] | | preceded by = [[File:Mnu fore.png|20px]] [[Clearleaf Forest]] | ||
| followed by = [[File:Mnu land.png|20px]] [[The Land of the Livid Dead (Rayman 3)|The Land of the Livid Dead]] | |||
| murfysscore = 25901 | | murfysscore = 25901 | ||
| maxscore = | | maxscore = 112150 | ||
| maxscorenote = This figure is a theoretical value, as some points need to be lost throughout the level. | |||
| cages = 9 | | cages = 9 | ||
| matuvus = 5 | | matuvus = 5 | ||
| Line 11: | Line 13: | ||
}} | }} | ||
* ''This article is about the level in | * ''This article is about the level in [[Rayman 3]]. For the level in [[Rayman: Hoodlums' Revenge]], see [[Bog of Murk (Rayman: Hoodlums' Revenge)]].'' | ||
[[File: | [[File:Rayman3 conceptart1.jpg|thumb|250px|right|An [[Rayman 3 (early production)|early version]] of [[Bégoniax]]'s house.]] | ||
[[File:Rayman Concepts 07b.jpg|thumb|250px|right|Concept art of [[Bégoniax]] in front of her mirror.]] | |||
{{ | {{Quote|text=This uncharted marshland lies in the nether-realms of [[Glade of Dreams|Rayman’s world]]. It's home to a slew of fiendish flora and fauna – not to mention [[Bégoniax|anti-social witches]] and [[Count Razoff|egomaniacal musketeers]].|sign=Press release|source=''[[Rayman 3]]''}} | ||
'''The Bog of Murk''', also known as '''the Umber Swamp''', is the third of nine levels found in ''[[Rayman 3]]''. This level introduces the player to the [[Throttle Copter]], the last of the [[Laser-Washing Powder]] cans to be discovered. It also marks the smallest appearance of [[Globox]] in a level, as he does not appear until the very last cutscene (although his voice can be heard in the first and sixth phases). | '''The Bog of Murk''', also known as '''the Umber Swamp''',<ref>Rayman3.com (via archive.org), ''Worlds'', https://web.archive.org/web/20030622082143/http://www.rayman3.com/us/worlds.php</ref> is the third of nine levels found in ''[[Rayman 3]]''. This level introduces the player to the [[Throttle Copter]], the last of the [[Laser-Washing Powder]] cans to be discovered. It also marks the smallest appearance of [[Globox]] in a level, as he does not appear until the very last cutscene (although his voice can be heard in the first and sixth phases). | ||
==Description== | ==Description== | ||
This world is a dark and murky marshland of [[piranha]]-infested swamps, and is the home of two anti-social characters – [[Bégoniax]] the witch, and [[Count Razoff]] the hunter – who soon see [[Rayman]] as an enemy. It is also home to [[Muddibog]]s who throw rocks at both [[Rayman]] and the [[Hoodlum]]s. Early in the first level, large flying creatures with hands for heads called [[Mawpaw]]s can be seen in the distant sky, one of which later helps [[Rayman]] out in the dungeon of [[Count Razoff#Count Razoff's mansion|Razoff's mansion]]. | This world is a dark and murky marshland of [[piranha]]-infested swamps, and is the home of two anti-social characters – [[Bégoniax]] the witch, and [[Razoff|Count Razoff]] the hunter – who soon see [[Rayman]] as an enemy. It is also home to [[Muddibog]]s who throw rocks at both [[Rayman]] and the [[Hoodlum]]s. Early in the first level, large flying creatures with hands for heads called [[Mawpaw]]s can be seen in the distant sky, one of which later helps [[Rayman]] out in the dungeon of [[Count Razoff#Count Razoff's mansion|Razoff's mansion]]. | ||
A tribe of [[Teensie]]s called [[Murkin]]s were originally planned to live in the swamp but were cut from the game. | A tribe of [[Teensie]]s called [[Murkin]]s were originally planned to live in the swamp but were cut from the game. | ||
| Line 26: | Line 29: | ||
==As a level== | ==As a level== | ||
===Stage 1 – [[Bégoniax]]=== | ===Stage 1 – [[Bégoniax]]=== | ||
The level occurs after [[Rayman]] has tumbled from one of the [[Teensie Highway]]s and been | The level occurs after [[Rayman]] has tumbled from one of the [[Teensie Highway]]s and been separated from [[Globox]]. He lands in a toilet cubicle occupied by the witch [[Bégoniax]], who becomes incredibly angry and threatens [[Rayman]], despite his feeble attempts to tell her he did not mean anything. Just outside the toilet, [[Rayman]] can break open a [[cage]], [[Teensie|the occupant]] of which will bestow upon him the first [[Throttle Copter]] can of [[Laser-Washing Powder]]. [[Rayman]] can use this to reach [[Bégoniax]]'s house. Once there, the battle against [[Bégoniax]] begins. The two chase each other around a large cauldron, the contents of which either can disturb at anytime by jumping up and hitting. If the contents hit one of the fighters, they will be transformed into a [[toad]], making them very vulnerable to the other's attacks. If [[Rayman]] wins, [[Bégoniax]] flees, and if [[Rayman]] follows her, he can access a magic mirror which transports him to a new part of the marshes. | ||
The PlayStation 2 and GameCube versions feature an exclusive soundtrack for the [[Bégoniax]] battle. | The PlayStation 2 and GameCube versions feature an exclusive soundtrack for the [[Bégoniax]] battle. | ||
The score thresholds for this stage are 590 points for 25% (2 stars), 1180 points for 50% (3 stars), 1770 points for 75% (4 stars) and 2360 points for 100% (5 stars). | |||
<gallery widths="320px" heights="240px"> | |||
TBOM Section1.jpg|Overview of [[Bégoniax]]'s house its surroundings. | |||
R3HH PC-TBOM-Part1.png|The beginning of the first section. | |||
TBOM Section1 Begoniax.jpg|[[Bégoniax]] mixing her potion. | |||
BegoniaxRayman.jpg|[[Bégoniax]] challenges [[Rayman]] to a duel. | |||
TBOM End of the Section Begoniax.jpg|[[Bégoniax]] in front of her mirror. | |||
</gallery> | |||
===Stage 2 – The Island=== | ===Stage 2 – The Island=== | ||
As [[Rayman]] jumps through the transportation, he appears in an area that features a set of various [[Hoodlum]]s, including the debut of the [[Spinneroo]]. If [[Rayman]] can defeat them all and access the cans of [[Laser-Washing Powder]] that are given to him, he can leave the area. | As [[Rayman]] jumps through the transportation, he appears in an area that features a set of various [[Hoodlum]]s, including the debut of the [[Spinneroo]]. If [[Rayman]] can defeat them all and access the cans of [[Laser-Washing Powder]] that are given to him, he can leave the area. | ||
The score thresholds for this stage are 648 points for 25% (2 stars), 1295 points for 50% (3 stars), 1943 points for 75% (4 stars) and 2590 points for 100% (5 stars). | |||
<gallery widths="320px" heights="240px"> | |||
R3HH PC-TBOM-Part2.png|The beginning of the second section. | |||
Hoodlums play cards TBOM.jpg|Two [[Hoodmonger]]s playing cards. | |||
StumbleBoom.jpg|The first [[Stumbleboom]]. | |||
Slapdash Section2 TBOM.jpg|Two [[Slapdash]]es are protecting this [[cage]]. | |||
Hoodlock.jpg|The first [[Spinneroo]]. | |||
</gallery> | |||
===Stage 3 – Meet [[Muddibog]]s!=== | ===Stage 3 – Meet [[Muddibog]]s!=== | ||
This phase begins with a [[Hoodmonger]] fighting off a swarm of [[Muddibog]]s. The winner of the fight is random, but is usually the [[Muddibog]]s. Regardless, [[Rayman]] must defeat whoever is left standing, grab the [[Lockjaw]], and carry on through a small building to a second bog, which features more [[Muddibog]]s, [[Hoodlum]]s, and [[piranha]]s similar to those seen in the previous two games. | This phase begins with a [[Hoodmonger]] fighting off a swarm of [[Muddibog]]s. The winner of the fight is random, but is usually the [[Muddibog]]s. Regardless, [[Rayman]] must defeat whoever is left standing, grab the [[Lockjaw]], and carry on through a small building to a second bog, which features more [[Muddibog]]s, [[Hoodlum]]s, and [[piranha]]s similar to those seen in the previous two games. | ||
If one of the [[Hoodlum]]'s boats is jumped on, it will move to the side of the building and sail in a circle, allowing [[Rayman]] to collect some [[Jewel|yellow gems]]. It also come across a small island with a hollow tree which contains some more [[Jewel|yellow gems]], a [[Jewel|green gem]] & several [[Jewel|red gems]]. If one uses the camera to look around, a fleet of [[Hoodlum]] airships can be seen carrying [[Hoodlum]]s to [[The Land of the Livid Dead (Rayman 3)|the Land of the Livid Dead]]. | If one of the [[Hoodlum]]'s boats is jumped on, it will move to the side of the building and sail in a circle, allowing [[Rayman]] to collect some [[Jewel|yellow gems]]. It also come across a small island with a hollow tree which contains some more [[Jewel|yellow gems]], a [[Jewel|green gem]] & several [[Jewel|red gems]]. If one uses the camera to look around, a fleet of [[Hoodlum]] airships can be seen carrying [[Hoodlum]]s to [[The Land of the Livid Dead (Rayman 3)|the Land of the Livid Dead]]. | ||
This phase is one of the hardest in gathering the best combo score, because of the many factors that go into this level (i.e. determining if either the [[Hoodmonger]] defeats the [[Muddibog]]s or if he gets defeated, and that the combo involves nearly all of the enemies that appear in this level.) <ref>https://raymanpc.com/forum/viewtopic.php?f=13&t=4986</ref> | This phase is one of the hardest in gathering the best combo score, because of the many factors that go into this level (i.e. determining if either the [[Hoodmonger]] defeats the [[Muddibog]]s or if he gets defeated, and that the combo involves nearly all of the enemies that appear in this level.)<ref>https://raymanpc.com/forum/viewtopic.php?f=13&t=4986</ref> | ||
The score thresholds for this stage are 3250 points for 25% (2 stars), 6500 points for 50% (3 stars), 9750 points for 75% (4 stars) and 13000 points for 100% (5 stars). | |||
===Stage 4 – [[ | <gallery widths="320px" heights="240px"> | ||
R3HH PC-TBOM-Part3.png|The beginning of the third section. | |||
Nettles R3.jpg|Two [[nettle]]s can be seen in the Bog of Murk. | |||
Muddibogs.jpg|Two [[Muddibog]]s attacking [[Rayman]]. | |||
BOTM Secret Area Section 3.jpg|[[Rayman]] uses a small boat to reach the island. | |||
BOTM Secret Area Section 3 Islet.jpg|The island. | |||
</gallery> | |||
===Stage 4 – [[Razoff]]'s mansion=== | |||
This stage takes place mostly underground, and has [[Rayman]] navigating several tunnels and fighting off [[Hoodlum]]s inside and outside to eventually leave the area. At the end of the stage, he comes across a mysterious mansion that even the [[Hoodlum]]s cannot enter. However, once all the [[Hoodlum]]s are beaten, the doors mysteriously open and [[Rayman]] can enter, ending the stage. | This stage takes place mostly underground, and has [[Rayman]] navigating several tunnels and fighting off [[Hoodlum]]s inside and outside to eventually leave the area. At the end of the stage, he comes across a mysterious mansion that even the [[Hoodlum]]s cannot enter. However, once all the [[Hoodlum]]s are beaten, the doors mysteriously open and [[Rayman]] can enter, ending the stage. | ||
The score thresholds for this stage are 1530 points for 25% (2 stars), 3060 points for 50% (3 stars), 4590 points for 75% (4 stars) and 6120 points for 100% (5 stars). | |||
== | <gallery widths="320px" heights="240px"> | ||
R3HH PC-TBOM-Part4.png|The beginning of the fourth section. | |||
Hoodlums TBOM Section4.jpg|Two [[Hoodmonger]]s. | |||
Razoff's mansion.png|[[Razoff]]'s mansion. | |||
</gallery> | |||
===Stage 5 – [[Razoff|Count Razoff]]=== | |||
Here, [[Rayman]] meets the nefarious [[Razoff|Count Razoff]], a hunter who is intent on killing [[Rayman]] and adding him to his collection. He expresses interest in stuffing him and mounting him on his wall, but also in turning him into a rug and putting him in front of his fireplace. The fight consists of the two chasing each other around [[Razoff]]'s huge mansion, fighting whenever they meet. After [[Razoff]] loses a certain amount of health on three occasions, the screen changes to a view of [[Razoff]]'s gun and [[Rayman]] must take cover behind statues. Once [[Rayman]] has worked [[Razoff]]'s health bar down to zero, [[Razoff]] flees into a basement, announcing that no one can stop him. [[Rayman]] must follow him underground to end the stage, and to defeat him for good. | |||
Inside [[Razoff]]'s mansion is a room with a large mirror. If [[Rayman]] is left in idle in front of it, he will make a face at himself and notice he has something stuck in his teeth, pulling it out. | |||
Before the last encounter to give [[Razoff]] 0 health, there's a room with four [[Jewel|yellow gems]] that the player can enter in to accomplish the [[Razoff]] Triple Glitch. It is very difficult to achieve.<ref>https://raymanpc.com/forum/viewtopic.php?f=13&t=4986</ref> | |||
The score thresholds for this stage are 946 points for 25% (2 stars), 1891 points for 50% (3 stars), 2837 points for 75% (4 stars) and 3782 points for 100% (5 stars). | |||
<gallery widths="320px" heights="240px"> | |||
Razoff in his observatory.jpg|[[Razoff]] in his observatory. | |||
R3HH PC-TBOM-Part5.png|The beginning of the fifth section. | |||
Razoff in game R3.JPG|[[Razoff]] aims [[Rayman]] with his sniper rifle. | |||
Ugly Free.JPG|[[Rayman]] frees two [[Ugly|Uglies]]. | |||
R2 Textures Used in TBOM.jpg|Some textures from ''[[Rayman 2]]'' are used in this section. | |||
</gallery> | |||
===Stage 6 – [[Razoff]]'s last stand=== | |||
This final stage sees [[Rayman]] and [[Razoff]] as they conclude their fight. This time, [[Razoff]] hangs from a giant ball on a chain, which he attempts to ram [[Rayman]] with. Later in the fight, [[Rayman]] can obtain [[Heavy Metal Fist]]s to give him an advantage. Once [[Razoff]]'s health is completely depleted, he tumbles into the pit below. | |||
It is possible to achieve a glitch that can garner more points towards a good combo when [[Rayman]] has the [[Heavy Metal Fist]]. The player can strafe to make [[Razoff]] hit the wall near the camera right in the middle. Then, the player needs to stand on the cross between the first two stone pathways to where [[Rayman]] can shoot [[Razoff]] as many as 4 times.<ref>https://raymanpc.com/forum/viewtopic.php?f=13&t=4986</ref> | |||
The score thresholds for this stage are 948 points for 25% (2 stars), 1895 points for 50% (3 stars), 2843 points for 75% (4 stars) and 3790 points for 100% (5 stars). | |||
<gallery widths="320px" heights="240px"> | |||
R3HH PC-TBOM-Part6.png|The beginning of the sixth section. | |||
Razoff Ball R3.JPG|[[Razoff]] on the wrecking ball. | |||
Paluchard Saving Rayman R3.JPG|A [[Mawpaw]] helps [[Rayman]] to go up if it falls in a hole. | |||
</gallery> | |||
===Epilogue=== | ===Epilogue=== | ||
[[ | [[Razoff]] finds [[Globox]] in his basement and attempts to shoot him. However, he is suddenly met by a group of [[Ugly|small creatures]] he had previously captured, who he is apparently scared of. He runs, but is caught by [[Bégoniax]], who underlines her not-so-subtle desires of what she plans to do with him. [[Rayman]], [[Globox]] and the [[Ugly|small creatures]] watch, a little disturbed, as [[Razoff]] fails to escape [[Bégoniax]]'s grasp, before [[Globox]] questions [[Rayman]] as to how they will reach the [[Roméo Patti|Doctor's]] office. [[Rayman]] notices a magic mirror in the basement, and remembering the one he encountered in [[Bégoniax]]'s house, announces that he has an idea. | ||
<gallery widths="320px" heights="240px"> | |||
Ugly Cinematic.jpg|The [[Ugly|Uglies]], [[Rayman]] and [[Globox]] observing [[Razoff]] and [[Bégoniax]] | |||
</gallery> | |||
==Soundtracks== | |||
*[https://raytunes.raymanpc.com/music/R3/035%20-%20The%20Witch's%20Domain.mp3 "The Witch's Domain"] | |||
*[https://raytunes.raymanpc.com/music/R3/036%20-%20The%20House%20in%20the%20Swamp.mp3 "The House in the Swamp"] | |||
*[https://raytunes.raymanpc.com/music/R3/037%20-%20B%C3%A9goniax%20~Cauldron%20Chaos~.mp3 "Bégoniax ~Cauldron Chaos~"] | |||
*[https://raytunes.raymanpc.com/music/R3/038%20-%20The%20Magic%20Mirror.mp3 "The Magic Mirror"] | |||
*[https://raytunes.raymanpc.com/music/R3/039%20-%20(Jingle)%20Through%20the%20Mirror.mp3 "(Jingle) Through the Mirror)"] | |||
*[https://raytunes.raymanpc.com/music/R3/040%20-%20Piranha%20Patrol.mp3 "Piranha Patrol"] | |||
*[https://raytunes.raymanpc.com/music/R3/041%20-%20Blocking%20the%20Way.mp3 "Blocking the Way"] | |||
*[https://raytunes.raymanpc.com/music/R3/042%20-%20Moonlit%20Swamps.mp3 "Moonlit Swamps"] | |||
*[https://raytunes.raymanpc.com/music/R3/043%20-%20The%20Muddibog%20Posse.mp3 "The Muddibog Posse"] | |||
*[https://raytunes.raymanpc.com/music/R3/044%20-%20Moonlit%20Swamps%20~Lost%20in%20Thought~.mp3 "Moonlit Swamps ~Lost in Thought~"] | |||
*[https://raytunes.raymanpc.com/music/R3/045%20-%20Intruder%20Alert!.mp3 "Intruder Alert!"] | |||
*[https://raytunes.raymanpc.com/music/R3/046%20-%20Moonlit%20Swamps%20~Echoes%20in%20the%20Dark~.mp3 "Moonlit Swamps ~Echoes in the Dark~"] | |||
*[https://raytunes.raymanpc.com/music/R3/047%20-%20Crossing%20the%20Swamp.mp3 "Crossing the Swamp"] | |||
*[https://raytunes.raymanpc.com/music/R3/048%20-%20The%20Swamp%20Cave%20~Underneath%20the%20Roots~.mp3 "The Swamp Cave ~Underneath the Roots~"] | |||
*[https://raytunes.raymanpc.com/music/R3/049%20-%20The%20Hoodmonger%20Sniper.mp3 "The Hoodmonger Sniper"] | |||
*[https://raytunes.raymanpc.com/music/R3/050%20-%20The%20Swamp%20Cave%20~Bad%20Architecture~.mp3 "The Swamp Cave ~Bad Architecture~"] | |||
*[https://raytunes.raymanpc.com/music/R3/051%20-%20The%20Swamp%20Cave%20~Last%20Line%20of%20Defence~.mp3 "The Swamp Cave ~Last Line of Defence"] | |||
*[https://raytunes.raymanpc.com/music/R3/052%20-%20The%20Hunter's%20Domain.mp3 "The Hunter's Domain"] | |||
*[https://raytunes.raymanpc.com/music/R3/053%20-%20Let%20the%20Hunt%20Begin!.mp3 "Let the Hunt Begin!"] | |||
*[https://raytunes.raymanpc.com/music/R3/054%20-%20Count%20Razoff%20~Unlucky%20and%20Unwise~.mp3 "Count Razoff ~Unlucky and Unwise~"] | |||
*[https://raytunes.raymanpc.com/music/R3/055%20-%20Count%20Razoff%20~The%20Most%20Dangerous%20Game~.mp3 "Count Razoff ~The Most Dangerous Game~"] | |||
==Saves== | |||
This section lists saves for the PC version of the game. Instructions on how to implement them can be found [https://raysaves.raymanpc.com/rayman3.html here]. | |||
*[https://raysaves.raymanpc.com/saves/rayman3/L3P1.sav Phase 1] | |||
*[https://raysaves.raymanpc.com/saves/rayman3/L3P2.sav Phase 2] | |||
*[https://raysaves.raymanpc.com/saves/rayman3/L3P3.sav Phase 3] | |||
*[https://raysaves.raymanpc.com/saves/rayman3/L3P4.sav Phase 4] | |||
*[https://raysaves.raymanpc.com/saves/rayman3/L3P5.sav Phase 5] | |||
*[https://raysaves.raymanpc.com/saves/rayman3/L3P6.sav Phase 6] | |||
==External links== | ==External links== | ||
[ | * [https://www.youtube.com/watch?v=33S5G3b7WVk The Bog of Murk walkthrough at YouTube (PC version)] | ||
== | ==Notes and references== | ||
<references /> | <references /> | ||
| Line 128: | Line 165: | ||
[[de:Der Krötensumpf]] | [[de:Der Krötensumpf]] | ||
[[pl:Bagna Mroku]] | [[pl:Bagna Mroku]] | ||
[[es:La Ciénaga]] | |||
[[ru:Угрюмое Болото]] | |||
[[Category:Places from Rayman 3|Bog of Murk, the]] | [[Category:Places from Rayman 3|Bog of Murk, the]] | ||
Latest revision as of 06:08, 29 July 2025
 The Bog of Murk The Bog of Murk
| |
|---|---|
 | |
←  Clearleaf Forest Clearleaf Forest
|
 The Land of the Livid Dead → The Land of the Livid Dead →
|
 Murfy's score: Murfy's score:
|
     
|
| Maximum score: |   [1] [1]
|
 
|
 
|
 
| |
- This article is about the level in Rayman 3. For the level in Rayman: Hoodlums' Revenge, see Bog of Murk (Rayman: Hoodlums' Revenge).


This uncharted marshland lies in the nether-realms of Rayman’s world. It's home to a slew of fiendish flora and fauna – not to mention anti-social witches and egomaniacal musketeers.—Press release, Rayman 3
The Bog of Murk, also known as the Umber Swamp,[2] is the third of nine levels found in Rayman 3. This level introduces the player to the Throttle Copter, the last of the Laser-Washing Powder cans to be discovered. It also marks the smallest appearance of Globox in a level, as he does not appear until the very last cutscene (although his voice can be heard in the first and sixth phases).
Description
This world is a dark and murky marshland of piranha-infested swamps, and is the home of two anti-social characters – Bégoniax the witch, and Count Razoff the hunter – who soon see Rayman as an enemy. It is also home to Muddibogs who throw rocks at both Rayman and the Hoodlums. Early in the first level, large flying creatures with hands for heads called Mawpaws can be seen in the distant sky, one of which later helps Rayman out in the dungeon of Razoff's mansion.
A tribe of Teensies called Murkins were originally planned to live in the swamp but were cut from the game.
As a level
Stage 1 – Bégoniax
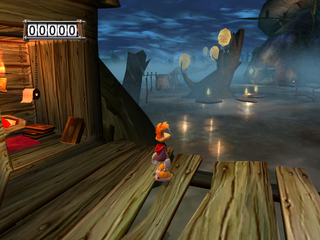
The level occurs after Rayman has tumbled from one of the Teensie Highways and been separated from Globox. He lands in a toilet cubicle occupied by the witch Bégoniax, who becomes incredibly angry and threatens Rayman, despite his feeble attempts to tell her he did not mean anything. Just outside the toilet, Rayman can break open a cage, the occupant of which will bestow upon him the first Throttle Copter can of Laser-Washing Powder. Rayman can use this to reach Bégoniax's house. Once there, the battle against Bégoniax begins. The two chase each other around a large cauldron, the contents of which either can disturb at anytime by jumping up and hitting. If the contents hit one of the fighters, they will be transformed into a toad, making them very vulnerable to the other's attacks. If Rayman wins, Bégoniax flees, and if Rayman follows her, he can access a magic mirror which transports him to a new part of the marshes.
The PlayStation 2 and GameCube versions feature an exclusive soundtrack for the Bégoniax battle.
The score thresholds for this stage are 590 points for 25% (2 stars), 1180 points for 50% (3 stars), 1770 points for 75% (4 stars) and 2360 points for 100% (5 stars).
-
 Overview of Bégoniax's house its surroundings.
 -
 The beginning of the first section.
 -
 Bégoniax mixing her potion.
 -

-
 Bégoniax in front of her mirror.


Stage 2 – The Island
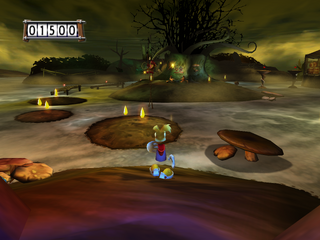
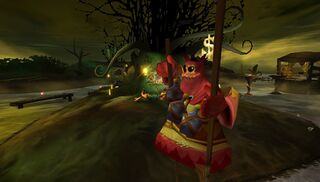
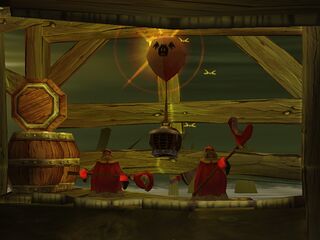
As Rayman jumps through the transportation, he appears in an area that features a set of various Hoodlums, including the debut of the Spinneroo. If Rayman can defeat them all and access the cans of Laser-Washing Powder that are given to him, he can leave the area.
The score thresholds for this stage are 648 points for 25% (2 stars), 1295 points for 50% (3 stars), 1943 points for 75% (4 stars) and 2590 points for 100% (5 stars).
-
 The beginning of the second section.
 -
 Two Hoodmongers playing cards.
 -
 The first Stumbleboom.
 -
 Two Slapdashes are protecting this cage.
 -
 The first Spinneroo.


Stage 3 – Meet Muddibogs!
This phase begins with a Hoodmonger fighting off a swarm of Muddibogs. The winner of the fight is random, but is usually the Muddibogs. Regardless, Rayman must defeat whoever is left standing, grab the Lockjaw, and carry on through a small building to a second bog, which features more Muddibogs, Hoodlums, and piranhas similar to those seen in the previous two games.
If one of the Hoodlum's boats is jumped on, it will move to the side of the building and sail in a circle, allowing Rayman to collect some yellow gems. It also come across a small island with a hollow tree which contains some more yellow gems, a green gem & several red gems. If one uses the camera to look around, a fleet of Hoodlum airships can be seen carrying Hoodlums to the Land of the Livid Dead.
This phase is one of the hardest in gathering the best combo score, because of the many factors that go into this level (i.e. determining if either the Hoodmonger defeats the Muddibogs or if he gets defeated, and that the combo involves nearly all of the enemies that appear in this level.)[3]
The score thresholds for this stage are 3250 points for 25% (2 stars), 6500 points for 50% (3 stars), 9750 points for 75% (4 stars) and 13000 points for 100% (5 stars).
-
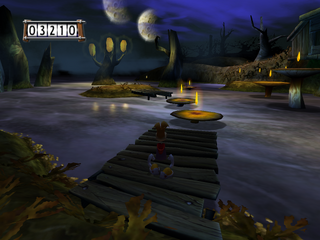 The beginning of the third section.
 -
 Two nettles can be seen in the Bog of Murk.
 -

-
 Rayman uses a small boat to reach the island.
 -
 The island.


Stage 4 – Razoff's mansion
This stage takes place mostly underground, and has Rayman navigating several tunnels and fighting off Hoodlums inside and outside to eventually leave the area. At the end of the stage, he comes across a mysterious mansion that even the Hoodlums cannot enter. However, once all the Hoodlums are beaten, the doors mysteriously open and Rayman can enter, ending the stage.
The score thresholds for this stage are 1530 points for 25% (2 stars), 3060 points for 50% (3 stars), 4590 points for 75% (4 stars) and 6120 points for 100% (5 stars).
-
 The beginning of the fourth section.
 -
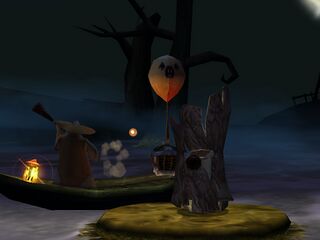 Two Hoodmongers.
 -
 Razoff's mansion.


Stage 5 – Count Razoff
Here, Rayman meets the nefarious Count Razoff, a hunter who is intent on killing Rayman and adding him to his collection. He expresses interest in stuffing him and mounting him on his wall, but also in turning him into a rug and putting him in front of his fireplace. The fight consists of the two chasing each other around Razoff's huge mansion, fighting whenever they meet. After Razoff loses a certain amount of health on three occasions, the screen changes to a view of Razoff's gun and Rayman must take cover behind statues. Once Rayman has worked Razoff's health bar down to zero, Razoff flees into a basement, announcing that no one can stop him. Rayman must follow him underground to end the stage, and to defeat him for good.
Inside Razoff's mansion is a room with a large mirror. If Rayman is left in idle in front of it, he will make a face at himself and notice he has something stuck in his teeth, pulling it out.
Before the last encounter to give Razoff 0 health, there's a room with four yellow gems that the player can enter in to accomplish the Razoff Triple Glitch. It is very difficult to achieve.[4]
The score thresholds for this stage are 946 points for 25% (2 stars), 1891 points for 50% (3 stars), 2837 points for 75% (4 stars) and 3782 points for 100% (5 stars).
-
 Razoff in his observatory.
 -
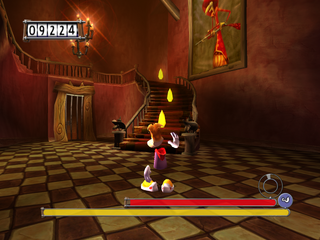 The beginning of the fifth section.
 -

-
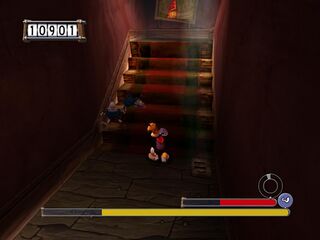
-
 Some textures from Rayman 2 are used in this section.


Stage 6 – Razoff's last stand
This final stage sees Rayman and Razoff as they conclude their fight. This time, Razoff hangs from a giant ball on a chain, which he attempts to ram Rayman with. Later in the fight, Rayman can obtain Heavy Metal Fists to give him an advantage. Once Razoff's health is completely depleted, he tumbles into the pit below.
It is possible to achieve a glitch that can garner more points towards a good combo when Rayman has the Heavy Metal Fist. The player can strafe to make Razoff hit the wall near the camera right in the middle. Then, the player needs to stand on the cross between the first two stone pathways to where Rayman can shoot Razoff as many as 4 times.[5]
The score thresholds for this stage are 948 points for 25% (2 stars), 1895 points for 50% (3 stars), 2843 points for 75% (4 stars) and 3790 points for 100% (5 stars).
-
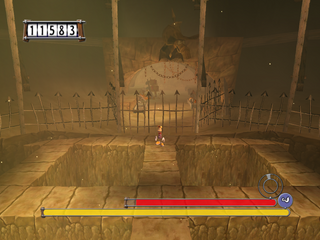 The beginning of the sixth section.
 -
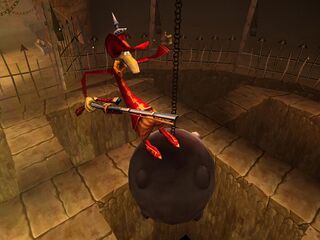 Razoff on the wrecking ball.
 -


Epilogue
Razoff finds Globox in his basement and attempts to shoot him. However, he is suddenly met by a group of small creatures he had previously captured, who he is apparently scared of. He runs, but is caught by Bégoniax, who underlines her not-so-subtle desires of what she plans to do with him. Rayman, Globox and the small creatures watch, a little disturbed, as Razoff fails to escape Bégoniax's grasp, before Globox questions Rayman as to how they will reach the Doctor's office. Rayman notices a magic mirror in the basement, and remembering the one he encountered in Bégoniax's house, announces that he has an idea.

Soundtracks
- "The Witch's Domain"
- "The House in the Swamp"
- "Bégoniax ~Cauldron Chaos~"
- "The Magic Mirror"
- "(Jingle) Through the Mirror)"
- "Piranha Patrol"
- "Blocking the Way"
- "Moonlit Swamps"
- "The Muddibog Posse"
- "Moonlit Swamps ~Lost in Thought~"
- "Intruder Alert!"
- "Moonlit Swamps ~Echoes in the Dark~"
- "Crossing the Swamp"
- "The Swamp Cave ~Underneath the Roots~"
- "The Hoodmonger Sniper"
- "The Swamp Cave ~Bad Architecture~"
- "The Swamp Cave ~Last Line of Defence"
- "The Hunter's Domain"
- "Let the Hunt Begin!"
- "Count Razoff ~Unlucky and Unwise~"
- "Count Razoff ~The Most Dangerous Game~"
Saves
This section lists saves for the PC version of the game. Instructions on how to implement them can be found here.
External links
Notes and references
- ↑ This figure is a theoretical value, as some points need to be lost throughout the level.
- ↑ Rayman3.com (via archive.org), Worlds, https://web.archive.org/web/20030622082143/http://www.rayman3.com/us/worlds.php
- ↑ https://raymanpc.com/forum/viewtopic.php?f=13&t=4986
- ↑ https://raymanpc.com/forum/viewtopic.php?f=13&t=4986
- ↑ https://raymanpc.com/forum/viewtopic.php?f=13&t=4986
