The Fairy Council
- This article is about the level in Rayman 3. For the level in Rayman: Hoodlums' Revenge, see Fairy Council (Rayman: Hoodlums' Revenge).
 | |
| ← |
|
| Maximum score: | |
It all starts here. This mystical forest kingdom is home to the Heart of the World, and the Hoodlums can’t wait to get their grubby mitts on it. Time for Rayman to start cleaning up this neighborhood.—Press release, Rayman 3
The Fairy Council is a location first seen in Rayman 3, although it was originally mentioned in Rayman 2.[1] It plays a similar role in the game to that of the Woods of Light in Rayman 2. The Fairy Council acts a tutorial level in which Murfy reprises his role as Rayman's guide and introduces the player to the game's controls. The Heart of the World, which was also previously mentioned in Rayman 2 (and seen in the form of its constituent Yellow Lums), is located here. It is finally seen at the end of the level.
Unlike the original Rayman game and Rayman 2, in which their respective first levels had cages, no cages are present in the Fairy Council.
Description
In spite of its name, the Fairy Council contains few fairies; neither Betilla the Fairy nor Ly the Fairy appear. The only fairies which are seen in the Fairy Council are a handful of Ludivs and a number of minuscule, firefly-like fairies that do not appear elsewhere in the series. The Fairy Council is more importantly the resting place of the Heart of the World, the mystical conglomeration of energy which contains all 1,000 existing Yellow Lums and is the source of all power – including that of the god Polokus. The chamber in which the Heart of the World is contained is also the throne room of the Grand Minimus, the four amnesiatic kings of the Teensies. They use it as a strobe light to complement their disco dancing.
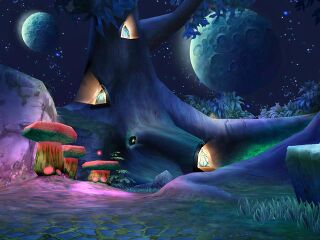
Surrounded by a tranquil forest, the ominous Fairy Council is mysterious and majestic. The interior glows with a blue aura and various halls have reflective walls or floors. Ludivs reside within the council walls in a similar fashion to ants. Deep within the Fairy Council lies the Grand Minimus' throne room and the Heart of the World.
As alluded to in the manual of Rayman 2, the Fairy Council acts a sort of central meeting place when trouble strikes the Glade of Dreams.
The Fairy Council is the only level in Rayman 3 in which Murfy appears. At one point in the level, he laments that he is still stuck playing a sidekick, even after his role in Rayman 2. At the end of the level, he departs, saying ‘See you in Rayman 4!’ – a game which never came to fruition.
As a level
Stage 1 – The first Hoodlum ambush
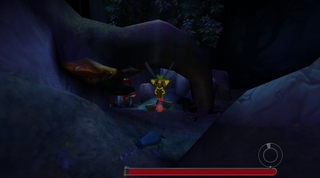
Straight after the introduction cinematic, the game begins. Murfy picks up Rayman, whose hands have gone missing, by his hair and airlifts him over the grounds near the Council, which has just been invaded by Hoodlums. The player mainly controls the handless Rayman, who steers Murfy by leaning his weight left and right. He must maneuver to collect enough of the Red Lums that are scattered throughout the area. If Rayman has not collected enough of them to restore his health to a satisfactory level, Murfy takes him back to the beginning again. There are two rounds of Red Lums to gather. Once enough have been accumulated, the pair make their way to safety.
As this is an introductory stage in which Combo mode is yet to be introduced, there is no score to gain (0 points will give 100%, or 5 stars).
-
 The beginning of the first section
 -

-
 A Mawpaw emerges from a lake


Stage 2 – Finding Globox
Rayman and Murfy end up in a quieter place around the Fairy Council, where there are no Hoodlums in sight, and scattered gems, most of which are yellow. At this point, Murfy withdraws the Manual and tells Rayman that his missing hands are in possession of Globox, who is hiding somewhere. He then introduces the player to the game's score system, in which points are added to the score for certain actions. Rayman then begins his search for Globox, while breaking Garden Raygnomes by kicking with his feet and collecting gems and Red Lums (if he needs them). Some of the gems form a trail.
Eventually, Rayman and Murfy are outside of the Fairy Council itself, where they find a shivering barrel and a foot switch. It turns out that Globox is hiding in the barrel, and Rayman has to follow him. The foot switch causes what appears to be a stone block to appear, which blocks Globox's path, allowing Rayman to kick him free. Now that the friends have reunited, Rayman's hands reattach to his body, and he can now use his fist to attack. Near the entrance, he will encounter a single Hermit Crab hidden in the ground.
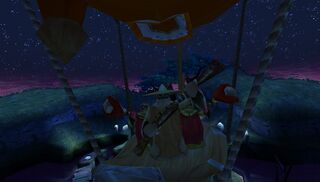
At the door of the Council, there is a hand switch which turns on a light that attracts Globox's attention briefly. He turns around and notices a gang of Hoodlums - a Hoodmonger and two Slapdashes - coming down in an air boat. Globox becomes scared of the approaching Hoodlums and runs straight through the door into the Council, breaking it to allow him to be followed by the Hoodlums, and then Rayman and Murfy.
The score thresholds for this stage are 443 points for 25% (2 stars), 885 points for 50% (3 stars), 1328 points for 75% (4 stars) and 1770 points for 100% (5 stars).
-
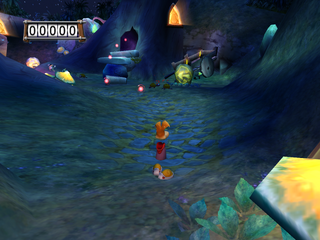 The beginning of the second section
 -
 Rayman reaches the Fairy Council.
 -
 Globox is found hiding in a barrel of plum juice.
 -


.jpg)
Stage 3 – Inside the Council
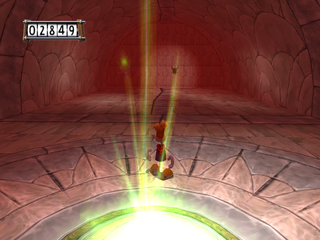
At this point, Rayman and Murfy arrive inside the Fairy Council itself, starting with a small chamber in which at the center is an elevator with a hand switch. In the Polish, Russian and Hebrew versions of the game, an additional Slapdash can be found here. Rayman has to punch this repeatedly to lift him upwards to the next level, in which there is a path going in an upwards spiral followed by several ledges. He first encounters pigpots in here, and these need to be broken in order for the door at the top of this chamber to open. This leads him into a larger chamber in which there is an elevator with a sheet of stained glass in a form of a hand switch. Rayman has to perform lateral shots at this switch to lift him up to the next level.
When he reaches the top, he encounters a Hoodmonger which displays a dollar ($) sign atop its head. The glass bridge between them lifts itself upwards, blocking him from direct contact, and Rayman will have to shoot laterally again to inflict damage to the Hoodmonger. Upon its defeat, André emerges and tells Rayman that he will deal with him later, and then flies away, leaving a small, mysterious green can on the floor. Murfy examines it, and discovers that it contains Laser-Washing Powder that transforms the user's clothes into combat fatigues. Rayman decides to use it against Murfy's warnings that it could be dangerous, thus introducing him to the Vortex power, the first of five different powers delivered by these cans.
With the glass bridge being lowered, Rayman encounters three meadowscrews which can be screwed into the floor when he punches them under the influence of the Vortex. Once they are down, Rayman can climb up them and kill a Slapdash before finally walking down a corridor thus ending this stage.
The score thresholds for this stage are 1113 points for 25% (2 stars), 2225 points for 50% (3 stars), 3338 points for 75% (4 stars) and 4450 points for 100% (5 stars).
-
 The beginning of the third section
 -
 This Slapdash at the beginning of the third section is unique to the Polish, Russian and Hebrew versions of the game.
 -

-
 Murfy discovers a can of Laser-Washing Powder.


Stage 4 – The Council falls apart
Rayman and Murfy arrive in a large chamber. At the left side, there is a wooden target with a crude painting of Globox, at which a Hoodmonger carrying a Vortex hides behind. He uses this to strike at some stone ledges with similar properties to the meadowscrews, ending with a bouncy platform that lifts him onto a ceiling of vines that he has to climb onto. This leads him into a small chamber with a wall of vines to climb up, and the first Tribelle found in the game. After climbing up the vines, Rayman is now in a corridor with a slippery slope. The only way to cross this is to bounce on the floating platforms there. At the top of the slope there is another wall of vines, leading him to another chamber in which the fairies are found.
André hides in one of six areas in which the fairies nest. A Slapdash carrying a Vortex and a group of podocrocks are encountered here. Rayman will have to keep checking the nests until André is found. André escapes through the doors that lead to the Heart of the World, which are then opened by one of the fairies. Rayman then goes through, climbing in between two walls (akin to Rayman 2), and then into a chamber with a staircase that is falling apart.
This leads to another large chamber. Two Ninja Crabs are encountered here, one of which is crushed by a stone, though it is possible to shoot it to defeat it in time. A Vortex can is also found here, which Rayman uses as appropriate to progress to a ceiling of vines which is also falling apart. At the end of this, Globox appears, only for André to head straight for him and get swallowed, causing Globox to run straight to the Heart of the World.
The score thresholds for this stage are 1298 points for 25% (2 stars), 2595 points for 50% (3 stars), 3893 points for 75% (4 stars) and 5190 points for 100% (5 stars).
-
 The beginning of the fourth section
 -
 A Hoodmonger hides behind this painting of Globox.
 -
 A Ludiv surrounded by light fairies


Stage 5 – The Heart of the World
Rayman and Murfy finally arrive at the Heart of the World. Upon entry, the Grand Minimus finds out that André is still alive and wreaking havoc within Globox's stomach. Uncertain on how dangerous it would be to keep Globox in this chamber with André inside him, one of the Grand Minimus then instructs Rayman to take Globox to see the first of the three Teensie doctors, Otto Psi, whose office is in Clearleaf Forest. He tosses Globox into a portal, and Rayman himself follows after Murfy warns him of the dangers the Black Lum could impose on Globox (especially forcing him to drink plum juice, which he is allergic to), and finally bids him goodbye.
A secret room can be found in this area, which is accessible if Rayman was to climb on a ledge on one of the pillars, and then run across the ledge higher up in the room. A secret door opens, and Rayman then slides down a spiral band of neon lights trailed with gems, ending with a green gem. He is then returned to the Heart of the World, ready to walk into the portal to the first Teensie Highway.
The score thresholds for this stage are 2000 points for 25% (2 stars), 4000 points for 50% (3 stars), 6000 points for 75% (4 stars) and 8000 points for 100% (5 stars).
-
 The beginning of the fifth section
 -
 The Heart of the World lies in the final chamber of the Fairy Council.
 -
 Crowned Grand Minimus around the Heart of the World


.jpg)
Stage 6 – The first Teensie Highway
Main article: Teensie Highway
Once Rayman goes through the portal after Globox and the Teensies, he follows them through the first of a series of psychedelic wormholes known as the aforementioned Teensie Highway, in which he has to time his jumps over a bunch of varied length platforms. Reaching the end will then begin making his way to Clearleaf Forest.
The score thresholds for this stage are 1500 points for 25% (2 stars), 3000 points for 50% (3 stars), 4500 points for 75% (4 stars) and 6000 points for 100% (5 stars).
-
 The beginning of the sixth section

Early development
-
 Concept art of the introduction scene
 -
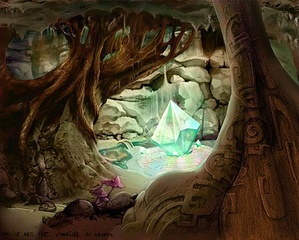 Concept art of the Fairy Council. The crystal may be the first design of the Heart of the World.
 -

-
 The second section of the Fairy Council
 -

-

-
 The Fairy Council
 -

-
 A group of Podocrocks


Soundtracks
- "A Hard Landing"
- "Once Upon a Time"
- "Searching for Globox"
- "Check It Out, the Fairy Council!"
- "Hands Found"
- "The Fairy Council ~Under the Starlight~"
- "The Fairy Council ~Entrance Hall~"
- "Pursuing André ~The First Hoodlum~"
- "Murfy's in Trouble!"
- "In the Fairy Hallways"
- "What is Going On Here?"
- "Pursuing André ~He's Hiding Someplace~"
- "Don't Let Him Escape!"
- "The End of the World"
- "Globox Swallows André"
Saves
This section lists saves for the PC version of the game. Instructions on how to implement them can be found here.
See also
External links
References
- ↑ Rayman 2 manual, Media:R2UKPCManual.pdf
