Hoodlum Headquarters: Difference between revisions
No edit summary |
Hunchman801 (talk | contribs) mNo edit summary |
||
| (84 intermediate revisions by 24 users not shown) | |||
| Line 1: | Line 1: | ||
{{R3Level | |||
| name = Hoodlum Headquarters | |||
| icon = Mnu blac.png | |||
| image = [[File:HoodlumHeadquartersPC.jpg|center|320px|Hoodlum Headquarters]] | |||
| preceded by = [[File:Mnu mont.png|20px]] [[The Summit Beyond the Clouds]] | |||
| followed by = [[File:Mnu donj.png|20px]] [[The Tower of the Leptys]] | |||
| murfysscore = 43701 | |||
| maxscore = 122609 | |||
| cages = 7 | |||
| matuvus = 5 | |||
| tribelles = 3 | |||
}} | |||
{{Quote|text=Constructed from spare parts, bits of machinery, and plenty of [[Hoodlum]] elbow grease, the Hoodlum Meddleworks is the production center for all [[Hoodlum]] munitions. It’s also where the [[Hoodlum]]s covet their treasured [[Plum juice|Plum Juice]] recipe.|sign=Press release|source=''[[Rayman 3]]''}} | |||
André's machine 'the | The '''Hoodlum Headquarters''', also known as the '''Hoodlum Meddleworks''' or the '''Hoodlum Factory''', is the penultimate level in ''[[Rayman 3]]''. After climbing to the top of [[the Summit Beyond the Clouds]], [[Rayman]] is forced to snowboard after his frozen friend [[Globox]]. When [[Rayman]] manages to pass him their weight combined manages to break the stone shelf they were standing on, tumbling them into the headquarters. The headquarters is overseen by the game's main villain, [[André]], who uses tricks and traps to capture [[Globox]]. | ||
==As a level== | |||
===Stage 1 - The Welcome Desk and the Warehouse=== | |||
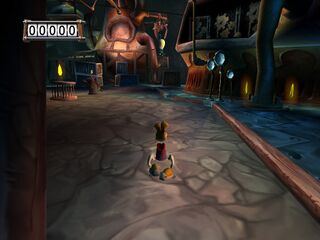
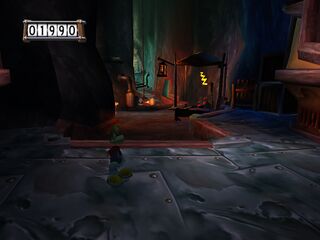
[[Rayman]] and [[Globox]] arrive through a pipe, and find themselves at the entrance to the headquarters. The [[hostess]] begins welcoming the duo, and [[Globox]] immediately falls in love with her voice. After fighting a [[Grim Keeper]], the duo proceed through a narrow passageway to get to the 'welcome desk', where the hostess is stationed. Unfortunately, a [[Spinneroo]] guards the entrance, and if [[Rayman]] tries to attack him, an out-of-reach [[Hoodoo]] will protect his companion from harm. [[Rayman]] finds another route, up a ladder, to get to the [[Hoodoo]], but the floor breaks and [[Rayman]] finds himself traveling down another pipe to the Warehouse, where the [[Hoodlum]]s test their weapons. Eventually, after defeating some of the [[Hoodlum]]s on the lower level and advancing upwards, [[Rayman]] must carry several rocks up slopes whilst avoiding [[plum juice]] grenades thrown by an enthusiastic [[Hoodboom]] to reach a [[switch]] that lowers the platform the [[Hoodoo]] was standing on. After defeating the [[Hoodoo]] and the [[Spinneroo]], [[Rayman]] and [[Globox]] head into the next room, where a wooden cut-out of a bikini-clad female member of [[Globox's species]] has been set up. [[Globox]] runs over to hug the cut-out, but falls into a trap whilst doing so. [[André]] then starts talking over the intercom about how [[Rayman]] will be next to fall into a trap. [[Rayman]] must go up and defeat a [[Stumbleboom]] that contains a [[Heavy Metal Fist]] to break down a door to progress. | |||
The score thresholds for this stage are 2805 points for 25% (2 stars), 5610 points for 50% (3 stars), 8415 points for 75% (4 stars) and 11220 points for 100% (5 stars). | |||
<gallery widths="320px" heights="240px"> | |||
HoodlumHeadquartersPC.jpg|The beginning of the first section. | |||
HoodlumsProtect.jpg|This [[Spinneroo]] is protected by a [[Hoodoo]]. | |||
The warehouse.jpg|The warehouse. | |||
</gallery> | |||
===Stage 2 - The Firing Range=== | |||
[[Rayman]] arrives in a room full of [[Hoodlum]]s, and a claw machine carrying a screaming [[Globox]], who is upside-down. Once [[Rayman]] beats all the [[Hoodlum]]s, a pair of [[Hoodstormer]]s will come out of a machine. Once they are defeated, a [[Heckler]] will appear. [[Rayman]] must defeat it to leave the room. As [[Globox]] is upside-down, all the blood is rushing to his head, and he becomes more intelligent as a result. [[Rayman]] must use the [[Shock Rocket]] to shoot a [[Hoodmonger]] that has raised some needed crates to continue on. After getting the crates down through a [[switch]], [[Rayman]] needs to defeat two [[Hoodoo]]s, one protecting a [[Hoodmonger Soldier]], and the other a [[Hoodmonger Officer]]. Once completed, [[Rayman]] jumps down another pipe and manages to lose sight of the now intelligent [[Globox]], ending up in the firing range, where, to open a door, [[Rayman]] must move a stone onto a pressure pad. When he carries it halfway through, a [[Hoodmonger]] will appear and blast its own head off. [[Rayman]] must then battle the three remaining [[Hoodmonger]]s in the firing range itself, filled with a variety of weapons. Once they are all defeated, the [[hostess]] locks the entrance and complains that [[André]] isn't pleased that [[Rayman]]'s still alive, so until the [[Hoodlum]]s learn how to shoot, they will remain locked in the firing range. [[Rayman]] must destroy several targets of himself and [[Globox]] and avoid shooting the [[hostess]] targets to escape the firing range. | |||
The score thresholds for this stage are 4618 points for 25% (2 stars), 9235 points for 50% (3 stars), 13853 points for 75% (4 stars) and 18470 points for 100% (5 stars). | |||
<gallery widths="320px" heights="240px"> | |||
Section2HoodlumsHQ.jpg|The beginning of the second section. | |||
The Firing Range.jpg|View from outside the firing range. | |||
The Firing Range 2.jpg|View from inside the firing range, that store all kinds of [[Hoodlum]] weapons. | |||
</gallery> | |||
===Stage 3 - The Foundry=== | |||
[[Rayman]] enters the foundry, where he must scale large contraptions to follow [[Globox]]. It starts with jumping from crate to crate and avoiding the hot lava. Once he reaches a ladder and defeats a [[Hoodboom]], [[Rayman]] will now jump from metal plate to metal plate that are moving on a conveyor belt. After reaching another ladder to progress upwards, doors open, and one at a time comes a [[Hoodmonger]], [[Hoodmonger Soldier]], and [[Hoodmonger Officer]] in that order. Upon defeating another [[Hoodmonger Officer]] guarding a [[switch]], once [[Rayman]] activates it more metal plates are moving, this time in a vertical way needed to continue. After dodging some obstacles and timing jumps, [[Rayman]] reaches the end. The door behind and in front of him close, as a [[Heckler]] whom is protected by a [[Hoodoo]] appears. When the [[Hoodoo]] is defeated, out comes a [[Heavy Metal Fist]] can, needed to destroy the [[Heckler]]. The door leading to the exit opens as the [[Heckler]] is destroyed. | |||
The score thresholds for this stage are 2548 points for 25% (2 stars), 5096 points for 50% (3 stars), 7644 points for 75% (4 stars) and 10191 points for 100% (5 stars). | |||
===Secret area=== | |||
There is a chamber hidden inside the boiler that contains a statue of [[Razorbeard|Admiral Razorbeard]] and many of his [[Robo-Pirate]] henchmen standing behind a table, spoofing the ''Last Supper'' painting by Leonardo da Vinci. | |||
<gallery widths="320px" heights="240px"> | |||
HoodlumHQ Section3.jpg|The beginning of the third section. | |||
R2 Textures in R3 (Hoodlum HQ).jpg|Some textures from ''[[Rayman 2]]'' are used in this stage. | |||
Hoodlum HQ Section3 End of the section.png|These metal plates and treadmills allow to continue the ascent of the foundry. | |||
Razorbeard Last Soup.JPG|A hidden chamber containing statues of [[Robo-Pirate]]s, as well as a statue of [[Razorbeard|Admiral Razorbeard]]. | |||
HoodlumHQ Section3End2.jpg|Kind of chair lifts. | |||
</gallery> | |||
===Stage 4 - The Hall of the [[Horrible Machine]]=== | |||
[[Rayman]] arrives in a narrow area where several wooden planks are being transported through scalding pipes. Below lies many [[Porkibank|pigpots]], one contains a [[Jewel|green gem]]. [[Globox]] can be seen, and [[Rayman]] must follow him up until he gets trapped inside another room, full of [[Armaguiddon]]s. [[Rayman]] must go an alternate route, but runs into the [[Horrible Machine]], which he must fight by filling up its pressure gauge. Eventually, the [[Horrible Machine]] is defeated, and in a last-ditch attempt to stop [[Rayman]], [[André]] opens up floodgates holding back lava. | |||
The score thresholds for this stage are 3572 points for 25% (2 stars), 7143 points for 50% (3 stars), 10714 points for 75% (4 stars) and 14285 points for 100% (5 stars). | |||
<gallery widths="320px" heights="240px"> | |||
Hoodlum HQ Section4.jpg|The beginning of the fourth section. | |||
R3 Horrible Machine.png|The [[Horrible Machine]]. | |||
</gallery> | |||
===Stage 5 - The lava run=== | |||
[[André]] unleashes a lava flood, which [[Rayman]] must run from. Occasionally, [[Slapdash]]es block his path. When [[Rayman]] completes this stage, the factory explodes, destroying the headquarters and killing a proportion of [[André]]'s army. Both [[André]], [[Rayman]], and many others [[Hoodlum]]s survive the suicide attempt. [[André]] then appears at [[the Tower of the Leptys]] to meet with [[Reflux]], as he gains the immense power of the [[Leptys]]. | |||
The score thresholds for this stage are 288 points for 25% (2 stars), 575 points for 50% (3 stars), 863 points for 75% (4 stars) and 1150 points for 100% (5 stars). | |||
<gallery widths="320px" heights="240px"> | |||
HoodlumHQ Section5.jpg|The beginning of the fifth section. | |||
Hoodlum HQ End of the Section5.jpg|The wooden tower towards the end of the section. | |||
</gallery> | |||
==Images from [[Rayman 3 (early production)|the early production of ''Rayman 3'']]== | |||
<gallery widths="320px" heights="240px"> | |||
Concept HHQ 1.jpg|Concept art of the Hoodlum Headquarters. | |||
Concept HHQ 2.jpg|Concept art of the Hoodlum Headquarters. | |||
Concept HHQ 3.jpg|Concept art of the Hoodlum Headquarters. | |||
Concept HHQ 4.jpg|Concept art of the arms factory. | |||
Concept HHQ 5.jpg|Concept art of the arms factory. | |||
Concept HHQ 6.jpg|Concept art of a tank full of [[piranha]]s. | |||
Concept HHQ 7.jpg|Concept art of the wood reserve. | |||
R3HH-EarlyRayman2Style-2.jpg|The warehouse. | |||
Hoodlum Headquarters (early version).jpg|The foundry. | |||
</gallery> | |||
==Soundtracks== | |||
*[https://raytunes.raymanpc.com/music/R3/104%20-%20Hoodlum%20Headquarters.mp3 "Hoodlum Headquarters"] | |||
*[https://raytunes.raymanpc.com/music/R3/105%20-%20Hoodlum%20Headquarters%20~Lava%20Flow~.mp3 "Hoodlum Headquarters ~Lava Flow~"] | |||
*[https://raytunes.raymanpc.com/music/R3/106%20-%20Hoodlum%20Headquarters%20~Heavy%20Machinery~.mp3 "Hoodlum Headquarters ~Heavy Machinery~"] | |||
*[https://raytunes.raymanpc.com/music/R3/109%20-%20Hoodlum%20Headquarters%20~Nausea~.mp3 "Hoodlum Headquarters ~Nausea~"] | |||
*[https://raytunes.raymanpc.com/music/R3/107%20-%20Factory%20Mayhem%20~Target%20Practice~.mp3 "Factory Mayhem ~Target Practice~"] | |||
*[https://raytunes.raymanpc.com/music/R3/108%20-%20Factory%20Mayhem%20~Perilous%20Pathways~.mp3 "Factory Mayhem ~Perilous Pathways~"] | |||
*[https://raytunes.raymanpc.com/music/R3/110%20-%20The%20Horrible%20Machine%20~Rising%20Temperature~.mp3 "The Horrible Machine ~Rising Temperatures~"] | |||
*[https://raytunes.raymanpc.com/music/R3/111%20-%20The%20Horrible%20Machine%20~Attackers!~.mp3 "The Horrible Machine ~Attackers!~"] | |||
*[https://raytunes.raymanpc.com/music/R3/112%20-%20The%20Great%20Escape.mp3 "The Great Escape"] | |||
==Saves== | |||
This section lists saves for the PC version of the game. Instructions on how to implement them can be found [https://raysaves.raymanpc.com/rayman3.html here]. | |||
*[https://raysaves.raymanpc.com/saves/rayman3/L8P1.sav Phase 1] | |||
*[https://raysaves.raymanpc.com/saves/rayman3/L8P2.sav Phase 2] | |||
*[https://raysaves.raymanpc.com/saves/rayman3/L8P3.sav Phase 3] | |||
*[https://raysaves.raymanpc.com/saves/rayman3/L8P4.sav Phase 4] | |||
*[https://raysaves.raymanpc.com/saves/rayman3/L8P5.sav Phase 5] | |||
==Trivia== | ==Trivia== | ||
*A | *A replica of the Eiffel Tower built entirely from [[plum juice]] crates can be seen in the Welcome Desk. | ||
*The | *The temperature in the headquarters is 98.6 degrees, according to the [[hostess]]. | ||
[[ | |||
==External links== | |||
*[https://www.youtube.com/watch?v=zK9WIMQx8dw Hoodlum Headquarters playthrough on YouTube (PC version)] | |||
==Notes== | |||
<references /> | |||
{{Rayman3worlds}} | |||
[[fr:Le Quartier Général Hoodlums]] | |||
[[de:Hoodlums Hauptquartier]] | |||
[[pl:Kwatera Mroklumów]] | |||
[[es:Cuartel General Hoodlum]] | |||
[[ru:Штаб Злумов]] | |||
[[Category:Places from Rayman 3]] | [[Category:Places from Rayman 3]] | ||
Latest revision as of 06:08, 29 July 2025
 Hoodlum Headquarters Hoodlum Headquarters
| |
|---|---|
 | |
←  The Summit Beyond the Clouds The Summit Beyond the Clouds
|
 The Tower of the Leptys → The Tower of the Leptys →
|
 Murfy's score: Murfy's score:
|
     
|
| Maximum score: |    
|
 
|
 
|
 
| |
Constructed from spare parts, bits of machinery, and plenty of Hoodlum elbow grease, the Hoodlum Meddleworks is the production center for all Hoodlum munitions. It’s also where the Hoodlums covet their treasured Plum Juice recipe.—Press release, Rayman 3
The Hoodlum Headquarters, also known as the Hoodlum Meddleworks or the Hoodlum Factory, is the penultimate level in Rayman 3. After climbing to the top of the Summit Beyond the Clouds, Rayman is forced to snowboard after his frozen friend Globox. When Rayman manages to pass him their weight combined manages to break the stone shelf they were standing on, tumbling them into the headquarters. The headquarters is overseen by the game's main villain, André, who uses tricks and traps to capture Globox.
As a level
Stage 1 - The Welcome Desk and the Warehouse
Rayman and Globox arrive through a pipe, and find themselves at the entrance to the headquarters. The hostess begins welcoming the duo, and Globox immediately falls in love with her voice. After fighting a Grim Keeper, the duo proceed through a narrow passageway to get to the 'welcome desk', where the hostess is stationed. Unfortunately, a Spinneroo guards the entrance, and if Rayman tries to attack him, an out-of-reach Hoodoo will protect his companion from harm. Rayman finds another route, up a ladder, to get to the Hoodoo, but the floor breaks and Rayman finds himself traveling down another pipe to the Warehouse, where the Hoodlums test their weapons. Eventually, after defeating some of the Hoodlums on the lower level and advancing upwards, Rayman must carry several rocks up slopes whilst avoiding plum juice grenades thrown by an enthusiastic Hoodboom to reach a switch that lowers the platform the Hoodoo was standing on. After defeating the Hoodoo and the Spinneroo, Rayman and Globox head into the next room, where a wooden cut-out of a bikini-clad female member of Globox's species has been set up. Globox runs over to hug the cut-out, but falls into a trap whilst doing so. André then starts talking over the intercom about how Rayman will be next to fall into a trap. Rayman must go up and defeat a Stumbleboom that contains a Heavy Metal Fist to break down a door to progress.
The score thresholds for this stage are 2805 points for 25% (2 stars), 5610 points for 50% (3 stars), 8415 points for 75% (4 stars) and 11220 points for 100% (5 stars).
-
 The beginning of the first section.
 -

-
 The warehouse.


Stage 2 - The Firing Range
Rayman arrives in a room full of Hoodlums, and a claw machine carrying a screaming Globox, who is upside-down. Once Rayman beats all the Hoodlums, a pair of Hoodstormers will come out of a machine. Once they are defeated, a Heckler will appear. Rayman must defeat it to leave the room. As Globox is upside-down, all the blood is rushing to his head, and he becomes more intelligent as a result. Rayman must use the Shock Rocket to shoot a Hoodmonger that has raised some needed crates to continue on. After getting the crates down through a switch, Rayman needs to defeat two Hoodoos, one protecting a Hoodmonger Soldier, and the other a Hoodmonger Officer. Once completed, Rayman jumps down another pipe and manages to lose sight of the now intelligent Globox, ending up in the firing range, where, to open a door, Rayman must move a stone onto a pressure pad. When he carries it halfway through, a Hoodmonger will appear and blast its own head off. Rayman must then battle the three remaining Hoodmongers in the firing range itself, filled with a variety of weapons. Once they are all defeated, the hostess locks the entrance and complains that André isn't pleased that Rayman's still alive, so until the Hoodlums learn how to shoot, they will remain locked in the firing range. Rayman must destroy several targets of himself and Globox and avoid shooting the hostess targets to escape the firing range.
The score thresholds for this stage are 4618 points for 25% (2 stars), 9235 points for 50% (3 stars), 13853 points for 75% (4 stars) and 18470 points for 100% (5 stars).
-
 The beginning of the second section.
 -
 View from outside the firing range.
 -
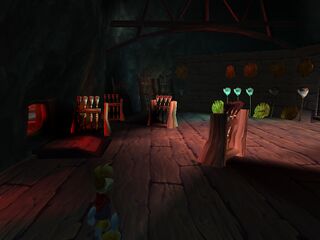 View from inside the firing range, that store all kinds of Hoodlum weapons.


Stage 3 - The Foundry
Rayman enters the foundry, where he must scale large contraptions to follow Globox. It starts with jumping from crate to crate and avoiding the hot lava. Once he reaches a ladder and defeats a Hoodboom, Rayman will now jump from metal plate to metal plate that are moving on a conveyor belt. After reaching another ladder to progress upwards, doors open, and one at a time comes a Hoodmonger, Hoodmonger Soldier, and Hoodmonger Officer in that order. Upon defeating another Hoodmonger Officer guarding a switch, once Rayman activates it more metal plates are moving, this time in a vertical way needed to continue. After dodging some obstacles and timing jumps, Rayman reaches the end. The door behind and in front of him close, as a Heckler whom is protected by a Hoodoo appears. When the Hoodoo is defeated, out comes a Heavy Metal Fist can, needed to destroy the Heckler. The door leading to the exit opens as the Heckler is destroyed.
The score thresholds for this stage are 2548 points for 25% (2 stars), 5096 points for 50% (3 stars), 7644 points for 75% (4 stars) and 10191 points for 100% (5 stars).
Secret area
There is a chamber hidden inside the boiler that contains a statue of Admiral Razorbeard and many of his Robo-Pirate henchmen standing behind a table, spoofing the Last Supper painting by Leonardo da Vinci.
-
 The beginning of the third section.
 -
 Some textures from Rayman 2 are used in this stage.
 -
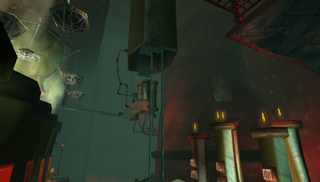 These metal plates and treadmills allow to continue the ascent of the foundry.
 -
 A hidden chamber containing statues of Robo-Pirates, as well as a statue of Admiral Razorbeard.
 -
 Kind of chair lifts.

.jpg)


Stage 4 - The Hall of the Horrible Machine
Rayman arrives in a narrow area where several wooden planks are being transported through scalding pipes. Below lies many pigpots, one contains a green gem. Globox can be seen, and Rayman must follow him up until he gets trapped inside another room, full of Armaguiddons. Rayman must go an alternate route, but runs into the Horrible Machine, which he must fight by filling up its pressure gauge. Eventually, the Horrible Machine is defeated, and in a last-ditch attempt to stop Rayman, André opens up floodgates holding back lava.
The score thresholds for this stage are 3572 points for 25% (2 stars), 7143 points for 50% (3 stars), 10714 points for 75% (4 stars) and 14285 points for 100% (5 stars).
-
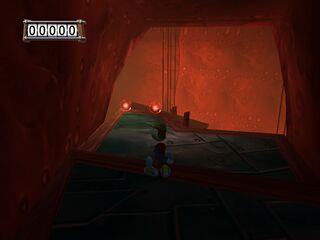 The beginning of the fourth section.
 -
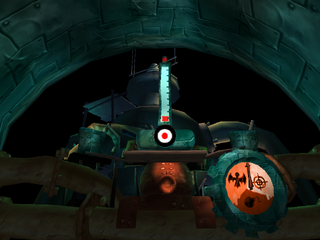 The Horrible Machine.


Stage 5 - The lava run
André unleashes a lava flood, which Rayman must run from. Occasionally, Slapdashes block his path. When Rayman completes this stage, the factory explodes, destroying the headquarters and killing a proportion of André's army. Both André, Rayman, and many others Hoodlums survive the suicide attempt. André then appears at the Tower of the Leptys to meet with Reflux, as he gains the immense power of the Leptys.
The score thresholds for this stage are 288 points for 25% (2 stars), 575 points for 50% (3 stars), 863 points for 75% (4 stars) and 1150 points for 100% (5 stars).
-
 The beginning of the fifth section.
 -
 The wooden tower towards the end of the section.


Images from the early production of Rayman 3
-
 Concept art of the Hoodlum Headquarters.
 -
 Concept art of the Hoodlum Headquarters.
 -
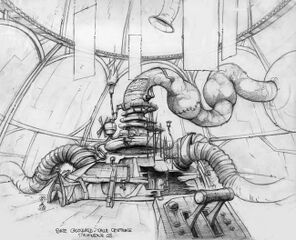 Concept art of the Hoodlum Headquarters.
 -
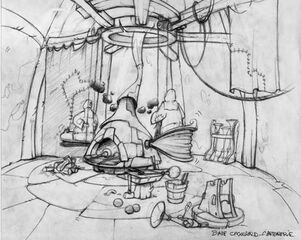 Concept art of the arms factory.
 -
 Concept art of the arms factory.
 -
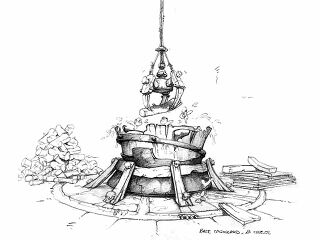 Concept art of a tank full of piranhas.
 -
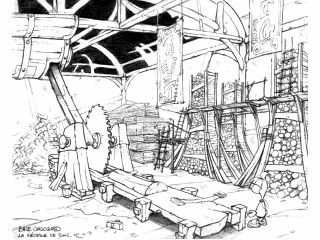 Concept art of the wood reserve.
 -
 The warehouse.
 -
 The foundry.


.jpg)
Soundtracks
- "Hoodlum Headquarters"
- "Hoodlum Headquarters ~Lava Flow~"
- "Hoodlum Headquarters ~Heavy Machinery~"
- "Hoodlum Headquarters ~Nausea~"
- "Factory Mayhem ~Target Practice~"
- "Factory Mayhem ~Perilous Pathways~"
- "The Horrible Machine ~Rising Temperatures~"
- "The Horrible Machine ~Attackers!~"
- "The Great Escape"
Saves
This section lists saves for the PC version of the game. Instructions on how to implement them can be found here.
Trivia
- A replica of the Eiffel Tower built entirely from plum juice crates can be seen in the Welcome Desk.
- The temperature in the headquarters is 98.6 degrees, according to the hostess.
External links
Notes
