The Tower of the Leptys: Difference between revisions
Hunchman801 (talk | contribs) No edit summary |
Hunchman801 (talk | contribs) mNo edit summary |
||
| (38 intermediate revisions by 11 users not shown) | |||
| Line 1: | Line 1: | ||
{{ | {{R3Level | ||
| name = The Tower of the Leptys | | name = The Tower of the Leptys | ||
| image = [[ | | icon = Mnu donj.png | ||
| preceded by = [[Hoodlum Headquarters]] | | image = [[File:TheToweroftheLeptysPC.jpg|center|320px|The Tower of the Leptys]] | ||
| followed by = Ending scene | | preceded by = [[File:Mnu blac.png|20px]] [[Hoodlum Headquarters]] | ||
| followed by = [[File:Mnu flms.png|20px]] Ending scene | |||
| murfysscore = 48001 | | murfysscore = 48001 | ||
| maxscore = | | maxscore = 127229 | ||
| cages = 10 | | cages = 10 | ||
| matuvus = 1 | | matuvus = 1 | ||
| Line 11: | Line 12: | ||
}} | }} | ||
'''The Tower of the Leptys''' is the ninth and final level of ''[[Rayman 3 | '''The Tower of the Leptys''' is the ninth and final level of ''[[Rayman 3]]''. It is the tower built by the [[Knaaren]] for their god, the [[Leptys]]. The only enemies here are several kinds of [[Hoodlum]]s, [[André]], and the final boss, [[Reflux]], who is a [[Knaaren]] that [[Rayman]] has to defeat in four fights. The first three fights are at the top of the tower and the last one is in the [[Leptys]]' world in the sky. | ||
==As a level== | ==As a level== | ||
===Stage 1 – The Great Fights=== | ===Stage 1 – The Great Fights=== | ||
Rayman must fight his way up the tower. | [[Rayman]] must fight his way up the tower. The first group of [[Hoodlum]]s consist of [[Hoodmonger]]s, a [[Hoodmonger Soldier]], a [[Hoodoo]], [[Hoodmonger Officer]]s and a [[Hoodstormer]], all in that order in terms of first seen. Once they all are destroyed, a [[Heavy Metal Fist]] can appears, needed to destroy a barricade blocking the way. As [[Rayman]] passes the bodies of lava, he encounters the second group of [[Hoodlum]]s. This one has several [[Hoodstormer]]s, a [[Heckler]], and a [[Hoodmonger Officer]]. Once they and the [[Hoodmonger Officer]] are defeated, [[Rayman]] can now destroy the [[Heckler]]. After that, three more [[Heckler]]s come running in. [[Rayman]] will need to keep refilling the [[Heavy Metal Fist]] in order to successfully destroy the three [[Heckler]]s. Once dead, for the first time in the game, a [[Hoodoo]], whom is protecting a [[Hoodmonger Soldier]], is being protected by another [[Hoodoo]]. When [[Rayman]] defeats the two [[Hoodoo]]s and the [[Hoodmonger Soldier]], the final [[Crazy Shoe]] appears. After [[Crazy Shoe|the shoe]] is beaten, the [[Throttle Copter]] is now able to be used to advance to a higher level. As [[Rayman]] progresses through the higher level with the [[Lockjaw]], defeating a couple of [[Slapdash]]es along the way, he slides down back to the first area where he greets a [[Hoodstormer]]. Once defeated, the [[Throttle Copter]] comes, and [[Rayman]] can now rise up and reach the ledge that leads to the last room, and then the exit. | ||
The score thresholds for this stage are 4000 points for 25% (2 stars), 8000 points for 50% (3 stars), 12000 points for 75% (4 stars) and 16000 points for 100% (5 stars). | |||
<gallery widths="320px" heights="240px"> | |||
RaymanShoes LeptysTower.jpg|[[Rayman]] chasing his [[Crazy Shoe]]. | |||
LeptysTower Section1 (End).jpg|The last room. | |||
</gallery> | |||
===Stage 2 – Up the Tower!=== | ===Stage 2 – Up the Tower!=== | ||
This | This stage is predominantly inside the tower. Just by walking a short distance, the final pair of [[Lavomatrix]]es appear. When they are defeated, the [[Lockjaw]] can be found at the beginning of the stairs, and that's where [[Rayman]] can begin moving upwards. For a while, [[Hoodlum]] activity dies down, as [[Rayman]] uses the hooks from the [[Lockjaw]] to progress higher and higher to the top stairs. Once [[Rayman]] reaches the top of the room, pairs of [[Hoodstormer]]s come out of nowhere and start shooting. [[Rayman]] is able to defeat them all, and recover the [[Lockjaw]] after losing it to using the [[Throttle Copter]] to finish getting to the top. [[Rayman]] leaves the room and enters into a smaller one, that after a while, will start a slow but continuous lava flooding. [[Rayman]] is able to escape with the help of many [[Throttle Copter]]s. Now he needs to take advantage of the pile of [[balloon]]s to continue towards an upcoming final lava flood. [[Rayman]] will once more have to use the [[balloon]]s to escape the lava flood and when he does, the exit is straight ahead. | ||
The score thresholds for this stage are 4650 points for 25% (2 stars), 9300 points for 50% (3 stars), 13950 points for 75% (4 stars) and 18600 points for 100% (5 stars). | |||
<gallery widths="320px" heights="240px"> | |||
LeptysTower Section2.jpg|The second section. | |||
LeptysTower Section2 (top of the tower).jpg|[[Rayman]] at the top of the first room. | |||
LeptysTower Section2.2.jpg|[[Rayman]] must reach the top of the room with multiple platforms and [[Laser-Washing Powder]]. | |||
Leptys Tower Section2 conveyor belt.jpg|The presence of a [[Hoodstormer]] makes progress difficult on these platforms. | |||
LeptysTower Balloons.jpg|[[Rayman]] must jump on these [[balloon]]s while avoiding the shots of a [[Hoodmonger Officer]]. | |||
LeptysTower Balloons 2.jpg|[[Rayman]] have to use these [[balloon]]s to reach the top of this room. | |||
</gallery> | |||
===Stage 3 – [[Armaguiddon]] Battle=== | |||
[[Globox]] reappears with an [[Armaguiddon]] and the two friends are reunited. [[Rayman]] must navigate the [[Armaguiddon]] through several narrow passageways; contact with almost anything will cause damage. Occasionally the two will be attacked by other [[Armaguiddon]] pilots that look like [[Hoodmonger Soldier]]s. During this time [[Globox]] drives and [[Rayman]] uses the gun at the back of the vehicle to shoot down the aggressors in the style of a first-person shooter. When all of the pilots have been defeated, the two are able to find the entrance to a room that leads to where [[André]] and [[Reflux]] are. [[Rayman]] gets dropped off, and runs in hope of quickly encountering the two. | |||
The score thresholds for this stage are 2000 points for 25% (2 stars), 4000 points for 50% (3 stars), 6000 points for 75% (4 stars) and 8000 points for 100% (5 stars). | |||
<gallery widths="320px" heights="240px"> | |||
LeptysTower (The Armaguiddons).jpg|[[Globox]] and [[Rayman]] travel this section with their [[Armaguiddon]]. | |||
Rayman-3-Armaguiddon.jpg|[[Globox]] and [[Rayman]] on their [[Armaguiddon]], with an enemy pursuing them. | |||
LeptysTower Section3.jpg|The third section. | |||
</gallery> | |||
===Stage 4 – The Top Reached, the Battle Started!=== | ===Stage 4 – The Top Reached, the Battle Started!=== | ||
Rayman first climbs a series of steps with no opposition. | [[Rayman]] first climbs a series of steps with no opposition. He can hear [[André]] and [[Reflux]] talking as he progresses. Near the end, there are several [[Porkibank|pigpots]]. Eventually, he encounters [[Reflux]] again and the final battle begins. Firstly, [[Reflux]] raises his shield. [[Rayman]] must use the [[Lockjaw]] to lower it and then the [[Heavy Metal Fist]] to deal damage to [[Reflux]]. Once this fairly easy round has been won, [[Reflux]] injects himself with the [[Leptys]], creating a more formidable boss. [[Rayman]] must circle giant [[Reflux]] waiting for him to throw his fist to the ground. When he does, [[Rayman]] can run up onto his back and attack the [[Leptys]] with the [[Heavy Metal Fist]] once again (attacking with the [[Telescopic fist|normal fist]] or the [[Lockjaw]] will prove fruitless). Next, [[Reflux]] begins to levitate. [[Rayman]] must use the floating debris around him, with the help of several [[Throttle Copter]]s, to reach a [[Shock Rocket]] can. Once the [[Leptys]] is hit with the [[Shock Rocket]], [[Reflux]] develops wings and flies away. [[Globox]] returns with the [[Armaguiddon]] and [[Rayman]] hops aboard. The two give chase. | ||
===Secret areas=== | |||
At the beginning of the level, if [[Rayman]] approaches the statue of the two [[Knaaren]] with 43,001 points or more, a door will open, granting him access to a [[Xowar secret|secret zoo]], filled with [[Jewel|green gems]] and [[Bonton|exotic]] [[Xowar|creatures]]. | |||
After [[Reflux]] has been defeated twice, [[Rayman]] can fall down the side of the arena to find the last [[Jewel|green gem]] in an alcove. But [[Rayman]] will have to be careful, because if he falls into the bottomless pit, the "Game Over" will appear and the stage will have to be restarted. | |||
== | <gallery widths="320px" heights="240px"> | ||
LeptysTower Section4.jpg|The fifth section. | |||
Refluxfirstform2.JPG|The top of the Tower, where [[Rayman]] and [[Reflux]] fight. | |||
</gallery> | |||
===Stage 5 - The | ===Stage 5 - The Final Battle=== | ||
Rayman must use the Armaguiddon's weaponry to shoot down Reflux's shields. Once this has been done enough Reflux will land and | [[Rayman]] must use the [[Armaguiddon]]'s weaponry to shoot down [[Reflux]]'s shields. Once this has been done enough, [[Reflux]] will make a charge towards the [[Armaguiddon]], so [[Rayman]] will have to shoot the exposed [[Leptys]] to decrease [[Reflux]]'s health. This causes him to land and [[André]] will begin to spawn [[Hoodmonger]]s from inside the [[Leptys]]. [[Rayman]] and [[Globox]] must fly around and defeat the [[Hoodmonger]]s before they can return to [[Reflux]]. Any of them that achieve their goal replenish [[Reflux]]'s health. Gameplay repeats like this until [[Reflux]]'s health reaches 0 and turns into ice and shatters. Afterwards, [[André]] falls to the ground. [[Rayman]] must use his [[grimace]] ability to turn him into a [[Red Lum]], thus eliminating his threat. | ||
<gallery widths="320px" heights="240px"> | |||
Leptys Astral Plane 1.jpg|The astral plane. | |||
Leptys Astral Plane 2.jpg|Another view of the astral plane. | |||
Ray&André (Leptys Astral Plane).jpg|[[Rayman]] faces [[André]] for the last time. | |||
</gallery> | |||
===Epilogue=== | ===Epilogue=== | ||
Rayman and Globox are returned to [[ | [[Rayman]] and [[Globox]] are returned to [[the Fairy Council]] where all is well. However, [[Globox]] misses [[André]]. [[Rayman]] states that making [[André]] a [[Black Lum]] again is probably not a good idea and that he wouldn't know how to do it anyway. [[Globox]] reveals that he would have to scare the [[Red Lum]], and [[Rayman]] hates to imagine what could possibly do that. It is then revealed in a flashback that it was [[Rayman]]'s hands wandering around performing tricks upon the [[Red Lum]] that caused [[André]] to be "born" in the first place - a humourous irony. | ||
<gallery widths="320px" heights="150px"> | |||
Mains Baladeuses1.jpg|[[Rayman]] and [[Globox]] asleep. | |||
Mains Baladeuses.jpg|The hands of [[Rayman]] make shadow puppets before this [[Red Lum]]. | |||
Mains Baladeuses 2.jpg|After being frightened by this shadow puppet, this [[Red Lum]] becomes [[André]] the [[Black Lum]]. | |||
</gallery> | |||
==Soundtracks== | |||
*[https://raytunes.raymanpc.com/music/R3/114%20-%20The%20Tower%20of%20the%20Leptys.mp3 "The Tower of the Leptys"] | |||
*[https://raytunes.raymanpc.com/music/R3/115%20-%20No%20Time%20to%20Lose!%20~Rising%20Lava~.mp3 "No Time to Lose! ~Rising Lava~"] | |||
*[https://raytunes.raymanpc.com/music/R3/116%20-%20No%20Time%20to%20Lose!%20~Conveyor%20Belts~.mp3 "No Time to Lose! ~Conveyor Belts~"] | |||
*[https://raytunes.raymanpc.com/music/R3/117%20-%20The%20Armaguiddon%20~Off%20We%20Go~.mp3 "The Armaguiddon ~Off We Go~"] | |||
*[https://raytunes.raymanpc.com/music/R3/118%20-%20The%20Armaguiddon%20~It's%20an%20Ambush!~.mp3 "The Armaguiddon ~It's an Ambush!~"] | |||
*[https://raytunes.raymanpc.com/music/R3/119%20-%20The%20Armaguiddon%20~Lying%20Low~%20(Movement%201).mp3 "The Armaguiddon ~Lying Low~ (Movement 1)"] | |||
*[https://raytunes.raymanpc.com/music/R3/120%20-%20The%20Armaguiddon%20~Lying%20Low~%20(Movement%202).mp3 "The Armaguiddon ~Lying Low~ (Movement 2)"] | |||
*[https://raytunes.raymanpc.com/music/R3/121%20-%20The%20Armaguiddon%20~Lying%20Low~%20(Movement%203).mp3 "The Armaguiddon ~Lying Low~ (Movement 3)"] | |||
*[https://raytunes.raymanpc.com/music/R3/122%20-%20The%20Armaguiddon%20~Bell%20Tower~.mp3 "The Armaguiddon ~Bell Tower~"] | |||
*[https://raytunes.raymanpc.com/music/R3/123%20-%20The%20Armaguiddon%20~Hall%20of%20Mirrors~%20(Movement%201).mp3 "The Armaguiddon ~Hall of Mirrors~ (Movement 1)"] | |||
*[https://raytunes.raymanpc.com/music/R3/124%20-%20The%20Armaguiddon%20~Hall%20of%20Mirrors~%20(Movement%202).mp3 "The Armaguiddon ~Hall of Mirrors~ (Movement 2)"] | |||
*[https://raytunes.raymanpc.com/music/R3/125%20-%20The%20Armaguiddon%20~Hall%20of%20Mirrors~%20(Movement%203).mp3 "The Armaguiddon ~Hall of Mirrors~ (Movement 3)"] | |||
*[https://raytunes.raymanpc.com/music/R3/126%20-%20The%20Armaguiddon%20~Shootout%20in%20the%20Pillar%20Room~.mp3 " The Armaguiddon ~Shootout in the Pillar Room~"] | |||
*[https://raytunes.raymanpc.com/music/R3/127%20-%20The%20Armaguiddon%20~Through%20the%20Ruins~.mp3 "The Armaguiddon ~Through the Ruins~"] | |||
*[https://raytunes.raymanpc.com/music/R3/128%20-%20The%20Armaguiddon%20~Chaos~.mp3 "The Armaguiddon ~Chaos~"] | |||
*[https://raytunes.raymanpc.com/music/R3/129%20-%20Reflux%20~Prelude~.mp3 "Reflux ~Prelude~"] | |||
*[https://raytunes.raymanpc.com/music/R3/130%20-%20Reflux%20~Fallen%20Knaaren%20Warrior~.mp3 "Reflux ~Fallen Knaaren Warrior~"] | |||
*[https://raytunes.raymanpc.com/music/R3/131%20-%20Reflux%20~Scepter%20Transformation~.mp3 "Reflux ~Scepter Transformation~"] | |||
*[https://raytunes.raymanpc.com/music/R3/132%20-%20Reflux%20~Giant%20Knaaren%20Warrior~.mp3 "Reflux ~Giant Knaaren Warrior~"] | |||
*[https://raytunes.raymanpc.com/music/R3/133%20-%20Reflux%20~Ascension~.mp3 "Reflux ~Ascension~"] | |||
*[https://raytunes.raymanpc.com/music/R3/134%20-%20Reflux%20~Ascended%20Knaaren%20Warrior~.mp3 "Reflux ~Ascended Knaaren Warrior~"] | |||
*[https://raytunes.raymanpc.com/music/R3/135%20-%20Reflux%20~Sprouting%20Wings~.mp3 "Reflux ~Sprouting Wings~"] | |||
*[https://raytunes.raymanpc.com/music/R3/136%20-%20The%20Leptys%20~Appearance~.mp3 "The Leptys ~Appearance~"] | |||
*[https://raytunes.raymanpc.com/music/R3/137%20-%20The%20Leptys%20~Bringer%20of%20Night~%20(Movement%201).mp3 "The Leptys ~Bringer of Night~ (Movement 1)"] | |||
*[https://raytunes.raymanpc.com/music/R3/139%20-%20The%20Leptys%20~Bringer%20of%20Night~%20(Movement%202).mp3 "The Leptys ~Bringer of Night~ (Movement 2)"] | |||
*[https://raytunes.raymanpc.com/music/R3/140%20-%20The%20Leptys%20~Bringer%20of%20Night~%20(Movement%203).mp3 "The Leptys ~Bringer of Night~ (Movement 3)"] | |||
*[https://raytunes.raymanpc.com/music/R3/142%20-%20The%20Leptys%20~Bringer%20of%20Night~%20(Movement%204).mp3 "The Leptys ~Bringer of Night~ (Movement 4)"] | |||
*[https://raytunes.raymanpc.com/music/R3/138%20-%20The%20Leptys%20~Weakened~.mp3 "The Leptys ~Weakened~"] | |||
*[https://raytunes.raymanpc.com/music/R3/141%20-%20The%20Leptys%20~Recharged~.mp3 "The Leptys ~Recharged~"] | |||
*[https://raytunes.raymanpc.com/music/R3/143%20-%20The%20Leptys%20~A%20God's%20Downfall~.mp3 "The Leptys ~A God's Downfall~"] | |||
*[https://raytunes.raymanpc.com/music/R3/144%20-%20The%20Final%20Lum.mp3 "The Final Lum"] | |||
==Saves== | |||
This section lists saves for the PC version of the game. Instructions on how to implement them can be found [https://raysaves.raymanpc.com/rayman3.html here]. | |||
*[https://raysaves.raymanpc.com/saves/rayman3/L9P1.sav Phase 1] | |||
*[https://raysaves.raymanpc.com/saves/rayman3/L9P2.sav Phase 2] | |||
*[https://raysaves.raymanpc.com/saves/rayman3/L9P3.sav Phase 3] | |||
*[https://raysaves.raymanpc.com/saves/rayman3/L9P4.sav Phase 4] | |||
*[https://raysaves.raymanpc.com/saves/rayman3/L9P5.sav Phase 5] | |||
==Trivia== | ==Trivia== | ||
*The poisonous water in the Armaguiddon shooting phase uses a texture from ''Rayman 2''. | *The poisonous water in the [[Armaguiddon]] shooting phase uses a texture from ''[[Rayman 2]]''. | ||
==External links== | ==External links== | ||
*[ | *[https://www.youtube.com/watch?v=5zynOIJuGgc Gameplay of the Tower of the Leptys level (PC version)] | ||
{{Rayman3worlds}} | {{Rayman3worlds}} | ||
[[fr:La Tour du Leptys]] | [[fr:La Tour du Leptys]] | ||
[[de:Der Turm von Leptys]] | |||
[[pl:Wieża Leptysa]] | [[pl:Wieża Leptysa]] | ||
[[es:La Torre del Leptys]] | |||
[[Category: Places from Rayman 3|Tower of the Leptys, The]] | [[ru:Башня Лептиса]] | ||
[[Category:Places from Rayman 3|Tower of the Leptys, The]] | |||
Latest revision as of 06:08, 29 July 2025
 The Tower of the Leptys The Tower of the Leptys
| |
|---|---|
 | |
←  Hoodlum Headquarters Hoodlum Headquarters
|
 Ending scene → Ending scene →
|
 Murfy's score: Murfy's score:
|
    
|
| Maximum score: |    
|

|
 
|

| |
The Tower of the Leptys is the ninth and final level of Rayman 3. It is the tower built by the Knaaren for their god, the Leptys. The only enemies here are several kinds of Hoodlums, André, and the final boss, Reflux, who is a Knaaren that Rayman has to defeat in four fights. The first three fights are at the top of the tower and the last one is in the Leptys' world in the sky.
As a level
Stage 1 – The Great Fights
Rayman must fight his way up the tower. The first group of Hoodlums consist of Hoodmongers, a Hoodmonger Soldier, a Hoodoo, Hoodmonger Officers and a Hoodstormer, all in that order in terms of first seen. Once they all are destroyed, a Heavy Metal Fist can appears, needed to destroy a barricade blocking the way. As Rayman passes the bodies of lava, he encounters the second group of Hoodlums. This one has several Hoodstormers, a Heckler, and a Hoodmonger Officer. Once they and the Hoodmonger Officer are defeated, Rayman can now destroy the Heckler. After that, three more Hecklers come running in. Rayman will need to keep refilling the Heavy Metal Fist in order to successfully destroy the three Hecklers. Once dead, for the first time in the game, a Hoodoo, whom is protecting a Hoodmonger Soldier, is being protected by another Hoodoo. When Rayman defeats the two Hoodoos and the Hoodmonger Soldier, the final Crazy Shoe appears. After the shoe is beaten, the Throttle Copter is now able to be used to advance to a higher level. As Rayman progresses through the higher level with the Lockjaw, defeating a couple of Slapdashes along the way, he slides down back to the first area where he greets a Hoodstormer. Once defeated, the Throttle Copter comes, and Rayman can now rise up and reach the ledge that leads to the last room, and then the exit.
The score thresholds for this stage are 4000 points for 25% (2 stars), 8000 points for 50% (3 stars), 12000 points for 75% (4 stars) and 16000 points for 100% (5 stars).
-
 Rayman chasing his Crazy Shoe.
 -
 The last room.

.jpg)
Stage 2 – Up the Tower!
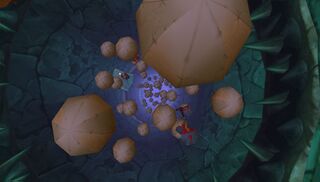
This stage is predominantly inside the tower. Just by walking a short distance, the final pair of Lavomatrixes appear. When they are defeated, the Lockjaw can be found at the beginning of the stairs, and that's where Rayman can begin moving upwards. For a while, Hoodlum activity dies down, as Rayman uses the hooks from the Lockjaw to progress higher and higher to the top stairs. Once Rayman reaches the top of the room, pairs of Hoodstormers come out of nowhere and start shooting. Rayman is able to defeat them all, and recover the Lockjaw after losing it to using the Throttle Copter to finish getting to the top. Rayman leaves the room and enters into a smaller one, that after a while, will start a slow but continuous lava flooding. Rayman is able to escape with the help of many Throttle Copters. Now he needs to take advantage of the pile of balloons to continue towards an upcoming final lava flood. Rayman will once more have to use the balloons to escape the lava flood and when he does, the exit is straight ahead.
The score thresholds for this stage are 4650 points for 25% (2 stars), 9300 points for 50% (3 stars), 13950 points for 75% (4 stars) and 18600 points for 100% (5 stars).
-
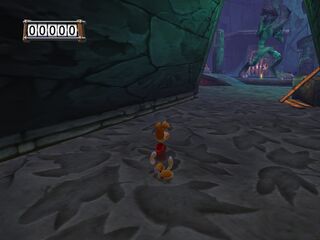 The second section.
 -
 Rayman at the top of the first room.
 -
 Rayman must reach the top of the room with multiple platforms and Laser-Washing Powder.
 -
 The presence of a Hoodstormer makes progress difficult on these platforms.
 -

-

.jpg)


Stage 3 – Armaguiddon Battle
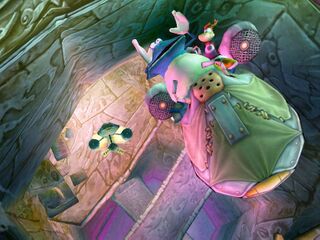
Globox reappears with an Armaguiddon and the two friends are reunited. Rayman must navigate the Armaguiddon through several narrow passageways; contact with almost anything will cause damage. Occasionally the two will be attacked by other Armaguiddon pilots that look like Hoodmonger Soldiers. During this time Globox drives and Rayman uses the gun at the back of the vehicle to shoot down the aggressors in the style of a first-person shooter. When all of the pilots have been defeated, the two are able to find the entrance to a room that leads to where André and Reflux are. Rayman gets dropped off, and runs in hope of quickly encountering the two.
The score thresholds for this stage are 2000 points for 25% (2 stars), 4000 points for 50% (3 stars), 6000 points for 75% (4 stars) and 8000 points for 100% (5 stars).
-

-
-
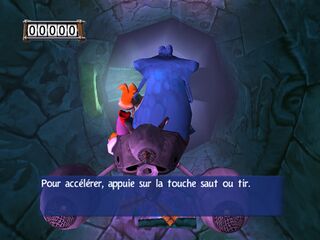 The third section.
.jpg)


Stage 4 – The Top Reached, the Battle Started!
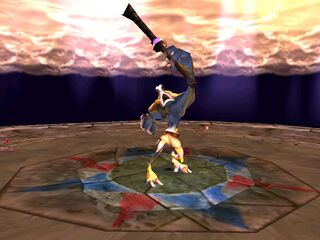
Rayman first climbs a series of steps with no opposition. He can hear André and Reflux talking as he progresses. Near the end, there are several pigpots. Eventually, he encounters Reflux again and the final battle begins. Firstly, Reflux raises his shield. Rayman must use the Lockjaw to lower it and then the Heavy Metal Fist to deal damage to Reflux. Once this fairly easy round has been won, Reflux injects himself with the Leptys, creating a more formidable boss. Rayman must circle giant Reflux waiting for him to throw his fist to the ground. When he does, Rayman can run up onto his back and attack the Leptys with the Heavy Metal Fist once again (attacking with the normal fist or the Lockjaw will prove fruitless). Next, Reflux begins to levitate. Rayman must use the floating debris around him, with the help of several Throttle Copters, to reach a Shock Rocket can. Once the Leptys is hit with the Shock Rocket, Reflux develops wings and flies away. Globox returns with the Armaguiddon and Rayman hops aboard. The two give chase.
Secret areas
At the beginning of the level, if Rayman approaches the statue of the two Knaaren with 43,001 points or more, a door will open, granting him access to a secret zoo, filled with green gems and exotic creatures.
After Reflux has been defeated twice, Rayman can fall down the side of the arena to find the last green gem in an alcove. But Rayman will have to be careful, because if he falls into the bottomless pit, the "Game Over" will appear and the stage will have to be restarted.
-
 The fifth section.
 -


Stage 5 - The Final Battle
Rayman must use the Armaguiddon's weaponry to shoot down Reflux's shields. Once this has been done enough, Reflux will make a charge towards the Armaguiddon, so Rayman will have to shoot the exposed Leptys to decrease Reflux's health. This causes him to land and André will begin to spawn Hoodmongers from inside the Leptys. Rayman and Globox must fly around and defeat the Hoodmongers before they can return to Reflux. Any of them that achieve their goal replenish Reflux's health. Gameplay repeats like this until Reflux's health reaches 0 and turns into ice and shatters. Afterwards, André falls to the ground. Rayman must use his grimace ability to turn him into a Red Lum, thus eliminating his threat.
-
 The astral plane.
 -
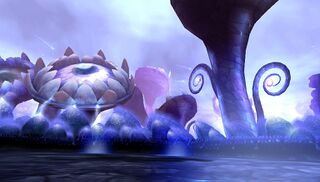 Another view of the astral plane.
 -


.jpg)
Epilogue
Rayman and Globox are returned to the Fairy Council where all is well. However, Globox misses André. Rayman states that making André a Black Lum again is probably not a good idea and that he wouldn't know how to do it anyway. Globox reveals that he would have to scare the Red Lum, and Rayman hates to imagine what could possibly do that. It is then revealed in a flashback that it was Rayman's hands wandering around performing tricks upon the Red Lum that caused André to be "born" in the first place - a humourous irony.


Soundtracks
- "The Tower of the Leptys"
- "No Time to Lose! ~Rising Lava~"
- "No Time to Lose! ~Conveyor Belts~"
- "The Armaguiddon ~Off We Go~"
- "The Armaguiddon ~It's an Ambush!~"
- "The Armaguiddon ~Lying Low~ (Movement 1)"
- "The Armaguiddon ~Lying Low~ (Movement 2)"
- "The Armaguiddon ~Lying Low~ (Movement 3)"
- "The Armaguiddon ~Bell Tower~"
- "The Armaguiddon ~Hall of Mirrors~ (Movement 1)"
- "The Armaguiddon ~Hall of Mirrors~ (Movement 2)"
- "The Armaguiddon ~Hall of Mirrors~ (Movement 3)"
- " The Armaguiddon ~Shootout in the Pillar Room~"
- "The Armaguiddon ~Through the Ruins~"
- "The Armaguiddon ~Chaos~"
- "Reflux ~Prelude~"
- "Reflux ~Fallen Knaaren Warrior~"
- "Reflux ~Scepter Transformation~"
- "Reflux ~Giant Knaaren Warrior~"
- "Reflux ~Ascension~"
- "Reflux ~Ascended Knaaren Warrior~"
- "Reflux ~Sprouting Wings~"
- "The Leptys ~Appearance~"
- "The Leptys ~Bringer of Night~ (Movement 1)"
- "The Leptys ~Bringer of Night~ (Movement 2)"
- "The Leptys ~Bringer of Night~ (Movement 3)"
- "The Leptys ~Bringer of Night~ (Movement 4)"
- "The Leptys ~Weakened~"
- "The Leptys ~Recharged~"
- "The Leptys ~A God's Downfall~"
- "The Final Lum"
Saves
This section lists saves for the PC version of the game. Instructions on how to implement them can be found here.
Trivia
- The poisonous water in the Armaguiddon shooting phase uses a texture from Rayman 2.
