Eat at Joe's: Difference between revisions
Castlefania (talk | contribs) m Ditto. |
Hunchman801 (talk | contribs) mNo edit summary |
||
| Line 10: | Line 10: | ||
==Part 1== | ==Part 1== | ||
This part is an introductory sequence, in which [[Rayman]] meets [[Joe the Extra-Terrestrial]], owner of a small diner whose electric power was cut off. [[ | This part is an introductory sequence, in which [[Rayman]] meets [[Joe|Joe the Extra-Terrestrial]], owner of a small diner whose electric power was cut off. [[Joe]] gives [[Rayman]] a [[firefly]] to help him for the dark caves in the next part. | ||
<gallery widths="320px" heights="256px"> | <gallery widths="320px" heights="256px"> | ||
| Line 19: | Line 19: | ||
==Part 2== | ==Part 2== | ||
[[Image:RaymanLuciole.png|thumb|316px|right|class=sprite|[[ | [[Image:RaymanLuciole.png|thumb|316px|right|class=sprite|[[Joe]]'s [[firefly]] proves useful in the dark caves]] | ||
In all versions except [[Rayman (Atari Jaguar)|the Atari Jaguar version]], this part is so dark that [[Rayman]] has to use [[ | In all versions except [[Rayman (Atari Jaguar)|the Atari Jaguar version]], this part is so dark that [[Rayman]] has to use [[Joe]]'s [[firefly]], which follows [[Telescopic fist|his fist]], to lighten his way. [[Rayman (Atari Jaguar)|The Atari Jaguar version]] also contains two [[cage]]s instead of one. As a result, the [[cage]] present in part 6 has been removed. | ||
<gallery widths="800px" heights="168px"> | <gallery widths="800px" heights="168px"> | ||
| Line 40: | Line 40: | ||
[[image:Soucoupe.png|right|thumb|316px|class=sprite|The first [[flying saucer]]]] | [[image:Soucoupe.png|right|thumb|316px|class=sprite|The first [[flying saucer]]]] | ||
In this part, [[Rayman]] has to [[telescopic fist|punch]] the plug that turns on the diner lights as well as a network of [[flying saucer]]s held with wires that make up [[ | In this part, [[Rayman]] has to [[telescopic fist|punch]] the plug that turns on the diner lights as well as a network of [[flying saucer]]s held with wires that make up [[Joe]]'s electricity system. They will allow [[Rayman]] to get back to [[Joe]]'s place. This is the only part along with part 6 of [[Bongo Hills]] and part 4 of [[Moskito's Nest]] that does not have any [[cage]]s and does not involve a boss. | ||
<gallery widths="800px" heights="222px"> | <gallery widths="800px" heights="222px"> | ||
| Line 50: | Line 50: | ||
[[Image:SoucoupeLevier.png|thumb|316px|right|class=sprite|Punching this [[switch]] changes the direction of the [[flying saucer]]]] | [[Image:SoucoupeLevier.png|thumb|316px|right|class=sprite|Punching this [[switch]] changes the direction of the [[flying saucer]]]] | ||
[[Rayman]] keeps using the network of [[flying saucer]]s to get back to [[ | [[Rayman]] keeps using the network of [[flying saucer]]s to get back to [[Joe]]'s diner. This part corresponds to the lower section of the third part. | ||
<gallery widths="320px" heights="224px"> | <gallery widths="320px" heights="224px"> | ||
| Line 60: | Line 60: | ||
[[Image:PoissonDents.png|thumb|316px|left|class=sprite|Several species of [[Fish (Eat at Joe's)|fish]] live in the caves]] | [[Image:PoissonDents.png|thumb|316px|left|class=sprite|Several species of [[Fish (Eat at Joe's)|fish]] live in the caves]] | ||
[[Rayman]] finally comes back to [[ | [[Rayman]] finally comes back to [[Joe]]'s diner, where he has to cross the water by jumping on buoys scattered all over the place while avoiding [[spiky ball|spiky balls]] and dangerous [[large-mouthed fish]]. | ||
<gallery widths="798px" heights="46px"> | <gallery widths="798px" heights="46px"> | ||
Revision as of 09:35, 30 August 2022
| Eat at Joe's | ||
|---|---|---|
 | ||
| ← Crystal Palace | Mr Skops' Stalactites → | |
Eat at Joe's (French: Mangez chez Joe – Eat at Joe's) is the second level of the Caves of Skops, the fifth world of the original Rayman game. It consists of six parts, although the first one is only an introductory sequence.
Part 1
This part is an introductory sequence, in which Rayman meets Joe the Extra-Terrestrial, owner of a small diner whose electric power was cut off. Joe gives Rayman a firefly to help him for the dark caves in the next part.

Part 2

In all versions except the Atari Jaguar version, this part is so dark that Rayman has to use Joe's firefly, which follows his fist, to lighten his way. The Atari Jaguar version also contains two cages instead of one. As a result, the cage present in part 6 has been removed.
-
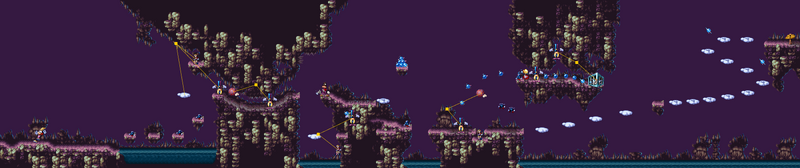 PC version
 -
 PlayStation version


Part 3
There are a lot of traps in this part which Rayman needs to avoid. This part corresponds to the higher section of the fifth part.

-
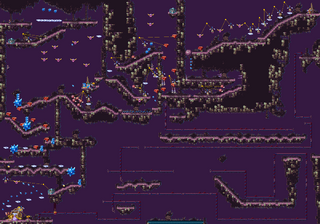 PC version
 -
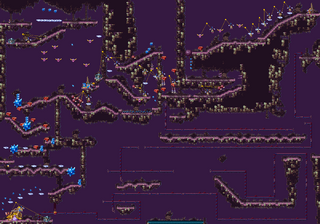 PlayStation version


Part 4

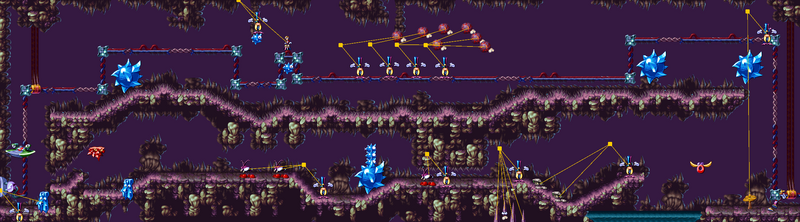
In this part, Rayman has to punch the plug that turns on the diner lights as well as a network of flying saucers held with wires that make up Joe's electricity system. They will allow Rayman to get back to Joe's place. This is the only part along with part 6 of Bongo Hills and part 4 of Moskito's Nest that does not have any cages and does not involve a boss.
-
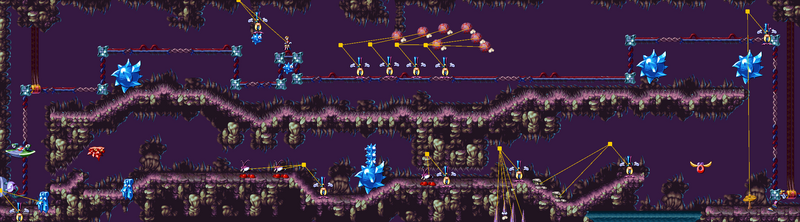 PC version
 -
 PlayStation version


Part 5

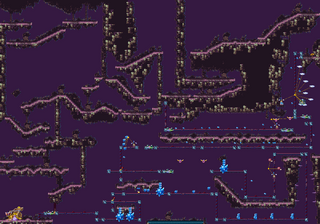
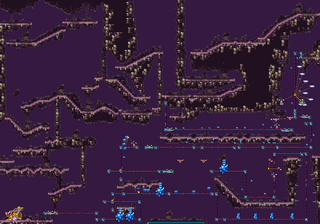
Rayman keeps using the network of flying saucers to get back to Joe's diner. This part corresponds to the lower section of the third part.
-
 PC version
 -
 PlayStation version


Part 6

Rayman finally comes back to Joe's diner, where he has to cross the water by jumping on buoys scattered all over the place while avoiding spiky balls and dangerous large-mouthed fish.
-
 PC version
 -
 PlayStation version


External links
Atari Jaguar
Sony PlayStation
PC/MS-DOS
Game Boy Advance