The Cave of Bad Dreams: Difference between revisions
Fixed bonus level link |
Hunchman801 (talk | contribs) mNo edit summary |
||
| (17 intermediate revisions by 5 users not shown) | |||
| Line 1: | Line 1: | ||
{{ | {{Quote|text=Your trip ends here!|sign=[[Jano]] to [[Rayman]]|source=''[[Rayman 2|Rayman 2: The Great Escape]]''}} | ||
'''The Cave of Bad Dreams''', also known as '''the Kingdom of the Dead''', is a sub-level in ''[[Rayman 2: The Great Escape]]'' and its remakes. It is where the monsters generated by [[Polokus]]'s nightmares are locked away by its | '''The Cave of Bad Dreams''', also known as '''the Kingdom of the Dead''', is a sub-level in ''[[Rayman 2|Rayman 2: The Great Escape]]'' and its remakes. It is where the monsters generated by [[Polokus]]'s nightmares are locked away by its guardian, [[Jano]], who also watches over a mountain of gold coins and jewels. Despite this, nobody has dared to enter the cave, not even [[Razorbeard]] and the [[Robo-Pirate]]s. Therefore, there are no [[cage]]s to be found inside. [[Rayman]], however, needs to go there in order to obtain the [[Elixir of Life]], which his friend [[Clark]] needs to recover from an illness caused by swallowing a rusty [[Robo-Pirate]]. The entrance to this subterranean grotto is located in [[the Marshes of Awakening]]. | ||
==Original version== | |||
{{R2PCLevel | |||
| name = The Cave of Bad Dreams | | name = The Cave of Bad Dreams | ||
| image = [[File:Thecaveofbaddreamspc.JPG | | image = [[File:Thecaveofbaddreamspc.JPG|320px|The Cave of Bad Dreams]] | ||
| connected to = [[The Marshes of Awakening]] | | connected to = [[The Marshes of Awakening]] | ||
| lums = [[File:Icon5.png|5]][[File:Icon0.png|0]] | | lums = [[File:Icon5.png|5]][[File:Icon0.png|0]] | ||
| Line 14: | Line 12: | ||
}} | }} | ||
Before entering the cave, [[Rayman]] has to remember the name of it, as [[Clark]] tells him in the [[Menhir Hills]], otherwise [[Jano]] will shoo him away. In this version of the game, it is found by walking on a giant branch to [[Rayman]]'s left at the beginning of [[the Marshes of Awakening]], until he sees [[Jano]] standing behind walls of cobwebs. The area is restricted as unknown territory by the [[Robo-Pirate]] army, thus they have no presence there or inside the cave. Provided that he reads in [[Rayman]]'s mind that he knows the name of this place, [[Jano]] will shake his skull-headed stick, which hypnotises [[Rayman]] and teleports him to the inside of the cave. | |||
<gallery widths="320px" heights="240px"> | |||
R2TGE-PC-TheCaveOfBadDreams-HallOfDoors.jpg|The [[Spiral Door]] in [[the Hall of Doors]] which takes [[Rayman]] to the Cave of Bad Dreams | |||
</gallery> | |||
===Phase 1=== | ===Phase 1=== | ||
Down the backbone of a gigantic animal, there is a [[Purple Lum]] to grab to cross a wide gap with rivers of living thorns at the bottom. | Down the backbone of a gigantic animal, there is a [[Purple Lum]] to grab to cross a wide gap with rivers of living thorns at the bottom. [[Skull]]s fall down into this, and [[Rayman]] uses them to get across some more, as well as climbing on walls with bones embedded into them. Then there is a wide hole in which a skeletal clawed [[arm]] pops out to grab [[Rayman]] and pull him into the unknown, but that can be prevented by shooting at them. After that, there are three pillars with climbable bones that sink as soon as [[Rayman]] grabs on. | ||
Down the next corridor which is riddled with more skeletal [[arm]]s, there is a double wall Rayman can wall jump inside of, but from time to time they space themselves out so he can't climb up, and then close in. At the top, there is a chasm, and on a wide edge there is a gold pedestal, like the one found in | Down the next corridor which is riddled with more skeletal [[arm]]s, there is a double wall [[Rayman]] can wall jump inside of, but from time to time they space themselves out so he can't climb up, and then close in. At the top, there is a chasm, and on a wide edge there is a gold pedestal, like the one found in [[the Sanctuary of Water and Ice]] guarded by a [[Mini Jano]]. About four to six of these appear, two at a time, and they all need to be defeated in order for the matching [[Magic Sphere]] to appear. Once they join, the pedestal moves and [[Rayman]] has to drop down the hole it reveals. | ||
Now there are two more pedestals, which surround a carving on the wall that looks like the one-eyed monsters Rayman had just encountered. To his left is a ledge that leads to two passages to choose from - each one is where a Magic Sphere can be found. The silver sphere is found in the passage on the left, the gold one to the right. In the silver chamber, there are giant slabs of stone that rotate on top of tall rocks, which Rayman needs to cross and throw the sphere back and then carry it to its correct pedestal. In the gold chamber, there is a skull supported by a skeletal [[arm]], which moves Rayman across the gap to the other side. Another moving double wall is passed through onto another moving skull, which leads to a series of pillars that are teeming with [[caterpillar]]s. Near them is a skull that moves upwards to a ledge where the gold sphere is found. This chamber is circular, so all Rayman needs to do is throw it down a few ledges rather than going all the way back. When both of the spheres are placed on their pedestals, the carving opens up by the mouth, and Rayman drops down a hole that is covered with fragile shards of green crystal. | Now there are two more pedestals, which surround a carving on the wall that looks like the one-eyed monsters [[Rayman]] had just encountered. To his left is a ledge that leads to two passages to choose from - each one is where a [[Magic Sphere]] can be found. The silver [[Magic Sphere|sphere]] is found in the passage on the left, the gold one to the right. In the silver chamber, there are giant slabs of stone that rotate on top of tall rocks, which [[Rayman]] needs to cross and throw the [[Magic Sphere|sphere]] back and then carry it to its correct pedestal. In the gold chamber, there is a [[skull]] supported by a skeletal [[arm]], which moves [[Rayman]] across the gap to the other side. Another moving double wall is passed through onto another moving [[skull]], which leads to a series of pillars that are teeming with [[caterpillar]]s. Near them is a skull that moves upwards to a ledge where the gold [[Magic Sphere|sphere]] is found. This chamber is circular, so all [[Rayman]] needs to do is throw it down a few ledges rather than going all the way back. When both of the [[Magic Sphere|spheres]] are placed on their pedestals, the carving opens up by the mouth, and [[Rayman]] drops down a hole that is covered with fragile shards of green crystal. | ||
===Phase 2=== | ===Phase 2=== | ||
Rayman is now in a passage with a slope covered with shining green crystal, and then Jano reappears from underground, threatening to eat him. Rayman now has to slide down, shooting any crystal growths that are in his way - if he slides too slowly, Jano will eat him, causing him to respawn at the beginning. At the end, he will enter a chasm where he has to avoid the fire that Jano breathes, just like his smaller counterparts. Jano will then generate floating | [[Rayman]] is now in a passage with a slope covered with shining green crystal, and then [[Jano]] reappears from underground, threatening to eat him. [[Rayman]] now has to slide down, shooting any crystal growths that are in his way - if he slides too slowly, [[Jano]] will eat him, causing him to respawn at the beginning. At the end, he will enter a chasm where he has to avoid the fire that [[Jano]] breathes, just like his smaller counterparts. [[Jano]] will then generate floating [[skull]]s which can be stopped by [[Rayman]]'s shots, and then he can jump from them to get to where [[Jano]] is standing. [[Jano]], who is invincible, will keep breathing fire and generating [[skull]]s until he is chased to the far end of the chasm by [[Rayman]], and then dig himself underground, allowing the limbless hero to walk into a chamber piled with treasure. | ||
A single coin is flicked and rolls to his feet, and Jano reappears and offers him all this treasure to keep for himself. There are two options to choose from - "I want the treasure", and "No treasure for me". The former is obviously the greedy choice, but if Rayman chooses that, he will be taken to a small deserted island where he gains a drastic amount of weight, and lazes in a deckchair with a fraction of his gold surrounding him. This scene pretends to be an ending, with the words "THE END" appearing, but then it returns to Rayman's decision. Rejecting the treasure, he is teleported back to the Marshes of Awakening, and congratulated by Jano for not being greedy. As a reward, Jano gives him the [[Elixir of Life]] to take to Clark back at the Menhir Hills. | A single coin is flicked and rolls to his feet, and [[Jano]] reappears and offers him all this treasure to keep for himself. There are two options to choose from - "I want the treasure", and "No treasure for me". The former is obviously the greedy choice, but if [[Rayman]] chooses that, he will be taken to a small deserted island where he gains a drastic amount of weight, and lazes in a deckchair with a fraction of his gold surrounding him. This scene pretends to be an ending, with the words "THE END" appearing, but then it returns to [[Rayman]]'s decision. Rejecting the treasure, he is teleported back to [[the Marshes of Awakening]], and congratulated by [[Jano]] for not being greedy. As a reward, [[Jano]] gives him the [[Elixir of Life]] to take to [[Clark]] back at [[the Menhir Hills]]. | ||
==Dreamcast version== | |||
{{R2DCLevel | |||
| name = The Cave of Bad Dreams | | name = The Cave of Bad Dreams | ||
| image = [[ | | image = [[File:TheCaveofBadDreamsDC.jpg|320px|The Cave of Bad Dreams]] | ||
| connected to = [[The Marshes of Awakening]] | | connected to = [[The Marshes of Awakening]] | ||
| lums = [[File:Icon5.png|5]][[File:Icon0.png|0]] | | lums = [[File:Icon5.png|5]][[File:Icon0.png|0]] | ||
| Line 39: | Line 39: | ||
}} | }} | ||
Most of this level remains the same as that in the original version. The major difference is in the final phase (the battle with [[Jano]]). In other versions, the only way [[Rayman]] can traverse the chasms between the pillars is via the floating [[skull]]s [[Jano]] creates. In the Dreamcast version, some of the chasms now contain rotating slabs of stone (similar to those found in the silver [[Magic Sphere|sphere]] area), making it easier for [[Rayman]] to get across. While a few points still require the usage of floating [[skull]]s, overall the change makes the battle somewhat easier in this version. | |||
Most of this level remains the same as that in the original version. The major difference is in the final phase (the battle with Jano). In other versions, the only way Rayman can traverse the chasms between the pillars is via the floating | |||
<gallery widths="320px" heights="240px"> | |||
The Cave of Bad Dreams (Dreamcast).jpg|The [[Spiral Door]] in [[the Isle of Doors]] which leads to the Cave of Bad Dreams | |||
</gallery> | |||
==PlayStation version== | |||
{{R2PSLevel | |||
| name = The Cave of Bad Dreams | | name = The Cave of Bad Dreams | ||
| image = [[File:Rayman 2 PS1 Loading Screen 8.png | | image = [[File:Rayman 2 PS1 Loading Screen 8.png|320px|The Cave of Bad Dreams]] | ||
| connected to = [[The Menhir Hills]] | | connected to = [[The Menhir Hills]] | ||
| lums = [[File:Icon6PS.png|6]][[File:Icon5PS.png|5]] | | lums = [[File:Icon6PS.png|6]][[File:Icon5PS.png|5]] | ||
| Line 55: | Line 56: | ||
}} | }} | ||
In this version of the game, the Cave of Bad Dreams is not a sub level, but a true level that follows [[the Menhir Hills]]. This means that [[Rayman]] will not need to travel back to [[the Marshes of Awakening]] to find the cave's entrance. The sub plot involving [[Clark]] and the [[Elixir of Life|elixir]] is still present, however. The original two phases have both been split into two, meaning that there are now four, although they mostly play the same as the original game. | |||
In this version of the game, the Cave of Bad Dreams is not a sub level, but a true level that follows the Menhir Hills. | |||
===Phase 1=== | ===Phase 1=== | ||
While there is still a backbone, it has been split to different platforms to run and jump across. | While there is still a backbone, it has been split to different platforms to run and jump across. Much of this part of the phase remains the same, but instead of the moving double wall, there are three [[Purple Lum]]s to use to get to the top of chasm in which the [[Mini Jano]] roam. There are only two of these, but they have a much stronger resistance than those in the original version. | ||
===Phase 2=== | ===Phase 2=== | ||
In this version of the game, | In this version of the game, phase 2 begins at the two pedestals and the one eyed monster carving on the wall. Much of this area stays the same as that in the original version, except for the appearance of [[jumping eye]]s – previously seen at the entrance of the cave in [[the Marshes of Awakening]] - in the gold passage. | ||
<gallery widths="320px" heights="240px"> | |||
Cave of Bad Dreams various.jpg|[[Rayman]] must use [[Magic Sphere]]s to open this door to [[Jano]]'s ultimate domain. | |||
</gallery> | |||
===Phase 3=== | ===Phase 3=== | ||
In this phase, Rayman is chased by Jano down the green crystal slide, which remains the same as that in the original version. | In this phase, [[Rayman]] is chased by [[Jano]] down the green crystal slide, which remains the same as that in the original version. | ||
[[ | ===Phase 4=== | ||
The confrontation with [[Jano]] begins, where he will use the same techniques – breathing fire and generating [[skull]]s – as before. The only differences here is that some pillars will fall when [[Rayman]] steps on them. At the end, he will automatically refuse the treasure and reveal to [[Jano]] that he only came to get the [[Elixir of Life|Elixir]] for [[Clark]]. This amuses [[Jano]], and he gives him the [[Elixir of Life]]. | |||
== | <gallery widths="320px" heights="131px"> | ||
Cave of Bad Dreams treasure.jpg|Deep within the Cave of Bad Dreams, [[Jano]] has hidden [[Polokus]]'s precious treasure. | |||
</gallery> | |||
==PlayStation 2 version== | |||
{{R2PS2Level | |||
| name = The Cave of Bad Dreams | | name = The Cave of Bad Dreams | ||
| image = [[ | | image = [[File:TheCaveofBadDreamsPS2.jpg|320px|The Cave of Bad Dreams]] | ||
| preceded by = [[The Marshes of Awakening]] | | preceded by = [[The Marshes of Awakening]] | ||
| followed by = [[The Menhir Hills]] | | followed by = [[The Menhir Hills]] | ||
| Line 85: | Line 89: | ||
}} | }} | ||
In this version of the game, the Cave of Bad Dreams is located at the end of [[the Marshes of Awakening]], which should only be visited once [[Clark]] tells [[Rayman]] the name of the cave. Apart from graphical enhancements, much of this level remains the same as before, though there are no [[Yellow Lum]]s to collect. There is also an extra ledge in the chasm with the first gold pedestal, on which more of the [[Mini Jano]] roam. Defeating these does not reveal anything. | |||
In this version of the game, the Cave of Bad Dreams is located at the end of the Marshes of Awakening, which should only be visited once Clark tells Rayman the name of the | |||
Unlike the previous versions, in which the | Unlike the previous versions, in which the cave can be revisited, it can only be visited once, and [[Jano]] will not be at the end of the Marshes to take [[Rayman]] back in again because there are no [[Yellow Lum]]s. | ||
<gallery widths="320px" heights="240px"> | |||
RRCOBD chasm.jpg|In ''[[Rayman Revolution]]'', the Cave of Bad Dreams contains an additional chasm. | |||
Rayman With The Jano Treasure.jpg|[[Rayman]] as pictured if he accepted the treasure | |||
</gallery> | |||
==Game Boy Color version== | |||
{{R2GBCLevel | |||
| name = Cave of Bad Dreams | | name = Cave of Bad Dreams | ||
| image = [[ | | image = [[File:gbc228.png|160px|class=sprite|Cave of Bad Dreams]] | ||
| preceded by = [[Whale Bay#Game Boy Color version|Whale Bay]] | | preceded by = [[Whale Bay#Game Boy Color version|Whale Bay]] | ||
| followed by = [[The Canopy#Game Boy Color version|The Canopy]] | | followed by = [[The Canopy#Game Boy Color version|The Canopy]] | ||
| lums = [[ | | lums = [[File:Icon7GBC.png|7]][[File:Icon5GBC.png|5]] | ||
| cages = [[ | | cages = [[File:Icon3GBC.png|3]] | ||
}} | }} | ||
In the Game Boy Color adaptation, the Cave of Bad Dreams directly follows [[Whale Bay]], and this is where [[Rayman]] first gets the [[Super helicopter|Super-Heli]] from [[Ly|Ly the Fairy]]. The subplot with [[Clark]] is not present. The music is an edited version of [[the Woods of Light]]. | |||
<gallery widths="160px" heights="144px" class="sprite"> | |||
Gbc2 31.PNG|[[Ly]] the [[fairy]] gives [[Rayman]] the ability to fly | |||
</gallery> | |||
===Part 1=== | ===Part 1=== | ||
| Line 121: | Line 124: | ||
</gallery> | </gallery> | ||
==== [[Bonus level (Rayman 2)|Bonus level]] ==== | ====[[Bonus level (Rayman 2)|Bonus level]]==== | ||
<gallery widths="320px" heights="320px"> | <gallery widths="320px" heights="320px"> | ||
Rayman2GBCUS - 21.png | Rayman2GBCUS - 21.png | ||
| Line 131: | Line 134: | ||
</gallery> | </gallery> | ||
| | ==In ''Rayman Legends Retold''== | ||
The Cave of Bad Dreams is present on the map included with the launch edition of ''[[Rayman Legends Retold]]''. Unlike most other locations on the map, its name is underlined, a distinction only shared with locations that have been confirmed to appear in the game. This means that the Cave of Bad Dreams could be a secret world in ''[[Rayman Legends Retold]]''. | |||
<gallery widths="320px" heights="240px"> | |||
Rayman Legends Retold World Map.webp|The Cave of Bad Dreams is underlined on the map. | |||
</gallery> | |||
==External links== | ==External links== | ||
*[https://www.youtube.com/watch?v=_N8fsVJ3_pg The Cave of Bad Dreams playthrough at YouTube (PC version) (Part 1/2)] | |||
*[ | *[https://www.youtube.com/watch?v=seAnZTSOxiU The Cave of Bad Dreams playthrough at YouTube (PC version) (Part 2/2)] | ||
*[ | *[https://www.youtube.com/watch?v=P_9wqLTDVmo The Cave of Bad Dreams playthrough at YouTube (Sega Dreamcast version) (Part 1/2)] | ||
*[https://www.youtube.com/watch?v=QnsCkSsmXBs The Cave of Bad Dreams playthrough at YouTube (Sega Dreamcast version) (Part 2/2)] | |||
*[ | *[https://www.youtube.com/watch?v=Zl8xU02aYHo The Cave of Bad Dreams playthrough at YouTube (Sony PlayStation version)] | ||
*[ | *[https://www.youtube.com/watch?v=d92HZFphVC0 The Cave of Bad Dreams playthrough at YouTube (Sony PlayStation 2 version) (Part 1/2)] | ||
*[https://www.youtube.com/watch?v=0Ih4Zk18QA0 The Cave of Bad Dreams playthrough at YouTube (Sony PlayStation 2 version) (Part 2/2)] | |||
*[ | *[https://www.youtube.com/watch?v=zutI2dDUVk0 Cave of Bad Dreams playthrough at YouTube (Game Boy Color version) (Part 1/2)] | ||
*[https://www.youtube.com/watch?v=Nregjrl1598 Cave of Bad Dreams playthrough at YouTube (Game Boy Color version) (Part 2/2)] | |||
*[ | |||
*[ | |||
*[ | |||
*[ | |||
{{Rayman2worlds}} | {{Rayman2worlds}} | ||
| Line 154: | Line 156: | ||
[[fr:La Grotte des Mauvais Rêves]] | [[fr:La Grotte des Mauvais Rêves]] | ||
[[de:Die Höhle der Alpträume]] | [[de:Die Höhle der Alpträume]] | ||
[[pl:Jaskinia | [[pl:Jaskinia złych snów]] | ||
[[es:La Cueva de las Pesadillas]] | [[es:La Cueva de las Pesadillas]] | ||
[[ru:Пещера Дурных Снов]] | |||
[[zh:噩梦巢穴]] | |||
[[Category:Places from Rayman 2|Cave of Bad Dreams, The]] | [[Category:Places from Rayman 2|Cave of Bad Dreams, The]] | ||
[[Category:Places from Rayman 2 Forever|Cave of Bad Dreams, The]] | [[Category:Places from Rayman 2 Forever|Cave of Bad Dreams, The]] | ||
Latest revision as of 09:10, 7 June 2026
Your trip ends here!
The Cave of Bad Dreams, also known as the Kingdom of the Dead, is a sub-level in Rayman 2: The Great Escape and its remakes. It is where the monsters generated by Polokus's nightmares are locked away by its guardian, Jano, who also watches over a mountain of gold coins and jewels. Despite this, nobody has dared to enter the cave, not even Razorbeard and the Robo-Pirates. Therefore, there are no cages to be found inside. Rayman, however, needs to go there in order to obtain the Elixir of Life, which his friend Clark needs to recover from an illness caused by swallowing a rusty Robo-Pirate. The entrance to this subterranean grotto is located in the Marshes of Awakening.
Original version
| The Cave of Bad Dreams | ||
|---|---|---|

| ||
 The Marshes of Awakening The Marshes of Awakening
| ||
  
|

| |
Before entering the cave, Rayman has to remember the name of it, as Clark tells him in the Menhir Hills, otherwise Jano will shoo him away. In this version of the game, it is found by walking on a giant branch to Rayman's left at the beginning of the Marshes of Awakening, until he sees Jano standing behind walls of cobwebs. The area is restricted as unknown territory by the Robo-Pirate army, thus they have no presence there or inside the cave. Provided that he reads in Rayman's mind that he knows the name of this place, Jano will shake his skull-headed stick, which hypnotises Rayman and teleports him to the inside of the cave.

Phase 1
Down the backbone of a gigantic animal, there is a Purple Lum to grab to cross a wide gap with rivers of living thorns at the bottom. Skulls fall down into this, and Rayman uses them to get across some more, as well as climbing on walls with bones embedded into them. Then there is a wide hole in which a skeletal clawed arm pops out to grab Rayman and pull him into the unknown, but that can be prevented by shooting at them. After that, there are three pillars with climbable bones that sink as soon as Rayman grabs on.
Down the next corridor which is riddled with more skeletal arms, there is a double wall Rayman can wall jump inside of, but from time to time they space themselves out so he can't climb up, and then close in. At the top, there is a chasm, and on a wide edge there is a gold pedestal, like the one found in the Sanctuary of Water and Ice guarded by a Mini Jano. About four to six of these appear, two at a time, and they all need to be defeated in order for the matching Magic Sphere to appear. Once they join, the pedestal moves and Rayman has to drop down the hole it reveals.
Now there are two more pedestals, which surround a carving on the wall that looks like the one-eyed monsters Rayman had just encountered. To his left is a ledge that leads to two passages to choose from - each one is where a Magic Sphere can be found. The silver sphere is found in the passage on the left, the gold one to the right. In the silver chamber, there are giant slabs of stone that rotate on top of tall rocks, which Rayman needs to cross and throw the sphere back and then carry it to its correct pedestal. In the gold chamber, there is a skull supported by a skeletal arm, which moves Rayman across the gap to the other side. Another moving double wall is passed through onto another moving skull, which leads to a series of pillars that are teeming with caterpillars. Near them is a skull that moves upwards to a ledge where the gold sphere is found. This chamber is circular, so all Rayman needs to do is throw it down a few ledges rather than going all the way back. When both of the spheres are placed on their pedestals, the carving opens up by the mouth, and Rayman drops down a hole that is covered with fragile shards of green crystal.
Phase 2
Rayman is now in a passage with a slope covered with shining green crystal, and then Jano reappears from underground, threatening to eat him. Rayman now has to slide down, shooting any crystal growths that are in his way - if he slides too slowly, Jano will eat him, causing him to respawn at the beginning. At the end, he will enter a chasm where he has to avoid the fire that Jano breathes, just like his smaller counterparts. Jano will then generate floating skulls which can be stopped by Rayman's shots, and then he can jump from them to get to where Jano is standing. Jano, who is invincible, will keep breathing fire and generating skulls until he is chased to the far end of the chasm by Rayman, and then dig himself underground, allowing the limbless hero to walk into a chamber piled with treasure.
A single coin is flicked and rolls to his feet, and Jano reappears and offers him all this treasure to keep for himself. There are two options to choose from - "I want the treasure", and "No treasure for me". The former is obviously the greedy choice, but if Rayman chooses that, he will be taken to a small deserted island where he gains a drastic amount of weight, and lazes in a deckchair with a fraction of his gold surrounding him. This scene pretends to be an ending, with the words "THE END" appearing, but then it returns to Rayman's decision. Rejecting the treasure, he is teleported back to the Marshes of Awakening, and congratulated by Jano for not being greedy. As a reward, Jano gives him the Elixir of Life to take to Clark back at the Menhir Hills.
Dreamcast version
| The Cave of Bad Dreams | ||
|---|---|---|

| ||
| The Marshes of Awakening
| ||

|

| |
Most of this level remains the same as that in the original version. The major difference is in the final phase (the battle with Jano). In other versions, the only way Rayman can traverse the chasms between the pillars is via the floating skulls Jano creates. In the Dreamcast version, some of the chasms now contain rotating slabs of stone (similar to those found in the silver sphere area), making it easier for Rayman to get across. While a few points still require the usage of floating skulls, overall the change makes the battle somewhat easier in this version.
-
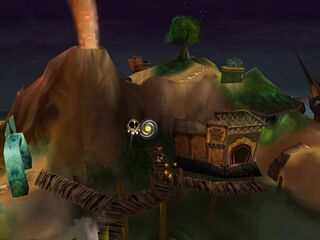 The Spiral Door in the Isle of Doors which leads to the Cave of Bad Dreams
.jpg)
PlayStation version
| The Cave of Bad Dreams | |||
|---|---|---|---|

| |||
| The Menhir Hills
| |||
  
|
 
|

|

|
In this version of the game, the Cave of Bad Dreams is not a sub level, but a true level that follows the Menhir Hills. This means that Rayman will not need to travel back to the Marshes of Awakening to find the cave's entrance. The sub plot involving Clark and the elixir is still present, however. The original two phases have both been split into two, meaning that there are now four, although they mostly play the same as the original game.
Phase 1
While there is still a backbone, it has been split to different platforms to run and jump across. Much of this part of the phase remains the same, but instead of the moving double wall, there are three Purple Lums to use to get to the top of chasm in which the Mini Jano roam. There are only two of these, but they have a much stronger resistance than those in the original version.
Phase 2
In this version of the game, phase 2 begins at the two pedestals and the one eyed monster carving on the wall. Much of this area stays the same as that in the original version, except for the appearance of jumping eyes – previously seen at the entrance of the cave in the Marshes of Awakening - in the gold passage.

Phase 3
In this phase, Rayman is chased by Jano down the green crystal slide, which remains the same as that in the original version.
Phase 4
The confrontation with Jano begins, where he will use the same techniques – breathing fire and generating skulls – as before. The only differences here is that some pillars will fall when Rayman steps on them. At the end, he will automatically refuse the treasure and reveal to Jano that he only came to get the Elixir for Clark. This amuses Jano, and he gives him the Elixir of Life.

PlayStation 2 version
| The Cave of Bad Dreams | |
|---|---|

| |
| ← The Marshes of Awakening | The Menhir Hills → |
| The Minisaurus Plain
| |
|
|

|
In this version of the game, the Cave of Bad Dreams is located at the end of the Marshes of Awakening, which should only be visited once Clark tells Rayman the name of the cave. Apart from graphical enhancements, much of this level remains the same as before, though there are no Yellow Lums to collect. There is also an extra ledge in the chasm with the first gold pedestal, on which more of the Mini Jano roam. Defeating these does not reveal anything.
Unlike the previous versions, in which the cave can be revisited, it can only be visited once, and Jano will not be at the end of the Marshes to take Rayman back in again because there are no Yellow Lums.
-
 In Rayman Revolution, the Cave of Bad Dreams contains an additional chasm.
 -
 Rayman as pictured if he accepted the treasure


Game Boy Color version
| Cave of Bad Dreams | ||
|---|---|---|

| ||
| ← Whale Bay | The Canopy → | |
  
|
 
| |
In the Game Boy Color adaptation, the Cave of Bad Dreams directly follows Whale Bay, and this is where Rayman first gets the Super-Heli from Ly the Fairy. The subplot with Clark is not present. The music is an edited version of the Woods of Light.

Part 1

Part 2

Bonus level

Part 3

In Rayman Legends Retold
The Cave of Bad Dreams is present on the map included with the launch edition of Rayman Legends Retold. Unlike most other locations on the map, its name is underlined, a distinction only shared with locations that have been confirmed to appear in the game. This means that the Cave of Bad Dreams could be a secret world in Rayman Legends Retold.
-
 The Cave of Bad Dreams is underlined on the map.

External links
- The Cave of Bad Dreams playthrough at YouTube (PC version) (Part 1/2)
- The Cave of Bad Dreams playthrough at YouTube (PC version) (Part 2/2)
- The Cave of Bad Dreams playthrough at YouTube (Sega Dreamcast version) (Part 1/2)
- The Cave of Bad Dreams playthrough at YouTube (Sega Dreamcast version) (Part 2/2)
- The Cave of Bad Dreams playthrough at YouTube (Sony PlayStation version)
- The Cave of Bad Dreams playthrough at YouTube (Sony PlayStation 2 version) (Part 1/2)
- The Cave of Bad Dreams playthrough at YouTube (Sony PlayStation 2 version) (Part 2/2)
- Cave of Bad Dreams playthrough at YouTube (Game Boy Color version) (Part 1/2)
- Cave of Bad Dreams playthrough at YouTube (Game Boy Color version) (Part 2/2)