The Sanctuary of Stone and Fire
The Sanctuary of Stone and Fire is a location in Rayman 2. It follows Whale Bay in all versions of the game but the PlayStation and Game Boy Color versions, in which it follows the Canopy. It is the second location in which one of the Four Masks of Polokus is hidden (except for the Game Boy Color version), and the longest level in the game.
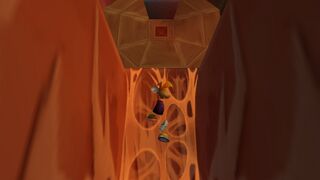
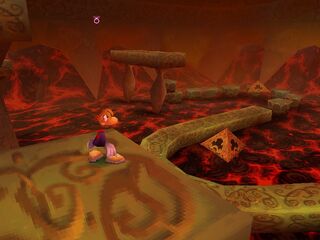
This level takes place in a mountainous area, and starts at the top of a gigantic fault which Rayman enters. It is filled with lava, and a volcano can be seen in the Dreamcast version. Inside the cliffs are tunnels and caves which eventually lead to two underground temples (which have been merged in the PlayStation version), one of which is the temple where the second mask of Polokus is located, while the other only contains extra Yellow Lums and cages. The main temple is home to Umber, who can be awakened with yellow and blue Magic Spheres. This is one of the few areas where plums grow; they are used several times to travel across rivers and lakes of lava.
The Sanctuary of Stone and Fire was originally called "The Sanctuary of Lava and Fire", and Foutch was meant to be its guardian.[1]
Original version
| The Sanctuary of Stone and Fire | ||
|---|---|---|

| ||
| ← Whale Bay | The Echoing Caves → | |
Before entering, Rayman will land in the Chamber of the Teensies, where he will need at least 300 Yellow Lums to enter the level.

Phase 1
Rayman finds himself in a canyon with a long river of lava, and has to glide down onto safe ground. To Rayman's left after that past a Robo-Pirate sign is a ledge with a metal tower, guarded by a red Henchman 800. He will then reach the tower by bouncing on a small net, from which a cage hangs inside, but at this moment he cannot get to it. Also he finds a Power Fist that he cannot reach just yet, and a wooden sparadrap, which releases a Purple Lum when shot at. This Purple Lum will help him get to the other side of the gap, and on the other side of the tower is another wooden sparadrap that contains a Purple Lum - this one will help him reach the Power Fist now.
Through the passage, Rayman will encounter another red Henchman 800, and then cross a few more ledges until he is inside a tunnel of lava, where he will find a tree that grows plums, which are resistant to the heat of this type of lava and can be used to ride on safely. Should Rayman decide to go back and reach some ledges that bear some Yellow Lums, he will find one passage that leads to a cavern in which there is a Gorilla Pirate. This one will not run far enough to drop itself into the lava, so Rayman will have to knock down another plum and use it to throw on the pirate's head (akin to the Livingstones in the original Rayman game). Standing on top of it them will help Rayman reach a cage.
The cage under the net can be accessed if Rayman goes back to the first plum tree and uses the fruit to travel all the way back to the beginning of the stage, where he will find a tunnel that leads to a cavern. In there, there is a pit with a new type of lava that will actually burn away the plum, with a large pointed metal spike sticking out. Rayman has to throw a plum onto it to help him get to the other side. Then, using two more spikes, he will throw another plum onto one, allow it to fall off the spike, and then do the same again until the plum can be used to help him reach a ledge that leads to the hidden cage.
Back at the first plum tree, Rayman will move on, and then climb on a ceiling covered with cobwebs, shooting away any baby caterpillars that get in his way.
Eventually, he will land on a piece of metalwork at which another plum tree is found, and he will use the plum to get to the other side of this body of lava, and climb up some rocky ledges until he finds a grassy area that points to two directions. This area appears as a separate part in the Nintendo 64 and Nintendo DS versions. If Rayman picks the right path he will go to the Sanctuary, but if he picks the left path he will go to the wrong temple.
Phase 2 (the optional temple)
This second temple does not hide away the second mask of Polokus and is therefore completely optional. It does however have some cages and Yellow Lums to find. Inside the first room is a pit of lava with a stone bridge over it, and a set of flamethrowers (stone carvings that resembles mouths and shoot fire from time to time). On one of the pillars is a cage, and between them is a door that can be broken down by Rayman's shots. Then there is another pit of lava below a stalactite that grows from the ceiling - this can be shot down and used to cross the pit. Down the corridor, Rayman will encounter another stalactite and a cage, and will then come across several pillars that can only be knocked down by shooting the wooden sparadraps that a stuck on them.
After crossing a set of broken stone paths down the lava river, and shooting down another stalactite, Rayman will step on a piece of rock that flows down the river by itself, until he sees a set of smooth stone altars, one of which leads to a short corridor round the back crawling with small spiders, which then leads to the top where a Purple Lum flies. Rayman uses that to cross the gap, and then go down the next corridor. There, he will drop down, and come across another moving piece of rock floating in the lava, and shooting down more stalactites and avoiding the flamethrowers, he makes it to a set of staircases. The one to his left doesn't lead to anywhere, so he needs to take the one to his right, which leads to a room with three breakable doors. One contains times Red Lums, one contains a cage and a Power Fist, the last contains a giant spider. This very door then leads a walking shell, which runs across the stone ledges, across rivers of lava, to the exit of this temple.
-
 Inside the optional temple.

Phase 1 (revisited)
Outside, Rayman is on higher ground than he was when he entered the optional temple, crosses the giant log to get the Yellow Lums there, and will finally follow the path to the real Sanctuary of Stone and Fire. But first, he comes across some metalwork that is guarded by a purple Henchman 800, and breaks the cage it guards. He will then glide down through a passage that leads to a cavern haunted by a single stealthy Mini Jano, which reveals a plum when defeated. Rayman uses this to reach a ledge and goes down an open passage that leads to the real entrance to the Sanctuary - a set of broken stones that give way the second Rayman lands on them.
Phase 3
Rayman is finally inside the Sanctuary, and a plum tumbles down periodically. Rayman uses one to flow down the river of lava there, while avoiding patches of yellow lava which destroys the plum. This river cascades, and there Rayman has to jump off and glide down as the plum waits for him to stand on it again. Down this part of the river, nettles break through some of the walls and ceiling, which can be shot away by Rayman's shots. Eventually he will reach safe ground to fetch another plum, and then carry on riding down the lava in an area which appears as a separate part in the Nintendo 64 and Nintendo DS versions. There is a secret passage at this point, which leads to a room covered with cobwebs, some to bounce on, others to climb on, until he finds the cage at the very top. From there, he can glide down to the exit, which is an octagonal stone with one piece revealing a hole.
Now in a void with only some giant pillars to land on in an area which appears as a separate part in the Nintendo 64 and Nintendo DS versions, Rayman has to take a golden Magic Sphere across, while avoiding flamethrowers that now rotate, caterpillars and baby caterpillars. If Rayman drops it, a Purple Lum will appear at the bottom and take him back to the top to collect the Sphere again. He will them carry it until he comes across a pool of lava with a plum at the end. He has to throw the sphere upwards and shoot the plum, and then use it to cross the lava while carrying the sphere. Finally, he enters the chamber of Umber, the Guardian of the second mask of Polokus, but he has a silver sphere to go. The octagonal stone will rotate, and Rayman has to go through it.
He ends up at a familiar spot in the long river of lava that ended with the first octagonal stone he encountered, but that will rotate as well. Once he reaches it, he will end up in a room with sloping lava that ends with a breakable stone door in an area which appears as a separate part in the Nintendo 64 and Nintendo DS versions. Inside, there is a chasm with a pit of yellow lava, and a Purple Lum flies across - Rayman will have to follow it down a corridor and slide on some smooth stone to reach the end, at one point using another Purple Lum to swing across a pool of lava. Eventually, the flying Purple Lum drops down back into Umber's chamber, with Rayman following. Now the Purple Lum can be used to reach the silver sphere, which has been sitting on higher ground. Once this is placed on the silver pedestal, Umber awakens.
Unlike Axel, who was aggressive and tried to ward Rayman away from the first mask, Umber will not fight, but rather allow Rayman to stand on his head and sink into the pool of lava that finally leads to the pillar that keeps the second mask inside. Rayman gives this to Polokus, and then continues his journey to find the next one.
Dreamcast version
| The Sanctuary of Stone and Fire | ||
|---|---|---|

| ||
| ← Whale Bay | The Echoing Caves → | |
This level contains a number of the graphical enhancements characteristic of the Dreamcast version. The most notable is the addition of an active volcano in the background at the very beginning of the level. The volcano which forms the heart of the map-like Isle of Doors may be a representation of this one. In addition, after placing the golden sphere, the set of stairs that leads up to the rotating door has been replaced with a spider web.
-
 The Spiral Door in the Isle of Doors which leads to the Sanctuary of Stone and Fire.
 -
 A shock wave follows Rayman's Power Fist in the Dreamcast version.
 -
 The spider web which replaces the stairs seen in other versions.
.jpg)


PlayStation version
| The Sanctuary of Stone and Fire | |||
|---|---|---|---|

| |||
| ← The Canopy | The Echoing Caves → | ||
A whole new subplot is added to this level in which Admiral Razorbeard sends his ninja henchman Ninjaws to kill Rayman. Large sections of the level have been omitted, redesigned or retooled to suit the limits of the PlayStation hardware. There are also several new areas, which actually serve to make the level feel longer. The room with the Mini Jano is much closer to the beginning of the level, and instead has two Mini Janos that patrol a set pattern around the room and only breathe fire at Rayman. The two temples appear to have been merged together. Umber does not sink, and instead has dialogue with Rayman. Ninjaws fights Rayman in the mask room, adding another stage to the level not present in other versions. Due to this battle, the mask room is not full of lava.
-
 A holographic plum represents the Sanctuary of Stone and Fire in the Hall of Doors.
 -
 The PlayStation version contains all-new areas.


PlayStation 2 version
| The Sanctuary of Stone and Fire | |
|---|---|

| |
| ← Whale Bay | The Precipice → |
The level is mostly identical to the original, but has a few tweaks and graphical enhancements.
Major changes
In phase 1, the platform with Red Lums in the middle of the lava pool leading to the area with the Gorilla Pirate is missing. This suggests that Rayman must return to this area with the lava flight power in order to get the Yellow Lums and cage in that area. However, this is actually not the case. If Rayman jumps from precisely the right spot and angle, he can helicopter and grab the opposite ledge just near the right wall (under the plum tree). Once everything has been collected, jumping back is easier due to the difference in heights. This was probably not the intention of the designers, but it does save another trip through this level.
Phase 3 appears to have been split into three stages, as there are loading times where they did not occur before: first after dropping down a pit after the lava river, and later, when leaving Umber's room after placing the golden sphere. The passage in the rotated octagonal stone will not lead Rayman back to the previously visited lava river, but directly to the room with the lava slope and breakable door, making the level slightly shorter. However, leaving Umber's room through the octagonal stone, without first placing the golden sphere and rotating it, will still drop Rayman to the platform overlooking the lava river, allowing the Red Lums there to be obtained, and providing another chance to collect the last cage or any lums that were missed during the first trip through this section.
Minor changes
Phase 1
- The first and second battles feature multiple Henchmen.
- The lava passage starting from the first plum tree has more platforms and cobwebs, so the plum is not required at all for this part (except to backtrack to previous areas).
- The rocky ledges leading to the fork and the lava river leading to the wrong temple are well-lit, instead of dark as in the original version.
- The battle with the Mini Jano features different music and a different camera angle.
Phase 2
- The staircase leading to a wall (opposite the entrance to the chamber with the three doors) is now covered with debris, as if from a passage that crumbled.
- The passage leading from the big spider to the shell ride is covered with cobwebs.
- The first tunnel in the shell ride is covered with nettles instead of lava.
Revisiting
The level is easier if returned to after completion of the Lava Sanctuary, where Rayman gains the ability to hover over lava. In particular, most of phase 2 and phase 3 can be completed without plums and auxiliary platforms, although it takes longer. More importantly, the entire second part of phase 3 featuring the silver sphere can be skipped, as Rayman does not need to awaken Umber at all, and can just hover over the lava river to the exit chamber.
Game Boy Color version
| Sanctuary of Stone & Fire | ||
|---|---|---|

| ||
| ← The Canopy | Echoing Caves → | |
In Rayman 2 Forever, the Sanctuary of Stone and Fire directly follows the Canopy, but contains no mask. However, it still features plums, and a section where the lava is rising. The music for the first two levels is an edited version of the Precipice. The final level contains the Game Boy Color games' standard boss battle music.
Part 1

Bonus level

Part 2

Part 3

Screenshots
-
 The lava is rising.

External links
- The Sanctuary of Stone and Fire playthrough at YouTube (PC version) (Part 1/4)
- The Sanctuary of Stone and Fire playthrough at YouTube (PC version) (Part 2/4)
- The Sanctuary of Stone and Fire playthrough at YouTube (PC version) (Part 3/4)
- The Sanctuary of Stone and Fire playthrough at YouTube (PC version) (Part 4/4)
- The Sanctuary of Stone and Fire playthrough at YouTube (Sega Dreamcast version) (Part 1/3)
- The Sanctuary of Stone and Fire playthrough at YouTube (Sega Dreamcast version) (Part 2/3)
- The Sanctuary of Stone and Fire playthrough at YouTube (Sega Dreamcast version) (Part 3/3)
- The Sanctuary of Stone and Fire playthrough at YouTube (Sony PlayStation version)
- The Sanctuary of Stone and Fire playthrough at YouTube (Sony PlayStation 2 version) (Part 1/5)
- The Sanctuary of Stone and Fire playthrough at YouTube (Sony PlayStation 2 version) (Part 2/5)
- The Sanctuary of Stone and Fire playthrough at YouTube (Sony PlayStation 2 version) (Part 3/5)
- The Sanctuary of Stone and Fire playthrough at YouTube (Sony PlayStation 2 version) (Part 4/5)
- The Sanctuary of Stone and Fire playthrough at YouTube (Sony PlayStation 2 version) (Part 5/5)
- The Sanctuary of Stone and Fire playthrough at YouTube (Sony PlayStation 2 version) (Last Lums and Familiar Spirits) (Part 1/2)
- The Sanctuary of Stone and Fire playthrough at YouTube (Sony PlayStation 2 version) (Last Lums and Familiar Spirits) (Part 2/2)
- Sanctuary of Stone & Fire playthrough at YouTube (Game Boy Color version) (Part 1/2)
- Sanctuary of Stone & Fire playthrough at YouTube (Game Boy Color version) (Part 2/2)
References
- ↑ This information comes from the lines "The Sanctuary of Lava and Fire" and "FOUTCH: Guardian of the sanctuary of lava and fire" in early demos of the game.