The Desert of the Knaaren: Difference between revisions
Improvements and added links |
Hunchman801 (talk | contribs) No edit summary |
||
| (36 intermediate revisions by 11 users not shown) | |||
| Line 1: | Line 1: | ||
{{ | {{R3Level | ||
| name = The Desert of the Knaaren | | name = The Desert of the Knaaren | ||
| image = [[File:TheDesertoftheKnaarenPC.jpg|center|320px| | | icon = Mnu dese.png | ||
| preceded by = [[The Land of the Livid Dead (Rayman 3)|The Land of the Livid Dead]] | | image = [[File:TheDesertoftheKnaarenPC.jpg|center|320px|The Desert of the Knaaren]] | ||
| followed by = [[The Longest Shortcut]] | | preceded by = [[File:Mnu land.png|20px]] [[The Land of the Livid Dead (Rayman 3)|The Land of the Livid Dead]] | ||
| followed by = [[File:Mnu abra.png|20px]] [[The Longest Shortcut]] | |||
| murfysscore = 55501 | | murfysscore = 55501 | ||
| | | maxscore = 125989 | ||
| cages = 12 | | cages = 12 | ||
| matuvus = 7 | | matuvus = 7 | ||
| Line 13: | Line 12: | ||
}} | }} | ||
'''The Desert of the Knaaren''' is the fifth of the nine levels of ''[[Rayman 3]]''. This is where the native species of this land, the [[Knaaren]], dwell. The [[Knaaren]] carved their tunnels out of the solid rock, and they guard their domain fiercely and effectively, constantly patrolling the many passages. | '''The Desert of the Knaaren''', also known as the '''Knaaren Desert''', is the fifth of the nine levels of ''[[Rayman 3]]''. This is where the native species of this land, the [[Knaaren]], dwell. The [[Knaaren]] carved their tunnels out of the solid rock, and they guard their domain fiercely and effectively, constantly patrolling the many passages. | ||
[[Rayman]] is sent here from [[The Land of the Livid Dead (Rayman 3)|the Land of the Livid Dead]] by the second [[Teensie doctor]], [[Roméo Patti]]. Like [[Otto Psi]], [[Roméo Patti|Roméo]] was unable to extract the [[Black Lum]] [[André]] from [[Globox]]'s body, so [[Roméo Patti|Roméo]] sends [[Rayman]] and [[Globox]] to the Desert of the Knaaren, where the third [[Teensie doctor]], [[Art Rytus]], has his office. Along the way, [[Rayman]] and [[Globox]] fall into the tunnels, and [[Globox]] is captured by the [[Knaaren]]. [[Rayman]] must fight his way past [[Knaaren]] and [[Zombie Chicken]]s, and solve many puzzles along the way. Eventually he is captured by [[Reflux]], the champion of the [[Knaaren]], who challenges him to a duel in the arena. Once [[Rayman]] succeeds, [[Globox]] is freed, and [[Gumsi]], the child-king of the [[Knaaren]], uses the [[Sceptre of the Leptys]] to their god, the [[Leptys]], who grants [[Rayman]] the [[grimace]] ability as a reward. The heroes then meet up with [[Art Rytus]], who summons the other two doctors. Together they finally manage to extract [[André]], who escapes and tracks down the humiliated [[Reflux]]. [[André]] promises [[Reflux]] the opportunity to destroy [[Rayman]] once and for all if he will steal the [[Sceptre of the Leptys]] for him, and his promise is fulfilled in [[the Tower of the Leptys]], the game's final level. | |||
[[Rayman]] is sent here from [[The Land of the Livid Dead (Rayman 3)|the Land of the Livid Dead]] by the second [[Teensie doctor]], [[Roméo Patti]]. Like [[Otto Psi]], [[Roméo Patti|Roméo]] was unable to extract the [[Black Lum]] [[André]] from [[Globox]]'s body, so [[Roméo Patti|Roméo]] sends [[Rayman]] and [[Globox]] to the Desert of the Knaaren, where the third [[Teensie doctor]], [[ | |||
==Description== | ==Description== | ||
[[File:DOTKscreen.JPG|250px|frame|right|The Desert of the Knaaren is a desert world, and crossing it requires use of the tunnels, in which live the titular [[Knaaren]].]] | |||
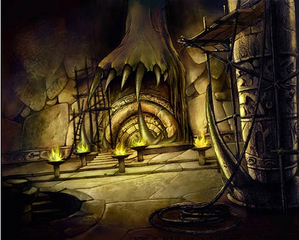
This is a world that is a harsh, scorching plain of sand, dotted by rocky outcrops and yawning chasms. The huge dinosaur-like skeletons which lie on the sand resemble those seen in [[the Cave of Bad Dreams]] in ''[[Rayman 2]]''. The desert looks hellish at first sight. However, beneath the barren, lifeless surface is a vast tunnel and cave system that delves deep into the rocky under-layers. | This is a world that is a harsh, scorching plain of sand, dotted by rocky outcrops and yawning chasms. The huge dinosaur-like skeletons which lie on the sand resemble those seen in [[the Cave of Bad Dreams]] in ''[[Rayman 2]]''. The desert looks hellish at first sight. However, beneath the barren, lifeless surface is a vast tunnel and cave system that delves deep into the rocky under-layers. | ||
==As a level== | ==As a level== | ||
===Stage 1 – Crossing the dessert=== | ===Stage 1 – Crossing the dessert=== | ||
The first stage of the level requires [[Rayman]] to jump across several | The first stage of the level requires [[Rayman]] to jump across several giant bones, fighting several [[Slapdash]]es as he goes. [[Globox]] has already run ahead of him as the desert sands burn. Eventually [[Rayman]] and [[Globox]] reach a small cave, on the other side they find themselves at the bottom of a canyon where a [[Hoodlum airship]] is dropping off several [[Hoodmonger]]s and [[Hoodmonger Soldier]]s. [[Globox]] consumes a barrel of [[plum juice]] which gives him flight, whilst [[Rayman]] must use the [[Throttle Copter]] to work his own way out of the canyon. Eventually he frees two [[Teensie]]s who tell him about the [[Knaaren]] Tunnels which [[Rayman]] and [[Globox]] must use to cross the desert. The duo enter the tunnels, but [[Globox]] is quickly captured by the [[Knaaren]] and [[Rayman]] is forced to run. Finding himself in a room full of [[Knaaren]], he must use a [[Shock Rocket]] to sound a [[Gong (Rayman 3)|gong]] which distracts the [[Knaaren]] whilst he makes his escape. In the next room, he must take a [[Zombie Chicken]] egg and carry it to a [[switch]] to open a door, and then perform the [[Gong (Rayman 3)|gong]] trick again to bypass one last [[Knaaren]]. After opening a final door using a [[Zombie Chicken]] egg, he can move on to the second stage. | ||
The score thresholds for this stage are 1638 points for 25% (2 stars), 3275 points for 50% (3 stars), 4913 points for 75% (4 stars) and 6550 points for 100% (5 stars). | |||
<gallery widths="320px" heights="240px"> | |||
TheDesertoftheKnaarenPC.jpg|The beginning of the first section. | |||
Le-Désert-des-Knaarens.jpg|Bones in the desert. | |||
Egg Switch R3.png|[[Rayman]] needs a [[Zombie Chicken]] egg to activate this [[switch]]. | |||
</gallery> | |||
===Stage 2 – The temple=== | ===Stage 2 – The temple=== | ||
As [[Rayman]] gets past the first stage of [[Knaaren]]s, he enters a room | As [[Rayman]] gets past the first stage of [[Knaaren]]s, he enters a room dominated by an imposing statue of the god [[Leptys]] (its first appearance in the game). At the top, he sees [[Globox]] being carried away by a [[Knaaren]] and must find a way to follow them. His first task is to get one of the [[Knaaren]]s that are nearby to chase him onto a large [[switch]] which will cause some floating platforms to align, making a path up to the top of the large [[Leptys]] statue. If [[Rayman]] takes a detour whilst jumping on these platforms, he can free a few [[Teensie]]s who will give him a [[Vortex]] to lower a [[meadowscrew]] on the ground and reach a secret area that contains a [[Jewel|green gem]]. Once this is done, [[Rayman]] must work his way up to top of the statue, using floating platforms and [[Lockjaw]]s, where he releases some [[Teensie]]s who will hand over a [[Throttle Copter]] with which he can use to get to the top, and leave the second stage. | ||
Originally, the statue was to attack [[Rayman]] when he was in its line of sight, by shooting lightning from its eyes. There is a [https://youtu.be/2KNXCYYuHmc?t=63 trailer] which shows this very briefly. This behaviour is deactivated in the final game, but the code is still present in the files. If it is [https://www.youtube.com/watch?v=vJPNu0FE8IU reactivated], the room becomes much more difficult to traverse. This is likely the reason that it was cut. | |||
The score thresholds for this stage are 2200 points for 25% (2 stars), 4400 points for 50% (3 stars), 6600 points for 75% (4 stars) and 8800 points for 100% (5 stars). | |||
<gallery widths="320px" heights="240px"> | |||
The Desert of the KnaarenSection2.png|The beginning of the second section. | |||
Knaaren Switch.JPG|Only [[Knaaren]]s can activate this [[switch]]. | |||
DOTK Section2 Leptys statue.jpg|The statue representing the [[Leptys]]. | |||
</gallery> | |||
===Stage 3 – The [[Knaaren]] tower=== | ===Stage 3 – The [[Knaaren]] tower=== | ||
The corridor ahead is blocked by several [[Knaaren]]s so [[Rayman]] must climb between two walls and stay on the top, before [[helicopter]]ing down past some green acid to continue out of that room. [[Rayman]] will now need to distract a [[Knaaren]] by using the [[Shock Rocket]] to hit a [[gong]]. It will create a loud sound, making the [[Knaaren]] run to it, to which [[Rayman]] will be able to get the [[Lockjaw]] to advance through the following area. The next small area is straight ahead, but there are two [[Teensie]] [[cage]]s, rescuing one will give him a pile of [[Jewel|yellow gems]], and the other a [[Jewel|green gem]]. After passing, [[Rayman]] will be required to perform the [[gong]] trick several times as he makes his way through a maze of tunnels and ledges, before climbing a large structure at the top of which lies the path onward. | The corridor ahead is blocked by several [[Knaaren]]s so [[Rayman]] must climb between two walls and stay on the top, before [[helicopter]]ing down past some green acid to continue out of that room. [[Rayman]] will now need to distract a [[Knaaren]] by using the [[Shock Rocket]] to hit a [[Gong (Rayman 3)|gong]]. It will create a loud sound, making the [[Knaaren]] run to it, to which [[Rayman]] will be able to get the [[Lockjaw]] to advance through the following area. The next small area is straight ahead, but there are two [[Teensie]] [[cage]]s, rescuing one will give him a pile of [[Jewel|yellow gems]], and the other a [[Jewel|green gem]]. After passing, [[Rayman]] will be required to perform the [[Gong (Rayman 3)|gong]] trick several times as he makes his way through a maze of tunnels and ledges, before climbing a large structure at the top of which lies the path onward. | ||
The score thresholds for this stage are 1578 points for 25% (2 stars), 3155 points for 50% (3 stars), 4733 points for 75% (4 stars) and 6310 points for 100% (5 stars). | |||
<gallery widths="320px" heights="240px"> | |||
The Desert of the KnaarenSection3.png|The beginning of the third section. | |||
DOTK Section 3 rock climbing.jpg|[[Rayman]] climbing the walls. | |||
DOTK Section 3 Gong.jpg|[[Rayman]] using [[Gong (Rayman 3)|gongs]] to distract the [[Knaaren]]s. | |||
DOTK Section 3 Tower.jpg|Overview of the [[Knaaren]] tower. | |||
DOTK Section 3 hidden Ray.jpeg|[[Rayman]] hidden behind a pillar. | |||
DOTK Section 3 Tower 2.jpg|The top of the tower. | |||
</gallery> | |||
===Stage 4 – Meeting [[Reflux]]=== | ===Stage 4 – Meeting [[Reflux]]=== | ||
[[Rayman]] continues to what seems like a quiet room, but as he advances to a large ledge, several groups of [[Knaaren]] come walking closer and closer to attack him. The only way out is to throw himself into the darkness below. He finds himself deep in the tunnels with some spirits, and must pass them and carry various rocks to different [[switch]]es scattered throughout the level in order to proceed. However, only certain paths will take his weight, and he must be careful not to lose the stone he is carrying. In amongst all this he will be required to perform more daring jumps. Eventually, another [[Knaaren]] group will corner him, and the only way he can escape is by destroying the ground below him and taking yet another tumble. Things don't get any better just now though, as it is here that he will meet the [[Knaaren]] champion [[Reflux]], who will take him to [[Destiny Arena|the mysterious "arena"]]. | [[Rayman]] continues to what seems like a quiet room, but as he advances to a large ledge, several groups of [[Knaaren]] come walking closer and closer to attack him. The only way out is to throw himself into the darkness below. He finds himself deep in the tunnels with some spirits, and must pass them and carry various rocks to different [[switch]]es scattered throughout the level in order to proceed. However, only certain paths will take his weight, and he must be careful not to lose the stone he is carrying. In amongst all this he will be required to perform more daring jumps. Eventually, another [[Knaaren]] group will corner him, and the only way he can escape is by destroying the ground below him and taking yet another tumble. Things don't get any better just now though, as it is here that he will meet the [[Knaaren]] champion [[Reflux]], who will take him to [[Destiny Arena|the mysterious "arena"]]. | ||
The score thresholds for this stage are 2800 points for 25% (2 stars), 5600 points for 50% (3 stars), 8400 points for 75% (4 stars) and 11200 points for 100% (5 stars). | |||
<gallery widths="320px" heights="240px"> | |||
The Desert of the KnaarenSection4.png|The beginning of the third section. | |||
DOTK Section 4 Attack.jpg|These [[Knaaren]]s encircle [[Rayman]]. | |||
DOTK Section 4 Zombie chicken egg.jpg|[[Rayman]] must use this [[Zombie Chicken]] egg to open that door. | |||
DOTK Section 4 End of the section.jpg|This room is flooded with a toxic green liquid. | |||
DOTK Section 4 Rayman is trapped.jpg|[[Rayman]] is trapped in this room. | |||
DOTK Section4 Reflux&Ray.jpg|[[Rayman]] meets [[Reflux]]. | |||
</gallery> | |||
===Stage 5 – [[Destiny Arena|The arena]]=== | ===Stage 5 – [[Destiny Arena|The arena]]=== | ||
[[Rayman]] is in [[Destiny Arena|the Knaaren arena]], in the company of [[Gumsi]], the [[Knaaren]] king, [[Reflux]], his champion, and their new prisoner [[Globox]]. To earn his and [[Globox]]'s freedom, [[Rayman]] must fight and defeat [[Reflux]]. If he cannot, his corpse shall be burnt. [[Reflux]] begins with a spin attack, but will eventually tire, allowing [[Rayman]] to get some hits in on him whilst he recovers. [[Rayman]] can drop down to the side of the raised platform and grab some [[Heavy Metal Fist]]s in order to increase fire power, but flames from the lava pit below will attack him constantly whilst he does this so he must be careful. Occasionally, [[Reflux]] will call meteors down from the ceiling. Even if [[Rayman]] avoids them, small fires will remain where they fall for the rest of the battle, making it even harder to retain stamina. Eventually, however, [[Rayman]] will come through and beat [[Reflux]]. [[Gumsi]] reacts angrily to this and begins to beat [[Globox]], but [[André]] will scare the child king by yelling from [[Globox]]'s stomach and [[Gumsi]] will admit defeat. | [[Rayman]] is in [[Destiny Arena|the Knaaren arena]], in the company of [[Gumsi]], the [[Knaaren]] king, [[Reflux]], his champion, and their new prisoner [[Globox]]. To earn his and [[Globox]]'s freedom, [[Rayman]] must fight and defeat [[Reflux]]. If he cannot, his corpse shall be burnt. [[Reflux]] begins with a spin attack, but will eventually tire, allowing [[Rayman]] to get some hits in on him whilst he recovers. [[Rayman]] can drop down to the side of the raised platform and grab some [[Heavy Metal Fist]]s in order to increase fire power, but flames from the lava pit below will attack him constantly whilst he does this so he must be careful. Occasionally, [[Reflux]] will call meteors down from the ceiling. Even if [[Rayman]] avoids them, small fires will remain where they fall for the rest of the battle, making it even harder to retain stamina. Eventually, however, [[Rayman]] will come through and beat [[Reflux]]. [[Gumsi]] reacts angrily to this and begins to beat [[Globox]], but [[André]] will scare the child king by yelling from [[Globox]]'s stomach and [[Gumsi]] will admit defeat. | ||
The score thresholds for this stage are 375 points for 25% (2 stars), 750 points for 50% (3 stars), 1125 points for 75% (4 stars) and 1500 points for 100% (5 stars). | |||
== | <gallery widths="320px" heights="240px"> | ||
Destiny Arena.png|The fifth section. | |||
Reflux first battle.jpg|[[Rayman]] fights [[Reflux]]. | |||
</gallery> | |||
===Intermission - The power of the [[Leptys]]=== | |||
[[Gumsi]] scolds [[Reflux]] for his loss, and announces that [[Rayman]] will receive "The power of the [[Leptys]]" as his reward for victory. [[Rayman]] receives the power, but its nature is not yet revealed. | |||
<gallery widths="320px" heights="240px"> | |||
The power of the Leptys.png|[[Gumsi]] gives [[Rayman]] the [[Leptys]]' power. | |||
</gallery> | |||
===Stage 6 - [[Grimace|The new power]]=== | ===Stage 6 - [[Grimace|The new power]]=== | ||
As [[Globox]] and [[Rayman]] make their way out of the tunnels, no longer pursued by the [[Knaaren]], the former wonders what [[Rayman]]'s new power is. Their path is blocked by a [[meadowscrew]], but there is no time to worry about that as they are attacked by a [[Hoodmonger]]. [[Rayman]] defeats the [[Hoodmonger]] and discovers that his new power is to turn [[Black Lum]]s into [[Red Lum]]s through using the [[grimace]]. Armed with this new ability, [[Rayman]] defeats a second [[Hoodmonger]], gets a [[Vortex]], lowers the [[meadowscrew]], and the duo leaves the inside room as they continue their mission. | As [[Globox]] and [[Rayman]] make their way out of the tunnels, no longer pursued by the [[Knaaren]], the former wonders what [[Rayman]]'s new power is. Their path is blocked by a [[meadowscrew]], but there is no time to worry about that as they are attacked by a [[Hoodmonger]]. [[Rayman]] defeats the [[Hoodmonger]] and discovers that his new power is to turn [[Black Lum]]s into [[Red Lum]]s through using the [[grimace]]. Armed with this new ability, [[Rayman]] defeats a second [[Hoodmonger]], gets a [[Vortex]], lowers the [[meadowscrew]], and the duo leaves the inside room as they continue their mission. | ||
The score thresholds for this stage are 750 points for 25% (2 stars), 1500 points for 50% (3 stars), 2250 points for 75% (4 stars) and 3000 points for 100% (5 stars). | |||
<gallery widths="320px" heights="240px"> | |||
The Desert of the KnaarenSection6.png|The sixth section | |||
</gallery> | |||
===Stage 7 - Back in the desert=== | ===Stage 7 - Back in the desert=== | ||
Now back outside, [[Rayman]] must defeat a [[Hoodoo]] and a [[Hoodmonger Officer]] guarded by it to reach a barrel of [[plum juice]] for [[Globox]]. The [[plum juice]] gives [[Globox]] both flight and [[bubble]] power, the latter of which [[Rayman]] can use to open a [[cage]] to get the [[Heavy Metal Fist]] to break open a nearby barricade. But before that, [[Rayman]] must defeat two [[Lavomatrix]]es to allow [[Globox]] to drink the barrel of [[plum juice]]. Once through the door, he must defeat several [[Hoodstormer]]s and [[Stumbleboom]]s to gain a [[Lockjaw]] fist. He must use this same power up to beat a [[Spineroo]]. He can then find secret area marked by a fire containing several [[Jewel|gems]]. Once he has them, he can meet up with [[Globox]] and finally enter the [[ | Now back outside, [[Rayman]] must defeat a [[Hoodoo]] and a [[Hoodmonger Officer]] guarded by it to reach a barrel of [[plum juice]] for [[Globox]]. The [[plum juice]] gives [[Globox]] both flight and [[bubble]] power, the latter of which [[Rayman]] can use to open a [[cage]] to get the [[Heavy Metal Fist]] to break open a nearby barricade. But before that, [[Rayman]] must defeat two [[Lavomatrix]]es to allow [[Globox]] to drink the barrel of [[plum juice]]. Once through the door, he must defeat several [[Hoodstormer]]s and [[Stumbleboom]]s to gain a [[Lockjaw]] fist. He must use this same power up to beat a [[Spineroo]]. He can then find secret area marked by a fire containing several [[Jewel|gems]]. Once he has them, he can meet up with [[Globox]] and finally enter the [[Art Rytus|Doctor]]'s office. | ||
The score thresholds for this stage are 4875 points for 25% (2 stars), 9750 points for 50% (3 stars), 14625 points for 75% (4 stars) and 19500 points for 100% (5 stars). This is one of two stages in the game where the score requirement differs in the GameCube version. There the 100% requirement is instead 21200 points, with the other requirements changed proportionally. This is the same requirement as listed in the [[Rayman 3: Hoodlum Havoc: Official Strategy Guide|official strategy guide]]. | |||
<gallery widths="320px" heights="240px"> | |||
The Desert of the KnaarenSection7.png|The seventh section. | |||
KnaarensFrescoes.jpg|This fresco represents [[Knaaren]]s on the run. | |||
Stumbleboom seventh section DOTK.jpg|A group of [[Stumbleboom]]s. | |||
</gallery> | |||
===Stage 8 - [[Art Rytus]]' office=== | |||
In this stage, [[Rayman]] must time when he stands on the [[switch]]es in order to defeat the [[Hoodmonger]]s across a pit in the [[Art Rytus|Doctor]]'s waiting room. Once he has beaten them, a platform will rise, allowing him to cross the pit. If he drops down once the platform is raised he can find a door leading to his next secret filled with yellow and red [[Jewel|gems]], including a [[Jewel|green gem]]. Now, he can take [[Globox]] to the third and final [[Art Rytus|Doctor]]. Though like the last visit to the doctor, [[Globox]] disagrees to go in. For some odd reason, [[Rayman]] uses the [[Lockjaw]] to grab [[Globox]] and force him to go in. | |||
|[[ | |||
The score thresholds for this stage are 2295 points for 25% (2 stars), 4590 points for 50% (3 stars), 6885 points for 75% (4 stars) and 9180 points for 100% (5 stars). | |||
<gallery widths="320px" heights="240px"> | |||
The Desert of the KnaarenSection8.png|The eighth and final section | |||
</gallery> | |||
===Epilogue=== | ===Epilogue=== | ||
[[ | [[Art Rytus]], along with [[Otto Psi]] and [[Roméo Patti]] are finally able to remove [[André]] from [[Globox]]'s stomach by playing a slower tune then the first two doctors played. However, [[André]] escapes into the desert and gathers several [[Black Lum]]s, announcing that "Nothing is lost" as he knows someone who can help them. This someone turns out to be [[Reflux]], who agrees to steal [[Gumsi]]'s [[Sceptre of the Leptys|Sceptre]] in return for another chance to defeat [[Rayman]]. | ||
<gallery widths="320px" heights="240px"> | |||
Reflux&André.png|[[André]] and [[Black Lums|his acolytes]] alongside [[Reflux]] | |||
</gallery> | |||
==Known glitches== | ==Known glitches== | ||
*Near the end of the first phase, the | *Near the end of the first phase, the [[Zombie Chicken]] egg dispensing vending machine may not produce an egg, which is required to unlock the door to proceed. How this glitch is triggered is still not known: however, one way is to simply play the game without saving or turning off the console and when the user reaches this point, the glitch should have taken effect. The only known solution is for the player to reset the console and load the most recent save point they have. | ||
==Gallery== | |||
===Screenshots=== | |||
<gallery widths="320px" heights="240px"> | |||
R3HH-EarlyRayman2Style-1.jpg|An [[Rayman 3 (early production)|early version]] of the ''[[Destiny Arena]]''. | |||
</gallery> | |||
===Concept art=== | |||
<gallery widths="320px" heights="240px"> | |||
Destiny Arena Concept Art.png|The ''[[Destiny Arena]]''. | |||
Concept DOTK 2.jpg|Concept art. | |||
Concept DOTK 3.jpg|Concept art. | |||
Knaaren Architecture.png|Concept art. | |||
R3DOTKartwork.png|Concept art. | |||
R3DOTKartwork2.png|Concept art. | |||
</gallery> | |||
==Soundtracks== | |||
*[https://raytunes.raymanpc.com/music/R3/079%20-%20Into%20the%20Deadlands.mp3 "Into the Deadlands"] | |||
*[https://raytunes.raymanpc.com/music/R3/080%20-%20The%20Chasm.mp3 "The Chasm"] | |||
*[https://raytunes.raymanpc.com/music/R3/081%20-%20Panic%20~Chased%20by%20the%20Knaaren~.mp3 "Panic ~Chased by the Knaaren~"] | |||
*[https://raytunes.raymanpc.com/music/R3/082%20-%20Haunted%20~Carrying%20the%20Egg~.mp3 "Haunted ~Carrying the Egg~"] | |||
*[https://raytunes.raymanpc.com/music/R3/083%20-%20Haunted%20~Zombie%20Chickens!~.mp3 "Haunted ~Zombie Chickens!~"] | |||
*[https://raytunes.raymanpc.com/music/R3/084%20-%20The%20Great%20Hall.mp3 "The Great Hall"] | |||
*[https://raytunes.raymanpc.com/music/R3/085%20-%20The%20Knaaren%20Labyrinth.mp3 "The Knaaren Labyrinth"] | |||
*[https://raytunes.raymanpc.com/music/R3/086%20-%20The%20Knaaren%20Labyrinth%20~Bone%20Corridors~.mp3 "The Knaaren Labyrinth ~Bone Corridors~"] | |||
*[https://raytunes.raymanpc.com/music/R3/087%20-%20The%20Knaaren%20Labyrinth%20~Spiraling%20Tower~.mp3 "The Knaaren Labyrinth ~Spiraling Tower~"] | |||
*[https://raytunes.raymanpc.com/music/R3/088%20-%20Deadly%20Traps%20~The%20Toxic%20Room~.mp3 "Deadly Traps ~The Toxic Room~"] | |||
*[https://raytunes.raymanpc.com/music/R3/089%20-%20Deadly%20Traps%20~Surrounded!~.mp3 "Deadly Traps ~Surrounded~"] | |||
*[https://raytunes.raymanpc.com/music/R3/090%20-%20Into%20The%20Destiny%20Arena.mp3 "Into The Destiny Arena"] | |||
*[https://raytunes.raymanpc.com/music/R3/091%20-%20Reflux%20~The%20Knaaren%20Warrior~.mp3 "Reflux ~The Knaaren Warrior~"] | |||
*[https://raytunes.raymanpc.com/music/R3/093%20-%20The%20Lavomatrix%20Twins.mp3 "The Lavomatrix Twins"] | |||
*[https://raytunes.raymanpc.com/music/R3/094%20-%20The%20Spinneroo.mp3 "The Spinneroo"] | |||
==Saves== | |||
This section lists saves for the PC version of the game. Instructions on how to implement them can be found [https://raysaves.raymanpc.com/rayman3.html here]. | |||
*[https://raysaves.raymanpc.com/saves/rayman3/L5P1.sav Phase 1] | |||
*[https://raysaves.raymanpc.com/saves/rayman3/L5P2.sav Phase 2] | |||
*[https://raysaves.raymanpc.com/saves/rayman3/L5P3.sav Phase 3] | |||
*[https://raysaves.raymanpc.com/saves/rayman3/L5P4.sav Phase 4] | |||
*[https://raysaves.raymanpc.com/saves/rayman3/L5P5.sav Phase 5] | |||
*[https://raysaves.raymanpc.com/saves/rayman3/L5P6.sav Phase 6] | |||
*[https://raysaves.raymanpc.com/saves/rayman3/L5P7.sav Phase 7] | |||
*[https://raysaves.raymanpc.com/saves/rayman3/L5P8.sav Phase 8] | |||
==Trivia== | ==Trivia== | ||
This level has the most stages of any other in ''[[Rayman 3]]'' (eight) and is the only level to have more than one FMV | *This level has the most stages of any other in ''[[Rayman 3]]'' (eight) and is the only level to have more than one FMV (full-motion video) cutscene. | ||
*While the Desert of the Knaaren likely does not appear in ''[[Rayman Legends Retold]]'', it is present on the map included with the game's launch edition. It is known as the "Knaaren Desert" on the map. | |||
==External links== | ==External links== | ||
*[ | *[https://www.youtube.com/watch?v=AgGKJvHPYXA The Desert of the Knaaren's playthrough at YouTube (PC version)] | ||
{{Rayman3worlds}} | {{Rayman3worlds}} | ||
| Line 139: | Line 186: | ||
[[de:Die Wüste der Knaaren]] | [[de:Die Wüste der Knaaren]] | ||
[[pl:Pustynia Knaarenów]] | [[pl:Pustynia Knaarenów]] | ||
[[es:El Desierto de los Knaaren]] | |||
[[ru:Пустыня Кнааров]] | |||
[[Category:Places from Rayman 3|Desert of the Knaaren, The]] | [[Category:Places from Rayman 3|Desert of the Knaaren, The]] | ||
Latest revision as of 09:35, 7 June 2026
 The Desert of the Knaaren The Desert of the Knaaren
| |
|---|---|
 | |
←  The Land of the Livid Dead The Land of the Livid Dead
|
 The Longest Shortcut → The Longest Shortcut →
|
 Murfy's score: Murfy's score:
|
    
|
| Maximum score: |    
|
 
|
 
|

| |
The Desert of the Knaaren, also known as the Knaaren Desert, is the fifth of the nine levels of Rayman 3. This is where the native species of this land, the Knaaren, dwell. The Knaaren carved their tunnels out of the solid rock, and they guard their domain fiercely and effectively, constantly patrolling the many passages.
Rayman is sent here from the Land of the Livid Dead by the second Teensie doctor, Roméo Patti. Like Otto Psi, Roméo was unable to extract the Black Lum André from Globox's body, so Roméo sends Rayman and Globox to the Desert of the Knaaren, where the third Teensie doctor, Art Rytus, has his office. Along the way, Rayman and Globox fall into the tunnels, and Globox is captured by the Knaaren. Rayman must fight his way past Knaaren and Zombie Chickens, and solve many puzzles along the way. Eventually he is captured by Reflux, the champion of the Knaaren, who challenges him to a duel in the arena. Once Rayman succeeds, Globox is freed, and Gumsi, the child-king of the Knaaren, uses the Sceptre of the Leptys to their god, the Leptys, who grants Rayman the grimace ability as a reward. The heroes then meet up with Art Rytus, who summons the other two doctors. Together they finally manage to extract André, who escapes and tracks down the humiliated Reflux. André promises Reflux the opportunity to destroy Rayman once and for all if he will steal the Sceptre of the Leptys for him, and his promise is fulfilled in the Tower of the Leptys, the game's final level.
Description

This is a world that is a harsh, scorching plain of sand, dotted by rocky outcrops and yawning chasms. The huge dinosaur-like skeletons which lie on the sand resemble those seen in the Cave of Bad Dreams in Rayman 2. The desert looks hellish at first sight. However, beneath the barren, lifeless surface is a vast tunnel and cave system that delves deep into the rocky under-layers.
As a level
Stage 1 – Crossing the dessert
The first stage of the level requires Rayman to jump across several giant bones, fighting several Slapdashes as he goes. Globox has already run ahead of him as the desert sands burn. Eventually Rayman and Globox reach a small cave, on the other side they find themselves at the bottom of a canyon where a Hoodlum airship is dropping off several Hoodmongers and Hoodmonger Soldiers. Globox consumes a barrel of plum juice which gives him flight, whilst Rayman must use the Throttle Copter to work his own way out of the canyon. Eventually he frees two Teensies who tell him about the Knaaren Tunnels which Rayman and Globox must use to cross the desert. The duo enter the tunnels, but Globox is quickly captured by the Knaaren and Rayman is forced to run. Finding himself in a room full of Knaaren, he must use a Shock Rocket to sound a gong which distracts the Knaaren whilst he makes his escape. In the next room, he must take a Zombie Chicken egg and carry it to a switch to open a door, and then perform the gong trick again to bypass one last Knaaren. After opening a final door using a Zombie Chicken egg, he can move on to the second stage.
The score thresholds for this stage are 1638 points for 25% (2 stars), 3275 points for 50% (3 stars), 4913 points for 75% (4 stars) and 6550 points for 100% (5 stars).
-
 The beginning of the first section.
 -
 Bones in the desert.
 -


Stage 2 – The temple
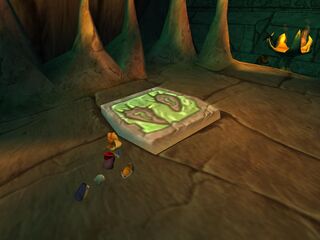
As Rayman gets past the first stage of Knaarens, he enters a room dominated by an imposing statue of the god Leptys (its first appearance in the game). At the top, he sees Globox being carried away by a Knaaren and must find a way to follow them. His first task is to get one of the Knaarens that are nearby to chase him onto a large switch which will cause some floating platforms to align, making a path up to the top of the large Leptys statue. If Rayman takes a detour whilst jumping on these platforms, he can free a few Teensies who will give him a Vortex to lower a meadowscrew on the ground and reach a secret area that contains a green gem. Once this is done, Rayman must work his way up to top of the statue, using floating platforms and Lockjaws, where he releases some Teensies who will hand over a Throttle Copter with which he can use to get to the top, and leave the second stage.
Originally, the statue was to attack Rayman when he was in its line of sight, by shooting lightning from its eyes. There is a trailer which shows this very briefly. This behaviour is deactivated in the final game, but the code is still present in the files. If it is reactivated, the room becomes much more difficult to traverse. This is likely the reason that it was cut.
The score thresholds for this stage are 2200 points for 25% (2 stars), 4400 points for 50% (3 stars), 6600 points for 75% (4 stars) and 8800 points for 100% (5 stars).
-
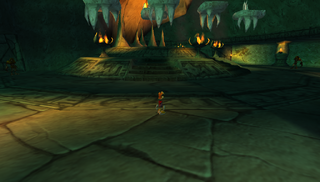 The beginning of the second section.
 -
-
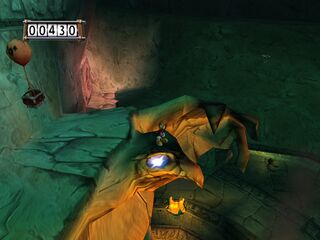 The statue representing the Leptys.


Stage 3 – The Knaaren tower
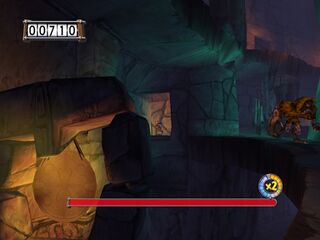
The corridor ahead is blocked by several Knaarens so Rayman must climb between two walls and stay on the top, before helicoptering down past some green acid to continue out of that room. Rayman will now need to distract a Knaaren by using the Shock Rocket to hit a gong. It will create a loud sound, making the Knaaren run to it, to which Rayman will be able to get the Lockjaw to advance through the following area. The next small area is straight ahead, but there are two Teensie cages, rescuing one will give him a pile of yellow gems, and the other a green gem. After passing, Rayman will be required to perform the gong trick several times as he makes his way through a maze of tunnels and ledges, before climbing a large structure at the top of which lies the path onward.
The score thresholds for this stage are 1578 points for 25% (2 stars), 3155 points for 50% (3 stars), 4733 points for 75% (4 stars) and 6310 points for 100% (5 stars).
-
 The beginning of the third section.
 -
 Rayman climbing the walls.
 -
-
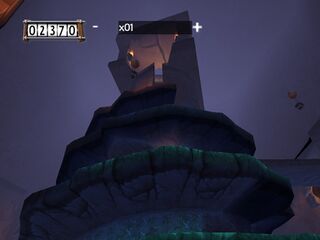 Overview of the Knaaren tower.
 -
 Rayman hidden behind a pillar.
 -
 The top of the tower.


Stage 4 – Meeting Reflux
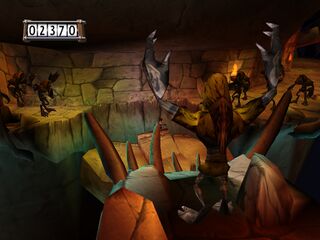
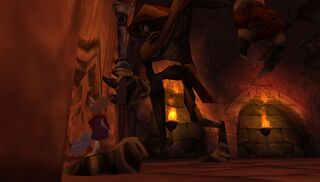
Rayman continues to what seems like a quiet room, but as he advances to a large ledge, several groups of Knaaren come walking closer and closer to attack him. The only way out is to throw himself into the darkness below. He finds himself deep in the tunnels with some spirits, and must pass them and carry various rocks to different switches scattered throughout the level in order to proceed. However, only certain paths will take his weight, and he must be careful not to lose the stone he is carrying. In amongst all this he will be required to perform more daring jumps. Eventually, another Knaaren group will corner him, and the only way he can escape is by destroying the ground below him and taking yet another tumble. Things don't get any better just now though, as it is here that he will meet the Knaaren champion Reflux, who will take him to the mysterious "arena".
The score thresholds for this stage are 2800 points for 25% (2 stars), 5600 points for 50% (3 stars), 8400 points for 75% (4 stars) and 11200 points for 100% (5 stars).
-
 The beginning of the third section.
 -
-
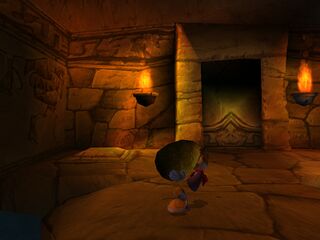 Rayman must use this Zombie Chicken egg to open that door.
 -
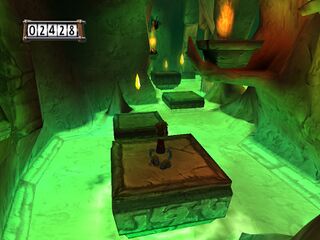 This room is flooded with a toxic green liquid.
 -
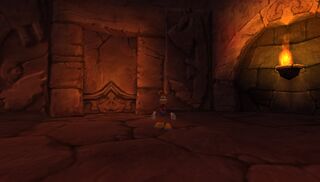 Rayman is trapped in this room.
 -


Stage 5 – The arena
Rayman is in the Knaaren arena, in the company of Gumsi, the Knaaren king, Reflux, his champion, and their new prisoner Globox. To earn his and Globox's freedom, Rayman must fight and defeat Reflux. If he cannot, his corpse shall be burnt. Reflux begins with a spin attack, but will eventually tire, allowing Rayman to get some hits in on him whilst he recovers. Rayman can drop down to the side of the raised platform and grab some Heavy Metal Fists in order to increase fire power, but flames from the lava pit below will attack him constantly whilst he does this so he must be careful. Occasionally, Reflux will call meteors down from the ceiling. Even if Rayman avoids them, small fires will remain where they fall for the rest of the battle, making it even harder to retain stamina. Eventually, however, Rayman will come through and beat Reflux. Gumsi reacts angrily to this and begins to beat Globox, but André will scare the child king by yelling from Globox's stomach and Gumsi will admit defeat.
The score thresholds for this stage are 375 points for 25% (2 stars), 750 points for 50% (3 stars), 1125 points for 75% (4 stars) and 1500 points for 100% (5 stars).
-
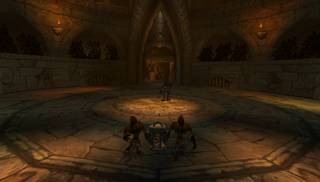 The fifth section.
 -


Intermission - The power of the Leptys
Gumsi scolds Reflux for his loss, and announces that Rayman will receive "The power of the Leptys" as his reward for victory. Rayman receives the power, but its nature is not yet revealed.

Stage 6 - The new power
As Globox and Rayman make their way out of the tunnels, no longer pursued by the Knaaren, the former wonders what Rayman's new power is. Their path is blocked by a meadowscrew, but there is no time to worry about that as they are attacked by a Hoodmonger. Rayman defeats the Hoodmonger and discovers that his new power is to turn Black Lums into Red Lums through using the grimace. Armed with this new ability, Rayman defeats a second Hoodmonger, gets a Vortex, lowers the meadowscrew, and the duo leaves the inside room as they continue their mission.
The score thresholds for this stage are 750 points for 25% (2 stars), 1500 points for 50% (3 stars), 2250 points for 75% (4 stars) and 3000 points for 100% (5 stars).
-
 The sixth section

Stage 7 - Back in the desert
Now back outside, Rayman must defeat a Hoodoo and a Hoodmonger Officer guarded by it to reach a barrel of plum juice for Globox. The plum juice gives Globox both flight and bubble power, the latter of which Rayman can use to open a cage to get the Heavy Metal Fist to break open a nearby barricade. But before that, Rayman must defeat two Lavomatrixes to allow Globox to drink the barrel of plum juice. Once through the door, he must defeat several Hoodstormers and Stumblebooms to gain a Lockjaw fist. He must use this same power up to beat a Spineroo. He can then find secret area marked by a fire containing several gems. Once he has them, he can meet up with Globox and finally enter the Doctor's office.
The score thresholds for this stage are 4875 points for 25% (2 stars), 9750 points for 50% (3 stars), 14625 points for 75% (4 stars) and 19500 points for 100% (5 stars). This is one of two stages in the game where the score requirement differs in the GameCube version. There the 100% requirement is instead 21200 points, with the other requirements changed proportionally. This is the same requirement as listed in the official strategy guide.
-
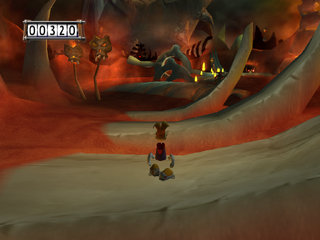 The seventh section.
 -
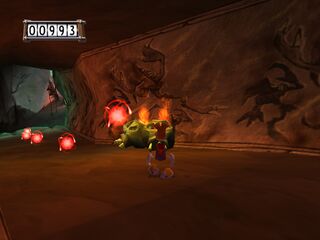 This fresco represents Knaarens on the run.
 -
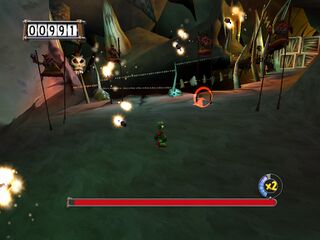 A group of Stumblebooms.


Stage 8 - Art Rytus' office
In this stage, Rayman must time when he stands on the switches in order to defeat the Hoodmongers across a pit in the Doctor's waiting room. Once he has beaten them, a platform will rise, allowing him to cross the pit. If he drops down once the platform is raised he can find a door leading to his next secret filled with yellow and red gems, including a green gem. Now, he can take Globox to the third and final Doctor. Though like the last visit to the doctor, Globox disagrees to go in. For some odd reason, Rayman uses the Lockjaw to grab Globox and force him to go in.
The score thresholds for this stage are 2295 points for 25% (2 stars), 4590 points for 50% (3 stars), 6885 points for 75% (4 stars) and 9180 points for 100% (5 stars).
-
 The eighth and final section

Epilogue
Art Rytus, along with Otto Psi and Roméo Patti are finally able to remove André from Globox's stomach by playing a slower tune then the first two doctors played. However, André escapes into the desert and gathers several Black Lums, announcing that "Nothing is lost" as he knows someone who can help them. This someone turns out to be Reflux, who agrees to steal Gumsi's Sceptre in return for another chance to defeat Rayman.

Known glitches
- Near the end of the first phase, the Zombie Chicken egg dispensing vending machine may not produce an egg, which is required to unlock the door to proceed. How this glitch is triggered is still not known: however, one way is to simply play the game without saving or turning off the console and when the user reaches this point, the glitch should have taken effect. The only known solution is for the player to reset the console and load the most recent save point they have.
Gallery
Screenshots
-
 An early version of the Destiny Arena.

Concept art
-
 The Destiny Arena.
 -
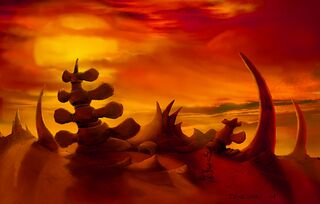 Concept art.
 -
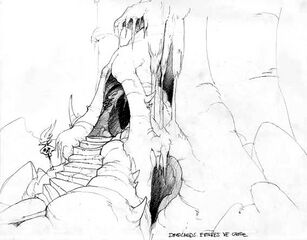 Concept art.
 -
 Concept art.
 -
 Concept art.
 -
 Concept art.


Soundtracks
- "Into the Deadlands"
- "The Chasm"
- "Panic ~Chased by the Knaaren~"
- "Haunted ~Carrying the Egg~"
- "Haunted ~Zombie Chickens!~"
- "The Great Hall"
- "The Knaaren Labyrinth"
- "The Knaaren Labyrinth ~Bone Corridors~"
- "The Knaaren Labyrinth ~Spiraling Tower~"
- "Deadly Traps ~The Toxic Room~"
- "Deadly Traps ~Surrounded~"
- "Into The Destiny Arena"
- "Reflux ~The Knaaren Warrior~"
- "The Lavomatrix Twins"
- "The Spinneroo"
Saves
This section lists saves for the PC version of the game. Instructions on how to implement them can be found here.
Trivia
- This level has the most stages of any other in Rayman 3 (eight) and is the only level to have more than one FMV (full-motion video) cutscene.
- While the Desert of the Knaaren likely does not appear in Rayman Legends Retold, it is present on the map included with the game's launch edition. It is known as the "Knaaren Desert" on the map.
