Savage Swarms: Difference between revisions
No edit summary |
Still need to revise this later when I continue the relics |
||
| Line 18: | Line 18: | ||
}} | }} | ||
'''Savage Swarms''' is the first level of the [[Grumbling Grottos]], a world in ''[[Rayman Origins]]''. [[Flying creature]]s appear heavily in this level but the heroes can briefly drive them away by punching [[gong]]s to create | '''Savage Swarms''' is the first level of the [[Grumbling Grottos]], a world in ''[[Rayman Origins]]''. [[Flying creature]]s appear heavily in this level but the heroes can briefly drive them away by punching [[gong]]s to create sound waves. This is the first level from this world and twenty-first overall that's not included in the [[Back to Origins]] mode in ''[[Rayman Legends]]''. | ||
==Area 1== | ==Area 1== | ||
As | As the heroes advance, they come across a large group of [[flying creature]]s. In order to scare them away and continue, the heroes must punch a [[gong]] to create a sound wave, causing the [[flying creature]]s to move away for a short period of time. Some sound waves are already provided by other objects. At one point, a special kind of cyclops [[gong]] will appear. This specific one, if punched, creates a sound wave around the heroes, but it won't last long. The first [[Skull Coin]] can be collected by punching the yellow [[gong]] and reaching the [[Skull Coin|coin]] surrounded by [[flying creature]]s. The second [[Skull Coin]] can be found through performing a walljump above the exit. | ||
<gallery widths="320px" heights="180px"> | <gallery widths="320px" heights="180px"> | ||
Savage Swarms 2.jpg|The first [[gong]] seen in the level. | Savage Swarms 2.jpg|The first [[gong]] seen in the level. | ||
Savage Swarms 3.jpg|The same [[gong]] after it has been hit. | Savage Swarms 3.jpg|The same [[gong]] after it has been hit. | ||
Savage Swarms 4.jpg| | Savage Swarms 4.jpg|Another type of [[gong]]. | ||
Savage Swarms 5.jpg| | Savage Swarms 5.jpg|Cyclops [[gong]]s will provide a sound wave which follows the heroes. | ||
</gallery> | </gallery> | ||
==Area 2== | ==Area 2== | ||
[[File:Savage Swarms 8.jpg|320px|thumb|right|A [[heart]] [[phial]].]] | [[File:Savage Swarms 8.jpg|320px|thumb|right|A [[heart]] [[phial]].]] | ||
This area starts out quiet, with no enemies in sight. Along the way, if the | This area starts out quiet, with no enemies in sight. Along the way, if the heroes crush attack on a slanted [[Drum (UbiArt games)|drum]] and perform walljumps, they find the first secret area. After the [[Electoon]]s are saved, the heroes can move on. The heroes will come across two paths, both will result in finding a [[Skull Coin]], the third and fourth ones. But the lower path will need to be taken in order to continue. More [[gong]]s of the variety are still useful for getting to the exit. The fifth [[Skull Coin]] can be retrieved by going down and punching a [[gong]] to the right of the [[Skull Coin|coin]]. | ||
===Secret area 1=== | ===Secret area 1=== | ||
The | The heroes need to be careful when using the moving sound waves, as [[flying creature]]s are everywhere. Once they get to the huge sound wave, they can destroy the three [[Red Bird]]s and break the [[cage]]. | ||
<gallery widths="320px" heights="180px"> | <gallery widths="320px" heights="180px"> | ||
Savage Swarms 6.jpg|The first secret | Savage Swarms 6.jpg|The first secret area, where the heroes need to stay within the sound waves in order to avoid the [[flying creature]]s. | ||
Savage Swarms 7.jpg|Three [[Red Bird]]s guard the [[cage]]. | Savage Swarms 7.jpg|Three [[Red Bird]]s guard the [[cage]]. | ||
</gallery> | </gallery> | ||
==Area 3== | ==Area 3== | ||
After a while, the | After a while, the heroes need to activate a [[switch]] to make one of the sound waves move around to scare off more [[flying creature]]s. The sixth [[Skull Coin]] can be acquired by punching a cyclops [[gong]] and using the sound wave to pass through the [[flying creature]]s. The heroes continue to use the moving and stationary sound waves to their advantage. The heroes will eventually escape the [[flying creature]]s. The second secret area can be found by using a [[Swingman]] to be able to perform a walljump to the platform leading up to the door. The exit is close by. | ||
<gallery widths="320px" heights="180px"> | <gallery widths="320px" heights="180px"> | ||
Savage Swarms 9.jpg|A [[Skull Coin]]. | Savage Swarms 9.jpg|A [[Skull Coin]]. | ||
Savage Swarms 10.jpg|The | Savage Swarms 10.jpg|The heroes will need to glide down slowly to not hit the [[flying creature]]s. | ||
</gallery> | </gallery> | ||
===Secret area 2=== | ===Secret area 2=== | ||
[[Rayman]] and his friends must use the [[mosquito]]es to reach the [[Electoon]] [[cage]]. During the ride, projectiles need to be shot on certain [[gong]]s to scare away [[flying creature]]s. When the | [[Rayman]] and his friends must use the [[mosquito]]es to reach the [[Electoon]] [[cage]]. During the ride, projectiles need to be shot on certain [[gong]]s to scare away [[flying creature]]s. When the heroes get to the end, they need to keep a [[gong]] providing a sound wave while destroying the [[Red Bird]]s. Once done, the [[cage]] can be broken. | ||
<gallery widths="320px" heights="180px"> | <gallery widths="320px" heights="180px"> | ||
Savage Swarms 11.jpg|The [[mosquito]]es can shoot the [[gong]]s from a distance. | Savage Swarms 11.jpg|The [[mosquito]]es can shoot the [[gong]]s from a distance. | ||
Savage Swarms 12.jpg|The | Savage Swarms 12.jpg|The heroes will have to stay within the sound waves as they move. | ||
Savage Swarms 13.jpg|The [[cage]] is once again guarded by three [[Red Bird]]s. | Savage Swarms 13.jpg|The [[cage]] is once again guarded by three [[Red Bird]]s. | ||
</gallery> | </gallery> | ||
==Area 4== | ==Area 4== | ||
In this area, the | In this area, the cyclops [[gong]]s will be used more to get past the [[flying creature]]s. Because of this, the heroes need to be quick when moving along, because the [[gong]]s are spread out. The exit is not too far away. | ||
<gallery widths="320px" heights="180px"> | <gallery widths="320px" heights="180px"> | ||
Savage Swarms 14.jpg|A [[Red Bird]]. | Savage Swarms 14.jpg|A [[Red Bird]]. | ||
Savage Swarms 15.jpg|The | Savage Swarms 15.jpg|The heroes will need to make small precise jumps before the sound wave runs out. | ||
</gallery> | </gallery> | ||
==Area 5== | ==Area 5== | ||
[[File:Savage Swarms 16.jpg|320px|thumb|left|The final area.]] | [[File:Savage Swarms 16.jpg|320px|thumb|left|The final area.]] | ||
All the | All the heroes need to do is defeat the four [[Red Bird]]s around the [[Electoon]] [[cage]]. When completed, the [[cage]] can be broken open to end the level. The heroes will then pose on the [[The Photographer|photoboard]] as [[the Magician]] waits for the total amount of [[Lum (UbiArt games)|Lums]] that were collected. | ||
{{Clear}} | {{Clear}} | ||
Revision as of 18:50, 10 September 2019
| Savage Swarms | |||||||||||
|---|---|---|---|---|---|---|---|---|---|---|---|
 | |||||||||||
| ← Poor Little Daisy | Tricky Winds → | ||||||||||
 Grumbling Grottos Grumbling Grottos
| |||||||||||
   
|

|

| |||||||||
   
|
|
  
| |||||||||

|
 
| ||||||||||

Savage Swarms is the first level of the Grumbling Grottos, a world in Rayman Origins. Flying creatures appear heavily in this level but the heroes can briefly drive them away by punching gongs to create sound waves. This is the first level from this world and twenty-first overall that's not included in the Back to Origins mode in Rayman Legends.
Area 1
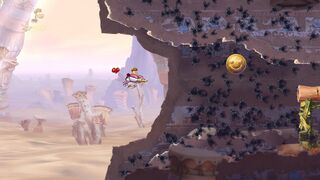
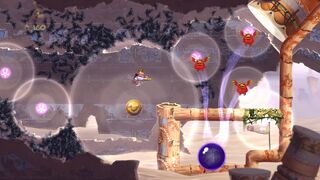
As the heroes advance, they come across a large group of flying creatures. In order to scare them away and continue, the heroes must punch a gong to create a sound wave, causing the flying creatures to move away for a short period of time. Some sound waves are already provided by other objects. At one point, a special kind of cyclops gong will appear. This specific one, if punched, creates a sound wave around the heroes, but it won't last long. The first Skull Coin can be collected by punching the yellow gong and reaching the coin surrounded by flying creatures. The second Skull Coin can be found through performing a walljump above the exit.
-
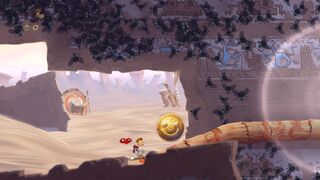 The first gong seen in the level.
 -
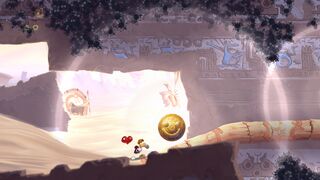 The same gong after it has been hit.
 -
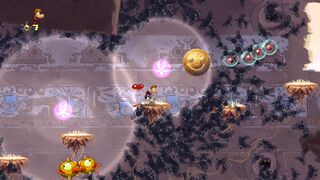 Another type of gong.
 -
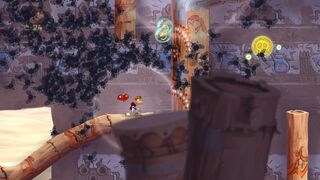 Cyclops gongs will provide a sound wave which follows the heroes.


Area 2

This area starts out quiet, with no enemies in sight. Along the way, if the heroes crush attack on a slanted drum and perform walljumps, they find the first secret area. After the Electoons are saved, the heroes can move on. The heroes will come across two paths, both will result in finding a Skull Coin, the third and fourth ones. But the lower path will need to be taken in order to continue. More gongs of the variety are still useful for getting to the exit. The fifth Skull Coin can be retrieved by going down and punching a gong to the right of the coin.
Secret area 1
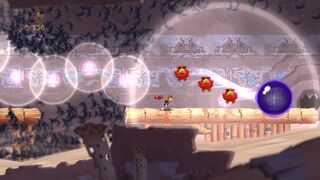
The heroes need to be careful when using the moving sound waves, as flying creatures are everywhere. Once they get to the huge sound wave, they can destroy the three Red Birds and break the cage.
-
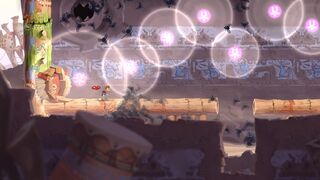 The first secret area, where the heroes need to stay within the sound waves in order to avoid the flying creatures.
 -


Area 3
After a while, the heroes need to activate a switch to make one of the sound waves move around to scare off more flying creatures. The sixth Skull Coin can be acquired by punching a cyclops gong and using the sound wave to pass through the flying creatures. The heroes continue to use the moving and stationary sound waves to their advantage. The heroes will eventually escape the flying creatures. The second secret area can be found by using a Swingman to be able to perform a walljump to the platform leading up to the door. The exit is close by.
-
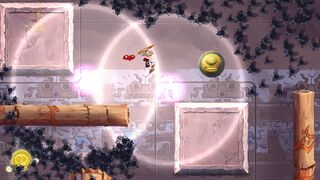 A Skull Coin.
 -
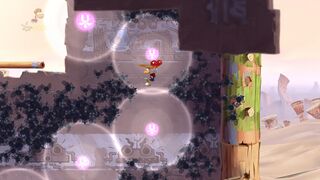 The heroes will need to glide down slowly to not hit the flying creatures.


Secret area 2
Rayman and his friends must use the mosquitoes to reach the Electoon cage. During the ride, projectiles need to be shot on certain gongs to scare away flying creatures. When the heroes get to the end, they need to keep a gong providing a sound wave while destroying the Red Birds. Once done, the cage can be broken.
-
 The mosquitoes can shoot the gongs from a distance.
 -
 The heroes will have to stay within the sound waves as they move.
 -


Area 4
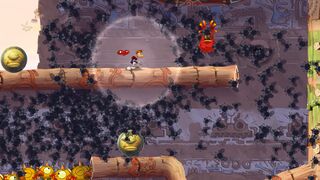
In this area, the cyclops gongs will be used more to get past the flying creatures. Because of this, the heroes need to be quick when moving along, because the gongs are spread out. The exit is not too far away.
-
 A Red Bird.
 -
 The heroes will need to make small precise jumps before the sound wave runs out.


Area 5

All the heroes need to do is defeat the four Red Birds around the Electoon cage. When completed, the cage can be broken open to end the level. The heroes will then pose on the photoboard as the Magician waits for the total amount of Lums that were collected.
External links
- Savage Swarms playthrough at YouTube (PC version) (Normal walkthrough + Lums Medal)
- Savage Swarms playthrough at YouTube (PC version) (Speed Trophy)