Outta My Way: Difference between revisions
Added images |
Hunchman801 (talk | contribs) Added language links |
||
| (20 intermediate revisions by 5 users not shown) | |||
| Line 1: | Line 1: | ||
{{ | {{ROLevel | ||
| name = Outta My Way | | name = Outta My Way | ||
| image = [[ | | image = [[File:OuttaMyWay.jpg|center|320px|Outta My Way]] | ||
| preceded by = [[Golly G. Golem]] | | preceded by = [[Golly G. Golem]] | ||
| followed by = [[Up And Down]] | | followed by = [[Up And Down]] | ||
| world = [[Jibberish Jungle|Ticklish Temples]] | | world = [[Jibberish Jungle|Ticklish Temples]] | ||
| medallion slot 1 = | | medallion slot 1 = Cage | ||
| medallion slot 2 = | | medallion slot 2 = Cage | ||
| medallion slot 3 = | | medallion slot 3 = Cage | ||
| medallion slot 4 = | | medallion slot 4 = Lums | ||
| medallion slot 5 = | | medallion slot 4 number = 150 | ||
| medallion slot 6 = | | medallion slot 5 = Lums | ||
| medal = | | medallion slot 5 number = 300 | ||
| | | medallion slot 6 = Time | ||
| | | medallion slot 6 number = 1:20 | ||
| medal = 350 | |||
| cup = 0:51 | |||
| skull coins = 6 | |||
| relics = 3 | |||
| format numbers = true | |||
}} | }} | ||
'''Outta My Way''' is the first level of the [[Ticklish Temples]], a world in ''[[Rayman Origins]]''. This marks the return of the [[Jibberish Jungle]] like environment, as | '''Outta My Way''' is the first level of the [[Jibberish Jungle|Ticklish Temples]], a world in ''[[Rayman Origins]]''. This marks the return of the [[Jibberish Jungle]]-like environment, as the heroes begin their search for one of the [[Four Kings]], [[Carnivora]]. This level is not included in the [[Back to Origins]] painting in ''[[Rayman Legends]]''. | ||
==Area 1== | ==Area 1== | ||
As the level begins, the heroes will need to safely jump across some thin platforms while defeating the [[Livingstone|Lividstones]] standing on them. The [[#Secret area 1|first secret area]] can be found by [[crush attack]]ing a [[bouncy flower]] and bouncing to a vine above, where the entrance is nearby. As the heroes proceed, they will reach an area where a platform sinks and there are foreground vines. They can drop down to a platform below, where the first [[Skull Coin]] can be found. The second [[Skull Coin]] can be acquired if the heroes perform the [[wall run]]ing ability on a tall platform, just to the right of the [[Water lily|water lilies]]. As the heroes advance to the exit, they will encounter enemies from the [[Sea of Serendipity]]: the [[blowfish]], and two [[spiky fish]]. | |||
===Secret | <gallery widths="320px" heights="180px"> | ||
[[File:Outta My Way 2.jpg|thumb | Outta My Way 1.jpg|[[Rayman]] about to jump on a [[Livingstone|Lividstone]]. | ||
The | Outta My Way 3.jpg|The levels now contain underwater sections, as [[Rayman]] now has the ability to [[Swimming|swim]] underwater. | ||
</gallery> | |||
===Secret area 1=== | |||
[[File:Outta My Way 2.jpg|320px|thumb|The first secret area.]] | |||
The heroes can defeat the three [[Livingstone|Lividstones]] on the bottom in two ways: one way is to manually defeat them one by one, and the other is to hit the red [[explosive bulb]]s, making geysers appear, which send two of the three [[Livingstone|Lividstones]] into the path of the [[live missile]]s. Either way, the geyser on the right will need to be used to reach a platform on the left, where two more [[Livingstone|Lividstones]] will be guarding the [[Electoon]] [[cage]]. Once all the enemies have been defeated, the [[cage]] can be broken. | |||
{{Clear}} | |||
===Relic 1=== | |||
[[File:Outta My Way first relic.png|thumb|320px|The first [[relic]] can be found on the platform to the left of [[Rayman]].]] | |||
The first [[relic]] can be found in this area; it is located in front of a platform to the left of the first [[Skull Coin]]. | |||
{{Clear}} | {{Clear}} | ||
==Area 2== | ==Area 2== | ||
[[ | Near the beginning of this area, a [[hunter]] will shoot red homing [[live missile]]s which will follow the heroes; they will continue to track the heroes until they collide with something solid, land in the water, or eventually explode. A temporary power can be collected; if the heroes dive into the water and [[Swimming|swim]] over to the wall on the left, the [[Flying Punch]] can be found, which will shoot long distances. The third [[Skull Coin]] can be collected by using the [[Livingstone|Lividstones]], or by [[Helicopter|hovering]] over to it after getting a [[running]] start. To reach the exit, the heroes need to safely land on top of the incoming [[live missile]]s, or spin attack, jump, and [[Helicopter|hover]], where they can just barely grab the ledge. | ||
[[ | |||
<gallery widths="320px" heights="180px"> | |||
Outta My Way 4.jpg|A [[hunter]] shooting a red [[live missile]]. | |||
Outta My Way 5.jpg|The heroes can reach the [[Skull Coin]] by jumping on the [[Livingstone|Lividstones]] or by [[Helicopter|hovering]]. | |||
</gallery> | |||
===Relic 2=== | |||
[[File:Outta My Way second relic.png|thumb|320px|The second [[relic]] can be found underwater just to the right of [[Rayman]].]] | |||
The second [[relic]] can be found in this area; it is located underwater near the exit. | |||
{{ | {{clear}} | ||
==Area 3== | ==Area 3== | ||
In this area, a [[hunter]] will start shooting homing red [[live missile]]s at the heroes from a platform above; the fourth [[Skull Coin]] of the level is located behind him. A wooden barricade is located to the right of another [[hunter]]; [[crush attack]]ing through it will lead the heroes to the [[#Secret area 2|second secret area]]. Afterwards, the heroes can collect the fifth [[Skull Coin]] if they [[crush attack]] a [[bouncy flower]], bouncing over the [[spiky flower]]s. The exit can be found to the right of the [[Livingstone|Lividstone]]. | |||
===Secret | <gallery widths="320px" heights="180px"> | ||
[[File:Outta My Way 8.jpg|thumb | Outta My Way 6.jpg|A platform with three [[heart]] bottles. | ||
Outta My Way 7.jpg|Another [[hunter]] shooting [[live missile]]s. | |||
Outta My Way 9.jpg|Several [[spiky platform]]s. | |||
</gallery> | |||
===Secret area 2=== | |||
[[File:Outta My Way 8.jpg|320px|thumb|The second secret area.]] | |||
The heroes will need to reach a large quantity of [[Livingstone|Lividstones]] while avoiding the [[spiky flower]]s. Once the [[Livingstone|Lividstones]] have been defeated, the heroes can hit the [[bulb]] on the left to make the [[spiky flower]]s retract, and the [[cage]] can be broken. | |||
{{clear}} | |||
===Relic 3=== | |||
[[File:Outta My Way third relic.png|thumb|320px|The third relic can be found in line with the statue's hand directly above [[Rayman]].]] | |||
The third [[relic]] can be found in this area; it is located in line with a statue's hand near the exit. | |||
{{Clear}} | {{Clear}} | ||
==Area 4== | ==Area 4== | ||
The platforms will begin to collapse | The platforms in this area will begin to collapse; the heroes need to hurry before the platforms sink into the abyss. If the heroes move quickly, they can reach the sixth [[Skull Coin]] before the platforms sink too low. At the end of the area, the heroes will need to defeat a [[Livingstone|Lividstone]] and a [[hunter]] to break the [[Electoon]] [[cage]], ending the level. The heroes will pose on the [[The Photographer|photoboard]] as [[The Magician (Rayman Origins)|the Magician]] waits for the total amount of [[Lum (UbiArt games)|Lums]] that have been collected throughout the level. | ||
<gallery widths="320px" heights="180px"> | |||
Outta My Way 10.jpg|A [[Lum King]]. | |||
Outta My Way 11.jpg|A [[Livingstone|Lividstone]]. | |||
Outta My Way 12.jpg|The end of the level with the [[cage]]. | |||
|} | </gallery> | ||
==Names in other languages== | |||
{{Names | |||
|en=Outta My Way | |||
|cs=Z cesty | |||
|nl=Opzij, opzij | |||
|fr=Hors de mon chemin | |||
|de=Aus dem Weg | |||
|hu=El az utamból! | |||
|it=Pistaaa! | |||
|ja=どいて どいて! | |||
|pl=Zejdź mi z drogi | |||
|pt=Fora do meu caminho | |||
|ru=Прочь с дороги | |||
|es=¡Que pasoooo! | |||
}} | |||
==External links== | ==External links== | ||
* [ | * [https://www.youtube.com/watch?v=pzL-O22ko0k Outta My Way playthrough at YouTube (PC version) (Normal walkthrough + Lums Medal)] | ||
* [ | * [https://www.youtube.com/watch?v=HTphHgqGy10 Outta My Way playthrough at YouTube (PC version) (Speed Trophy)] | ||
{{RaymanOriginslocations}} | {{RaymanOriginslocations}} | ||
[[fr:Hors de mon chemin]] | [[fr:Hors de mon chemin]] | ||
[[hu:El az utamból!]] | |||
[[it:Pistaaa!]] | |||
[[pl:Zejdź mi z drogi]] | [[pl:Zejdź mi z drogi]] | ||
[[es:¡Que pasoooo!]] | |||
[[Category:Places from Rayman Origins]] | [[Category:Places from Rayman Origins]] | ||
Latest revision as of 15:45, 27 March 2026
| Outta My Way | |||||
|---|---|---|---|---|---|
 | |||||
| ← Golly G. Golem | Up And Down → | ||||
Outta My Way is the first level of the Ticklish Temples, a world in Rayman Origins. This marks the return of the Jibberish Jungle-like environment, as the heroes begin their search for one of the Four Kings, Carnivora. This level is not included in the Back to Origins painting in Rayman Legends.
Area 1
As the level begins, the heroes will need to safely jump across some thin platforms while defeating the Lividstones standing on them. The first secret area can be found by crush attacking a bouncy flower and bouncing to a vine above, where the entrance is nearby. As the heroes proceed, they will reach an area where a platform sinks and there are foreground vines. They can drop down to a platform below, where the first Skull Coin can be found. The second Skull Coin can be acquired if the heroes perform the wall runing ability on a tall platform, just to the right of the water lilies. As the heroes advance to the exit, they will encounter enemies from the Sea of Serendipity: the blowfish, and two spiky fish.
-
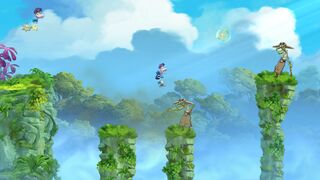 Rayman about to jump on a Lividstone.
 -


Secret area 1

The heroes can defeat the three Lividstones on the bottom in two ways: one way is to manually defeat them one by one, and the other is to hit the red explosive bulbs, making geysers appear, which send two of the three Lividstones into the path of the live missiles. Either way, the geyser on the right will need to be used to reach a platform on the left, where two more Lividstones will be guarding the Electoon cage. Once all the enemies have been defeated, the cage can be broken.
Relic 1

The first relic can be found in this area; it is located in front of a platform to the left of the first Skull Coin.
Area 2
Near the beginning of this area, a hunter will shoot red homing live missiles which will follow the heroes; they will continue to track the heroes until they collide with something solid, land in the water, or eventually explode. A temporary power can be collected; if the heroes dive into the water and swim over to the wall on the left, the Flying Punch can be found, which will shoot long distances. The third Skull Coin can be collected by using the Lividstones, or by hovering over to it after getting a running start. To reach the exit, the heroes need to safely land on top of the incoming live missiles, or spin attack, jump, and hover, where they can just barely grab the ledge.
-
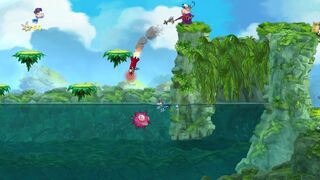 A hunter shooting a red live missile.
 -


Relic 2

The second relic can be found in this area; it is located underwater near the exit.
Area 3
In this area, a hunter will start shooting homing red live missiles at the heroes from a platform above; the fourth Skull Coin of the level is located behind him. A wooden barricade is located to the right of another hunter; crush attacking through it will lead the heroes to the second secret area. Afterwards, the heroes can collect the fifth Skull Coin if they crush attack a bouncy flower, bouncing over the spiky flowers. The exit can be found to the right of the Lividstone.
-
 A platform with three heart bottles.
 -
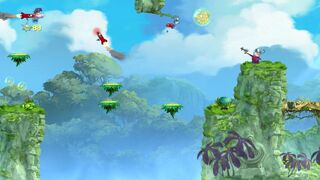 Another hunter shooting live missiles.
 -
 Several spiky platforms.


Secret area 2

The heroes will need to reach a large quantity of Lividstones while avoiding the spiky flowers. Once the Lividstones have been defeated, the heroes can hit the bulb on the left to make the spiky flowers retract, and the cage can be broken.
Relic 3

The third relic can be found in this area; it is located in line with a statue's hand near the exit.
Area 4
The platforms in this area will begin to collapse; the heroes need to hurry before the platforms sink into the abyss. If the heroes move quickly, they can reach the sixth Skull Coin before the platforms sink too low. At the end of the area, the heroes will need to defeat a Lividstone and a hunter to break the Electoon cage, ending the level. The heroes will pose on the photoboard as the Magician waits for the total amount of Lums that have been collected throughout the level.
-
 A Lum King.
 -
 A Lividstone.
 -
 The end of the level with the cage.


Names in other languages
| Language | Name |
|---|---|
| English | Outta My Way |
| Czech | Z cesty |
| Dutch | Opzij, opzij |
| French | Hors de mon chemin |
| German | Aus dem Weg |
| Hungarian | El az utamból! |
| Italian | Pistaaa! |
| Japanese | どいて どいて! |
| Polish | Zejdź mi z drogi |
| Portuguese | Fora do meu caminho |
| Russian | Прочь с дороги |
| Spanish | ¡Que pasoooo! |
External links
- Outta My Way playthrough at YouTube (PC version) (Normal walkthrough + Lums Medal)
- Outta My Way playthrough at YouTube (PC version) (Speed Trophy)