Port 'O Panic: Difference between revisions
Kadeleather (talk | contribs) Replaced content with "YOU'RE A SQUID NOW YOU'RE A KID NOW" |
m Reverted edits by Kadeleather (talk) to last revision by Ray502 |
||
| Line 1: | Line 1: | ||
{{Template:ROLevel | |||
| name = Port 'O Panic | |||
| image = [[Image:22 port o panic.jpg|center|320px|''Port 'O Panic'']] | |||
| preceded by = [[Aim for the Eel!]] | |||
| followed by = [[Swimming with Stars]] | |||
| world = [[Sea of Serendipity]] | |||
| type = [[File:RO-Medallion-SixSlots.png|center|''Six slots'']] | |||
| medallion slot 1 = [[File:RO-Cage.png|50px|Cage]] | |||
| medallion slot 2 = [[File:RO-Cage.png|50px|Cage]] | |||
| medallion slot 3 = [[File:RO-Cage.png|50px|Cage]] | |||
| medallion slot 4 = [[File:Icon1RO.png|15px|''1'']][[File:Icon5RO.png|15px|''5'']][[File:Icon0RO.png|15px|''0'']] [[File:RO-Lums.png|30px|Lums]] | |||
| medallion slot 5 = [[File:Icon3RO.png|15px|''3'']][[File:Icon0RO.png|15px|''0'']][[File:Icon0RO.png|15px|''0'']] [[File:RO-Lums.png|30px|Lums]] | |||
| medallion slot 6 = [[File:Icon1RO.png|15px|''1'']][[File:IconColonRO.png|6px|'':'']][[File:Icon2RO.png|15px|''2'']][[File:Icon0RO.png|15px|''0'']] [[File:RO-Clock.png|30px|Time]] | |||
| medal = [[File:Icon3RO.png|15px|''3'']][[File:Icon5RO.png|15px|''5'']][[File:Icon0RO.png|15px|''0'']] | |||
| coin = [[File:Icon5RO.png|15px|''5'']] | |||
| cup = [[File:Icon0RO.png|15px|''0'']][[File:IconColonRO.png|6px|'':'']][[File:Icon5RO.png|15px|''5'']][[File:Icon5RO.png|15px|''5'']] | |||
| relic = [[File:Icon3RO.png|15px|''3'']] | |||
}} | |||
'''Port 'O Panic''' is the first level of the [[Sea of Serendipity]], the fourth world in ''[[Rayman Origins]]''. [[Rayman]] and his team of heroes in this level meet the fourth [[nymph]], [[Annetta Fish]], who is trapped in the jaw of a [[Antitoon|Darktoon]]. This is the first level from this world and thirteenth overall that's not included in the [[Back to Origins]] mode in ''[[Rayman Legends]]''. | |||
==Area 1== | |||
Throughout the beginning area, [[Red Wizard]]s run back and forth, while being caught under the jaw of [[Antitoon|Darktoons]]. If the heroes destroy them all and save the [[Red Wizard]]s, the player will receive the trophy/achievement, [[No Panic!]]. The first secret area of the level can be found by using a wooden teeter-totter to get up to one of the [[Red Wizard]]s on the left, then climbing up some platforms leading up to the door. The team can continue on, avoiding scattered flames and saving more [[Red Wizard]]s. The players may notice that if they attempt to [[Swimming|swim]] underwater to get some [[Lum (UbiArt games)|Lums]], the heroes will automatically float back up. The power can be acquired by saving [[Annetta Fish]] later in the level. The team can advance now to the closely exit. | |||
<gallery widths="320px" heights="180px"> | |||
Port 'O Panic 1.jpg|This wooden teeter-totter can be used to reach the first secret area. | |||
Port 'O Panic 3.jpg|Freeing all of the [[Red Wizard]]s from the [[Antitoon|Darktoons]] will reward the player with the '[[No Panic!]]' achievement. | |||
</gallery> | |||
===Secret area 1=== | |||
[[File:Port 'O Panic 2.jpg|320px|thumb|right|The first secret area.]] | |||
The objective in this secret area is to use the ropes and geyser to reach and defeat the sleeping [[Antitoon|Darktoon]]. Once all three are defeated, the [[Electoon]] [[cage]] can be broken. | |||
{{Clear}} | |||
==Area 2== | |||
This is the area where the heroes meet [[Annetta Fish]], the fourth [[nymph]] of the game. Like the other three, she is trapped underneath the jaw of a [[Antitoon|Darktoon]]. The [[Antitoon|Darktoon]] runs away upon entry, so the team must chase after it. Shortly near the exit, the [[Antitoon|Darktoon]] makes a long jump to a [[warship]], controlled by a [[Livingstone|Lividstone]]. | |||
<gallery widths="320px" heights="180px"> | |||
Port 'O Panic 4.jpg|[[Annetta Fish]] has been trapped by a [[Antitoon|Darktoon]]. | |||
Port 'O Panic 5.jpg|[[Annetta Fish]] calling out for the player to save her. | |||
Port 'O Panic 6.jpg|The [[Antitoon|Darktoon]] will attempt to outrun the player before jumping onto a [[warship]] seen in the background. | |||
</gallery> | |||
==Area 3== | |||
[[File:Port 'O Panic 7.jpg|320px|thumb|left|The [[warship]] will constantly shoot [[helicopter bomb]]s at the player, which will also break many of the wooden structures in the level.]] | |||
The [[warship]] will now attempt to destroy the heroes by shooting [[helicopter bomb]]s at them. This is a similar attack force to how the [[Robo-Pirate]] [[warship]]s attempted to do to [[Rayman]] in ''[[Rayman 2]]''. As the [[warship]] continues to shoot [[Helicopter bomb|bombs]], the team must also avoid stationary and falling fireballs. The first [[Skull Coin]] can be collected by using small wooden barricades to move upwards. | |||
{{Clear}} | |||
==Area 4== | |||
The chase continues, as the [[warship]] still tries to destroy the heroes. The second [[Skull Coin]] can be collected by taking the lower path and escaping from a different [[Helicopter bomb|bomb]] pouring out flames from the higher path. The third [[Skull Coin]] is found above and in between two multi-wooden platforms. Finally, the [[Antitoon|Darktoon]] gets off the ship, allowing the players to destroy it, and receive the power to dive from [[Annetta Fish]]. The new power can be used to get the fourth [[Skull Coin]] of the level, hidden behind some underwater foreground scenery, as well as reaching the exit. | |||
<gallery widths="320px" heights="180px"> | |||
Port 'O Panic 8.jpg|Fireballs keep falling down, causing most of the structures to be set on fire. | |||
Port 'O Panic 9.jpg|The [[Skull Coin]] can only be collected before the wooden structures collapse. | |||
Port 'O Panic 10.jpg|Eventually the [[Antitoon|Darktoon]] with [[Annetta Fish]] will stop, letting the player free [[Annetta Fish]]. | |||
Port 'O Panic 12.jpg|Freeing [[Annetta Fish]] will give the player the power to swim. | |||
Port 'O Panic 13.jpg|[[Swimming]] is done automatically, with the player being able to move using the movement controls. | |||
</gallery> | |||
==Area 5== | |||
While underwater, the heroes come across many [[fish]]es in different colours singing a tune. Once they pass them, the team enters into an underwater cavern. The second secret area can be found by [[swimming]] downwards in between a tight gap. Once the [[Electoon]]s are saved, the heroes can advance on, avoiding the pink/redish [[spiky fish]]es. Along the way, the team will also encounter electrical [[jellyfish]], and sharp spikes that appear if the team gets close to them. The fifth [[Skull Coin]] can be retrieved by avoiding a small group of [[jellyfish]] hovering around it. The heroes can now advance to the exit. | |||
<gallery widths="320px" heights="180px"> | |||
Port 'O Panic 14.jpg|[[Rayman]] [[swimming]] with a bunch of differently coloured [[fish]]. | |||
Port 'O Panic 16.jpg|A few [[spiky fish]] can be seen before the area ends. | |||
</gallery> | |||
===Secret area 2=== | |||
[[File:Port 'O Panic 15.jpg|320px|thumb|right|The second secret area.]] | |||
In this secret area, there are a bunch of friendly [[fish]]es, but also some not so friendly [[Redfish|red fishes]] with swords. The team can destroy the [[Redfish|red fishes]], which allow the [[Electoon]] [[cage]] on land to be broken. | |||
{{Clear}} | |||
==Area 6== | |||
There are several [[Livingstone|Lividstones]] guarding the [[cage]] around the area, so the heroes have to defeat them all. A teeter-totter can be used to send a [[Helicopter bomb|bomb]] flying towards the [[Livingstone|Lividstones]] to destroy them easily. The [[cage]] will then be able to be broken to end the level. Then the team poses on the [[The Photographer|photoboard]] as [[the Magician]] waits for the total amount of [[Lum (UbiArt games)|Lums]] that were collected in the level. | |||
<gallery widths="320px" heights="180px"> | |||
Port 'O Panic 17.jpg|The final area has a bunch of [[Livingstone|Lividstones]]. | |||
Port 'O Panic 18.jpg|Using the teeter-tooter, the player can send the [[Helicopter bomb|bomb]] to take out the [[Livingstone|Lividstones]]. | |||
</gallery> | |||
==External links== | |||
* [http://www.youtube.com/watch?v=qsojIMM2W1U Port 'O Panic playthrough at YouTube (PC version) (Saving the nymph only)] | |||
* [http://www.youtube.com/watch?v=_ss8TXIQpYA Port 'O Panic playthrough at YouTube (PC version) (Normal walkthrough + Lums Medal)] | |||
* [http://www.youtube.com/watch?v=VGNEZ9vp8OQ Port 'O Panic playthrough at YouTube (PC version) (Speed Trophy)] | |||
{{RaymanOriginslocations}} | |||
[[fr:Panique au port]] | |||
[[pl:Port paniki]] | |||
[[Category:Places from Rayman Origins]] | |||
Revision as of 14:23, 19 May 2018
| Port 'O Panic | |||||||||||
|---|---|---|---|---|---|---|---|---|---|---|---|
 | |||||||||||
| ← Aim for the Eel! | Swimming with Stars → | ||||||||||
 Sea of Serendipity Sea of Serendipity
| |||||||||||
   
|

|

| |||||||||
   
|
|
  
| |||||||||

|

| ||||||||||

Port 'O Panic is the first level of the Sea of Serendipity, the fourth world in Rayman Origins. Rayman and his team of heroes in this level meet the fourth nymph, Annetta Fish, who is trapped in the jaw of a Darktoon. This is the first level from this world and thirteenth overall that's not included in the Back to Origins mode in Rayman Legends.
Area 1
Throughout the beginning area, Red Wizards run back and forth, while being caught under the jaw of Darktoons. If the heroes destroy them all and save the Red Wizards, the player will receive the trophy/achievement, No Panic!. The first secret area of the level can be found by using a wooden teeter-totter to get up to one of the Red Wizards on the left, then climbing up some platforms leading up to the door. The team can continue on, avoiding scattered flames and saving more Red Wizards. The players may notice that if they attempt to swim underwater to get some Lums, the heroes will automatically float back up. The power can be acquired by saving Annetta Fish later in the level. The team can advance now to the closely exit.
-
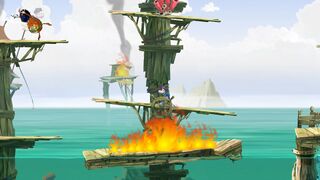 This wooden teeter-totter can be used to reach the first secret area.
 -
 Freeing all of the Red Wizards from the Darktoons will reward the player with the 'No Panic!' achievement.


Secret area 1

The objective in this secret area is to use the ropes and geyser to reach and defeat the sleeping Darktoon. Once all three are defeated, the Electoon cage can be broken.
Area 2
This is the area where the heroes meet Annetta Fish, the fourth nymph of the game. Like the other three, she is trapped underneath the jaw of a Darktoon. The Darktoon runs away upon entry, so the team must chase after it. Shortly near the exit, the Darktoon makes a long jump to a warship, controlled by a Lividstone.
-
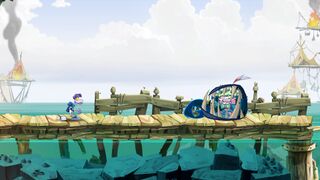 Annetta Fish has been trapped by a Darktoon.
 -
 Annetta Fish calling out for the player to save her.
 -


Area 3

The warship will now attempt to destroy the heroes by shooting helicopter bombs at them. This is a similar attack force to how the Robo-Pirate warships attempted to do to Rayman in Rayman 2. As the warship continues to shoot bombs, the team must also avoid stationary and falling fireballs. The first Skull Coin can be collected by using small wooden barricades to move upwards.
Area 4
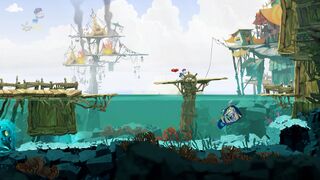
The chase continues, as the warship still tries to destroy the heroes. The second Skull Coin can be collected by taking the lower path and escaping from a different bomb pouring out flames from the higher path. The third Skull Coin is found above and in between two multi-wooden platforms. Finally, the Darktoon gets off the ship, allowing the players to destroy it, and receive the power to dive from Annetta Fish. The new power can be used to get the fourth Skull Coin of the level, hidden behind some underwater foreground scenery, as well as reaching the exit.
-
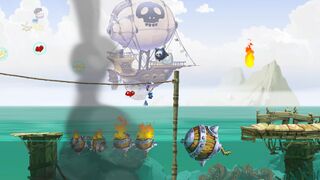 Fireballs keep falling down, causing most of the structures to be set on fire.
 -
 The Skull Coin can only be collected before the wooden structures collapse.
 -
-
 Freeing Annetta Fish will give the player the power to swim.
 -
 Swimming is done automatically, with the player being able to move using the movement controls.


Area 5
While underwater, the heroes come across many fishes in different colours singing a tune. Once they pass them, the team enters into an underwater cavern. The second secret area can be found by swimming downwards in between a tight gap. Once the Electoons are saved, the heroes can advance on, avoiding the pink/redish spiky fishes. Along the way, the team will also encounter electrical jellyfish, and sharp spikes that appear if the team gets close to them. The fifth Skull Coin can be retrieved by avoiding a small group of jellyfish hovering around it. The heroes can now advance to the exit.
-

-
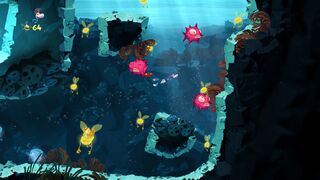 A few spiky fish can be seen before the area ends.


Secret area 2

In this secret area, there are a bunch of friendly fishes, but also some not so friendly red fishes with swords. The team can destroy the red fishes, which allow the Electoon cage on land to be broken.
Area 6
There are several Lividstones guarding the cage around the area, so the heroes have to defeat them all. A teeter-totter can be used to send a bomb flying towards the Lividstones to destroy them easily. The cage will then be able to be broken to end the level. Then the team poses on the photoboard as the Magician waits for the total amount of Lums that were collected in the level.
-
 The final area has a bunch of Lividstones.
 -
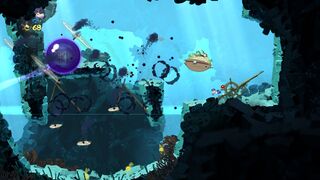 Using the teeter-tooter, the player can send the bomb to take out the Lividstones.


External links
- Port 'O Panic playthrough at YouTube (PC version) (Saving the nymph only)
- Port 'O Panic playthrough at YouTube (PC version) (Normal walkthrough + Lums Medal)
- Port 'O Panic playthrough at YouTube (PC version) (Speed Trophy)