Port 'O Panic: Difference between revisions
No edit summary |
Hunchman801 (talk | contribs) Added language links |
||
| (11 intermediate revisions by 4 users not shown) | |||
| Line 1: | Line 1: | ||
{{ | {{ROLevel | ||
| name = Port 'O Panic | | name = Port 'O Panic | ||
| image = [[ | | image = [[File:22 port o panic.jpg|center|320px|Port 'O Panic]] | ||
| preceded by = [[Aim for the Eel!]] | | preceded by = [[Aim for the Eel!]] | ||
| followed by = [[Swimming with Stars]] | | followed by = [[Swimming with Stars]] | ||
| world = [[Sea of Serendipity]] | | world = [[Sea of Serendipity]] | ||
| medallion slot 1 = Cage | |||
| medallion slot 1 = | | medallion slot 2 = Cage | ||
| medallion slot 2 = | | medallion slot 3 = Cage | ||
| medallion slot 3 = | | medallion slot 4 = Lums | ||
| medallion slot 4 = | | medallion slot 4 number = 150 | ||
| medallion slot 5 = | | medallion slot 5 = Lums | ||
| medallion slot 6 = | | medallion slot 5 number = 300 | ||
| | | medallion slot 6 = Time | ||
| | | medallion slot 6 number = 1:20 | ||
| cup = | | medal = 350 | ||
| | | cup = 0:55 | ||
| skull coins = 5 | |||
| relics = 3 | |||
| format numbers = true | |||
}} | }} | ||
'''Port 'O Panic''' is the first level of the [[Sea of Serendipity]], the fourth world in ''[[Rayman Origins]]''. In this level, the heroes meet the fourth [[nymph]], [[Annetta Fish]], who is trapped in the jaw of a [[Antitoon|Darktoon]]. This is | '''Port 'O Panic''' is the first level of the [[Sea of Serendipity]], the fourth world in ''[[Rayman Origins]]''. In this level, the heroes meet the fourth [[nymph]], [[Annetta Fish]], who is trapped in the jaw of a [[Antitoon|Darktoon]]. This level is not included in the [[Back to Origins]] painting in ''[[Rayman Legends]]''. | ||
==Area 1== | ==Area 1== | ||
Throughout the first area, [[Red Wizard]]s are seen | Throughout the first area, [[Red Wizard]]s are seen running back and forth while caught under the jaws of [[Antitoon|Darktoons]]. If the heroes defeat all of the [[Antitoon|Darktoons]] and save the [[Red Wizard]]s, the player will unlock the trophy/achievement "[[No Panic!]]". The first secret area of the level can be found by using a wooden seesaw to reach a [[Red Wizard]] to its upper left; the heroes can find the entrance to their left by climbing up some platforms. As the heroes proceed, they will need to avoid scattered flames, while optionally saving the [[Red Wizard]]s. They cannot [[Swimming|swim]] underwater yet, meaning some underwater [[Lum (UbiArt games)|Lums]] cannot be obtained on their first visit; the power to do so can be acquired by saving [[Annetta Fish]] later in the level. The heroes can then proceed to find the exit nearby. | ||
<gallery widths="320px" heights="180px"> | <gallery widths="320px" heights="180px"> | ||
Port 'O Panic 1.jpg|This wooden | Port 'O Panic 1.jpg|This wooden seesaw can be used to reach the first secret area. | ||
Port 'O Panic 3.jpg|Freeing all of the [[Red Wizard]]s from the [[Antitoon|Darktoons]] will reward the player with the | Port 'O Panic 3.jpg|Freeing all of the [[Red Wizard]]s from the [[Antitoon|Darktoons]] will reward the player with the "[[No Panic!]]" achievement. | ||
</gallery> | </gallery> | ||
===Secret area 1=== | ===Secret area 1=== | ||
[[File:Port 'O Panic 2.jpg | [[File:Port 'O Panic 2.jpg|thumb|320px|The first secret area.]] | ||
In this secret area, the heroes will need to defeat the sleeping [[Antitoon|Darktoons]], which they can reach by using ropes and a geyser. Once all three have been defeated, the [[Electoon]] [[cage]] can be broken. | In this secret area, the heroes will need to defeat the sleeping [[Antitoon|Darktoons]], which they can reach by using ropes and a geyser. Once all three have been defeated, the [[Electoon]] [[cage]] can be broken. | ||
| Line 35: | Line 39: | ||
==Area 2== | ==Area 2== | ||
In this area, the heroes meet [[Annetta Fish]], the fourth [[nymph]] of the game. Like the other three, she is trapped between the jaws of a [[Antitoon|Darktoon]]. The [[Antitoon|Darktoon]] flees upon seeing the heroes, so they will need to chase after it. As the heroes approach the exit, the [[Antitoon|Darktoon]] makes a long jump to a [[warship]] | In this area, the heroes meet [[Annetta Fish]], the fourth [[nymph]] of the game. Like the other three, she is trapped between the jaws of a [[Antitoon|Darktoon]]. The [[Antitoon|Darktoon]] flees upon seeing the heroes, so they will need to chase after it. As the heroes approach the exit, the [[Antitoon|Darktoon]] makes a long jump to a [[warship]] controlled by a [[Livingstone|Lividstone]]. | ||
<gallery widths="320px" heights="180px"> | <gallery widths="320px" heights="180px"> | ||
Port 'O Panic 4.jpg|[[Annetta Fish]] has been | Port 'O Panic 4.jpg|[[Annetta Fish]] has been captured by a [[Antitoon|Darktoon]]. | ||
Port 'O Panic 5.jpg|[[Annetta Fish]] calling out for the | Port 'O Panic 5.jpg|[[Annetta Fish]] calling out for the heroes to save her. | ||
Port 'O Panic 6.jpg|The [[Antitoon|Darktoon]] will attempt to outrun the | Port 'O Panic 6.jpg|The [[Antitoon|Darktoon]] will attempt to outrun the heroes before jumping onto a [[warship]] seen in the background. | ||
</gallery> | </gallery> | ||
==Area 3== | ==Area 3== | ||
[[File:Port 'O Panic 7.jpg | [[File:Port 'O Panic 7.jpg|thumb|320px|The [[warship]] will constantly shoot [[Helicopter bomb|bombs]] at the heroes, which will also break many of the wooden structures in the level.]] | ||
The [[warship]] will now attempt to defeat the heroes by shooting [[ | |||
The [[warship]] will now attempt to defeat the heroes by shooting [[Helicopter bomb|bombs]] at them. This is a similar to how the [[Robo-Pirate]] [[warship]]s attacked [[Rayman]] in ''[[Rayman 2]]''. As the [[warship]] continues to shoot [[Helicopter bomb|bombs]], the heroes must also avoid stationary and falling fireballs. The first [[Skull Coin]] can be reached by quickly using some small, wooden platforms before the [[warship]] destroys them. | |||
{{Clear}} | {{Clear}} | ||
==Area 4== | ==Area 4== | ||
The chase continues, as the [[warship]] is still attempting to defeat the heroes. The second [[Skull Coin]] can be collected by taking the lower path and escaping from a different type of [[Helicopter bomb|bomb]], which pours out flames from | The chase continues, as the [[warship]] is still attempting to defeat the heroes. The second [[Skull Coin]] can be collected by taking the lower path and escaping from a different type of [[Helicopter bomb|bomb]], which pours out flames from above. The third [[Skull Coin]] can be found above, between two multi-storey wooden platforms. Finally, the [[Antitoon|Darktoon]] departs from the ship, allowing the heroes to defeat it and receive the power to [[Swimming|dive]] from [[Annetta Fish]]. The new power can be used to reach the fourth [[Skull Coin]] of the level, hidden underwater behind some coral to their left. The heroes proceed to the exit, which can be found nearby. | ||
<gallery widths="320px" heights="180px"> | <gallery widths="320px" heights="180px"> | ||
Port 'O Panic 8.jpg|Fireballs keep falling down, causing most of the structures to be set on fire. | Port 'O Panic 8.jpg|Fireballs keep falling down, causing most of the structures to be set on fire. | ||
Port 'O Panic 9.jpg|The [[Skull Coin]] can only be collected before the wooden structures collapse. | Port 'O Panic 9.jpg|The [[Skull Coin]] can only be collected before the wooden structures collapse. | ||
Port 'O Panic 10.jpg|Eventually the [[Antitoon|Darktoon]] | Port 'O Panic 10.jpg|Eventually, the [[Antitoon|Darktoon]] holding [[Annetta Fish]] captive will stop, letting the heroes free the [[nymph]]. | ||
Port 'O Panic 11.jpg|[[Annetta Fish]] once freed from the [[Antitoon|Darktoon]] | |||
Port 'O Panic 12.jpg|Freeing [[Annetta Fish]] will give the | Port 'O Panic 12.jpg|Freeing [[Annetta Fish]] will give the heroes the power to [[Swimming|swim]]. | ||
Port 'O Panic 13.jpg|[[Swimming]] is done automatically, with the | Port 'O Panic 13.jpg|[[Swimming]] is done automatically, with the heroes being able to move using the movement controls. | ||
</gallery> | </gallery> | ||
==Area 5== | ==Area 5== | ||
While underwater, the heroes will encounter | While underwater, the heroes will encounter a shoal of coloured [[friendly fish]] singing a tune. Once they pass them, they will enter an underwater cavern. The second secret area can be found by [[swimming]] downwards into a tight space. Once the [[Electoon]]s are saved, the heroes can proceed while carefully avoiding the pink [[spiky fish]]. Along the way, the heroes will also encounter some electric [[jellyfish]] and sharp [[spiky shell]]s that will pop out as they approach them. The fifth [[Skull Coin]] can be retrieved by avoiding the small group of [[jellyfish]] which are hovering around it. The heroes can now proceed to the exit. | ||
<gallery widths="320px" heights="180px"> | <gallery widths="320px" heights="180px"> | ||
Port 'O Panic 14.jpg|[[Rayman]] [[swimming]] with a | Port 'O Panic 14.jpg|[[Rayman]] [[swimming]] with a large number of differently coloured [[friendly fish]]. | ||
Port 'O Panic 16.jpg|A few [[spiky fish]] can be seen before the area ends. | Port 'O Panic 16.jpg|A few [[spiky fish]] can be seen before the area ends. | ||
</gallery> | </gallery> | ||
===Relic 1=== | ===Relic 1=== | ||
[[File:Port 'O Panic first relic.png|thumb | [[File:Port 'O Panic first relic.png|thumb|320px|The first [[relic]] can be found underwater, just in front of [[Rayman]].]] | ||
The first [[relic]] can be found soon after entering this area; it is located near the | |||
The first [[relic]] can be found soon after entering this area; it is located near the seabed. | |||
{{clear}} | {{clear}} | ||
===Secret area 2=== | ===Secret area 2=== | ||
[[File:Port 'O Panic 15.jpg | [[File:Port 'O Panic 15.jpg|thumb|320px|The second secret area.]] | ||
In this secret area, there are | |||
In this secret area, there are many [[friendly fish]], but also some hostile [[redfish]] with swords. The team can defeat the [[redfish]], which allows the [[Electoon]] [[cage]] on land to be broken. | |||
{{clear}} | {{clear}} | ||
===Relic 2=== | ===Relic 2=== | ||
[[File:Port 'O Panic second relic.png|thumb | [[File:Port 'O Panic second relic.png|thumb|320px|The second [[relic]] can be found underwater on the seabed, just in front of [[Rayman]].]] | ||
The second [[relic]] can be found just past the second secret area; it is located on the seabed. | The second [[relic]] can be found just past the second secret area; it is located on the seabed. | ||
| Line 88: | Line 96: | ||
===Relic 3=== | ===Relic 3=== | ||
[[File:Port 'O Panic third relic.png|thumb | [[File:Port 'O Panic third relic.png|thumb|320px|The third [[relic]] can be found underwater near a pink [[spiky fish]], just in front of [[Rayman]].]] | ||
The third [[relic]] can be found underwater near the exit, close to a pink [[spiky fish]]. | The third [[relic]] can be found underwater near the exit, close to a pink [[spiky fish]]. | ||
| Line 94: | Line 103: | ||
==Area 6== | ==Area 6== | ||
There are several [[Livingstone|Lividstones]] guarding the [[cage]] around the area, so the heroes will need to defeat them all. A | There are several [[Livingstone|Lividstones]] guarding the [[cage]] around the area, so the heroes will need to defeat them all. A seesaw can be used to send a [[helicopter bomb]] flying towards the [[Livingstone|Lividstones]] to defeat them all easily. Once they have all been defeated, the [[cage]] can be broken, ending the level; the heroes will then pose on the [[The Photographer|photoboard]] as [[The Magician (Rayman Origins)|the Magician]] counts the total number of [[Lum (UbiArt games)|Lums]] collected throughout the level. | ||
<gallery widths="320px" heights="180px"> | <gallery widths="320px" heights="180px"> | ||
Port 'O Panic 17.jpg|The final area | Port 'O Panic 17.jpg|The final area contains many [[Livingstone|Lividstones]]. | ||
Port 'O Panic 18.jpg|Using the | Port 'O Panic 18.jpg|Using the seesaw, the heroes can send the [[helicopter bomb]] to take out the [[Livingstone|Lividstones]]. | ||
</gallery> | </gallery> | ||
==Names in other languages== | |||
{{Names | |||
|en=Port 'O Panic | |||
|cs=Přístav paniky | |||
|nl=Gehavend | |||
|fr=Panique au port | |||
|de=Hafen der Strafen | |||
|hu=Pánik-kikötő | |||
|it=Porto Panico | |||
|ja=パニックの みなと | |||
|pl=Port paniki | |||
|pt=Ai, que susto! | |||
|ru=Порт-Паник | |||
|es=¡Ay, qué miedo! | |||
}} | |||
==External links== | ==External links== | ||
* [ | * [https://www.youtube.com/watch?v=ohlgL-ubSLo Port 'O Panic playthrough at YouTube (PC version) (Normal walkthrough + Lums Medal)] | ||
* [https://www.youtube.com/watch?v=uGWKkEB-2gU Port 'O Panic playthrough at YouTube (PC version) (Speed Trophy)] | |||
* [ | |||
{{RaymanOriginslocations}} | {{RaymanOriginslocations}} | ||
[[fr:Panique au port]] | [[fr:Panique au port]] | ||
[[hu:Pánik-kikötő]] | |||
[[pl:Port paniki]] | [[pl:Port paniki]] | ||
[[Category:Places from Rayman Origins]] | [[Category:Places from Rayman Origins]] | ||
Latest revision as of 15:46, 27 March 2026
| Port 'O Panic | |||||
|---|---|---|---|---|---|
 | |||||
| ← Aim for the Eel! | Swimming with Stars → | ||||
 Sea of Serendipity Sea of Serendipity
| |||||
   
|

|

| |||
   
|
|
  
| |||

|

| ||||

|

| ||||

Port 'O Panic is the first level of the Sea of Serendipity, the fourth world in Rayman Origins. In this level, the heroes meet the fourth nymph, Annetta Fish, who is trapped in the jaw of a Darktoon. This level is not included in the Back to Origins painting in Rayman Legends.
Area 1
Throughout the first area, Red Wizards are seen running back and forth while caught under the jaws of Darktoons. If the heroes defeat all of the Darktoons and save the Red Wizards, the player will unlock the trophy/achievement "No Panic!". The first secret area of the level can be found by using a wooden seesaw to reach a Red Wizard to its upper left; the heroes can find the entrance to their left by climbing up some platforms. As the heroes proceed, they will need to avoid scattered flames, while optionally saving the Red Wizards. They cannot swim underwater yet, meaning some underwater Lums cannot be obtained on their first visit; the power to do so can be acquired by saving Annetta Fish later in the level. The heroes can then proceed to find the exit nearby.
-
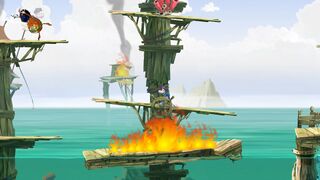 This wooden seesaw can be used to reach the first secret area.
 -
 Freeing all of the Red Wizards from the Darktoons will reward the player with the "No Panic!" achievement.


Secret area 1

In this secret area, the heroes will need to defeat the sleeping Darktoons, which they can reach by using ropes and a geyser. Once all three have been defeated, the Electoon cage can be broken.
Area 2
In this area, the heroes meet Annetta Fish, the fourth nymph of the game. Like the other three, she is trapped between the jaws of a Darktoon. The Darktoon flees upon seeing the heroes, so they will need to chase after it. As the heroes approach the exit, the Darktoon makes a long jump to a warship controlled by a Lividstone.
-
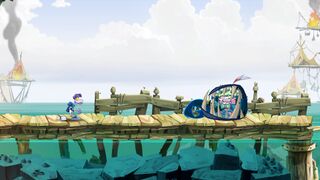 Annetta Fish has been captured by a Darktoon.
 -
 Annetta Fish calling out for the heroes to save her.
 -


Area 3

The warship will now attempt to defeat the heroes by shooting bombs at them. This is a similar to how the Robo-Pirate warships attacked Rayman in Rayman 2. As the warship continues to shoot bombs, the heroes must also avoid stationary and falling fireballs. The first Skull Coin can be reached by quickly using some small, wooden platforms before the warship destroys them.
Area 4
The chase continues, as the warship is still attempting to defeat the heroes. The second Skull Coin can be collected by taking the lower path and escaping from a different type of bomb, which pours out flames from above. The third Skull Coin can be found above, between two multi-storey wooden platforms. Finally, the Darktoon departs from the ship, allowing the heroes to defeat it and receive the power to dive from Annetta Fish. The new power can be used to reach the fourth Skull Coin of the level, hidden underwater behind some coral to their left. The heroes proceed to the exit, which can be found nearby.
-
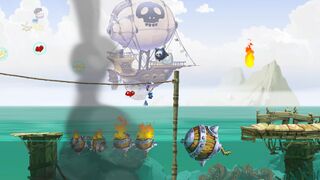 Fireballs keep falling down, causing most of the structures to be set on fire.
 -
 The Skull Coin can only be collected before the wooden structures collapse.
 -
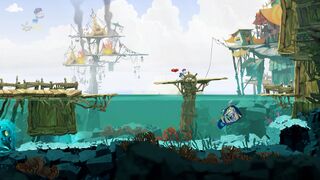
-
 Annetta Fish once freed from the Darktoon
 -
 Freeing Annetta Fish will give the heroes the power to swim.
 -
 Swimming is done automatically, with the heroes being able to move using the movement controls.


Area 5
While underwater, the heroes will encounter a shoal of coloured friendly fish singing a tune. Once they pass them, they will enter an underwater cavern. The second secret area can be found by swimming downwards into a tight space. Once the Electoons are saved, the heroes can proceed while carefully avoiding the pink spiky fish. Along the way, the heroes will also encounter some electric jellyfish and sharp spiky shells that will pop out as they approach them. The fifth Skull Coin can be retrieved by avoiding the small group of jellyfish which are hovering around it. The heroes can now proceed to the exit.
-

-
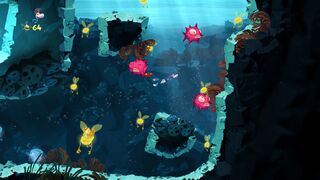 A few spiky fish can be seen before the area ends.


Relic 1

The first relic can be found soon after entering this area; it is located near the seabed.
Secret area 2

In this secret area, there are many friendly fish, but also some hostile redfish with swords. The team can defeat the redfish, which allows the Electoon cage on land to be broken.
Relic 2

The second relic can be found just past the second secret area; it is located on the seabed.
Relic 3

The third relic can be found underwater near the exit, close to a pink spiky fish.
Area 6
There are several Lividstones guarding the cage around the area, so the heroes will need to defeat them all. A seesaw can be used to send a helicopter bomb flying towards the Lividstones to defeat them all easily. Once they have all been defeated, the cage can be broken, ending the level; the heroes will then pose on the photoboard as the Magician counts the total number of Lums collected throughout the level.
-
 The final area contains many Lividstones.
 -
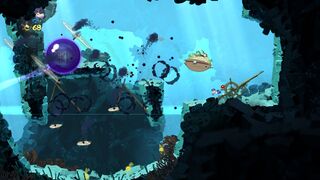 Using the seesaw, the heroes can send the helicopter bomb to take out the Lividstones.


Names in other languages
| Language | Name |
|---|---|
| English | Port 'O Panic |
| Czech | Přístav paniky |
| Dutch | Gehavend |
| French | Panique au port |
| German | Hafen der Strafen |
| Hungarian | Pánik-kikötő |
| Italian | Porto Panico |
| Japanese | パニックの みなと |
| Polish | Port paniki |
| Portuguese | Ai, que susto! |
| Russian | Порт-Паник |
| Spanish | ¡Ay, qué miedo! |
External links
- Port 'O Panic playthrough at YouTube (PC version) (Normal walkthrough + Lums Medal)
- Port 'O Panic playthrough at YouTube (PC version) (Speed Trophy)