Moseying the Mountain: Difference between revisions
m →Area 6 |
Hunchman801 (talk | contribs) Added language links |
||
| (24 intermediate revisions by 8 users not shown) | |||
| Line 1: | Line 1: | ||
{{ | {{ROLevel | ||
| name = Moseying the Mountain | | name = Moseying the Mountain | ||
| image = [[ | | image = [[File:28 moseying the mountain.jpg|center|320px|Moseying the Mountain]] | ||
| preceded by = [[Fire When Wetty]] | | preceded by = [[Fire When Wetty]] | ||
| followed by = [[Mystical Munkeys]] | | followed by = [[Mystical Munkeys]] | ||
| world = [[Mystical Pique]] | | world = [[Mystical Pique]] | ||
| medallion slot 1 = Cage | |||
| medallion slot 1 = | | medallion slot 2 = Cage | ||
| medallion slot 2 = | | medallion slot 3 = Cage | ||
| medallion slot 3 = | | medallion slot 4 = Lums | ||
| medallion slot 4 = | | medallion slot 4 number = 150 | ||
| medallion slot 5 = | | medallion slot 5 = Lums | ||
| medallion slot 6 = | | medallion slot 5 number = 300 | ||
| medal = | | medallion slot 6 = Time | ||
| | | medallion slot 6 number = 1:25 | ||
| | | medal = 350 | ||
| cup = 1:06 | |||
| skull coins = 6 | |||
| relics = 3 | |||
| format numbers = true | |||
}} | }} | ||
'''Moseying the Mountain''' is the first level of | '''Moseying the Mountain''' is the first level of [[Mystical Pique]], the fifth world in ''[[Rayman Origins]]''. This is where the heroes meet the fifth and final [[nymph]], [[Helena Handbasket]]. Once they save her from the jaw of a [[Antitoon|Darktoon]], she gives them the power to [[Wall run|run on walls]]. This level contains environments from both the [[Jibberish Jungle]] and [[Mystical Pique]]. The PlayStation Vita version of ''[[Rayman Origins]]'' features a [[Ghost Mode]] of this level. It is not included in the [[Back to Origins]] painting in ''[[Rayman Legends]]''. | ||
==Area 1== | ==Area 1== | ||
Upon entry, an [[Electoon]] | Upon entry, an [[Electoon]] can be heard crying for help. The [[#Secret area 1|first secret area]] can be found by going to the left and jumping up to the platform, which leads to the entrance. Once the [[Electoon]]s are saved, the heroes can begin to advance, while carefully avoiding [[Darkroot]]s. The first [[Skull Coin]] of the level can be collected by properly timing a [[crush attack]] on a [[bouncy flower]] from a vine, which is located between two [[Darkroot]]s. The exit can be found to the right of the [[Skull Coin|coin]]. | ||
<gallery widths="320px" heights="180px"> | |||
Moseying the Mountain 3.jpg|[[Darkroot]]s will appear and grow throughout the level. | |||
| [[ | Moseying the Mountain 4.jpg|[[Livingstone|Lividstones]] appear in the first environment. | ||
</gallery> | |||
===Secret | ===Relic 1=== | ||
The | [[File:Moseying the Mountain first relic.png|thumb|320px|The first [[relic]] can be found just above the vine which [[Rayman]] is holding onto.]] | ||
The first [[relic]] can be found in this area, directly above the [[Skull Coin]]. | |||
{{clear}} | |||
===Secret area 1=== | |||
The heroes will need to defeat the numerous [[Livingstone|Lividstones]] throughout the area while avoiding the [[Darkroot]]s. Once all the [[Livingstone|Lividstones]] have been defeated, the [[cage]] can be broken. | |||
<gallery widths="320px" heights="180px"> | |||
Moseying the Mountain 1.jpg|The first secret area. | |||
Moseying the Mountain 2.jpg|Many [[Livingstone|Lividstones]] are scattered throughout the area. | |||
</gallery> | |||
==Area 2== | ==Area 2== | ||
This is where the heroes spot [[Helena Handbasket]], who is being held captive by a [[Antitoon|Darktoon]]. The heroes will need to chase the [[Antitoon|Darktoon]] as it runs away from them. Along the way, the [[Antitoon|Darktoon]] will run up walls, foreshadowing [[Wall run|the next permanent power]] [[Helena Handbasket|Helena]] will grant the heroes once she has been saved. The second [[Skull Coin]] can be collected by quickly using a [[crush attack]] on the first [[bouncy flower]] to the right in order to reach the [[Skull Coin|coin]] before the [[Darkroot]]s block it. Occasionally during the chase, the heroes will need to take alternative paths, as the route that the [[Antitoon|Darktoon]] takes can only be traversed if the heroes have the power to [[wall run]]. After ascending further, the heroes will need to [[Helicopter|fly]] higher with the help of an updraft. While ascending, the third [[Skull Coin]] can be retrieved by [[Helicopter|gliding]] towards it as they approach the top. Eventually, the heroes manage to catch up with the [[Antitoon|Darktoon]], where they are able to defeat him, receiving the aforementioned power to [[Wall run|run on walls]] from [[Helena Handbasket|Helena]]. The new power will prove useful to the heroes, as they will need to reach a [[switch]] above them in order to open the door which leads to the exit. | |||
This is where | |||
<gallery widths="320px" heights="180px"> | |||
Moseying the Mountain 5.jpg|The second area. | |||
Moseying the Mountain 6.jpg|[[Helena Handbasket]] wanting to get out of the [[Antitoon|Darktoon]]'s jaw. | |||
Moseying the Mountain 7.jpg|The [[Antitoon|Darktoon]] [[Wall run|running up on a wall]]. | |||
Moseying the Mountain 8.jpg|The heroes may need to take an alternative path to chase the [[Antitoon|Darktoon]]. | |||
Moseying the Mountain 9.jpg|The heroes will need to keep pursuing the [[Antitoon|Darktoon]] as it climbs higher. | |||
Moseying the Mountain 10.jpg|The [[Antitoon|Darktoon]] will continue to [[Wall run|run on walls]]. | |||
Moseying the Mountain 11.jpg|The [[Helicopter|glide]] power must be used to ascend using the air current. | |||
Moseying the Mountain 12.jpg|The [[Antitoon|Darktoon]] can be defeated here. | |||
Moseying the Mountain 13.jpg|[[Helena Handbasket]] will grant the heroes a new power. | |||
Moseying the Mountain 14.jpg|The new power allows the heroes to [[Wall run|run on walls]]. | |||
Moseying the Mountain 15.jpg|The power will be used throughout the rest of the level. | |||
</gallery> | |||
==Area 3== | ==Area 3== | ||
In this area, there are several members of [[Globox | In this area, there are several members of [[Globox's species]] named the [[Red Wizard]]s trapped between two closed doors. The heroes will need to reach another [[switch]] in order to open the doors and free them. After they have been saved, the heroes will need to follow the [[Red Wizard]]s as they [[Wall run|run up a wall]], where they will arrive at five magical platforms. The heroes will need to perform a ritual with the [[Red Wizard]]s in order to open the door; they will need to get up and down in sync with the [[Red Wizard|Wizards]], and each correct move is worth one [[Lum (UbiArt games)|Lum]]. After the heroes successfully perform the ritual, the door will open, and they can proceed to the next area. | ||
A [[List of glitches in UbiArt games#Moseying the Mountain|glitch]] may be triggered in this section, resulting in the heroes being unable to move. | |||
<gallery widths="320px" heights="180px"> | |||
Moseying the Mountain 16.jpg|The [[Red Wizard]]s will need to be freed to continue. | |||
Moseying the Mountain 17.jpg|The [[Red Wizard]]s will lead the heroes to the door. | |||
Moseying the Mountain 18.jpg|The heroes will need to follow the [[Red Wizard]]s. | |||
Moseying the Mountain 19.jpg|A magic ritual needs to be performed in order to open the door. | |||
Moseying the Mountain 20.jpg|The beginning of the ritual. | |||
Moseying the Mountain 21.jpg|The heroes will need to get up and down in sync with the [[Red Wizard]]s. | |||
Moseying the Mountain 22.jpg|The ritual needs to be in tune. | |||
Moseying the Mountain 23.jpg|The door will eventually open. | |||
</gallery> | |||
===Relic 2=== | |||
[[File:Moseying the Mountain second relic.png|thumb|320px|The second [[relic]] can be found just below [[Rayman]], camouflaged in the snow.]] | |||
The second [[relic]] can be found in this area, just after the heroes pass the area where they meet the [[Red Wizard]]s. | |||
{{Clear}} | |||
==Area 4== | ==Area 4== | ||
The heroes enter a cave, filled with spikes and where meditating [[fakir]]s are found. Throughout the area, the heroes will need to use their newly acquired power to [[Wall run|run on walls]] in order to avoid the spikes and [[Darkroot]]s. The fourth [[Skull Coin]] is located above a zip-line and a couple of [[Darkroot]]s. There are a couple of [[Red Wizard]]s with [[Antitoon|Darktoons]] attached to their heads, though defeating them is not a requirement. The exit can be found nearby. | |||
<gallery widths="320px" heights="180px"> | |||
Moseying the Mountain 24.jpg|Meditating [[fakir]]s with long beards. | |||
Moseying the Mountain 25.jpg|The power to [[Wall run|run on walls]] can be used here. | |||
</gallery> | |||
==Area 5== | ==Area 5== | ||
Once again, [[ | Once again, the heroes need to [[Wall run|run on walls]], but while destroying the ice blocks which block their way. Afterwards, the [[#Secret area 2|second secret area]] can be found by using a meditating [[fakir]]'s long beard, then [[Wall run|running up a wall]] to reach the entrance. After freeing the [[Electoon]]s, the heroes can proceed to reach a platform filled with [[Antitoon|Darktoons]], one attached to a [[Red Wizard]]; the fifth [[Skull Coin]] can be found hiding just above the platform. The heroes will then need to [[Running|run]] on a wheel. A platform will rise up, and more [[Antitoon|Darktoons]] will appear near the exit. The sixth [[Skull Coin]] can be collected right above the exit, by [[Wall run|running up a wall]] which leads to it. | ||
<gallery widths="320px" heights="180px"> | |||
| | Moseying the Mountain 26.jpg|Large ice blocks will need to be destroyed along the way. | ||
| [[ | Moseying the Mountain 28.jpg|[[Antitoon|Darktoons]] beneath the heroes. | ||
Moseying the Mountain 29.jpg|This wheel can be used to make the rocky platform rise up. | |||
</gallery> | |||
===Secret | ===Relic 3=== | ||
All the | [[File:Moseying the Mountain third relic.png|thumb|320px|The third relic can be found behind the [[fakir]], just to his right.]] | ||
The third [[relic]] can be found in this area; it is located in the background behind a [[fakir]]. | |||
{{Clear}} | |||
===Secret area 2=== | |||
[[File:Moseying the Mountain 27.jpg|thumb|320px|The second secret area.]] | |||
All the heroes need to do is reach an [[explosive bulb]] and attack it to make a large rotating platform move, squashing the [[Livingstone|Lividstones]] underneath. Once completed, the [[cage]] can be broken. | |||
{{Clear}} | |||
==Area 6== | ==Area 6== | ||
[[File: | [[File:Moseying the Mountain 30.jpg|thumb|320px|The final area of the level.]] | ||
The | |||
The heroes will need to defeat the bouncing [[Psychlops]] first, then [[Running|run]] on a wheel to make it rotate, causing a vine to move towards the heroes. Using the vine will help them reach the [[Livingstone|Lividstones]], which will also need to be defeated in order to break the [[Electoon]] [[cage]] and complete the level. Once they have been defeated, the heroes will pose on the [[The Photographer|photoboard]] as [[The Magician (Rayman Origins)|the Magician]] counts the total number of [[Lum (UbiArt games)|Lums]] collected throughout the level. | |||
{{Clear}} | {{Clear}} | ||
==Names in other languages== | |||
{{Names | |||
|en=Moseying the Mountain | |||
|cs=Courání po horách | |||
|nl=Bergwandeling | |||
|fr=Balade en montagne | |||
|de=Barfuß zu Berge | |||
|hu=Nyüzsgő-hegy | |||
|it=A zonzo per la montagna | |||
|ja=やまを ぶらぶら | |||
|pl=Wędrówka przez góry | |||
|pt=Escalando a montanha | |||
|ru=Слоняясь по горе | |||
|es=Montaña serpenteante | |||
}} | |||
==External links== | ==External links== | ||
* [ | * [https://www.youtube.com/watch?v=yqQUhlVJJS8 Moseying the Mountain playthrough at YouTube (PC version) (Normal walkthrough + Lums Medal)] | ||
* [https://www.youtube.com/watch?v=Tx3Uc0mr-Iw Moseying the Mountain playthrough at YouTube (PC version) (Speed Trophy)] | |||
* [ | |||
{{RaymanOriginslocations}} | {{RaymanOriginslocations}} | ||
[[fr:Balade en montagne]] | [[fr:Balade en montagne]] | ||
[[hu:Nyüzsgő-hegy]] | |||
[[pl:Wędrówka przez góry]] | [[pl:Wędrówka przez góry]] | ||
[[Category:Places from Rayman Origins]] | [[Category:Places from Rayman Origins]] | ||
Latest revision as of 15:44, 27 March 2026
| Moseying the Mountain | |||||
|---|---|---|---|---|---|
 | |||||
| ← Fire When Wetty | Mystical Munkeys → | ||||
 Mystical Pique Mystical Pique
| |||||
   
|

|

| |||
   
|
|
  
| |||

|

| ||||

|

| ||||

Moseying the Mountain is the first level of Mystical Pique, the fifth world in Rayman Origins. This is where the heroes meet the fifth and final nymph, Helena Handbasket. Once they save her from the jaw of a Darktoon, she gives them the power to run on walls. This level contains environments from both the Jibberish Jungle and Mystical Pique. The PlayStation Vita version of Rayman Origins features a Ghost Mode of this level. It is not included in the Back to Origins painting in Rayman Legends.
Area 1
Upon entry, an Electoon can be heard crying for help. The first secret area can be found by going to the left and jumping up to the platform, which leads to the entrance. Once the Electoons are saved, the heroes can begin to advance, while carefully avoiding Darkroots. The first Skull Coin of the level can be collected by properly timing a crush attack on a bouncy flower from a vine, which is located between two Darkroots. The exit can be found to the right of the coin.
-
 Darkroots will appear and grow throughout the level.
 -
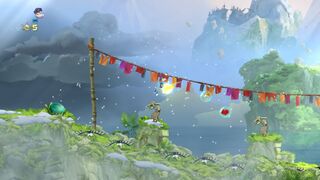 Lividstones appear in the first environment.


Relic 1

The first relic can be found in this area, directly above the Skull Coin.
Secret area 1
The heroes will need to defeat the numerous Lividstones throughout the area while avoiding the Darkroots. Once all the Lividstones have been defeated, the cage can be broken.
-
 The first secret area.
 -
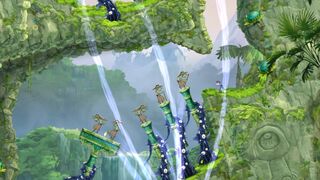 Many Lividstones are scattered throughout the area.


Area 2
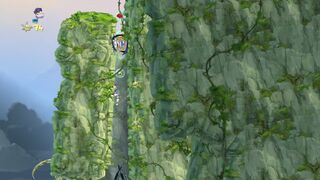
This is where the heroes spot Helena Handbasket, who is being held captive by a Darktoon. The heroes will need to chase the Darktoon as it runs away from them. Along the way, the Darktoon will run up walls, foreshadowing the next permanent power Helena will grant the heroes once she has been saved. The second Skull Coin can be collected by quickly using a crush attack on the first bouncy flower to the right in order to reach the coin before the Darkroots block it. Occasionally during the chase, the heroes will need to take alternative paths, as the route that the Darktoon takes can only be traversed if the heroes have the power to wall run. After ascending further, the heroes will need to fly higher with the help of an updraft. While ascending, the third Skull Coin can be retrieved by gliding towards it as they approach the top. Eventually, the heroes manage to catch up with the Darktoon, where they are able to defeat him, receiving the aforementioned power to run on walls from Helena. The new power will prove useful to the heroes, as they will need to reach a switch above them in order to open the door which leads to the exit.
-
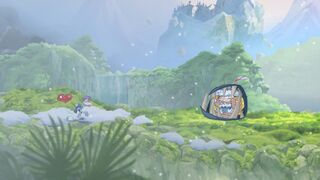 The second area.
 -
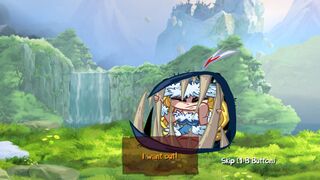 Helena Handbasket wanting to get out of the Darktoon's jaw.
 -
-
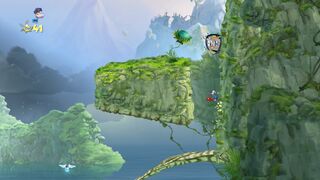
 The heroes may need to take an alternative path to chase the Darktoon.
 -
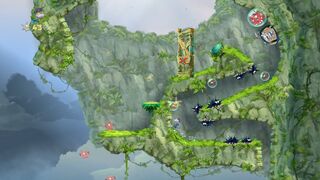
 The heroes will need to keep pursuing the Darktoon as it climbs higher.
 -
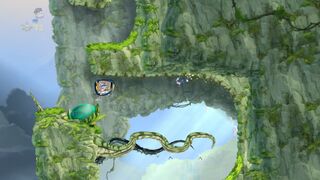
 The Darktoon will continue to run on walls.
 -
 The glide power must be used to ascend using the air current.
 -
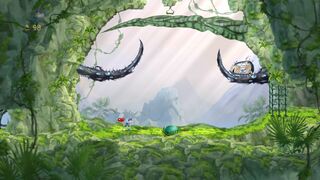 The Darktoon can be defeated here.
 -
 Helena Handbasket will grant the heroes a new power.
 -
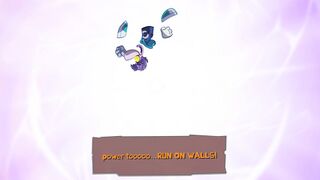 The new power allows the heroes to run on walls.
 -
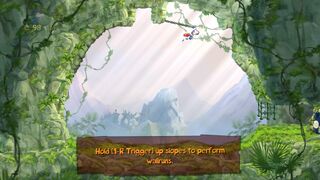 The power will be used throughout the rest of the level.


Area 3
In this area, there are several members of Globox's species named the Red Wizards trapped between two closed doors. The heroes will need to reach another switch in order to open the doors and free them. After they have been saved, the heroes will need to follow the Red Wizards as they run up a wall, where they will arrive at five magical platforms. The heroes will need to perform a ritual with the Red Wizards in order to open the door; they will need to get up and down in sync with the Wizards, and each correct move is worth one Lum. After the heroes successfully perform the ritual, the door will open, and they can proceed to the next area.
A glitch may be triggered in this section, resulting in the heroes being unable to move.
-
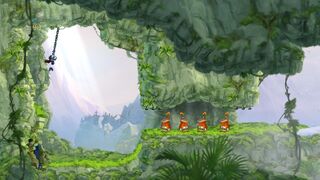
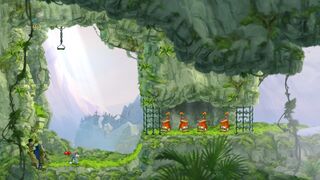 The Red Wizards will need to be freed to continue.
 -
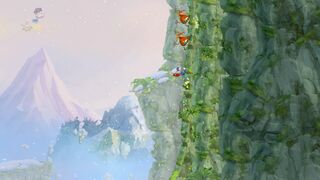
 The Red Wizards will lead the heroes to the door.
 -
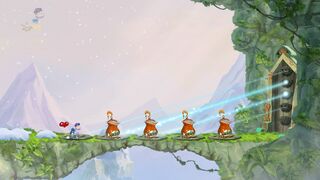
 The heroes will need to follow the Red Wizards.
 -
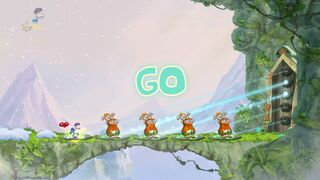
 A magic ritual needs to be performed in order to open the door.
 -
 The beginning of the ritual.
 -
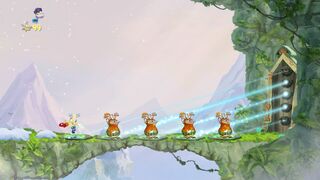 The heroes will need to get up and down in sync with the Red Wizards.
 -
 The ritual needs to be in tune.
 -
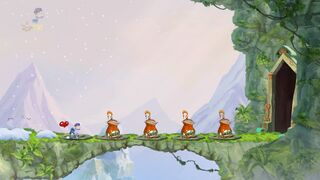 The door will eventually open.


Relic 2

The second relic can be found in this area, just after the heroes pass the area where they meet the Red Wizards.
Area 4
The heroes enter a cave, filled with spikes and where meditating fakirs are found. Throughout the area, the heroes will need to use their newly acquired power to run on walls in order to avoid the spikes and Darkroots. The fourth Skull Coin is located above a zip-line and a couple of Darkroots. There are a couple of Red Wizards with Darktoons attached to their heads, though defeating them is not a requirement. The exit can be found nearby.
-
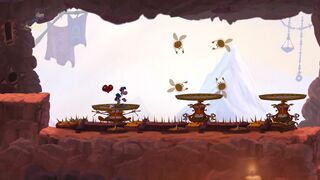 Meditating fakirs with long beards.
 -
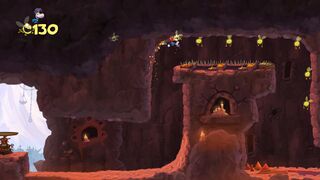 The power to run on walls can be used here.


Area 5
Once again, the heroes need to run on walls, but while destroying the ice blocks which block their way. Afterwards, the second secret area can be found by using a meditating fakir's long beard, then running up a wall to reach the entrance. After freeing the Electoons, the heroes can proceed to reach a platform filled with Darktoons, one attached to a Red Wizard; the fifth Skull Coin can be found hiding just above the platform. The heroes will then need to run on a wheel. A platform will rise up, and more Darktoons will appear near the exit. The sixth Skull Coin can be collected right above the exit, by running up a wall which leads to it.
-
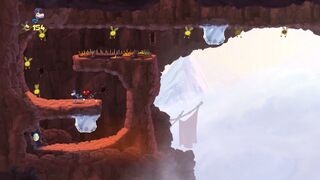 Large ice blocks will need to be destroyed along the way.
 -
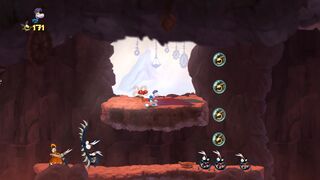 Darktoons beneath the heroes.
 -
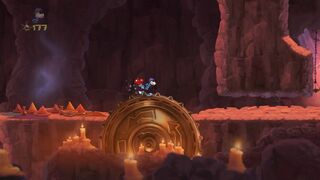 This wheel can be used to make the rocky platform rise up.


Relic 3

The third relic can be found in this area; it is located in the background behind a fakir.
Secret area 2

All the heroes need to do is reach an explosive bulb and attack it to make a large rotating platform move, squashing the Lividstones underneath. Once completed, the cage can be broken.
Area 6

The heroes will need to defeat the bouncing Psychlops first, then run on a wheel to make it rotate, causing a vine to move towards the heroes. Using the vine will help them reach the Lividstones, which will also need to be defeated in order to break the Electoon cage and complete the level. Once they have been defeated, the heroes will pose on the photoboard as the Magician counts the total number of Lums collected throughout the level.
Names in other languages
| Language | Name |
|---|---|
| English | Moseying the Mountain |
| Czech | Courání po horách |
| Dutch | Bergwandeling |
| French | Balade en montagne |
| German | Barfuß zu Berge |
| Hungarian | Nyüzsgő-hegy |
| Italian | A zonzo per la montagna |
| Japanese | やまを ぶらぶら |
| Polish | Wędrówka przez góry |
| Portuguese | Escalando a montanha |
| Russian | Слоняясь по горе |
| Spanish | Montaña serpenteante |
External links
- Moseying the Mountain playthrough at YouTube (PC version) (Normal walkthrough + Lums Medal)
- Moseying the Mountain playthrough at YouTube (PC version) (Speed Trophy)