The Deadly Lights: Difference between revisions
No edit summary |
RayGamer99 (talk | contribs) |
||
| (18 intermediate revisions by 8 users not shown) | |||
| Line 1: | Line 1: | ||
{{ | {{RLLevel | ||
| name = The Deadly Lights | | name = The Deadly Lights | ||
| image = [[File:Thedeadlylights.png|center|320px| | | image = [[File:Thedeadlylights.png|center|320px|The Deadly Lights]] | ||
| difficulty = [[File:DifficultySkull.png|32px| | | difficulty = [[File:DifficultySkull.png|32px|Skull]][[File:DifficultySkull.png|32px|Skull]] | ||
| preceded by = [[The Mysterious Inflatable Island]] | | preceded by = [[The Mysterious Inflatable Island]] | ||
| followed by = [[The Ninja Dojo]] | | followed by = [[The Ninja Dojo]] | ||
| world = [[20,000 Lums Under the Sea]] | | world = [[20,000 Lums Under the Sea]] | ||
| teensies = [[File:Icon1RO.png|15px| | | teensies = [[File:Icon1RO.png|15px|1]][[File:Icon0RO.png|15px|0]] | ||
| bronze cup = [[File:Icon1RO.png|15px| | | bronze cup = [[File:Icon1RO.png|15px|1]][[File:Icon5RO.png|15px|5]][[File:Icon0RO.png|15px|0]] [[File:RO-Lums.png|30px|Lums]] | ||
| silver cup = [[File:Icon3RO.png|15px| | | silver cup = [[File:Icon3RO.png|15px|3]][[File:Icon0RO.png|15px|0]][[File:Icon0RO.png|15px|0]] [[File:RO-Lums.png|30px|Lums]] | ||
| lucky ticket = [[File:Icon4RO.png|15px| | | lucky ticket = [[File:Icon4RO.png|15px|4]][[File:Icon5RO.png|15px|5]][[File:Icon0RO.png|15px|0]] [[File:RO-Lums.png|30px|Lums]] | ||
| gold cup = [[File:Icon6RO.png|15px| | | gold cup = [[File:Icon6RO.png|15px|6]][[File:Icon0RO.png|15px|0]][[File:Icon0RO.png|15px|0]] [[File:RO-Lums.png|30px|Lums]] | ||
}} | }} | ||
'''The Deadly Lights''' is the second level of [[20,000 Lums Under the Sea]], the fourth world in ''[[Rayman Legends]]''. Its name is a spoof of the title of the ''James Bond'' short story and the 1987 movie, ''The Living Daylights''. | |||
'''The Deadly Lights''' is the second | ==Area 1== | ||
Now in an underwater base, [[Rayman]] and his friends will still meet [[Underwater Toad]]s and [[Dark Sentry|Dark Sentries]]. After a while, the team calls on [[Murfy]] to assist in pressing buttons that will cause a nearby platform to appear and block the light of a [[Dark Sentry]]. He will also cut ropes to block the lights to help the heroes continue in the base. The [[Dark Sentry|Dark Sentries]] won't always appear when there's a button nearby though. The first secret area can be found by going through a fake, dark foreground to the very left of a certain [[Underwater Toad]]. The first [[Skull Coin]] is right above the [[Darkblocker]] at the end of this area. | |||
<gallery widths="320px" heights="180px"> | |||
The Deadly Lights 1.png|The beginning of the level. | |||
The Deadly Lights 2.png|[[Murfy]] helping the player avoid the lights from the [[Dark Sentry|Dark Sentries]]. | |||
Rayman Legends Switch - The Deadly Lights 1.jpg|The same area in [[Murfy's Touch]] on the Nintendo Switch. | |||
Rayman Legends Switch - The Deadly Lights 2.jpg|Sometimes in-game dialog appears in [[Murfy's Touch]]. | |||
The Deadly Lights 3.png|Platforms that [[Murfy]] can toggle to appear. | |||
Rayman Legends Switch - The Deadly Lights 3.jpg|The same area in [[Murfy's Touch]] on the Nintendo Switch, changed to use the rotation feature instead of [[switch]]es. | |||
Rayman Legends Switch - The Deadly Lights 4.jpg|Rotating the screen rotates the entire level. | |||
Rayman Legends Switch - The Deadly Lights 5.jpg|Some handles need to be pulled by the player in [[Murfy's Touch]]. | |||
</gallery> | |||
===Queen [[Teensie]] area=== | |||
[[Murfy]] must move the wheel around to allow the team to avoid the huge [[Dark Sentry]] light and reach and defeat the [[Underwater Toad]] tormenting the [[Teensie]]. | |||
<gallery widths="320px" heights="180px"> | |||
The Deadly Lights 4.png|The first secret area. | |||
The Deadly Lights 5.png|[[Murfy]] must move the wheel to change where the light is shining. | |||
The Deadly Lights 6.png|The [[Teensie]]. | |||
</gallery> | |||
==Area 2== | |||
The process of [[Murfy]] pressing multiple buttons to make platforms appear and block the many [[Dark Sentry|Dark Sentries]] and their lights will continue. Walls will also be pulled by [[Murfy]] to let the heroes advance by wall jumping. | |||
<gallery widths="320px" heights="180px"> | |||
The Deadly Lights 7.png|[[Murfy]] can interact with the switches and pull down the platforms, helping the player to progress. | |||
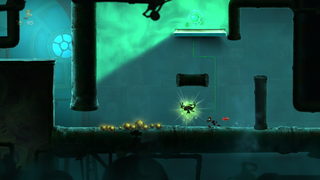
The Deadly Lights 8.png|A secret [[Skull Coin]] can be found on the top left.<ref>https://youtu.be/94fTvWNblZU The secret Skull Coin in the second area on YouTube</ref> | |||
</gallery> | |||
==Area 3== | |||
The heroes will be in a different part of the underwater base as they continue on, this time upwards. The second secret area can be reached by getting on a moveable platform and letting [[Murfy]] move the one on top to allow the team to reach the ledge of the platform leading up to the room. The second [[Skull Coin]] is located mostly behind a fake looking pipe. After safely reaching the top, the exit is to the right. | |||
<gallery widths="320px" heights="180px"> | |||
The Deadly Lights 9.png|[[Murfy]] can move these platforms. | |||
Rayman Legends Switch - The Deadly Lights 6.jpg|The same area in [[Murfy's Touch]] on the Nintendo Switch. | |||
The Deadly Lights 12.png|[[Murfy]] can toggle the platforms to appear, allowing the player to pass without being in the light. | |||
</gallery> | |||
===King [[Teensie]] area=== | |||
The gang needs to get onto a platform that will shortly begin to move up. [[Murfy]] must continuously turn the wheel to block the incoming lights of the [[Dark Sentry|Dark Sentries]] while the team defeats the [[Underwater Toad]]s. | |||
<gallery widths="320px" heights="180px"> | |||
The Deadly Lights 10.png|The second secret area. | |||
The Deadly Lights 11.png|The [[cage]]. | |||
</gallery> | |||
{{clear}} | {{clear}} | ||
{{ | {{RLLevel | ||
| name = The Deadly Lights - Invaded | | name = The Deadly Lights - Invaded | ||
| image = [[File:Invaded4.png|center|320px| | | image = [[File:Invaded4.png|center|320px|The Deadly Lights - Invaded]] | ||
| difficulty = [[File:DifficultySkull.png|32px| | | difficulty = [[File:DifficultySkull.png|32px|Skull]][[File:DifficultySkull.png|32px|Skull]][[File:DifficultySkull.png|32px|Skull]][[File:DifficultySkull.png|32px|Skull]] | ||
| world = [[20,000 Lums Under the Sea]] | | world = [[20,000 Lums Under the Sea]] | ||
| teensies = [[File:Icon3RO.png|15px| | | teensies = [[File:Icon3RO.png|15px|3]] | ||
}} | }} | ||
==Invaded== | ==Invaded== | ||
This level is invaded by enemies from [[Olympus Maximus]], including [[Minotaur]]s, [[lavaroot]]s and swarmed [[dark creature]]s. | |||
It is unlocked once the original level completed and if the player(s) gets far enough in [[Olympus Maximus]]. | |||
The level combines the first two sections reversed, and goes from the end of the second section to somewhere near the start of the first section. However, there's no more transition between the sections (where a [[Darkblocker]] can be found in the original level). The presence of the invaders makes the level harder: swarms of [[dark creature]]s can swim through the several pipes everywhere in the level; however, there are no more [[Dark Sentry|Dark Sentries]]. | |||
<gallery widths="320px" heights="180px"> | |||
The Deadly Lights (Invaded) 1.jpg|The beginning of the level, starting at the door leading to the third area in the original level. It is impossible to get in there in the invaded version. | |||
The Deadly Lights (Invaded) 2.jpg|The [[dark creature]]s chasing [[Rayman]]. | |||
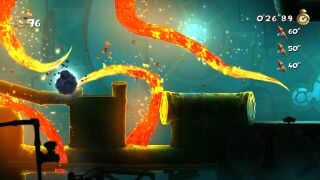
The Deadly Lights (Invaded) 3.jpg|[[Rayman]] jumping through the [[lavaroot]]s. | |||
The Deadly Lights (Invaded) 4.jpg|A stack of [[Minotaur]]s. | |||
</gallery> | |||
{{clear}} | {{clear}} | ||
==Name in other languages== | |||
{{names | |||
|fr=Dangereuses lumières | |||
|es=¡No vayas en la luz! | |||
|de=Lichter des Todes | |||
|it=Luci mortali | |||
|nl=De dodelijke lichten | |||
|ja=W4-2 「水中の秘密基地」 | |||
|ru=Смертельный свет | |||
}} | |||
==External links== | ==External links== | ||
*[https://www.youtube.com/watch?v= | *[https://www.youtube.com/watch?v=rZ3J0oKz0X0 The Deadly Lights' playthrough at YouTube (PC version)] | ||
*[https://www.youtube.com/watch?v= | *[https://www.youtube.com/watch?v=AWNGQUeWbIE The Deadly Lights (Invaded)'s playthrough at YouTube (PC version)] | ||
==References== | |||
<references/> | |||
{{ | {{RaymanLegendsLocations}} | ||
[[de:Lichter des Todes]] | [[de:Lichter des Todes]] | ||
[[pl:Zwodnicze światła]] | |||
[[Category:Places from Rayman Legends]] | [[Category:Places from Rayman Legends]] | ||
Latest revision as of 23:51, 23 June 2024
| The Deadly Lights | ||||||||
|---|---|---|---|---|---|---|---|---|
 | ||||||||
| ← The Mysterious Inflatable Island | The Ninja Dojo → | |||||||
The Deadly Lights is the second level of 20,000 Lums Under the Sea, the fourth world in Rayman Legends. Its name is a spoof of the title of the James Bond short story and the 1987 movie, The Living Daylights.
Area 1
Now in an underwater base, Rayman and his friends will still meet Underwater Toads and Dark Sentries. After a while, the team calls on Murfy to assist in pressing buttons that will cause a nearby platform to appear and block the light of a Dark Sentry. He will also cut ropes to block the lights to help the heroes continue in the base. The Dark Sentries won't always appear when there's a button nearby though. The first secret area can be found by going through a fake, dark foreground to the very left of a certain Underwater Toad. The first Skull Coin is right above the Darkblocker at the end of this area.
-
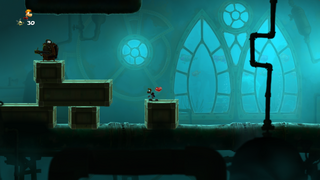 The beginning of the level.
 -
 Murfy helping the player avoid the lights from the Dark Sentries.
 -
 The same area in Murfy's Touch on the Nintendo Switch.
 -
 Sometimes in-game dialog appears in Murfy's Touch.
 -
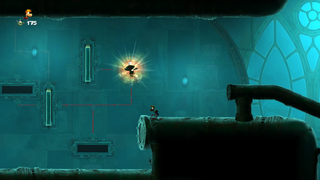 Platforms that Murfy can toggle to appear.
 -
 The same area in Murfy's Touch on the Nintendo Switch, changed to use the rotation feature instead of switches.
 -
 Rotating the screen rotates the entire level.
 -
 Some handles need to be pulled by the player in Murfy's Touch.


Queen Teensie area
Murfy must move the wheel around to allow the team to avoid the huge Dark Sentry light and reach and defeat the Underwater Toad tormenting the Teensie.


Area 2
The process of Murfy pressing multiple buttons to make platforms appear and block the many Dark Sentries and their lights will continue. Walls will also be pulled by Murfy to let the heroes advance by wall jumping.
-
 Murfy can interact with the switches and pull down the platforms, helping the player to progress.
 -
![A secret Skull Coin can be found on the top left.[1]](/wiki/script-en/images/thumb/6/65/The_Deadly_Lights_8.png/320px-The_Deadly_Lights_8.png) A secret Skull Coin can be found on the top left.[1]
A secret Skull Coin can be found on the top left.[1]

![A secret Skull Coin can be found on the top left.[1]](/wiki/en/File:The_Deadly_Lights_8.png)
Area 3
The heroes will be in a different part of the underwater base as they continue on, this time upwards. The second secret area can be reached by getting on a moveable platform and letting Murfy move the one on top to allow the team to reach the ledge of the platform leading up to the room. The second Skull Coin is located mostly behind a fake looking pipe. After safely reaching the top, the exit is to the right.
-
 Murfy can move these platforms.
 -
 The same area in Murfy's Touch on the Nintendo Switch.
 -
 Murfy can toggle the platforms to appear, allowing the player to pass without being in the light.


King Teensie area
The gang needs to get onto a platform that will shortly begin to move up. Murfy must continuously turn the wheel to block the incoming lights of the Dark Sentries while the team defeats the Underwater Toads.
-
 The second secret area.
 -
 The cage.


| The Deadly Lights - Invaded | ||||||||
|---|---|---|---|---|---|---|---|---|
 | ||||||||
Invaded
This level is invaded by enemies from Olympus Maximus, including Minotaurs, lavaroots and swarmed dark creatures.
It is unlocked once the original level completed and if the player(s) gets far enough in Olympus Maximus.
The level combines the first two sections reversed, and goes from the end of the second section to somewhere near the start of the first section. However, there's no more transition between the sections (where a Darkblocker can be found in the original level). The presence of the invaders makes the level harder: swarms of dark creatures can swim through the several pipes everywhere in the level; however, there are no more Dark Sentries.
-
 The beginning of the level, starting at the door leading to the third area in the original level. It is impossible to get in there in the invaded version.
 -
 The dark creatures chasing Rayman.
 -
-
 A stack of Minotaurs.
_1.jpg)
_2.jpg)
_3.jpg)
_4.jpg)
Name in other languages
| Language | Name |
|---|---|
| Dutch | De dodelijke lichten |
| French | Dangereuses lumières |
| German | Lichter des Todes |
| Italian | Luci mortali |
| Japanese | W4-2 「水中の秘密基地」 |
| Russian | Смертельный свет |
| Spanish | ¡No vayas en la luz! |
External links
- The Deadly Lights' playthrough at YouTube (PC version)
- The Deadly Lights (Invaded)'s playthrough at YouTube (PC version)
References
- ↑ https://youtu.be/94fTvWNblZU The secret Skull Coin in the second area on YouTube