Infiltration Station: Difference between revisions
Added information |
No edit summary |
||
| Line 17: | Line 17: | ||
==Area 1== | ==Area 1== | ||
After getting close to the exit of the starting area, the team calls on [[Murfy]]. He will need to move metal objects that block a certain part of the [[Dark Sentry|Dark Sentries]]' light. | After getting close to the exit of the starting area, the team calls on [[Murfy]]. He will need to move metal objects that block a certain part of the [[Dark Sentry|Dark Sentries]]' light. | ||
<gallery widths="320px" heights="180px"> | |||
Infiltration Station 1.png|The beginning of the level. | |||
Infiltration Station 2.png|[[Murfy]] holding a metal object. | |||
</gallery> | |||
==Area 2== | ==Area 2== | ||
[[Murfy]] needs to move the [[Dark Sentry]] itself to allow the heroes to reach the very close by door. | [[Murfy]] needs to move the [[Dark Sentry]] itself to allow the heroes to reach the very close by door. | ||
<gallery widths="320px" heights="180px"> | |||
Infiltration Station 3.png|[[Murfy]] moving the [[Dark Sentry]] around the area. | |||
</gallery> | |||
==Area 3== | ==Area 3== | ||
The first secret area can be found by [[Murfy]] pressing the second button to make a platform appear that lets the players get to the door. This area is pretty straightforward after the secret area is completed. | The first secret area can be found by [[Murfy]] pressing the second button to make a platform appear that lets the players get to the door. This area is pretty straightforward after the secret area is completed. | ||
<gallery widths="320px" heights="180px"> | |||
Infiltration Station 4.png|A [[switch]] which [[Murfy]] can interact with. | |||
Infiltration Station 7.png|A [[Lum (UbiArt games)|Lum]] cage. | |||
Infiltration Station 8.png|A [[Teensy]]. | |||
</gallery> | |||
===Queen [[Teensie]] area=== | ===Queen [[Teensie]] area=== | ||
While [[Murfy]] pushes several buttons, the team must be quick in jumping from platform to platform to get to the [[cage]]. | While [[Murfy]] pushes several buttons, the team must be quick in jumping from platform to platform to get to the [[cage]]. | ||
<gallery widths="320px" heights="180px"> | |||
Infiltration Station 5.png|The first secret area. | |||
Infiltration Station 6.png|The [[Teensy]] [[cage]]. | |||
</gallery> | |||
==Area 4== | ==Area 4== | ||
When [[Murfy]] begins to move the metal object, the heroes must move with it in order to avoid the large [[Dark Sentry]] light to safely reach the door. | When [[Murfy]] begins to move the metal object, the heroes must move with it in order to avoid the large [[Dark Sentry]] light to safely reach the door. | ||
<gallery widths="320px" heights="180px"> | |||
Infiltration Station 9.png|Another metal object used to block the light. | |||
</gallery> | |||
==Area 5== | ==Area 5== | ||
The first [[Skull Coin]] is right under where the heroes appear. Sometimes at the start, a button will need to be pressed more than once by [[Murfy]] for the team to not get hit by the lights. The second secret area is behind a dark, fake foreground wall. After getting by another [[Dark Sentry]], the door and the second [[Skull Coin]] will be found. | The first [[Skull Coin]] is right under where the heroes appear. Sometimes at the start, a button will need to be pressed more than once by [[Murfy]] for the team to not get hit by the lights. The second secret area is behind a dark, fake foreground wall. After getting by another [[Dark Sentry]], the door and the second [[Skull Coin]] will be found. | ||
<gallery widths="320px" heights="180px"> | |||
Infiltration Station 10.png|A [[Skull Coin]] beneath the entrance. | |||
Infiltration Station 13.png|[[Murfy]] can turn the platform which the [[Dark Sentry]] is lying on. | |||
</gallery> | |||
===King [[Teensie]] area=== | ===King [[Teensie]] area=== | ||
[[Murfy]] needs to move the metal object while the players attempt to break open the flying [[cage]]. | [[Murfy]] needs to move the metal object while the players attempt to break open the flying [[cage]]. | ||
<gallery widths="320px" heights="180px"> | |||
Infiltration Station 11.png|The second secret area. | |||
Infiltration Station 12.png|The [[Teensy]] [[cage]]. | |||
</gallery> | |||
==Area 6== | ==Area 6== | ||
Again, [[Murfy]] needs to move the [[Dark Sentry]] to allow the heroes to get to the nearby door. The third [[Skull Coin]] is to the far right, almost on the pipe wall. | Again, [[Murfy]] needs to move the [[Dark Sentry]] to allow the heroes to get to the nearby door. The third [[Skull Coin]] is to the far right, almost on the pipe wall. | ||
<gallery widths="320px" heights="180px"> | |||
Infiltration Station 14.png|The second to last area of the level. | |||
</gallery> | |||
==Area 7== | ==Area 7== | ||
The team needs to go to the top; [[Murfy]] must press buttons to make platforms appear. The exit is close by. | The team needs to go to the top; [[Murfy]] must press buttons to make platforms appear. The exit is close by. | ||
<gallery widths="320px" heights="180px"> | |||
Infiltration Station 15.png|Several [[switch]]es for [[Murfy]] to interact with. | |||
Infiltration Station 16.png|There is a [[cage]] beneath the exit. | |||
</gallery> | |||
{{clear}} | {{clear}} | ||
Revision as of 16:36, 21 March 2018
| Infiltration Station | ||||||||
|---|---|---|---|---|---|---|---|---|
 | ||||||||
| ← Mansion of the Deep | The Shaolin Master Dojo → | |||||||
Infiltration Station is the fifth level of 20,000 Lums Under the Sea, the fourth world in Rayman Legends. In this level, Rayman and the heroes call on Murfy to help them advance through the dangers of the underwater base.
Area 1
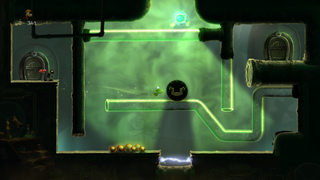
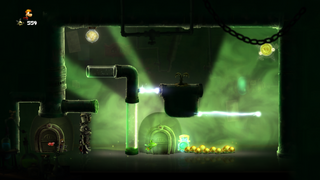
After getting close to the exit of the starting area, the team calls on Murfy. He will need to move metal objects that block a certain part of the Dark Sentries' light.
-
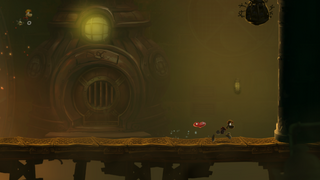 The beginning of the level.
 -
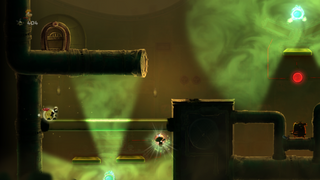
 Murfy holding a metal object.


Area 2
Murfy needs to move the Dark Sentry itself to allow the heroes to reach the very close by door.
-
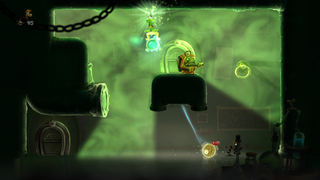 Murfy moving the Dark Sentry around the area.

Area 3
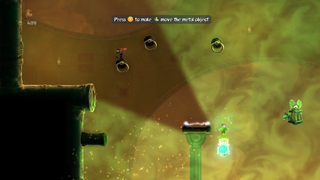
The first secret area can be found by Murfy pressing the second button to make a platform appear that lets the players get to the door. This area is pretty straightforward after the secret area is completed.


Queen Teensie area
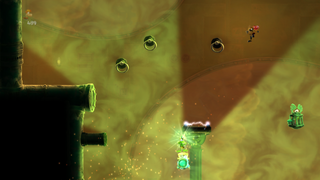
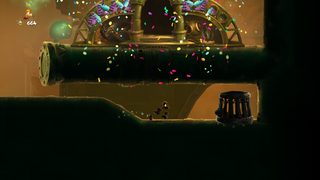
While Murfy pushes several buttons, the team must be quick in jumping from platform to platform to get to the cage.
-
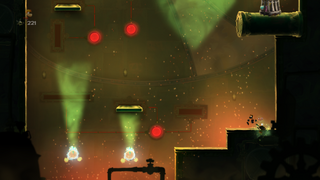 The first secret area.
 -


Area 4
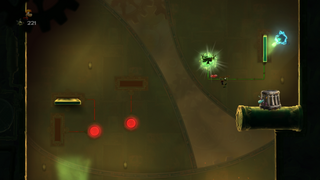
When Murfy begins to move the metal object, the heroes must move with it in order to avoid the large Dark Sentry light to safely reach the door.
-
 Another metal object used to block the light.

Area 5
The first Skull Coin is right under where the heroes appear. Sometimes at the start, a button will need to be pressed more than once by Murfy for the team to not get hit by the lights. The second secret area is behind a dark, fake foreground wall. After getting by another Dark Sentry, the door and the second Skull Coin will be found.
-
 A Skull Coin beneath the entrance.
 -
 Murfy can turn the platform which the Dark Sentry is lying on.


King Teensie area
Murfy needs to move the metal object while the players attempt to break open the flying cage.
-
 The second secret area.
 -


Area 6
Again, Murfy needs to move the Dark Sentry to allow the heroes to get to the nearby door. The third Skull Coin is to the far right, almost on the pipe wall.
-
 The second to last area of the level.

Area 7
The team needs to go to the top; Murfy must press buttons to make platforms appear. The exit is close by.
-

-
 There is a cage beneath the exit.


| Infiltration Station - Invaded | ||||||||
|---|---|---|---|---|---|---|---|---|
 | ||||||||
Invaded
This level is invaded by enemies from Toad Story, including toads, Red Toads, stilt-toads and Ogers, Franckies from Teensies In Trouble and Dark Rayman.
The level is part of the six ones invaded by Dark Rayman, and is unlocked once the five Dark Teensies are defeated. Unlike the other levels, the levels invaded by Dark Rayman do not require the player to complete the original levels.
This level has, along with Enchanted Forest - invaded, a unique gameplay in which the character(s) are stuck in a section of the level, and must clear the area from all the enemies incoming (enemies from Toad Story) in order to proceed to the next section. Most of the time, a vine obstructs the player's way, who must clear the area from the enemies to remove those obstacles.
Meanwhile, Dark Rayman is trying to catch the player (or the player leading the group if played with more than one player) by imitating their movements. The player must kill all the enemies and avoid Dark Rayman at the same time.
The level is divided into four sections, each of them are inspired by the rooms from the original level:
- The first section seems to begin where Murfy helps the player in the original level. The player(s) must head to the room where some toads spawn. A vine blocks the way to the next room and is removed once all the enemies (three toads, two stilt-toads and a parachute toad) are defeated.
- The second room appears to be the room which comes directly after the first one in the original level, but reversed. No more Dark Sentries, but four toads and two Ogers to defeat, and the vines are also changing position once the player(s) defeats enough enemies.
- In the third room, the player(s) can run onto the walls and vines to defeat three stilt-toads and two toads.
- In the final room, player(s) must dispose of three toads and two Franckies before opening a way to the Teensies to free.
External links
- Infiltration Station's playthrough at YouTube (PC version)
- Infiltration Station (Invaded)'s playthrough at YouTube (PC version)