Hell Breaks Loose: Difference between revisions
No edit summary |
The Jonster (talk | contribs) links |
||
| (26 intermediate revisions by 10 users not shown) | |||
| Line 1: | Line 1: | ||
{{ | {{RLLevel | ||
| name = Hell Breaks Loose | | name = Hell Breaks Loose | ||
| image = [[File:Hellbreaksloose.png|center|320px| | | image = [[File:Hellbreaksloose.png|center|320px|Hell Breaks Loose]] | ||
| difficulty = [[File:DifficultySkull.png|32px| | | difficulty = [[File:DifficultySkull.png|32px|Skull]][[File:DifficultySkull.png|32px|Skull]][[File:DifficultySkull.png|32px|Skull]][[File:DifficultySkull.png|32px|Skull]][[File:DifficultySkull.png|32px|Skull]] | ||
| preceded by = [[Swarmed and Dangerous]] | | preceded by = [[Swarmed and Dangerous]] | ||
| followed by = [[A Cloud of Darkness!]] | | followed by = [[A Cloud of Darkness!]] | ||
| world = [[Olympus Maximus]] | | world = [[Olympus Maximus]] | ||
| teensies = [[File:Icon1RO.png|15px| | | teensies = [[File:Icon1RO.png|15px|1]][[File:Icon0RO.png|15px|0]] | ||
| bronze cup = [[File: | | bronze cup = [[File:Icon7RO.png|15px|7]][[File:Icon5RO.png|15px|5]] [[File:RO-Lums.png|30px|Lums]] | ||
| silver cup = [[File: | | silver cup = [[File:Icon1RO.png|15px|1]][[File:Icon5RO.png|15px|5]][[File:Icon0RO.png|15px|0]] [[File:RO-Lums.png|30px|Lums]] | ||
| lucky ticket = [[File: | | lucky ticket = [[File:Icon2RO.png|15px|2]][[File:Icon2RO.png|15px|2]][[File:Icon5RO.png|15px|5]] [[File:RO-Lums.png|30px|Lums]] | ||
| gold cup = [[File: | | gold cup = [[File:Icon3RO.png|15px|3]][[File:Icon0RO.png|15px|0]][[File:Icon0RO.png|15px|0]] [[File:RO-Lums.png|30px|Lums]] | ||
}} | }} | ||
'''Hell Breaks Loose''' is the eighth level of [[Olympus Maximus]], the fifth world in ''[[Rayman Legends]]''. The heroes call upon [[Murfy]] to assist in escaping from the [[Dragon (Olympus Maximus)|dragons]] the [[Dark Teensy]] whistles for. | |||
' | ==Description== | ||
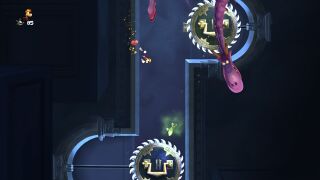
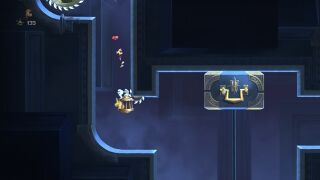
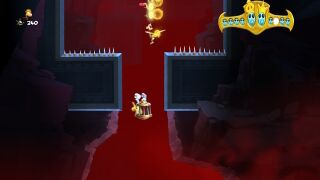
The heroes begin in a room that's similar to the ones in [[the Amazing Maze]]. After using the [[wall run]] ability to dodge the spikes and small [[buzzsaw]]s, the heroes call upon [[Murfy]] to move larger [[buzzsaw]]s and platforms. The first secret area is located above a blue movable platform on the left side. After cutting a rope, the heroes spot the fifth [[Dark Teensy]] oiling up his vehicle. He then whistles for three [[Dragon (Olympus Maximus)|dragons]] and rides away. The heroes must [[wall run]] to escape the [[Dragon (Olympus Maximus)|dragons]], all while [[Murfy]] moves various objects and cuts ropes. After a while, with the chase still on, the heroes and the [[Dragon (Olympus Maximus)|dragons]] enter into the rocky labyrinth. Nearby are bodies of lava that will shoot bursts of lava if the solid objects are moved. [[Murfy]] needs to move these to defeat the [[Dragon (Olympus Maximus)|dragons]]. After all are defeated, the heroes can now search for the exit that's straight ahead. A [[Skull Coin]] is close by, along with the second secret area. | |||
< | <gallery widths="320px" heights="180px"> | ||
Hell Breaks Loose 1.jpg|The start of the level. | |||
RL-Buzzsaw-Murfy.jpg|A [[buzzsaw]] that can be moved by [[Murfy]]. | |||
Hell Breaks Loose 4.jpg|The fifth [[Dark Teensy]]. | |||
Hell Breaks Loose 5.jpg|The [[Dragon (Olympus Maximus)|dragons]] arriving at the [[Dark Teensy]]'s command. | |||
Hell Breaks Loose 6.jpg|The [[Dragon (Olympus Maximus)|dragons]] chasing [[Rayman]] and [[Murfy]]. | |||
Hell Breaks Loose 7.jpg|A flying [[Teensie]] [[cage]]. | |||
Hell Breaks Loose 8.jpg|Another flying [[Teensie]] [[cage]]. | |||
Hell Breaks Loose 9.jpg|The [[Dragon (Olympus Maximus)|dragons]] continuing their pursuit. | |||
Hell Breaks Loose 10.jpg|The first [[Dragon (Olympus Maximus)|dragon]] being scorched. | |||
Hell Breaks Loose 11.jpg|The second [[Dragon (Olympus Maximus)|dragon]] following suit. | |||
Hell Breaks Loose 12.jpg|The third and final [[Dragon (Olympus Maximus)|dragon]] meeting the same demise. | |||
Hell Breaks Loose 15.jpg|The end of the level. | |||
</gallery> | |||
{{ | ===Queen [[Teensie]] area=== | ||
[[Murfy]] must carefully move the wheel back and forth to allow the heroes to safely reach the [[Teensie]] [[cage]]. | |||
<gallery widths="320px" heights="180px"> | |||
Hell Breaks Loose 3.jpg|The first secret area. | |||
</gallery> | |||
===King [[Teensie]] area=== | |||
All the heroes needs to do is bounce on the [[Drum (UbiArt games)|drums]] to get to the [[cage]]. | |||
<gallery widths="320px" heights="180px"> | |||
Hell Breaks Loose 13.jpg|The second secret area. | |||
Hell Breaks Loose 14.jpg|The [[Teensie]] [[cage]]. | |||
Rayman Legends Switch - Drums.jpg|The same area in [[Murfy's Touch]]. | |||
</gallery> | |||
{{clear}} | |||
{{RLLevel | |||
| name = Hell Breaks Loose - Invaded | | name = Hell Breaks Loose - Invaded | ||
| image = [[File:Invaded5.png|center|320px| | | image = [[File:Invaded5.png|center|320px|Hell Breaks Loose - Invaded]] | ||
| difficulty = [[File:DifficultySkull.png|32px| | | difficulty = [[File:DifficultySkull.png|32px|Skull]][[File:DifficultySkull.png|32px|Skull]][[File:DifficultySkull.png|32px|Skull]][[File:DifficultySkull.png|32px|Skull]] | ||
| world = [[Olympus Maximus]] | | world = [[Olympus Maximus]] | ||
| teensies = [[File:Icon3RO.png|15px| | | teensies = [[File:Icon3RO.png|15px|3]] | ||
}} | }} | ||
==Invaded== | ==Invaded== | ||
This level is invaded by the [[Underwater Toad]]s from [[20,000 Lums Under the Sea]] and [[Dark Rayman (Rayman Legends)|Dark Rayman]]. | |||
The level is one of the six levels to be invaded by [[Dark Rayman (Rayman Legends)|Dark Rayman]], and is unlocked once the five [[Dark Teensy|Dark Teensies]] are defeated. Unlike other invaded levels, the ones invaded by [[Bad Rayman|Dark Rayman]] do not require the original levels to be completed in advance. | |||
The level takes place near the beginning of the normal level and is slightly modified; it ends where [[Murfy]] appears to help the heroes in the normal one. | |||
Due to the presence of the invaders, most of the place is flooded, and the heroes will start underwater. | |||
In order to proceed, the heroes, chased by [[Dark Rayman (Rayman Legends)|Dark Rayman]], will have to activate levers by attacking them in order to remove the single-eyed saws blocking their way. [[Underwater Toad]]s are also here to bother the heroes. | |||
<gallery widths="320px" heights="180px"> | |||
Hell Breaks Loose - invaded1.jpg|The beginning of the level. | |||
Hell Breaks Loose - invaded2.jpg|[[Buzzsaw]]s. | |||
Hell Breaks Loose - invaded3.jpg|An [[Underwater Toad]]. | |||
</gallery> | |||
===Trivia=== | ===Trivia=== | ||
* In the Wii U version, Murfy can appear on multiplayer to help his friends by poking the eye of the saws : it | *This is the only level with 10 teensies that does not require the player to get 600 lums for the gold cup. | ||
*It is the very last level in the game where the heroes are assisted by Murfy. | |||
*Sometimes, in version of the game outside of the Wii U, PS Vita and Switch ports, in the King Teensie area, Murfy might automatically touch a lum, and turn it purple. | |||
* In the Wii U version, [[Murfy]] can appear on multiplayer to help his friends by poking the eye of the saws: it deactivates them, and the heroes may pass through them. However, unless there are 4 or 5 players, it is impossible to pass through the last two pairs of saws when they are deactivated. There is still a mouse hole to succeed, though it is almost random. | |||
*It is the only level invaded by Dark Rayman to not have a 5 Skull difficulty. | |||
{{ | ==Name in other languages== | ||
{{names | |||
|fr=C'est l'enfer ici ! | |||
|es=El infierno se desata | |||
|de=Hölle, Hölle, Hölle! | |||
|it=Inferno di fuoco | |||
|nl= | |||
|ja=W5-6 「恐怖の急転直下」 | |||
|ru=Ад на земле | |||
}} | |||
==External links== | ==External links== | ||
*[https://www.youtube.com/watch?v= | *[https://www.youtube.com/watch?v=fSg_8VlFJa4 Hell Breaks Loose's playthrough at YouTube (PC version)] | ||
*[https://www.youtube.com/watch?v= | *[https://www.youtube.com/watch?v=lOVXmqd8-mQ Hell Breaks Loose (Invaded)'s playthrough at YouTube (PC version)] | ||
{{ | {{RaymanLegendsLocations}} | ||
[[fr:C'est l'enfer ici !]] | [[fr:C'est l'enfer ici !]] | ||
[[pl:Piekło uciekło]] | |||
[[Category:Places from Rayman Legends]] | [[Category:Places from Rayman Legends]] | ||
Latest revision as of 16:32, 10 December 2023
| Hell Breaks Loose | ||||||||
|---|---|---|---|---|---|---|---|---|
 | ||||||||

| ||||||||
| ← Swarmed and Dangerous | A Cloud of Darkness! → | |||||||
 Olympus Maximus Olympus Maximus
| ||||||||
  
|
||||||||
   
|

| |||||||
 
|
 
| |||||||
Hell Breaks Loose is the eighth level of Olympus Maximus, the fifth world in Rayman Legends. The heroes call upon Murfy to assist in escaping from the dragons the Dark Teensy whistles for.
Description
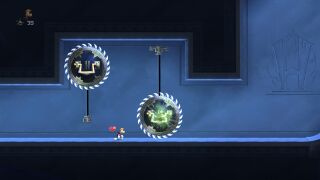
The heroes begin in a room that's similar to the ones in the Amazing Maze. After using the wall run ability to dodge the spikes and small buzzsaws, the heroes call upon Murfy to move larger buzzsaws and platforms. The first secret area is located above a blue movable platform on the left side. After cutting a rope, the heroes spot the fifth Dark Teensy oiling up his vehicle. He then whistles for three dragons and rides away. The heroes must wall run to escape the dragons, all while Murfy moves various objects and cuts ropes. After a while, with the chase still on, the heroes and the dragons enter into the rocky labyrinth. Nearby are bodies of lava that will shoot bursts of lava if the solid objects are moved. Murfy needs to move these to defeat the dragons. After all are defeated, the heroes can now search for the exit that's straight ahead. A Skull Coin is close by, along with the second secret area.
-
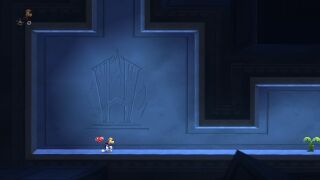 The start of the level.
 -
-
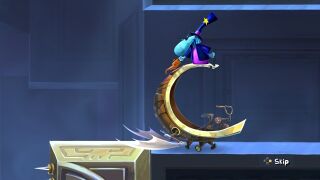 The fifth Dark Teensy.
 -
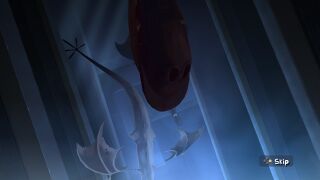 The dragons arriving at the Dark Teensy's command.
 -
-
-
-
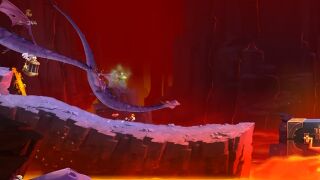 The dragons continuing their pursuit.
 -
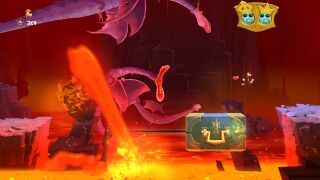 The first dragon being scorched.
 -
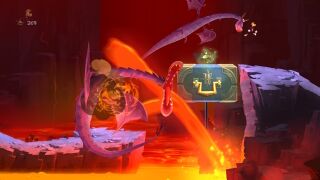 The second dragon following suit.
 -
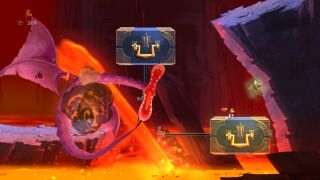 The third and final dragon meeting the same demise.
 -
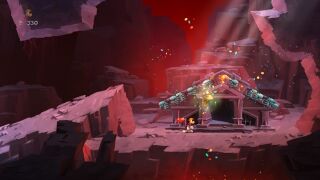 The end of the level.


Queen Teensie area
Murfy must carefully move the wheel back and forth to allow the heroes to safely reach the Teensie cage.
-
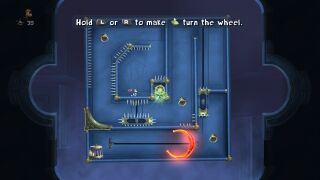 The first secret area.

King Teensie area
All the heroes needs to do is bounce on the drums to get to the cage.
-
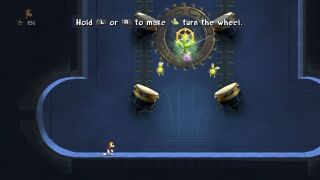 The second secret area.
 -
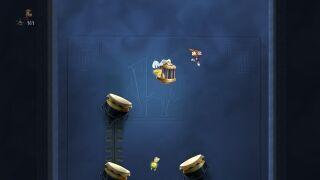
-
 The same area in Murfy's Touch.


| Hell Breaks Loose - Invaded | ||||||||
|---|---|---|---|---|---|---|---|---|
 | ||||||||
|
| ||||||||
| Olympus Maximus
| ||||||||
|
|
||||||||
Invaded
This level is invaded by the Underwater Toads from 20,000 Lums Under the Sea and Dark Rayman.
The level is one of the six levels to be invaded by Dark Rayman, and is unlocked once the five Dark Teensies are defeated. Unlike other invaded levels, the ones invaded by Dark Rayman do not require the original levels to be completed in advance.
The level takes place near the beginning of the normal level and is slightly modified; it ends where Murfy appears to help the heroes in the normal one.
Due to the presence of the invaders, most of the place is flooded, and the heroes will start underwater.
In order to proceed, the heroes, chased by Dark Rayman, will have to activate levers by attacking them in order to remove the single-eyed saws blocking their way. Underwater Toads are also here to bother the heroes.
-
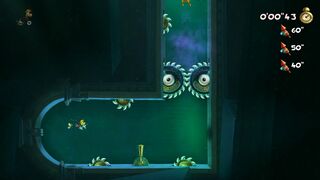 The beginning of the level.
 -

-
 An Underwater Toad.


Trivia
- This is the only level with 10 teensies that does not require the player to get 600 lums for the gold cup.
- It is the very last level in the game where the heroes are assisted by Murfy.
- Sometimes, in version of the game outside of the Wii U, PS Vita and Switch ports, in the King Teensie area, Murfy might automatically touch a lum, and turn it purple.
- In the Wii U version, Murfy can appear on multiplayer to help his friends by poking the eye of the saws: it deactivates them, and the heroes may pass through them. However, unless there are 4 or 5 players, it is impossible to pass through the last two pairs of saws when they are deactivated. There is still a mouse hole to succeed, though it is almost random.
- It is the only level invaded by Dark Rayman to not have a 5 Skull difficulty.
Name in other languages
| Language | Name |
|---|---|
| French | C'est l'enfer ici ! |
| German | Hölle, Hölle, Hölle! |
| Italian | Inferno di fuoco |
| Japanese | W5-6 「恐怖の急転直下」 |
| Russian | Ад на земле |
| Spanish | El infierno se desata |
External links
- Hell Breaks Loose's playthrough at YouTube (PC version)
- Hell Breaks Loose (Invaded)'s playthrough at YouTube (PC version)