Elevator Ambush: Difference between revisions
RayGamer99 (talk | contribs) |
Hunchman801 (talk | contribs) mNo edit summary |
||
| (14 intermediate revisions by 3 users not shown) | |||
| Line 2: | Line 2: | ||
| name = Elevator Ambush | | name = Elevator Ambush | ||
| image = [[File:Elevatorambush.png|center|320px|Elevator Ambush]] | | image = [[File:Elevatorambush.png|center|320px|Elevator Ambush]] | ||
| difficulty = [[File:DifficultySkull.png|32px| | | difficulty = [[File:DifficultySkull.png|32px|Skull]][[File:DifficultySkull.png|32px|Skull]][[File:DifficultySkull.png|32px|Skull]][[File:DifficultySkull.png|32px|Skull]] | ||
| preceded by = [[The Shaolin Master Dojo]] | | preceded by = [[The Shaolin Master Dojo]] | ||
| followed by = [[There's Always a Bigger Fish]] | | followed by = [[There's Always a Bigger Fish]] | ||
| world = [[20,000 Lums Under the Sea]] | | world = [[20,000 Lums Under the Sea]] | ||
| teensies = [[File:Icon1RO.png|15px| | | teensies = [[File:Icon1RO.png|15px|1]][[File:Icon0RO.png|15px|0]] | ||
| bronze cup = [[File:Icon1RO.png|15px| | | bronze cup = [[File:Icon1RO.png|15px|1]][[File:Icon5RO.png|15px|5]][[File:Icon0RO.png|15px|0]] [[File:RO-Lums.png|30px|Lums]] | ||
| silver cup = [[File:Icon3RO.png|15px| | | silver cup = [[File:Icon3RO.png|15px|3]][[File:Icon0RO.png|15px|0]][[File:Icon0RO.png|15px|0]] [[File:RO-Lums.png|30px|Lums]] | ||
| lucky ticket = [[File:Icon4RO.png|15px| | | lucky ticket = [[File:Icon4RO.png|15px|4]][[File:Icon5RO.png|15px|5]][[File:Icon0RO.png|15px|0]] [[File:RO-Lums.png|30px|Lums]] | ||
| gold cup = [[File:Icon6RO.png|15px| | | gold cup = [[File:Icon6RO.png|15px|6]][[File:Icon0RO.png|15px|0]][[File:Icon0RO.png|15px|0]] [[File:RO-Lums.png|30px|Lums]] | ||
}} | }} | ||
| Line 25: | Line 25: | ||
==Area 2== | ==Area 2== | ||
When the team jumps onto a long pipe, it begins to move downward. While on it, [[Underwater Toad]]s create an ambush on the heroes. They can appear from above, the background and the foreground. Eventually, after defeating them, the pipe stops next to the exit door. | When the team jumps onto a long pipe, it begins to move downward. While on it, [[Underwater Toad]]s and [[Spy Toad]]s create an ambush on the heroes. They can appear from above, the background and the foreground. Eventually, after defeating them, the pipe stops next to the exit door. | ||
<gallery widths="320px" heights="180px"> | <gallery widths="320px" heights="180px"> | ||
| Line 32: | Line 32: | ||
==Area 3== | ==Area 3== | ||
At the start of this area, the team can hear a [[Sharkman]] grunting as he throws electrifying objects that will hurt the heroes if they come into contact. The first secret area can be found by going underwater near a different [[Sharkman]]. Shortly after, the heroes will go underwater. They need to be careful of the pipes that can crush them and the [[missile]]s being shot from an opening. The second [[Skull Coin]] is under a [[Dark Sentry]] and three underwater mines. Then, red homing [[missile]]s appear. The heroes need to be quick as they continue to [[Swimming|swim]]. The second secret area is located behind a fake foreground wall. The door is to the right of the second secret area. | At the start of this area, the team can hear a [[Sharkman]] grunting as he throws electrifying objects that will hurt the heroes if they come into contact. The first secret area can be found by going underwater near a different [[Sharkman]]. Shortly after, the heroes will go underwater. They need to be careful of the pipes that can crush them and the [[live missile]]s being shot from an opening. The second [[Skull Coin]] is under a [[Dark Sentry]] and three underwater mines. Then, red homing [[live missile]]s appear. The heroes need to be quick as they continue to [[Swimming|swim]]. The second secret area is located behind a fake foreground wall. The door is to the right of the second secret area. | ||
<gallery widths="320px" heights="180px"> | <gallery widths="320px" heights="180px"> | ||
Elevator Ambush 5.jpg|A [[Sharkman]]. | Elevator Ambush 5.jpg|A [[Sharkman]]. | ||
Elevator Ambush 8.jpg|A [[Teensie]] tied to a crushing pipe. | Elevator Ambush 8.jpg|A [[Teensie]] tied to a crushing pipe. | ||
Elevator Ambush 9.jpg|A barrage of [[missile]]s. | Elevator Ambush 9.jpg|A barrage of [[live missile]]s. | ||
</gallery> | </gallery> | ||
| Line 57: | Line 57: | ||
==Area 4== | ==Area 4== | ||
[[ | The [[Elder Teensy]] grants the team the power to use the [[Flying Punch]] as they jump on another pipe that acts like an elevator. Another ambush from the [[Underwater Toad|Underwater]] and [[Spy Toad]]s commences. [[Dark Sentry|Dark Sentries]] now will appear during the fight. The heroes must survive until they reach the door. | ||
<gallery widths="320px" heights="180px"> | <gallery widths="320px" heights="180px"> | ||
| Line 64: | Line 64: | ||
==Area 5== | ==Area 5== | ||
The gang easily spots the fourth [[Dark Teensy]] tormenting a girl [[Teensie]]. When the [[Dark Teensy]] notices the heroes from behind, he straps the girl to his mechanical vehicle and rides away. The team must follow them, with the [[ | The gang easily spots the fourth [[Dark Teensy]] tormenting a girl [[Teensie]]. When the [[Dark Teensy]] notices the heroes from behind, he straps the girl to his mechanical vehicle and rides away. The team must follow them, with the [[Flying Punch]] power-up. The area is straightforward; [[Sharkman|Sharkmen]] and [[Spy Toad]]s appear as they advance. | ||
<gallery widths="320px" heights="180px"> | <gallery widths="320px" heights="180px"> | ||
| Line 70: | Line 70: | ||
Elevator Ambush 14.jpg|[[Rayman]] near a [[Sharkman]]. | Elevator Ambush 14.jpg|[[Rayman]] near a [[Sharkman]]. | ||
Elevator Ambush 15.jpg|Two [[Spy Toad]]s, one torturing a [[Teensie]]. | Elevator Ambush 15.jpg|Two [[Spy Toad]]s, one torturing a [[Teensie]]. | ||
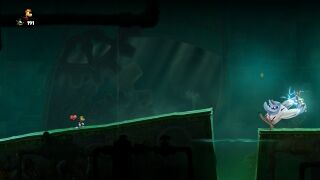
Elevator Ambush 16.jpg|A flying [[Teensie]] [[cage]] guarded by a wall of electricity. | |||
</gallery> | </gallery> | ||
==Area 6== | ==Area 6== | ||
The heroes find the [[Dark Teensy]] again. They now must hurry while they chase him. Dangers underwater like red [[missile]]s and mines stand in the team's way. Back on dry land in the base, the girl [[Teensie]] pokes the [[Dark Teensy]]'s nose and escapes. The level is completed after the [[Dark Teensy]] yells and goes away. | The heroes find the [[Dark Teensy]] again. They now must hurry while they chase him. Dangers underwater like red [[live missile]]s and mines stand in the team's way. Back on dry land in the base, the girl [[Teensie]] pokes the [[Dark Teensy]]'s nose and escapes. The level is completed after the [[Dark Teensy]] yells and goes away. | ||
<gallery widths="320px" heights="180px"> | <gallery widths="320px" heights="180px"> | ||
| Line 83: | Line 84: | ||
| name = Elevator Ambush - Invaded | | name = Elevator Ambush - Invaded | ||
| image = [[File:Invaded4.png|center|320px|Elevator Ambush - Invaded]] | | image = [[File:Invaded4.png|center|320px|Elevator Ambush - Invaded]] | ||
| difficulty = [[File:DifficultySkull.png|32px| | | difficulty = [[File:DifficultySkull.png|32px|Skull]][[File:DifficultySkull.png|32px|Skull]][[File:DifficultySkull.png|32px|Skull]][[File:DifficultySkull.png|32px|Skull]] | ||
| world = [[20,000 Lums Under the Sea]] | | world = [[20,000 Lums Under the Sea]] | ||
| teensies = [[File:Icon3RO.png|15px| | | teensies = [[File:Icon3RO.png|15px|3]] | ||
}} | }} | ||
==Invaded== | ==Invaded== | ||
This level is invaded by enemies from [[Olympus Maximus]]. It features [[Minotaur]]s standing on shields, flameballs, | This level is invaded by enemies from [[Olympus Maximus]]. It features [[Minotaur]]s standing on shields, flameballs, [[lavaroot]]s and [[flying sword]]s near the end. | ||
It is unlocked once the original level is completed and if the player goes far enough in [[Olympus Maximus]]. | It is unlocked once the original level is completed and if the player goes far enough in [[Olympus Maximus]]. | ||
In this level, the player(s) starts from the lowest level of the first elevator in the original level, and has to reach the top of it. While the elevator doesn't work upwards, there is wind blowing upwards; the player(s) must use it to fly to the finish line, avoiding flameballs, | In this level, the player(s) starts from the lowest level of the first elevator in the original level, and has to reach the top of it. While the elevator doesn't work upwards, there is wind blowing upwards; the player(s) must use it to fly to the finish line, avoiding flameballs, [[flying sword]]s and [[Minotaur]]s. | ||
The player(s) are given at the beginning of the level the [[ | The player(s) are given at the beginning of the level the [[Flying Punch]]es by the [[Elder Teensy]]. | ||
<gallery widths="320px" heights="180px"> | |||
Elevator Ambush (Invaded) 1.jpg|The beginning of the level. | |||
Elevator Ambush (Invaded) 2.jpg|[[Rayman]] must avoid [[Red Minotaur]]s and [[lavaroot]]s. | |||
Elevator Ambush (Invaded) 3.jpg|A stack of [[Minotaur]]s. | |||
Elevator Ambush (Invaded) 4.jpg|[[Flying sword]]s and [[lavaroot]]s near the end of the level. | |||
</gallery> | |||
===Trivia=== | ===Trivia=== | ||
* On the background, [[Minotaur]]s invaded the rooms of the underwater base. In the Wii U | * On the background, [[Minotaur]]s invaded the rooms of the underwater base. In the Wii U and Nintendo Switch versions, in multiplayer only (in the Nintendo Switch version, handheld mode is required as well) the player controlling [[Murfy]] can tap them in order to get extra [[Lum (UbiArt games)|Lums]]. | ||
{{clear}} | {{clear}} | ||
| Line 114: | Line 122: | ||
==External links== | ==External links== | ||
*[https://www.youtube.com/watch?v= | *[https://www.youtube.com/watch?v=jGONNyT53C0 Elevator Ambush's playthrough at YouTube (PC version)] | ||
*[https://www.youtube.com/watch?v= | *[https://www.youtube.com/watch?v=DIZJWlMylSU Elevator Ambush (Invaded)'s playthrough at YouTube (PC version)] | ||
{{RaymanLegendsLocations}} | {{RaymanLegendsLocations}} | ||
Latest revision as of 16:05, 23 September 2024
| Elevator Ambush | ||||||||
|---|---|---|---|---|---|---|---|---|
 | ||||||||
| ← The Shaolin Master Dojo | There's Always a Bigger Fish → | |||||||
Elevator Ambush is the seventh level of 20,000 Lums Under the Sea, the fourth world in Rayman Legends. In certain parts of the level, Rayman and his friends will battle Underwater Toads and Spy Toads as they ride on pipes that act like elevators. They will also meet the fourth Dark Teensy.
Area 1
The team of heroes start out in a dark underwater base. The beginning is straightforward as the gang needs to avoid the Dark Sentries along the way. The first Skull Coin is located on the light of a Dark Sentry. The door is to the left after climbing down the water pipes.
-
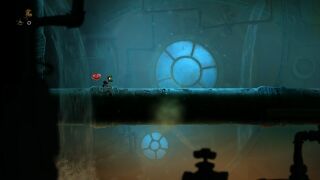 The beginning of the level.
 -
-
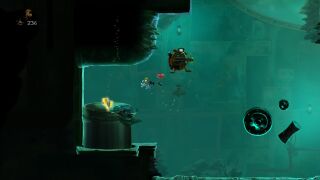
 A trapped Teensie inside the radar of a Dark Sentry.


Area 2
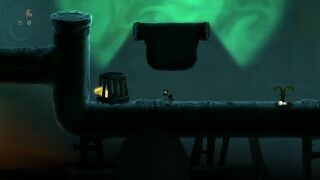
When the team jumps onto a long pipe, it begins to move downward. While on it, Underwater Toads and Spy Toads create an ambush on the heroes. They can appear from above, the background and the foreground. Eventually, after defeating them, the pipe stops next to the exit door.

Area 3
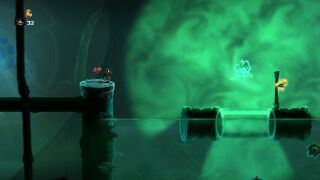
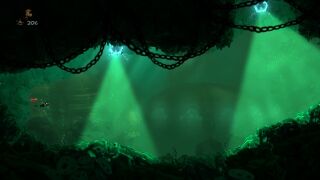
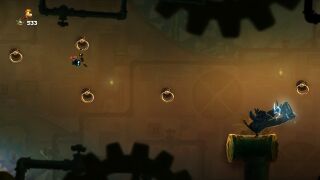
At the start of this area, the team can hear a Sharkman grunting as he throws electrifying objects that will hurt the heroes if they come into contact. The first secret area can be found by going underwater near a different Sharkman. Shortly after, the heroes will go underwater. They need to be careful of the pipes that can crush them and the live missiles being shot from an opening. The second Skull Coin is under a Dark Sentry and three underwater mines. Then, red homing live missiles appear. The heroes need to be quick as they continue to swim. The second secret area is located behind a fake foreground wall. The door is to the right of the second secret area.
-
 A Sharkman.
 -
 A Teensie tied to a crushing pipe.
 -
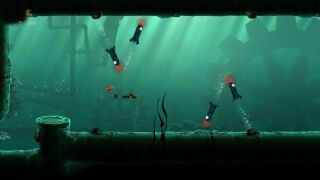 A barrage of live missiles.


Queen Teensie area
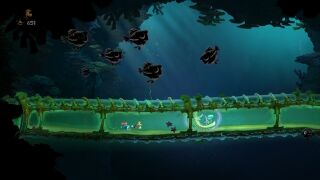
The players need to swim behind a strange sea creature called a Mecha Mini-Murray that will block the dangerous lights of the Dark Sentries in order to reach the cage at the end.
-
 Rayman must avoid the Dark Sentries.
 -
 The freed Teensie.


King Teensie area
The heroes must get onto a the moveable platforms and maneuver to avoid the multiple Dark Sentries.
-
 The start of the area.
 -


Area 4
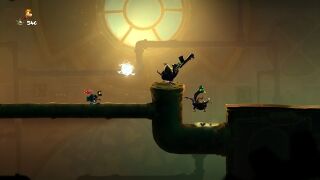
The Elder Teensy grants the team the power to use the Flying Punch as they jump on another pipe that acts like an elevator. Another ambush from the Underwater and Spy Toads commences. Dark Sentries now will appear during the fight. The heroes must survive until they reach the door.
-
 An army of Spy Toads.

Area 5
The gang easily spots the fourth Dark Teensy tormenting a girl Teensie. When the Dark Teensy notices the heroes from behind, he straps the girl to his mechanical vehicle and rides away. The team must follow them, with the Flying Punch power-up. The area is straightforward; Sharkmen and Spy Toads appear as they advance.
-
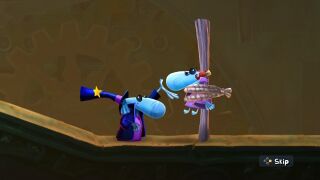 The fourth Dark Teensy tormenting a girl Teensie.
 -
-
-


Area 6
The heroes find the Dark Teensy again. They now must hurry while they chase him. Dangers underwater like red live missiles and mines stand in the team's way. Back on dry land in the base, the girl Teensie pokes the Dark Teensy's nose and escapes. The level is completed after the Dark Teensy yells and goes away.
-
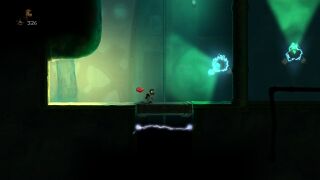
 Rayman chasing the Dark Teensy.
 -
 The Dark Teensy shouting angrily at the player and the girl Teensie.


| Elevator Ambush - Invaded | ||||||||
|---|---|---|---|---|---|---|---|---|
 | ||||||||
Invaded
This level is invaded by enemies from Olympus Maximus. It features Minotaurs standing on shields, flameballs, lavaroots and flying swords near the end.
It is unlocked once the original level is completed and if the player goes far enough in Olympus Maximus.
In this level, the player(s) starts from the lowest level of the first elevator in the original level, and has to reach the top of it. While the elevator doesn't work upwards, there is wind blowing upwards; the player(s) must use it to fly to the finish line, avoiding flameballs, flying swords and Minotaurs.
The player(s) are given at the beginning of the level the Flying Punches by the Elder Teensy.
-
 The beginning of the level.
 -
-
 A stack of Minotaurs.
 -
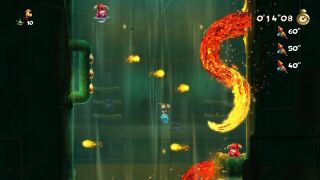
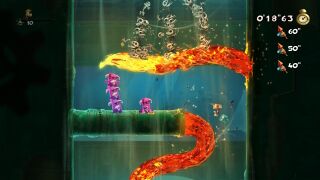
 Flying swords and lavaroots near the end of the level.
_1.jpg)
_2.jpg)
_3.jpg)
_4.jpg)
Trivia
- On the background, Minotaurs invaded the rooms of the underwater base. In the Wii U and Nintendo Switch versions, in multiplayer only (in the Nintendo Switch version, handheld mode is required as well) the player controlling Murfy can tap them in order to get extra Lums.
Name in other languages
| Language | Name |
|---|---|
| Dutch | In de lift |
| French | Ascenseurs sans fin |
| German | Aufzug-Attacke |
| Italian | Imboscata da ascensore |
| Japanese | W4-5 「待ちうける災難」 |
| Russian | Засада на подъёмнике |
| Spanish | Emboscada en el ascensor |
External links
- Elevator Ambush's playthrough at YouTube (PC version)
- Elevator Ambush (Invaded)'s playthrough at YouTube (PC version)