« Héros de la Croisée des Rêves » : différence entre les versions
Nouvelle page |
Mieux |
||
| (44 versions intermédiaires par 5 utilisateurs non affichées) | |||
| Ligne 1 : | Ligne 1 : | ||
[[ | __NOTOC__ | ||
[[ | Dans les premiers jeux de [[Rayman (série)|la série ''Rayman'']], [[Rayman]] était le seul personnage jouable, mais aussi le seul héros à protéger la [[Croisée des Rêves]] lorsqu'elle se trouvait menacée par des êtres malfaisants comme les [[Robot-Pirate|Robots-Pirates]] et les [[Hoodlums]]. | ||
[[ | |||
À partir de ''[[Rayman Origins]]'', d'autres personnages jouables sont apparus aux côtés de [[Rayman]], élargissant le nombre de héros protégeant la [[Croisée des Rêves]]. Parmi eux se trouvent quelques amis de longue date de [[Rayman]] comme [[Globox]] et des [[Grand Mini|Grands Minis]]. Les autres héros sont des membres de l'[[espèce de Rayman]] ou de [[Espèce de Globox|Globox]], des [[Ptizêtre]]s ou des princesse [[humain]]es. | |||
Certains de ces personnages jouables sont en réalité [[Rayman]] ou [[Globox]] avec une couleur de peau différente ou un déguisement, comme [[Raybox]] et [[Globox rouge]]. Ils font donc office de [[skin]] et non de nouveau personnage. | |||
==Apparitions== | |||
===''Rayman Origins''=== | |||
Dans | Dans chaque version de ''[[Rayman Origins]]'', il y a 16 personnages jouables, sauf dans la version Nintendo 3DS, où il n'y en a que 6. Ils se trouvent sous [[l'Arbre Ronfleur]], enfermés dans des [[bulle]]s. Pour pouvoir les incarner, il faut briser un certain nombre de [[cage]]s d'[[Électoon]]s, indiqué par [[Murfy]]. Une fois obtenus, on peut apprendre leur histoire en parlant avec [[Polokus]]. Une fois [[Lande aux Esprits Frappés (jeux UbiArt)|la Lande aux Esprits Frappés souterraine]] terminée, plusieurs joueurs peuvent incarner un même personnage en même temps. | ||
Dans les versions Xbox 360 et PlayStation 3 du jeu, le joueur gagne le succès/trophée [[Face B]] après avoir joué un niveau avec un personnage débloqué. | |||
Dans | Dans ''[[Rayman Origins: Enhanced Edition]]'', 18 personnages ont été ajoutées, soit un total de 34 personnages jouables. | ||
Dans ''[[Rayman Adventures]]'', il y a | <gallery widths="320px" heights="180px"> | ||
RO Polokus Chamber.jpg|Des personnages dans des [[bulle]]s sous [[l'Arbre Ronfleur]]. | |||
</gallery> | |||
===''Rayman Legends''=== | |||
Chaque version de ''[[Rayman Legends]]'' a un nombre de personnages jouables différent : il y en a 33 sur PC, 34 sur Xbox 360 et PlayStation 3, 35 sur PlayStation Vita, 36 sur PlayStation 4, 37 sur Xbox One et 44 sur Nintendo Switch. | |||
Les personnages jouables se trouvent dans la Galerie des Héros, enfermés dans des tableaux. Pour pouvoir les incarner, il faut soit amasser un certain nombre de [[Lums (jeux UbiArt)|Lums]], indiqué sur les cadenas qui verrouillent les tableaux, soit compléter un niveau de secours de princesse. Une fois obtenus, on peut apprendre leur histoire en regardant les tableaux. | |||
Dans les versions PC, Xbox 360, PlayStation 3, PlayStation Vita, Xbox One et PlayStation 4, le joueur gagne le succès/trophée [[Collectionneur de héros]]/[[C'est nous les héros]] quand il débloque dix tableaux de héros dans la Galerie des Héros et le succès/trophée [[Plus riche que riche]]/[[Millionnaire !]] quand il débloque le dernier héros, [[Rayomz]]. | |||
<gallery widths="320px" heights="180px"> | |||
Legends characters.png|Les quatre principaux héros de ''[[Rayman Legends]]''. | |||
RL Heroes Gallery FR.png|La plupart des personnages se débloquent en amassant des [[Lums (jeux UbiArt)|Lums]]. | |||
RL Save Barbara FR.png|Niveau de secours de [[Barbara]]. | |||
Heroes logo.png|thumb|Logo de la Galerie des Héros. | |||
</gallery> | |||
===Jeux mobiles ''Rayman'' réalisés avec l'UbiArt Framework=== | |||
Dans les versions iOS et Android de ''[[Rayman Jungle Run]]'', [[Rayman]] est le seul personnage jouable, mais trois autres peuvent être ajoutés en achetant un pack spécial. Dans la version Windows, les quatre personnages jouables sont disponibles immédiatement et gratuitement. | |||
Dans la plupart des versions de ''[[Rayman Fiesta Run]]'', il y a 14 personnages jouables, sauf dans la version iOS où il y en a 20. Il faut d'abord les déverrouiller sur la carte de sélection des niveaux. Cela fait, ils se trouvent dans la Galerie des Héros, enfermés dans des [[bulle]]s. Pour pouvoir les incarner, amasser un certain nombre de [[Lums (jeux UbiArt)|Lums]], indiqué sous les [[bulle]]s. | |||
Dans ''[[Rayman Adventures]]'', il y a 71 personnages jouables. Ils se trouvent dans la Galerie des Costumes. Certains peuvent être obtenus en échange de [[Gemme (Rayman Adventures)|gemmes]], tandis que d'autres peuvent être obtenus via des packs payants ou lors d'[[Évènement (Rayman Adventures)|évènements]] saisonniers. | |||
Dans ''[[Rayman Mini]]'', il y a 55 personnages jouables. Ils se trouvent dans la Galerie des Costumes. La plupart peuvent être obtenus en échange d'[[Électoon]]s ou de [[Pièce de la classe|pièces de la classe]]. | |||
<gallery widths="320px" heights="180px"> | |||
RA Rayman Gallery FR.png|La Galerie des Costumes de ''[[Rayman Adventures]]''. | |||
Rayman Mini App Store Screenshot 7.png|Cette image datant du développement de ''[[Rayman Mini]]'' montre la Galerie des Costumes du jeu. | |||
</gallery> | |||
==Liste des héros== | |||
{| class="wikitable" | {| class="wikitable" | ||
|- | |- | ||
! rowspan="2"|Image !! rowspan="2"|Nom !! colspan=" | ! rowspan="2"|Image !! rowspan="2"|Nom !! colspan="6"|Conditions d'obtention | ||
|- | |||
| ''[[Rayman Origins]]'' || ''[[Rayman Jungle Run]]'' || ''[[Rayman Legends]]'' || ''[[Rayman Fiesta Run]]'' || ''[[Rayman Adventures]]'' || ''[[Rayman Mini]]'' | |||
|- | |||
| [[File:RaymanArtworkRender.png|100px]] || [[Rayman]]<br />(alias '''Rayman classique''') || Disponible dès le début d'une partie || Disponible dès le début d'une partie || Disponible dès le début d'une partie || Disponible dès le début d'une partie || [[File:Icon5RO.png|15px|500]][[File:Icon0RO.png|15px|500]][[File:Icon0RO.png|15px|500]] [[File:Gem icon.png|25px]] || Disponible dès le début d'une partie | |||
|- | |||
| [[File:RaymanAdventures ArtworkRay.png|100px]] || [[Rayman]] || || || || || Disponible dès le début d'une partie || [[File:Icon1RO.png|15px|10]][[File:Icon0RO.png|15px|10]] [[File:Rayman Mini - Swag Coin Icon.png|25px]] | |||
|- | |||
| [[File:RL Raybox.png|100px]] || [[Raybox]]<br />(alias '''Costume de Globox''' et '''Ray-box''') || [[File:Icon5RO.png|15px|5]] [[File:RO-Electoon.png|25px]] (PC, Mac, Wii, Xbox 360, PlayStation 3, PlayStation Vita)<br />[[File:Icon5RO.png|15px|50]][[File:Icon0RO.png|15px|50]] [[File:RO-Electoon.png|25px]] (Nintendo 3DS) || Acheter le pack de Costumes (iOS et Android)<br />Disponible dès le début d'une partie (Windows) || [[File:Icon2RO.png|15px|20 000]][[File:Icon0RO.png|15px|20 000]] [[File:Icon0RO.png|15px|20 000]][[File:Icon0RO.png|15px|20 000]][[File:Icon0RO.png|15px|20 000]] [[File:RO-Lums.png|25px]] (PC, Xbox 360, PlayStation 3, PlayStation Vita)<br />[[File:Icon2RO.png|15px|28 000]][[File:Icon8RO.png|15px|28 000]] [[File:Icon0RO.png|15px|28 000]][[File:Icon0RO.png|15px|28 000]][[File:Icon0RO.png|15px|28 000]] [[File:RO-Lums.png|25px]] (PlayStation 4)<br />[[File:Icon4RO.png|15px|40 000]][[File:Icon0RO.png|15px|40 000]] [[File:Icon0RO.png|15px|40 000]][[File:Icon0RO.png|15px|40 000]][[File:Icon0RO.png|15px|40 000]] [[File:RO-Lums.png|25px]] (Wii U, Switch)<br />[[File:Icon5RO.png|15px|55 000]][[File:Icon5RO.png|15px|55 000]] [[File:Icon0RO.png|15px|55 000]][[File:Icon0RO.png|15px|55 000]][[File:Icon0RO.png|15px|55 000]] [[File:RO-Lums.png|25px]] (Xbox One) || [[File:Icon7RO.png|15px|700]][[File:Icon0RO.png|15px|700]][[File:Icon0RO.png|15px|700]] [[File:RO-Lums.png|25px]] || Se connecter à Facebook || [[File:Icon1RO.png|15px|11]][[File:Icon1RO.png|15px|11]] [[File:Rayman Mini - Electoon Icon.png|25px]] | |||
|- | |||
| [[File:Raymesis-Legends.png|100px]] || [[Raymésis]] <br />(alias '''Dark Ray''', '''Rayman Envoûté''', '''Rayman alter ego''' et '''Dark Rayman''') || [[File:Icon2RO.png|15px|220]][[File:Icon2RO.png|15px|220]][[File:Icon0RO.png|15px|220]] [[File:RO-Electoon.png|25px]] (PC, Mac, Wii, Xbox 360, PlayStation 3, PlayStation Vita)<br />[[File:Icon1RO.png|15px|150]][[File:Icon5RO.png|15px|150]][[File:Icon0RO.png|15px|150]] [[File:RO-Electoon.png|25px]] (Nintendo 3DS) || Acheter le pack de Costumes (iOS et Android)<br />Disponible dès le début d'une partie (Windows) || [[File:Icon7RO.png|15px|75 000]][[File:Icon5RO.png|15px|75 000]] [[File:Icon0RO.png|15px|75 000]][[File:Icon0RO.png|15px|75 000]][[File:Icon0RO.png|15px|75 000]] [[File:RO-Lums.png|25px]] (PC, Xbox 360, PlayStation 3, PlayStation Vita)<br />[[File:Icon1RO.png|15px|100 000]][[File:Icon0RO.png|15px|100 000]][[File:Icon0RO.png|15px|100 000]] [[File:Icon0RO.png|15px|100 000]][[File:Icon0RO.png|15px|100 000]][[File:Icon0RO.png|15px|100 000]] [[File:RO-Lums.png|25px]] (PlayStation 4)<br />[[File:Icon1RO.png|15px|130 000]][[File:Icon3RO.png|15px|130 000]][[File:Icon0RO.png|15px|130 000]] [[File:Icon0RO.png|15px|130 000]][[File:Icon0RO.png|15px|130 000]][[File:Icon0RO.png|15px|130 000]] [[File:RO-Lums.png|25px]] (Wii U, Switch)<br />[[File:Icon1RO.png|15px|170 000]][[File:Icon7RO.png|15px|170 000]][[File:Icon0RO.png|15px|170 000]] [[File:Icon0RO.png|15px|170 000]][[File:Icon0RO.png|15px|170 000]][[File:Icon0RO.png|15px|170 000]] [[File:RO-Lums.png|25px]] (Xbox One)|| [[File:Icon1RO.png|15px|1 200]] [[File:Icon2RO.png|15px|1 200]][[File:Icon0RO.png|15px|1 200]][[File:Icon0RO.png|15px|1 200]] [[File:RO-Lums.png|25px]] || [[File:Icon5RO.png|15px|500]][[File:Icon0RO.png|15px|500]][[File:Icon0RO.png|15px|500]] [[File:Gem icon.png|25px]] || [[File:Icon6RO.png|15px|6]] [[File:Rayman Mini - Electoon Icon.png|25px]] | |||
|- | |||
| [[File:Sir Rayelot.png|100px]] || [[Sire Rayelot]] || || || [[File:Icon2RO.png|15px|2 000]] [[File:Icon0RO.png|15px|2 000]][[File:Icon0RO.png|15px|2 000]][[File:Icon0RO.png|15px|2 000]] [[File:RO-Lums.png|25px]] || || [[File:Icon1RO.png|15px|150]][[File:Icon5RO.png|15px|150]][[File:Icon0RO.png|15px|150]] [[File:Gem icon.png|25px]] || [[File:Icon2RO.png|15px|22]][[File:Icon2RO.png|15px|22]] [[File:Rayman Mini - Swag Coin Icon.png|25px]] | |||
|- | |||
| [[File:Ray Plumber.png|100px]] || [[Ray-plombier]] || || || [[File:Icon9RO.png|15px|9 000]] [[File:Icon0RO.png|15px|9 000]][[File:Icon0RO.png|15px|9 000]][[File:Icon0RO.png|15px|9 000]] [[File:RO-Lums.png|25px]] (Wii U et Switch uniquement) || || || | |||
|- | |- | ||
| | | [[File:Ray Vaas (Transparent).png|100px]] || [[Ray Vaas]] || || || [[File:Icon9RO.png|15px|9 000]] [[File:Icon0RO.png|15px|9 000]][[File:Icon0RO.png|15px|9 000]][[File:Icon0RO.png|15px|9 000]] [[File:RO-Lums.png|25px]] (Précommande sur Xbox One uniquement)<br />Disponible dès le début d'une partie (Switch uniquement) || || Acheter le Pack Primal ou le Mégapack [[Ubisoft]]<br />Atteindre le top 2% du classement du marathon pour la première fois ([[Évènement (Rayman Adventures)|Évènement]] du Marathon du donjon uniquement, du 9 au 22 octobre 2018) || [[File:Icon3RO.png|15px|39]][[File:Icon9RO.png|15px|39]] [[File:Rayman Mini - Electoon Icon.png|25px]] | ||
|- | |- | ||
| [[ | | [[File:Raymolk.png|100px]] || [[Raymolk]] || || || [[File:Icon1RO.png|15px|130 000]][[File:Icon3RO.png|15px|130 000]][[File:Icon0RO.png|15px|130 000]] [[File:Icon0RO.png|15px|130 000]][[File:Icon0RO.png|15px|130 000]][[File:Icon0RO.png|15px|130 000]] [[File:RO-Lums.png|25px]] (PC, Xbox 360, PlayStation 3, PlayStation Vita)<br />[[File:Icon1RO.png|15px|170 000]][[File:Icon7RO.png|15px|170 000]][[File:Icon0RO.png|15px|170 000]] [[File:Icon0RO.png|15px|170 000]][[File:Icon0RO.png|15px|170 000]][[File:Icon0RO.png|15px|170 000]] [[File:RO-Lums.png|25px]] (PlayStation 4)<br />[[File:Icon2RO.png|15px|220 000]][[File:Icon2RO.png|15px|220 000]][[File:Icon0RO.png|15px|220 000]] [[File:Icon0RO.png|15px|220 000]][[File:Icon0RO.png|15px|220 000]][[File:Icon0RO.png|15px|220 000]] [[File:RO-Lums.png|25px]] (Wii U, Switch)<br />[[File:Icon2RO.png|15px|280 000]][[File:Icon8RO.png|15px|280 000]][[File:Icon0RO.png|15px|280 000]] [[File:Icon0RO.png|15px|280 000]][[File:Icon0RO.png|15px|280 000]][[File:Icon0RO.png|15px|280 000]] [[File:RO-Lums.png|25px]] (Xbox One)<br /> || || [[File:Icon5RO.png|15px|500]][[File:Icon0RO.png|15px|500]][[File:Icon0RO.png|15px|500]] [[File:Gem icon.png|25px]]<br />Acheter le Pack Primal<br />Atteindre la première place du classement du marathon pour la première fois ([[Évènement (Rayman Adventures)|Évènement]] du Marathon du donjon uniquement, du 9 au 22 octobre 2018) || [[File:Icon1RO.png|15px|1]] [[File:Rayman Mini - Electoon Icon.png|25px]] | ||
|- | |- | ||
| [[ | | [[File:Rayomz.png|100px]] || [[Rayomz]] || || || [[File:Icon1RO.png|15px|1 000 000]] [[File:Icon0RO.png|15px|1 000 000]][[File:Icon0RO.png|15px|1 000 000]][[File:Icon0RO.png|15px|1 000 000]] [[File:Icon0RO.png|15px|1 000 000]][[File:Icon0RO.png|15px|1 000 000]][[File:Icon0RO.png|15px|1 000 000]] [[File:RO-Lums.png|25px]] || || [[File:Icon1RO.png|15px|1 500]] [[File:Icon5RO.png|15px|1 500]][[File:Icon0RO.png|15px|1 500]][[File:Icon0RO.png|15px|1 500]] [[File:Gem icon.png|25px]]<br />Acheter le Pack Méga Aventure || [[File:Icon4RO.png|15px|4]] [[File:Rayman Mini - Swag Coin Icon.png|25px]] | ||
|- | |- | ||
| [[ | | [[File:Splinterray.png|100px]] || [[Splinter Ray]] || || || [[File:Icon2RO.png|15px|28 000]][[File:Icon8RO.png|15px|28 000]] [[File:Icon0RO.png|15px|28 000]][[File:Icon0RO.png|15px|28 000]][[File:Icon0RO.png|15px|28 000]] [[File:RO-Lums.png|25px]] (Précommande Xbox 360 uniquement)<br />Disponible dès le début d'une partie (Switch uniquement) || || [[File:Icon3RO.png|15px|3 000]] [[File:Icon0RO.png|15px|3 000]][[File:Icon0RO.png|15px|3 000]][[File:Icon0RO.png|15px|3 000]] [[File:Gem icon.png|25px]]<br />Acheter le Pack Tom Clancy, le Mégapack [[Ubisoft]] ou le Pack Splinter Ray || [[File:Icon1RO.png|15px|1]] [[File:Rayman Mini - Swag Coin Icon.png|25px]] | ||
|- | |- | ||
| [[ | | [[File:AssassinrayMini.png|100px]] || [[Rayssassin]]<br />(alias '''Ray Assassin''') || || || Disponible dès le début d'une partie (Précommande PlayStation 3 uniquement)<br />[[File:Icon9RO.png|15px|9 000]] [[File:Icon0RO.png|15px|9 000]][[File:Icon0RO.png|15px|9 000]][[File:Icon0RO.png|15px|9 000]] [[File:RO-Lums.png|25px]] (PlayStation 4 uniquement)<br />Disponible dès le début d'une partie (Switch uniquement) || || Acheter le Pack de Départ, le Must-have Pack, le Pack Assassin ou le Mégapack [[Ubisoft]]<br />Achat dans la Boutique || [[File:Icon1RO.png|15px|19]][[File:Icon9RO.png|15px|19]] [[File:Rayman Mini - Electoon Icon.png|25px]] | ||
|- | |- | ||
| [[ | | [[File:Ray of Persia.png|100px]] || [[Ray of Persia]] || || || Terminer le dernier Défi de [[Murfy]] (PlayStation Vita uniquement)<br />Disponible dès le début d'une partie (Switch uniquement) || || Acheter le Mégapack [[Ubisoft]] || [[File:Icon2RO.png|15px|26]][[File:Icon6RO.png|15px|26]] [[File:Rayman Mini - Swag Coin Icon.png|25px]] | ||
|- | |- | ||
| [[ | | [[File:Funkyray.png|100px]] || [[Funky Ray]] || || || Avoir téléchargé ''[[Rayman Legends Challenges App]]'' (Wii U uniquement)<br />100 points Uplay (PlayStation 4 et Xbox One uniquement)<br />Disponible dès le début d'une partie (Switch uniquement) || || [[File:Icon1RO.png|15px|1 500]] [[File:Icon5RO.png|15px|1 500]][[File:Icon0RO.png|15px|1 500]][[File:Icon0RO.png|15px|1 500]] [[File:Gem icon.png|25px]]<br />Acheter le Pack Groovy || | ||
|- | |- | ||
| [[ | | [[File:UbiRay.png|100px]] || [[Ray champion]]<br />(alias '''Ray Dev Team''' et '''UbiRay''') || || || Devenir un VIP (PlayStation 4 et Xbox One uniquement)<br />Disponible dès le début d'une partie (Switch uniquement) || || || | ||
|- | |- | ||
| [[ | | [[File:Santa Ray.png|100px]] || [[Raynoel]] || || || || [[File:Icon3RO.png|15px|3 000]] [[File:Icon0RO.png|15px|3 000]][[File:Icon0RO.png|15px|3 000]][[File:Icon0RO.png|15px|3 000]] [[File:RO-Lums.png|25px]] || || | ||
|- | |- | ||
| [[ | | [[File:Ray-mas.png|100px]] || [[Raynoel|Ray-Noël]] || || || || || Acheter le Pack Noël (Décembre 2015 et 2016 uniquement) || [[File:Icon1RO.png|15px|14]][[File:Icon4RO.png|15px|14]] [[File:Rayman Mini - Swag Coin Icon.png|25px]] | ||
|- | |- | ||
| [[ | | [[File:Santa Ray 2.png|100px]] || [[Raynoel 2]] || || || || [[File:Icon3RO.png|15px|3 000]] [[File:Icon0RO.png|15px|3 000]][[File:Icon0RO.png|15px|3 000]][[File:Icon0RO.png|15px|3 000]] [[File:RO-Lums.png|25px]] (iOS uniquement) || || | ||
|- | |- | ||
| [[ | | [[File:Ray-Fucius.png|100px]] || [[Ray-Fucius]] || || || || || Acheter le Pack Dojo || [[File:Icon1RO.png|15px|18]][[File:Icon8RO.png|15px|18]] [[File:Rayman Mini - Swag Coin Icon.png|25px]] | ||
|- | |- | ||
| [[ | | [[File:Shadow Ray.png|100px]] || [[Ray Noir & Blanc]] <br />(alias '''Shadow Ray''' et '''Dark Rayman''') || || || || || Acheter un pack spécial<br />Atteindre la première place du classement du marathon pour la première fois ([[Évènement (Rayman Adventures)|Évènement]] du Marathon du donjon uniquement, du 22 octobre au 6 novembre 2018) || [[File:Icon3RO.png|15px|33]][[File:Icon3RO.png|15px|33]] [[File:Rayman Mini - Electoon Icon.png|25px]] | ||
|- | |- | ||
| [[ | | [[File:Shayman (Transparent).png|100px]] || [[Shayman]] || || || || || Acheter le Pack J.O || | ||
|- | |- | ||
| [[ | | [[File:Rayman (RED).png|100px]] || [[(Rayman)RED]] || || || || Acheter le Pack (RED) (iOS uniquement) || || | ||
|- | |- | ||
| [[ | | [[File:RaymanWerewolf.png|100px]] || [[Raygarou]] || || || || Terminer le mode Cauchemar || || [[File:Icon1RO.png|15px|15]][[File:Icon5RO.png|15px|15]] [[File:Rayman Mini - Electoon Icon.png|25px]] | ||
|- | |- | ||
| [[ | | [[File:Raylatin.png|100px]] || [[Raylatine]] || || || || [[File:Icon6RO.png|15px|6 000]] [[File:Icon0RO.png|15px|6 000]][[File:Icon0RO.png|15px|6 000]][[File:Icon0RO.png|15px|6 000]] [[File:RO-Lums.png|25px]] || || | ||
|- | |- | ||
| [[ | | [[File:Rayphael.png|100px]] || [[Rayphaël]] || || || || || [[File:Icon2RO.png|15px|2 500]] [[File:Icon5RO.png|15px|2 500]][[File:Icon0RO.png|15px|2 500]][[File:Icon0RO.png|15px|2 500]] [[File:Golden Goblet.png|25px]] ([[Évènement (Rayman Adventures)|Évènement]] de la Chasse au Gobelet doré uniquement) || [[File:Icon4RO.png|15px|4]] [[File:Rayman Mini - Electoon Icon.png|25px]] | ||
|- | |- | ||
| [[ | | [[File:Raybolt.png|100px]] || [[Rayéclair]] || || || || || [[File:Icon2RO.png|15px|2 500]] [[File:Icon5RO.png|15px|2 500]][[File:Icon0RO.png|15px|2 500]][[File:Icon0RO.png|15px|2 500]] [[File:Gold Medal.png|25px]] ([[Évènement (Rayman Adventures)|Évènement]] du Marathon de l'été uniquement) || | ||
|- | |- | ||
| [[ | | [[File:Raybeard.png|100px]] || [[Raybarbe]] || || || || || [[File:Icon2RO.png|15px|2 500]] [[File:Icon5RO.png|15px|2 500]][[File:Icon0RO.png|15px|2 500]][[File:Icon0RO.png|15px|2 500]] [[File:Doubloon.png|25px]] ([[Évènement (Rayman Adventures)|Évènement]] de la Chasse au trésor de Raybarbe uniquement)<br />Achat dans la Boutique || | ||
|- | |- | ||
| [[ | | [[File:Raydoom.png|100px]] || [[Raydamnation]] || || || || || Acheter le Méga Pack Roue Infernale ([[Évènement (Rayman Adventures)|Évènement]] de la Roue Infernale uniquement) || [[File:Icon2RO.png|15px|27]][[File:Icon7RO.png|15px|27]] [[File:Rayman Mini - Electoon Icon.png|25px]] | ||
|- | |- | ||
| [[ | | [[File:Freeze Ray.png|100px]] || [[Rayfrigérateur]] || || || || || Acheter le Pack Chaleur de Noël ou le Pack glacé Rayfrigérateur || | ||
|- | |- | ||
| [[ | | [[File:Raysiris.png|100px]] || [[Raysiris]] || || || || || Acheter le Méga Pack Marathon ([[Évènement (Rayman Adventures)|Évènement]] du Marathon du désert uniquement)<br />Atteindre le top 10% du classement du marathon pour la première fois ([[Évènement (Rayman Adventures)|Évènement]] du Marathon du donjon uniquement, du 9 au 22 octobre 2018) || | ||
|- | |- | ||
| [[ | | [[File:Dr. Farayday.png|100px]] || Le [[Pr. Fa-Rayday]] || || || || || Acheter le Pack Électrisant || | ||
|- | |- | ||
| [[ | | [[File:Samuray.png|100px]] || [[Samuray]] || || || || || Acheter le Méga Pack Marathon ([[Évènement (Rayman Adventures)|Évènement]] du Marathon du printemps uniquement) || | ||
|- | |- | ||
| [[ | | [[File:Ray-One.png|100px]] || [[Ray-One]] || || || || || [[File:Icon2RO.png|15px|2 500]] [[File:Icon5RO.png|15px|2 500]][[File:Icon0RO.png|15px|2 500]][[File:Icon0RO.png|15px|2 500]] [[File:Kryptorium.png|25px]] ([[Évènement (Rayman Adventures)|Évènement]] de la Roue Spatiale uniquement) || | ||
|- | |- | ||
| [[ | | [[File:Raywiz.png|100px]] || [[Raystidigitateur]] || || || || || [[File:Icon2RO.png|15px|2 500]] [[File:Icon5RO.png|15px|2 500]][[File:Icon0RO.png|15px|2 500]][[File:Icon0RO.png|15px|2 500]] Gemmes ([[Évènement (Rayman Adventures)|Évènement]] du Marathon du donjon uniquement) || | ||
|- | |- | ||
| [[ | | [[File:Sorceray.png|100px]] || [[Arayvazteur]] || || || || || Acheter le Pack Aventure du donjon || | ||
|- | |- | ||
| [[ | | [[File:Ray-Gnarr.png|100px]] || [[Rayhistorik]] || || || || || Acheter le Pack Expédition Préhistorique ([[Évènement (Rayman Adventures)|Évènement]] de l'Expédition Rayhistorik uniquement) || | ||
|- | |- | ||
| || | | [[File:Globox RL.png|100px]] || [[Globox]]<br />(alias '''Globox classique''') || Disponible dès le début d'une partie || Acheter le pack de Costumes (iOS et Android)<br />Disponible dès le début d'une partie (Windows) || Disponible dès le début d'une partie || [[File:Icon5RO.png|15px|50]][[File:Icon0RO.png|15px|50]] [[File:RO-Lums.png|25px]] || [[File:Icon5RO.png|15px|500]][[File:Icon0RO.png|15px|500]][[File:Icon0RO.png|15px|500]] [[File:Gem icon.png|25px]]<br />Acheter le Pack Ambitieux Aventurier || Disponible dès le début d'une partie | ||
|- | |- | ||
| || [[ | | [[File:Globox Adventures.png|100px]] || [[Globox]] || || || || || [[File:Icon3RO.png|15px|3 000]] [[File:Icon0RO.png|15px|3 000]][[File:Icon0RO.png|15px|3 000]][[File:Icon0RO.png|15px|3 000]] [[File:Gem icon.png|25px]] || [[File:Icon1RO.png|15px|12]][[File:Icon2RO.png|15px|12]] [[File:Rayman Mini - Swag Coin Icon.png|25px]] | ||
|- | |- | ||
| || [[ | | [[File:Redgloboxrl.png|100px]] || [[Globox rouge]] || [[File:Icon8RO.png|15px|8]] [[File:RO-Electoon.png|25px]] (PC, Mac, Wii, Xbox 360, PlayStation 3, PlayStation Vita)<br />[[File:Icon1RO.png|15px|100]][[File:Icon0RO.png|15px|100]][[File:Icon0RO.png|15px|100]] [[File:RO-Electoon.png|25px]] (Nintendo 3DS) || || [[File:Icon9RO.png|15px|9 000]] [[File:Icon0RO.png|15px|9 000]][[File:Icon0RO.png|15px|9 000]][[File:Icon0RO.png|15px|9 000]] [[File:RO-Lums.png|25px]] (PC, Xbox 360, PlayStation 3, PlayStation Vita)<br />[[File:Icon1RO.png|15px|14 000]][[File:Icon4RO.png|15px|14 000]] [[File:Icon0RO.png|15px|14 000]][[File:Icon0RO.png|15px|14 000]][[File:Icon0RO.png|15px|14 000]] [[File:RO-Lums.png|25px]] (Wii U, Xbox One, PlayStation 4, Switch) || [[File:Icon9RO.png|15px|900]] [[File:Icon0RO.png|15px|900]][[File:Icon0RO.png|15px|900]] [[File:RO-Lums.png|25px]] || [[File:Icon1RO.png|15px|150]][[File:Icon5RO.png|15px|150]][[File:Icon0RO.png|15px|150]] [[File:Gem icon.png|25px]] || [[File:Icon9RO.png|15px|9]] [[File:Rayman Mini - Electoon Icon.png|25px]] | ||
|- | |- | ||
| [[ | | [[File:Glombrox.png|100px]] || [[Glombrox]]<br />(alias '''Glomoche''') || [[File:Icon2RO.png|15px|246]][[File:Icon4RO.png|15px|246]][[File:Icon6RO.png|15px|246]] [[File:RO-Electoon.png|25px]] (PC, Mac, Wii, Xbox 360, PlayStation 3, PlayStation Vita)<br />[[File:Icon2RO.png|15px|200]][[File:Icon0RO.png|15px|200]][[File:Icon0RO.png|15px|200]] [[File:RO-Electoon.png|25px]] (Nintendo 3DS) || || [[File:Icon4RO.png|15px|40 000]][[File:Icon0RO.png|15px|40 000]] [[File:Icon0RO.png|15px|40 000]][[File:Icon0RO.png|15px|40 000]][[File:Icon0RO.png|15px|40 000]] [[File:RO-Lums.png|25px]] (PC, Xbox 360, PlayStation 3, PlayStation Vita)<br />[[File:Icon5RO.png|15px|55 000]][[File:Icon5RO.png|15px|55 000]] [[File:Icon0RO.png|15px|55 000]][[File:Icon0RO.png|15px|55 000]][[File:Icon0RO.png|15px|55 000]] [[File:RO-Lums.png|25px]] (PlayStation 4)<br />[[File:Icon7RO.png|15px|75 000]][[File:Icon5RO.png|15px|75 000]] [[File:Icon0RO.png|15px|75 000]][[File:Icon0RO.png|15px|75 000]][[File:Icon0RO.png|15px|75 000]] [[File:RO-Lums.png|25px]] (Wii U, Switch)<br />[[File:Icon1RO.png|15px|100 000]][[File:Icon0RO.png|15px|100 000]][[File:Icon0RO.png|15px|100 000]] [[File:Icon0RO.png|15px|100 000]][[File:Icon0RO.png|15px|100 000]][[File:Icon0RO.png|15px|100 000]] [[File:RO-Lums.png|25px]] (Xbox One)|| [[File:Icon1RO.png|15px|1 500]] [[File:Icon5RO.png|15px|1 500]][[File:Icon0RO.png|15px|1 500]][[File:Icon0RO.png|15px|1 500]] [[File:RO-Lums.png|25px]] || || [[File:Icon3RO.png|15px|3]] [[File:Rayman Mini - Electoon Icon.png|25px]] | ||
|- | |- | ||
| | | [[File:Globox Costume 1.png|100px]] || [[Sire Globrax]] || || || Disponible dès le début d'une partie || || [[File:Icon5RO.png|15px|500]][[File:Icon0RO.png|15px|500]][[File:Icon0RO.png|15px|500]] [[File:Gem icon.png|25px]]<br />Acheter le Pack Ambitieux Aventurier || [[File:Icon2RO.png|15px|24]][[File:Icon4RO.png|15px|24]] [[File:Rayman Mini - Electoon Icon.png|25px]] | ||
|- | |- | ||
| [[ | | [[File:Glob Plumber.png|100px]] || [[Glob-plombier]] || || || [[File:Icon2RO.png|15px|28 000]][[File:Icon8RO.png|15px|28 000]] [[File:Icon0RO.png|15px|28 000]][[File:Icon0RO.png|15px|28 000]][[File:Icon0RO.png|15px|28 000]] [[File:RO-Lums.png|25px]] (Wii U et Switch uniquement) || || || | ||
|- | |- | ||
| [[ | | [[File:Glovaas.png|100px]] || [[Far Glob]]<br />(alias '''Glovaas''') || || || [[File:Icon4RO.png|15px|40 000]][[File:Icon0RO.png|15px|40 000]] [[File:Icon0RO.png|15px|40 000]][[File:Icon0RO.png|15px|40 000]][[File:Icon0RO.png|15px|40 000]] [[File:RO-Lums.png|25px]] (Xbox One uniquement)<br />Disponible dès le début d'une partie (Switch uniquement) || || Acheter le Pack Primal ou le Mégapack [[Ubisoft]] || | ||
|- | |- | ||
| [[ | | [[File:Globolk.png|100px]] || [[Globolk]] || || || [[File:Icon2RO.png|15px|250 000]][[File:Icon5RO.png|15px|250 000]][[File:Icon0RO.png|15px|250 000]] [[File:Icon0RO.png|15px|250 000]][[File:Icon0RO.png|15px|250 000]][[File:Icon0RO.png|15px|250 000]] [[File:RO-Lums.png|25px]] (PC, Xbox 360, PlayStation 3, PlayStation Vita)<br />[[File:Icon3RO.png|15px|300 000]][[File:Icon0RO.png|15px|300 000]][[File:Icon0RO.png|15px|300 000]] [[File:Icon0RO.png|15px|300 000]][[File:Icon0RO.png|15px|300 000]][[File:Icon0RO.png|15px|300 000]] [[File:RO-Lums.png|25px]] (PlayStation 4)<br />[[File:Icon3RO.png|15px|350 000]][[File:Icon5RO.png|15px|350 000]][[File:Icon0RO.png|15px|350 000]] [[File:Icon0RO.png|15px|350 000]][[File:Icon0RO.png|15px|350 000]][[File:Icon0RO.png|15px|350 000]] [[File:RO-Lums.png|25px]] (Wii U, Switch)<br />[[File:Icon4RO.png|15px|440 000]][[File:Icon4RO.png|15px|440 000]][[File:Icon0RO.png|15px|440 000]] [[File:Icon0RO.png|15px|440 000]][[File:Icon0RO.png|15px|440 000]][[File:Icon0RO.png|15px|440 000]] [[File:RO-Lums.png|25px]] (Xbox One)|| || Acheter le Pack Primal ou le Pack Explorateur de l'Extrême || [[File:Icon3RO.png|15px|3]] [[File:Rayman Mini - Swag Coin Icon.png|25px]] | ||
|- | |- | ||
| [[ | | [[File:Poglox.png|100px]] || [[Poglox]] || || || [[File:Icon5RO.png|15px|500 000]][[File:Icon0RO.png|15px|500 000]][[File:Icon0RO.png|15px|500 000]] [[File:Icon0RO.png|15px|500 000]][[File:Icon0RO.png|15px|500 000]][[File:Icon0RO.png|15px|500 000]] [[File:RO-Lums.png|25px]] (PC, Xbox 360, PlayStation 3, PlayStation Vita)<br />[[File:Icon5RO.png|15px|550 000]][[File:Icon5RO.png|15px|550 000]][[File:Icon0RO.png|15px|550 000]] [[File:Icon0RO.png|15px|550 000]][[File:Icon0RO.png|15px|550 000]][[File:Icon0RO.png|15px|550 000]] [[File:RO-Lums.png|25px]] (Wii U, PlayStation 4, Switch)<br />[[File:Icon6RO.png|15px|680 000]][[File:Icon8RO.png|15px|680 000]][[File:Icon0RO.png|15px|680 000]] [[File:Icon0RO.png|15px|680 000]][[File:Icon0RO.png|15px|680 000]][[File:Icon0RO.png|15px|680 000]] [[File:RO-Lums.png|25px]] (Xbox One) || || [[File:Icon5RO.png|15px|500]][[File:Icon0RO.png|15px|500]][[File:Icon0RO.png|15px|500]] [[File:Gem icon.png|25px]] || [[File:Icon6RO.png|15px|6]] [[File:Rayman Mini - Swag Coin Icon.png|25px]] | ||
|- | |- | ||
| [[ | | [[File:Glob Cell.png|100px]] || [[Glob Cell]] || || || Terminer le deuxième Défi de [[Murfy]] (PlayStation Vita uniquement)<br />Disponible dès le début d'une partie (Switch uniquement) || || Acheter le Pack Tom Clancy ou le Mégapack [[Ubisoft]]<br />Atteindre le top 10% du classement du marathon pour la première fois ([[Évènement (Rayman Adventures)|Évènement]] du Marathon du donjon uniquement, du 22 octobre au 6 novembre 2018) || [[File:Icon2RO.png|15px|20]][[File:Icon0RO.png|15px|20]] [[File:Rayman Mini - Swag Coin Icon.png|25px]] | ||
|- | |- | ||
| [[ | | [[File:Grovebox.png|100px]] || [[Globois]] || || || || || Acheter le Pack J.O || [[File:Icon2RO.png|15px|20]][[File:Icon0RO.png|15px|20]] [[File:Rayman Mini - Swag Coin Icon.png|25px]] | ||
|- | |- | ||
| [[ | | [[File:Globeach.png|100px]] || [[Globeach]] || || || || || [[File:Icon2RO.png|15px|2 500]] [[File:Icon5RO.png|15px|2 500]][[File:Icon0RO.png|15px|2 500]][[File:Icon0RO.png|15px|2 500]] [[File:Beach Ball.png|25px]] ([[Évènement (Rayman Adventures)|Évènement]] de la Chasse aux [[ballon]]s de plage uniquement) || | ||
|- | |- | ||
| [[ | | [[File:Glombie (Transparent).png|100px]] || [[Glombie]] || || || || || [[File:Icon3RO.png|15px|3 000]] [[File:Icon0RO.png|15px|3 000]][[File:Icon0RO.png|15px|3 000]][[File:Icon0RO.png|15px|3 000]] [[File:Pumpkin.png|25px]] ([[Évènement (Rayman Adventures)|Évènement]] de la Chasse aux citrouilles uniquement)<br />Acheter le Pack Sauvetage Non-Stop ou le Pack Aventurier Ambitieux<br />Atteindre le top 25% du classement du marathon pour la première fois ([[Évènement (Rayman Adventures)|Évènement]] du Marathon du donjon uniquement, du 9 au 22 octobre 2018) || [[File:Icon2RO.png|15px|28]][[File:Icon8RO.png|15px|28]] [[File:Rayman Mini - Swag Coin Icon.png|25px]] | ||
|- | |- | ||
| [[ | | [[File:Glombrero.png|100px]] || [[Glombrero]] || || || || || [[File:Icon2RO.png|15px|2 500]] [[File:Icon5RO.png|15px|2 500]][[File:Icon0RO.png|15px|2 500]][[File:Icon0RO.png|15px|2 500]] [[File:Firey Chillie.png|25px]] ([[Évènement (Rayman Adventures)|Évènement]] de la Roue de la Fiesta uniquement) || | ||
|- | |- | ||
| [[ | | [[File:Globox (RED).png|100px]] || [[(Globox)RED]] || || || || Acheter le Pack (RED) (iOS uniquement) || || | ||
|- | |- | ||
| [[ | | [[File:GlobXmas.png|100px]] || [[Globoel]]<br />(alias le '''Glo des neiges''') || || || || [[File:Icon5RO.png|15px|5 000]] [[File:Icon0RO.png|15px|5 000]][[File:Icon0RO.png|15px|5 000]][[File:Icon0RO.png|15px|5 000]] [[File:RO-Lums.png|25px]] (iOS uniquement) || [[File:Icon1RO.png|15px|1 500]] [[File:Icon5RO.png|15px|1 500]][[File:Icon0RO.png|15px|1 500]][[File:Icon0RO.png|15px|1 500]] [[File:Gem icon.png|25px]] (Entre mai et juillet 2018 uniquement)<br />Achat dans la Boutique || [[File:Icon1RO.png|15px|16]][[File:Icon6RO.png|15px|16]] [[File:Rayman Mini - Swag Coin Icon.png|25px]] | ||
|- | |- | ||
| [[ | | [[File:Sandbox.png|100px]] || [[Sandbox]] || || || || || [[File:Icon2RO.png|15px|2 500]] [[File:Icon5RO.png|15px|2 500]][[File:Icon0RO.png|15px|2 500]][[File:Icon0RO.png|15px|2 500]] [[File:Golden Scarabs.png|25px]] ([[Évènement (Rayman Adventures)|Évènement]] du Marathon du désert uniquement) || | ||
|- | |- | ||
| [[ | | [[File:Green Teensy.png|100px]] || Un [[Ptizêtre vert]] || Disponible dès le début d'une partie (sauf dans la version Nintendo 3DS) || || || || || | ||
|- | |- | ||
| [[ | | [[File:RL Goth Teensy.png|100px]] || Le [[Ptizêtre gothique]] || Disponible dès le début d'une partie (sauf dans la version Nintendo 3DS) || || Disponible dès le début d'une partie || [[File:Icon1RO.png|15px|1 000]] [[File:Icon0RO.png|15px|1 000]][[File:Icon0RO.png|15px|1 000]][[File:Icon0RO.png|15px|1 000]] [[File:RO-Lums.png|25px]] || [[File:Icon5RO.png|15px|500]][[File:Icon0RO.png|15px|500]][[File:Icon0RO.png|15px|500]] [[File:Gem icon.png|25px]] || [[File:Icon9RO.png|15px|9]] [[File:Rayman Mini - Swag Coin Icon.png|25px]] | ||
|- | |- | ||
| [[ | | [[File:Teensyray.png|100px]] || [[Ptizêt-Ray]]<br />(alias le '''Ptizêtre en Ray''') || [[File:Icon1RO.png|15px|220]][[File:Icon5RO.png|15px|15]] [[File:RO-Electoon.png|25px]] (sauf dans la version Nintendo 3DS) || || [[File:Icon5RO.png|15px|5 000]] [[File:Icon0RO.png|15px|5 000]][[File:Icon0RO.png|15px|5 000]][[File:Icon0RO.png|15px|5 000]] [[File:RO-Lums.png|25px]] || || || [[File:Icon2RO.png|15px|25]][[File:Icon5RO.png|15px|25]] [[File:Rayman Mini - Swag Coin Icon.png|25px]] | ||
|- | |- | ||
| [[ | | [[File:GlobTeen Rayman Mini.png|100px]] || [[PtiGlob]]<br />(alias '''Pti-Glob''') || [[File:Icon3RO.png|15px|35]][[File:Icon5RO.png|15px|35]] [[File:RO-Electoon.png|25px]] (sauf dans la version Nintendo 3DS) || || [[File:Icon1RO.png|15px|14 000]][[File:Icon4RO.png|15px|14 000]] [[File:Icon0RO.png|15px|14 000]][[File:Icon0RO.png|15px|14 000]][[File:Icon0RO.png|15px|14 000]] [[File:RO-Lums.png|25px]] (PC, Xbox 360, PlayStation 3, PlayStation Vita)<br />[[File:Icon2RO.png|15px|20 000]][[File:Icon0RO.png|15px|20 000]] [[File:Icon0RO.png|15px|20 000]][[File:Icon0RO.png|15px|20 000]][[File:Icon0RO.png|15px|20 000]] [[File:RO-Lums.png|25px]] (Wii U, Xbox One, PlayStation 4, Switch) || || || [[File:Icon2RO.png|15px|27]][[File:Icon7RO.png|15px|27]] [[File:Rayman Mini - Swag Coin Icon.png|25px]] | ||
|- | |- | ||
| [[ | | [[File:RM Teensy Queen.png|100px]] || La [[Reine Ptizêtre (personnage)|Reine Ptizêtre]] || [[File:Icon5RO.png|15px|55]][[File:Icon5RO.png|15px|55]] [[File:RO-Electoon.png|25px]] (sauf dans la version Nintendo 3DS) || || [[File:Icon2RO.png|15px|28 000]][[File:Icon8RO.png|15px|28 000]] [[File:Icon0RO.png|15px|28 000]][[File:Icon0RO.png|15px|28 000]][[File:Icon0RO.png|15px|28 000]] [[File:RO-Lums.png|25px]] (PC, Xbox 360, PlayStation 3, PlayStation Vita)<br />[[File:Icon4RO.png|15px|40 000]][[File:Icon0RO.png|15px|40 000]] [[File:Icon0RO.png|15px|40 000]][[File:Icon0RO.png|15px|40 000]][[File:Icon0RO.png|15px|40 000]] [[File:RO-Lums.png|25px]] (PlayStation 4)<br />[[File:Icon5RO.png|15px|55 000]][[File:Icon5RO.png|15px|55 000]] [[File:Icon0RO.png|15px|55 000]][[File:Icon0RO.png|15px|55 000]][[File:Icon0RO.png|15px|55 000]] [[File:RO-Lums.png|25px]] (Wii U, Switch)<br />[[File:Icon7RO.png|15px|75 000]][[File:Icon5RO.png|15px|75 000]] [[File:Icon0RO.png|15px|75 000]][[File:Icon0RO.png|15px|75 000]][[File:Icon0RO.png|15px|75 000]] [[File:RO-Lums.png|25px]] (Xbox One) || [[File:Icon2RO.png|15px|2 000]] [[File:Icon0RO.png|15px|2 000]][[File:Icon0RO.png|15px|2 000]][[File:Icon0RO.png|15px|2 000]] [[File:RO-Lums.png|25px]] || [[File:Icon5RO.png|15px|500]][[File:Icon0RO.png|15px|500]][[File:Icon0RO.png|15px|500]] [[File:Gem icon.png|25px]] || [[File:Icon7RO.png|15px|7]] [[File:Rayman Mini - Swag Coin Icon.png|25px]] | ||
|- | |- | ||
| [[ | | [[File:Rayman Mini Teensy Wizard.png|100px]] || Le [[Mage Ptizêtre]] || [[File:Icon6RO.png|15px|60]][[File:Icon0RO.png|15px|60]] [[File:RO-Electoon.png|25px]] (sauf dans la version Nintendo 3DS) || || [[File:Icon5RO.png|15px|55 000]][[File:Icon5RO.png|15px|55 000]] [[File:Icon0RO.png|15px|55 000]][[File:Icon0RO.png|15px|55 000]][[File:Icon0RO.png|15px|55 000]] [[File:RO-Lums.png|25px]] (PC, Xbox 360, PlayStation 3, PlayStation Vita)<br />[[File:Icon7RO.png|15px|75 000]][[File:Icon5RO.png|15px|75 000]] [[File:Icon0RO.png|15px|75 000]][[File:Icon0RO.png|15px|75 000]][[File:Icon0RO.png|15px|75 000]] [[File:RO-Lums.png|25px]] (PlayStation 4)<br />[[File:Icon1RO.png|15px|100 000]][[File:Icon0RO.png|15px|100 000]][[File:Icon0RO.png|15px|100 000]] [[File:Icon0RO.png|15px|100 000]][[File:Icon0RO.png|15px|100 000]][[File:Icon0RO.png|15px|100 000]] [[File:RO-Lums.png|25px]] (Wii U, Switch)<br />[[File:Icon1RO.png|15px|130 000]][[File:Icon3RO.png|15px|130 000]][[File:Icon0RO.png|15px|130 000]] [[File:Icon0RO.png|15px|130 000]][[File:Icon0RO.png|15px|130 000]][[File:Icon0RO.png|15px|130 000]] [[File:RO-Lums.png|25px]] (Xbox One) || || [[File:Icon1RO.png|15px|150]][[File:Icon5RO.png|15px|150]][[File:Icon0RO.png|15px|150]] [[File:Gem icon.png|25px]] || [[File:Icon2RO.png|15px|21]][[File:Icon1RO.png|15px|21]] [[File:Rayman Mini - Swag Coin Icon.png|25px]] | ||
|- | |- | ||
| [[ | | [[File:Grand-Minimus-Rayman-Legends.png|100px]] || Un [[Grand Mini]]mus || [[File:Icon7RO.png|15px|70]][[File:Icon0RO.png|15px|70]] [[File:RO-Electoon.png|25px]] (sauf dans la version Nintendo 3DS) || || Disponible dès le début d'une partie || [[File:Icon5RO.png|15px|500]][[File:Icon0RO.png|15px|500]][[File:Icon0RO.png|15px|500]] [[File:RO-Lums.png|25px]] || [[File:Icon1RO.png|15px|1 500]] [[File:Icon5RO.png|15px|1 500]][[File:Icon0RO.png|15px|1 500]][[File:Icon0RO.png|15px|1 500]] [[File:Gem icon.png|25px]]<br />Atteindre le top 2% du classement du marathon pour la première fois ([[Évènement (Rayman Adventures)|Évènement]] du Marathon du donjon uniquement, du 22 octobre au 6 novembre 2018) || | ||
|- | |- | ||
| [[ | | [[File:Ninjateensy.png|100px]] || Le [[Ptizêtre Ninja]]<br />(alias le '''Ptininja''') || [[File:Icon7RO.png|15px|75]][[File:Icon5RO.png|15px|75]] [[File:RO-Electoon.png|25px]] (sauf dans la version Nintendo 3DS) || || [[File:Icon1RO.png|15px|180 000]][[File:Icon8RO.png|15px|180 000]][[File:Icon0RO.png|15px|180 000]] [[File:Icon0RO.png|15px|180 000]][[File:Icon0RO.png|15px|180 000]][[File:Icon0RO.png|15px|180 000]] [[File:RO-Lums.png|25px]] (PC, Xbox 360, PlayStation 3, PlayStation Vita)<br />[[File:Icon2RO.png|15px|220 000]][[File:Icon2RO.png|15px|220 000]][[File:Icon0RO.png|15px|220 000]] [[File:Icon0RO.png|15px|220 000]][[File:Icon0RO.png|15px|220 000]][[File:Icon0RO.png|15px|220 000]] [[File:RO-Lums.png|25px]] (PlayStation 4)<br />[[File:Icon2RO.png|15px|280 000]][[File:Icon8RO.png|15px|280 000]][[File:Icon0RO.png|15px|280 000]] [[File:Icon0RO.png|15px|280 000]][[File:Icon0RO.png|15px|280 000]][[File:Icon0RO.png|15px|280 000]] [[File:RO-Lums.png|25px]] (Wii U, Switch)<br />[[File:Icon3RO.png|15px|350 000]][[File:Icon5RO.png|15px|350 000]][[File:Icon0RO.png|15px|350 000]] [[File:Icon0RO.png|15px|350 000]][[File:Icon0RO.png|15px|350 000]][[File:Icon0RO.png|15px|350 000]] [[File:RO-Lums.png|25px]] (Xbox One) || || Acheter le Pack Dojo<br />Atteindre le top 10% du classement du marathon pour la première fois ([[Évènement (Rayman Adventures)|Évènement]] du Marathon du donjon uniquement, du 6 au 14 novembre 2018) || [[File:Icon1RO.png|15px|19]][[File:Icon9RO.png|15px|19]] [[File:Rayman Mini - Swag Coin Icon.png|25px]] | ||
|- | |- | ||
| [[ | | [[File:FlamingTeensyMini.png|100px]] || Le [[Ptizêtre enflammé]] || [[File:Icon8RO.png|15px|80]][[File:Icon0RO.png|15px|80]] [[File:RO-Electoon.png|25px]] (sauf dans la version Nintendo 3DS) || || [[File:Icon3RO.png|15px|350 000]][[File:Icon5RO.png|15px|350 000]][[File:Icon0RO.png|15px|350 000]] [[File:Icon0RO.png|15px|350 000]][[File:Icon0RO.png|15px|350 000]][[File:Icon0RO.png|15px|350 000]] [[File:RO-Lums.png|25px]] (PC, Xbox 360, PlayStation 3, PlayStation Vita)<br />[[File:Icon4RO.png|15px|400 000]][[File:Icon0RO.png|15px|400 000]][[File:Icon0RO.png|15px|400 000]] [[File:Icon0RO.png|15px|400 000]][[File:Icon0RO.png|15px|400 000]][[File:Icon0RO.png|15px|400 000]] [[File:RO-Lums.png|25px]] (PlayStation 4)<br />[[File:Icon4RO.png|15px|440 000]][[File:Icon4RO.png|15px|440 000]][[File:Icon0RO.png|15px|440 000]] [[File:Icon0RO.png|15px|440 000]][[File:Icon0RO.png|15px|440 000]][[File:Icon0RO.png|15px|440 000]] [[File:RO-Lums.png|25px]] (Wii U, Switch)<br />[[File:Icon5RO.png|15px|550 000]][[File:Icon5RO.png|15px|550 000]][[File:Icon0RO.png|15px|550 000]] [[File:Icon0RO.png|15px|550 000]][[File:Icon0RO.png|15px|550 000]][[File:Icon0RO.png|15px|550 000]] [[File:RO-Lums.png|25px]] (Xbox One) || || || [[File:Icon1RO.png|15px|15]][[File:Icon5RO.png|15px|15]] [[File:Rayman Mini - Swag Coin Icon.png|25px]] | ||
|- | |- | ||
| [[ | | [[File:RM First King.png|100px]] || Le [[Primus Grand Minimus]]<br />(alias '''le premier roi''') || [[File:Icon9RO.png|15px|95]][[File:Icon5RO.png|15px|95]] [[File:RO-Electoon.png|25px]] (sauf dans la version Nintendo 3DS) || || [[File:Icon7RO.png|15px|750 000]][[File:Icon5RO.png|15px|750 000]][[File:Icon0RO.png|15px|750 000]] [[File:Icon0RO.png|15px|750 000]][[File:Icon0RO.png|15px|750 000]][[File:Icon0RO.png|15px|750 000]] [[File:RO-Lums.png|25px]] (PC, Xbox 360, PlayStation 3, PlayStation Vita, PlayStation 4, Wii U, Switch)<br />[[File:Icon8RO.png|15px|830 000]][[File:Icon3RO.png|15px|830 000]][[File:Icon0RO.png|15px|830 000]] [[File:Icon0RO.png|15px|830 000]][[File:Icon0RO.png|15px|830 000]][[File:Icon0RO.png|15px|830 000]] [[File:RO-Lums.png|25px]] (Xbox One) || || || [[File:Icon2RO.png|15px|23]][[File:Icon3RO.png|15px|23]] [[File:Rayman Mini - Swag Coin Icon.png|25px]] | ||
|- | |- | ||
| [[ | | [[File:Teensy Hermit.png|100px]] || Le [[Ptizêtre ermite]] || || || [[File:Icon1RO.png|15px|100 000]][[File:Icon0RO.png|15px|100 000]][[File:Icon0RO.png|15px|100 000]] [[File:Icon0RO.png|15px|100 000]][[File:Icon0RO.png|15px|100 000]][[File:Icon0RO.png|15px|100 000]] [[File:RO-Lums.png|25px]] (PC, Xbox 360, PlayStation 3, PlayStation Vita)<br />[[File:Icon1RO.png|15px|130 000]][[File:Icon3RO.png|15px|130 000]][[File:Icon0RO.png|15px|130 000]] [[File:Icon0RO.png|15px|130 000]][[File:Icon0RO.png|15px|130 000]][[File:Icon0RO.png|15px|130 000]] [[File:RO-Lums.png|25px]] (PlayStation 4)<br />[[File:Icon1RO.png|15px|170 000]][[File:Icon7RO.png|15px|170 000]][[File:Icon0RO.png|15px|170 000]] [[File:Icon0RO.png|15px|170 000]][[File:Icon0RO.png|15px|170 000]][[File:Icon0RO.png|15px|170 000]] [[File:RO-Lums.png|25px]] (Wii U, Switch)<br />[[File:Icon2RO.png|15px|220 000]][[File:Icon2RO.png|15px|220 000]][[File:Icon0RO.png|15px|220 000]] [[File:Icon0RO.png|15px|220 000]][[File:Icon0RO.png|15px|220 000]][[File:Icon0RO.png|15px|220 000]] [[File:RO-Lums.png|25px]] (Xbox One) || || Acheter le Pack Primal ou le Pack Méga Aventure || [[File:Icon1RO.png|15px|11]][[File:Icon1RO.png|15px|11]] [[File:Rayman Mini - Swag Coin Icon.png|25px]] | ||
|- | |- | ||
| [[ | | [[File:Goldenteensy.png|100px]] || Un [[Ptizêtre en or]] || || || [[File:Icon7RO.png|15px|700]][[File:Icon0RO.png|15px|700]][[File:Icon0RO.png|15px|700]] [[File:RL-Teensy.png|25px]] (PC, Xbox 360, PlayStation 3, PlayStation Vita, PlayStation 4, Wii U, Xbox One)<br />[[File:Icon8RO.png|15px|826]][[File:Icon2RO.png|15px|826]][[File:Icon6RO.png|15px|826]] [[File:RL-Teensy.png|25px]] (Switch) || || || Atteindre le 11ème niveau de [[Génialitude]] | ||
|- | |- | ||
| [[ | | [[File:Teen Punk (Transparent).png|100px]] || [[Pti-lote]] || || || || || [[File:Icon3RO.png|15px|3 000]] [[File:Icon0RO.png|15px|3 000]][[File:Icon0RO.png|15px|3 000]][[File:Icon0RO.png|15px|3 000]] [[File:Gem icon.png|25px]] || [[File:Icon1RO.png|15px|13]][[File:Icon3RO.png|15px|13]] [[File:Rayman Mini - Swag Coin Icon.png|25px]] | ||
|- | |- | ||
| [[ | | [[File:Rabbiteen.png|100px]] || Le [[Pti'lapin]] || || || || || [[File:Icon2RO.png|15px|2 000]] [[File:Icon0RO.png|15px|2 000]][[File:Icon0RO.png|15px|2 000]][[File:Icon0RO.png|15px|2 000]] œufs de Pâques ([[Évènement (Rayman Adventures)|Évènement]] de la Chasse aux œufs de Pâques uniquement)<br />Achat dans la Boutique || | ||
|- | |- | ||
| [[ | | [[File:Teenseer.png|100px]] || Le [[Pti-prophète]] || || || || || Acheter le Pack J.O || | ||
|- | |- | ||
| [[ | | [[File:Teensy (RED).png|100px]] || [[(Ptizêtre)RED]] || || || || Acheter le Pack (RED) (iOS uniquement) || || | ||
|- | |- | ||
| [[ | | [[File:Teensy Elf 1.png|100px]] || Le [[Ptizêtre lutin]] || || || || [[File:Icon6RO.png|15px|6 000]] [[File:Icon0RO.png|15px|6 000]][[File:Icon0RO.png|15px|6 000]][[File:Icon0RO.png|15px|6 000]] [[File:RO-Lums.png|25px]] || || | ||
|- | |- | ||
| [[ | | [[File:Teensy Elf 2.png|100px]] ||Le [[Ptizêtre lutin 2]]<br />(alias '''Pti-papa''') || || || || [[File:Icon8RO.png|15px|8 000]] [[File:Icon0RO.png|15px|8 000]][[File:Icon0RO.png|15px|8 000]][[File:Icon0RO.png|15px|8 000]] [[File:RO-Lums.png|25px]] (iOS uniquement) || || [[File:Icon2RO.png|15px|29]][[File:Icon9RO.png|15px|29]] [[File:Rayman Mini - Swag Coin Icon.png|25px]] | ||
|- | |- | ||
| [[ | | [[File:Teensllo.png|100px]] || [[Ptizêlatine]] || || || || [[File:Icon4RO.png|15px|4 000]] [[File:Icon0RO.png|15px|4 000]][[File:Icon0RO.png|15px|4 000]][[File:Icon0RO.png|15px|4 000]] [[File:RO-Lums.png|25px]] || || | ||
|- | |- | ||
| [[ | | [[File:Rayman Legends 150812 008.png|100px]] || [[Barbara]]<br />(alias '''Barbara classique''') || || || Terminer [[Course dans le donjon]] || || [[File:Icon5RO.png|15px|500]][[File:Icon0RO.png|15px|500]][[File:Icon0RO.png|15px|500]] [[File:Gem icon.png|25px]] || Disponible dès le début d'une partie | ||
|- | |- | ||
| [[ | | [[File:New Barbara.png|100px]] || [[Barbara]] || || || || || Disponible dès le début d'une partie || [[File:Icon8RO.png|15px|8]] [[File:Rayman Mini - Swag Coin Icon.png|25px]] | ||
|- | |- | ||
| [[ | | [[File:Elysia.png|100px]] || [[Élysia]] || || || Terminer [[Poursuite dans le donjon]] || || Disponible dès le début d'une partie || [[File:Icon4RO.png|15px|42]][[File:Icon2RO.png|15px|42]] [[File:Rayman Mini - Electoon Icon.png|25px]] | ||
|- | |- | ||
| [[ | | [[File:Aurora.png|100px]] || [[Aurora]] || || || Terminer [[600 pieds sous terre]] || || [[File:Icon1RO.png|15px|150]][[File:Icon5RO.png|15px|150]][[File:Icon0RO.png|15px|150]] [[File:Gem icon.png|25px]] || [[File:Icon3RO.png|15px|30]][[File:Icon0RO.png|15px|30]] [[File:Rayman Mini - Electoon Icon.png|25px]] | ||
|- | |- | ||
| [[ | | [[File:Twila.png|100px]] || [[Twila]] || || || Terminer [[6000 pieds sous terre]] || || [[File:Icon5RO.png|15px|500]][[File:Icon0RO.png|15px|500]][[File:Icon0RO.png|15px|500]] [[File:Gem icon.png|25px]]<br />Atteindre le top 2% du classement du marathon pour la première fois ([[Évènement (Rayman Adventures)|Évènement]] du Marathon du donjon uniquement, du 6 au 14 novembre 2018) || [[File:Icon3RO.png|15px|36]][[File:Icon6RO.png|15px|36]] [[File:Rayman Mini - Electoon Icon.png|25px]] | ||
|- | |- | ||
| [[ | | [[File:Estelia.png|100px]] || [[Estellia]] || || || Terminer [[Cours si tu tiens à la vie]] || || [[File:Icon5RO.png|15px|500]][[File:Icon0RO.png|15px|500]][[File:Icon0RO.png|15px|500]] [[File:Gem icon.png|25px]] || [[File:Icon7RO.png|15px|7]] [[File:Rayman Mini - Electoon Icon.png|25px]] | ||
|- | |- | ||
| [[ | | [[File:Selena.png|100px]] || [[Sélénia]] || || || Terminer [[Fuis si tu tiens à la vie]] || || [[File:Icon3RO.png|15px|3 000]] [[File:Icon0RO.png|15px|3 000]][[File:Icon0RO.png|15px|3 000]][[File:Icon0RO.png|15px|3 000]] [[File:Gem icon.png|25px]] || [[File:Icon2RO.png|15px|21]][[File:Icon1RO.png|15px|21]] [[File:Rayman Mini - Electoon Icon.png|25px]] | ||
|- | |- | ||
| [[ | | [[File:Ursula.png|100px]] || [[Ursula]] || || || Terminer [[Le dojo du ninja]] || || [[File:Icon1RO.png|15px|1 500]] [[File:Icon5RO.png|15px|1 500]][[File:Icon0RO.png|15px|1 500]][[File:Icon0RO.png|15px|1 500]] [[File:Gem icon.png|25px]]<br />Acheter le Pack Tom Clancy, le Pack Ambitieux Aventurier, le Pack Explorateur de l'Extrême ou le Pack Ursula<br />Atteindre la première place du classement du marathon pour la première fois ([[Évènement (Rayman Adventures)|Évènement]] du Marathon du donjon uniquement, du 6 au 14 novembre 2018) || [[File:Icon2RO.png|15px|2]] [[File:Rayman Mini - Electoon Icon.png|25px]] | ||
|- | |- | ||
| [[ | | [[File:Emma.png|100px]] || [[Emma]] || || || Terminer [[Le dojo du maître Shaolin]] || || [[File:Icon3RO.png|15px|3 000]] [[File:Icon0RO.png|15px|3 000]][[File:Icon0RO.png|15px|3 000]][[File:Icon0RO.png|15px|3 000]] [[File:Gem icon.png|25px]] || [[File:Icon1RO.png|15px|13]][[File:Icon3RO.png|15px|13]] [[File:Rayman Mini - Electoon Icon.png|25px]] | ||
|- | |- | ||
| [[ | | [[File:Olympia.png|100px]] || [[Olympia]] || || || Terminer [[Plus haut !]] || || Disponible dès le début d'une partie || [[File:Icon5RO.png|15px|5]] [[File:Rayman Mini - Electoon Icon.png|25px]] | ||
|- | |- | ||
| [[ | | [[File:Sibylla.png|100px]] || [[Sibylla]] || || || Terminer [[Toujours plus haut !]] || || [[File:Icon1RO.png|15px|1 500]] [[File:Icon5RO.png|15px|1 500]][[File:Icon0RO.png|15px|1 500]][[File:Icon0RO.png|15px|1 500]] [[File:Gem icon.png|25px]] || [[File:Icon1RO.png|15px|17]][[File:Icon7RO.png|15px|17]] [[File:Rayman Mini - Electoon Icon.png|25px]] | ||
|- | |- | ||
| [[ | | [[File:Assassinbarbara.png|100px]] || [[Avelina]] || || || Disponible dès le début d'une partie (Précommande sur Wii U uniquement)<br />Disponible dès le début d'une partie (Switch uniquement) || || Acheter le Pack de Départ, le Pack Assassin ou le Mégapack [[Ubisoft]] || [[File:Icon2RO.png|15px|2]] [[File:Rayman Mini - Swag Coin Icon.png|25px]] | ||
|- | |- | ||
| [[ | | [[File:Holly sprite (Rayman Adventures).png|100px]] || [[Noëlle]] || || || || || Acheter le Pack Noël (Décembre 2015 et 2016 uniquement) || [[File:Icon3RO.png|15px|30]][[File:Icon0RO.png|15px|30]] [[File:Rayman Mini - Swag Coin Icon.png|25px]] | ||
|- | |- | ||
| [[ | | [[File:Amazonia (Transparent).png|100px]] || [[Amazonia]] || || || || || Acheter le Pack J.O || [[File:Icon1RO.png|15px|17]][[File:Icon7RO.png|15px|17]] [[File:Rayman Mini - Swag Coin Icon.png|25px]] | ||
|- | |- | ||
| [[ | | [[File:Snowbrina.png|100px]] || [[Sabrineige]] || || || || || [[File:Icon2RO.png|15px|2 500]] [[File:Icon5RO.png|15px|2 500]][[File:Icon0RO.png|15px|2 500]][[File:Icon0RO.png|15px|2 500]] [[File:Winter item.png|25px]] ([[Évènement (Rayman Adventures)|Évènement]] de la Chasse d'hiver uniquement)<br />Acheter le Pack Grâce d'Éléphant ou le Pack Puissamment Déjanté || | ||
|- | |- | ||
| [[ | | [[File:Swifterella.png|100px]] || [[Speedrillon]] || || || || || Acheter le Méga Pack Marathon ([[Évènement (Rayman Adventures)|Évènement]] du Marathon de l'été uniquement) || [[File:Icon5RO.png|15px|5]] [[File:Rayman Mini - Swag Coin Icon.png|25px]] | ||
|- | |- | ||
| [[ | | [[File:Hellen.png|100px]] || [[Hadèsia]] || || || || || [[File:Icon2RO.png|15px|2 500]] [[File:Icon5RO.png|15px|2 500]][[File:Icon0RO.png|15px|2 500]][[File:Icon0RO.png|15px|2 500]] [[File:Cursed Bone.png|25px]] ([[Évènement (Rayman Adventures)|Évènement]] de la Roue Infernale uniquement) || | ||
|- | |- | ||
| || [[ | | [[File:Sakura.png|100px]]|| [[Sakura]] || || || || || [[File:Icon2RO.png|15px|2 500]] [[File:Icon5RO.png|15px|2 500]][[File:Icon0RO.png|15px|2 500]][[File:Icon0RO.png|15px|2 500]] [[File:Cherry Blossom.png|25px]] ([[Évènement (Rayman Adventures)|Évènement]] du Marathon du printemps uniquement) || | ||
|- | |- | ||
| || [[ | | [[File:Candice.png|100px]] || [[Candy-cane]] || || || || || Acheter le Pack Sucré || | ||
|- | |- | ||
| || [[ | | [[File:Barr-Barr.png|100px]] || [[Barbarrrrr]] || || || || || [[File:Icon3RO.png|15px|3 200]] [[File:Icon2RO.png|15px|3 200]][[File:Icon0RO.png|15px|3 200]][[File:Icon0RO.png|15px|3 200]] morceaux de viande préhistorique ([[Évènement (Rayman Adventures)|Évènement]] de l'Expédition Rayhistorik uniquement) || | ||
|} | |} | ||
| Ligne 196 : | Ligne 241 : | ||
{{ProtagonistesRaymanLegends}} | {{ProtagonistesRaymanLegends}} | ||
{{ProtagonistesRaymanAdventures}} | {{ProtagonistesRaymanAdventures}} | ||
{{ProtagonistesRaymanMini}} | |||
[[en:List of heroes and costumes in UbiArt games]] | [[en:List of heroes and costumes in UbiArt games]] | ||
[[ru:Список игровых персонажей в играх UbiArt]] | |||
[[Catégorie:Amis de Rayman Origins]] | [[Catégorie:Amis de Rayman Origins]] | ||
| Ligne 203 : | Ligne 250 : | ||
[[Catégorie:Amis de Rayman Legends]] | [[Catégorie:Amis de Rayman Legends]] | ||
[[Catégorie:Amis de Rayman Fiesta Run]] | [[Catégorie:Amis de Rayman Fiesta Run]] | ||
[[Catégorie:Amis de Rayman | [[Catégorie:Amis de Rayman Adventures]] | ||
[[Catégorie:Amis de Rayman Mini]] | |||
[[Catégorie:Humains]] | [[Catégorie:Humains]] | ||
[[Catégorie:Membres de l'espèce de Globox]] | [[Catégorie:Membres de l'espèce de Globox]] | ||
Dernière version du 11 juillet 2026 à 10:39
Dans les premiers jeux de la série Rayman, Rayman était le seul personnage jouable, mais aussi le seul héros à protéger la Croisée des Rêves lorsqu'elle se trouvait menacée par des êtres malfaisants comme les Robots-Pirates et les Hoodlums.
À partir de Rayman Origins, d'autres personnages jouables sont apparus aux côtés de Rayman, élargissant le nombre de héros protégeant la Croisée des Rêves. Parmi eux se trouvent quelques amis de longue date de Rayman comme Globox et des Grands Minis. Les autres héros sont des membres de l'espèce de Rayman ou de Globox, des Ptizêtres ou des princesse humaines.
Certains de ces personnages jouables sont en réalité Rayman ou Globox avec une couleur de peau différente ou un déguisement, comme Raybox et Globox rouge. Ils font donc office de skin et non de nouveau personnage.
Apparitions
Rayman Origins
Dans chaque version de Rayman Origins, il y a 16 personnages jouables, sauf dans la version Nintendo 3DS, où il n'y en a que 6. Ils se trouvent sous l'Arbre Ronfleur, enfermés dans des bulles. Pour pouvoir les incarner, il faut briser un certain nombre de cages d'Électoons, indiqué par Murfy. Une fois obtenus, on peut apprendre leur histoire en parlant avec Polokus. Une fois la Lande aux Esprits Frappés souterraine terminée, plusieurs joueurs peuvent incarner un même personnage en même temps.
Dans les versions Xbox 360 et PlayStation 3 du jeu, le joueur gagne le succès/trophée Face B après avoir joué un niveau avec un personnage débloqué.
Dans Rayman Origins: Enhanced Edition, 18 personnages ont été ajoutées, soit un total de 34 personnages jouables.
-
 Des personnages dans des bulles sous l'Arbre Ronfleur.

Rayman Legends
Chaque version de Rayman Legends a un nombre de personnages jouables différent : il y en a 33 sur PC, 34 sur Xbox 360 et PlayStation 3, 35 sur PlayStation Vita, 36 sur PlayStation 4, 37 sur Xbox One et 44 sur Nintendo Switch.
Les personnages jouables se trouvent dans la Galerie des Héros, enfermés dans des tableaux. Pour pouvoir les incarner, il faut soit amasser un certain nombre de Lums, indiqué sur les cadenas qui verrouillent les tableaux, soit compléter un niveau de secours de princesse. Une fois obtenus, on peut apprendre leur histoire en regardant les tableaux.
Dans les versions PC, Xbox 360, PlayStation 3, PlayStation Vita, Xbox One et PlayStation 4, le joueur gagne le succès/trophée Collectionneur de héros/C'est nous les héros quand il débloque dix tableaux de héros dans la Galerie des Héros et le succès/trophée Plus riche que riche/Millionnaire ! quand il débloque le dernier héros, Rayomz.
-
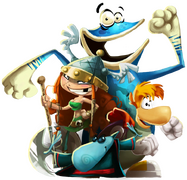 Les quatre principaux héros de Rayman Legends.
 -
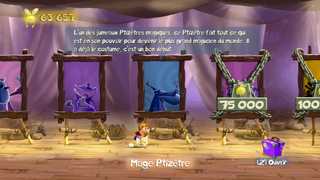 La plupart des personnages se débloquent en amassant des Lums.
 -
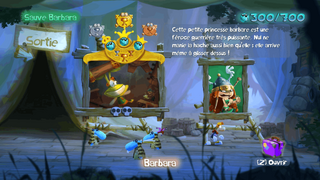 Niveau de secours de Barbara.
 -
 Logo de la Galerie des Héros.


Jeux mobiles Rayman réalisés avec l'UbiArt Framework
Dans les versions iOS et Android de Rayman Jungle Run, Rayman est le seul personnage jouable, mais trois autres peuvent être ajoutés en achetant un pack spécial. Dans la version Windows, les quatre personnages jouables sont disponibles immédiatement et gratuitement.
Dans la plupart des versions de Rayman Fiesta Run, il y a 14 personnages jouables, sauf dans la version iOS où il y en a 20. Il faut d'abord les déverrouiller sur la carte de sélection des niveaux. Cela fait, ils se trouvent dans la Galerie des Héros, enfermés dans des bulles. Pour pouvoir les incarner, amasser un certain nombre de Lums, indiqué sous les bulles.
Dans Rayman Adventures, il y a 71 personnages jouables. Ils se trouvent dans la Galerie des Costumes. Certains peuvent être obtenus en échange de gemmes, tandis que d'autres peuvent être obtenus via des packs payants ou lors d'évènements saisonniers.
Dans Rayman Mini, il y a 55 personnages jouables. Ils se trouvent dans la Galerie des Costumes. La plupart peuvent être obtenus en échange d'Électoons ou de pièces de la classe.
-
 La Galerie des Costumes de Rayman Adventures.
 -
 Cette image datant du développement de Rayman Mini montre la Galerie des Costumes du jeu.


Liste des héros
| Image | Nom | Conditions d'obtention | |||||
|---|---|---|---|---|---|---|---|
| Rayman Origins | Rayman Jungle Run | Rayman Legends | Rayman Fiesta Run | Rayman Adventures | Rayman Mini | ||
 |
Rayman (alias Rayman classique) |
Disponible dès le début d'une partie | Disponible dès le début d'une partie | Disponible dès le début d'une partie | Disponible dès le début d'une partie |    |
Disponible dès le début d'une partie |
 |
Rayman | Disponible dès le début d'une partie |  
| ||||
 |
Raybox (alias Costume de Globox et Ray-box) |
 (PC, Mac, Wii, Xbox 360, PlayStation 3, PlayStation Vita) (Nintendo 3DS) (PC, Mac, Wii, Xbox 360, PlayStation 3, PlayStation Vita) (Nintendo 3DS) |
Acheter le pack de Costumes (iOS et Android) Disponible dès le début d'une partie (Windows) |
  (PC, Xbox 360, PlayStation 3, PlayStation Vita) (PC, Xbox 360, PlayStation 3, PlayStation Vita) (PlayStation 4) (PlayStation 4) (Wii U, Switch) (Xbox One) (Wii U, Switch) (Xbox One) |
 |
Se connecter à Facebook | 
|
 |
Raymésis (alias Dark Ray, Rayman Envoûté, Rayman alter ego et Dark Rayman) |
(PC, Mac, Wii, Xbox 360, PlayStation 3, PlayStation Vita) (Nintendo 3DS) |
Acheter le pack de Costumes (iOS et Android) Disponible dès le début d'une partie (Windows) |
(PC, Xbox 360, PlayStation 3, PlayStation Vita) (PlayStation 4) (Wii U, Switch) (Xbox One) (Wii U, Switch) (Xbox One) |
|
|

|
 |
Sire Rayelot | |
|
| |||
 |
Ray-plombier |  (Wii U et Switch uniquement) (Wii U et Switch uniquement) |
|||||
.png) |
Ray Vaas | (Précommande sur Xbox One uniquement) Disponible dès le début d'une partie (Switch uniquement) |
Acheter le Pack Primal ou le Mégapack Ubisoft Atteindre le top 2% du classement du marathon pour la première fois (Évènement du Marathon du donjon uniquement, du 9 au 22 octobre 2018) |
| |||
 |
Raymolk | (PC, Xbox 360, PlayStation 3, PlayStation Vita) (PlayStation 4) (Wii U, Switch) (Xbox One) |
Acheter le Pack Primal Atteindre la première place du classement du marathon pour la première fois (Évènement du Marathon du donjon uniquement, du 9 au 22 octobre 2018) |
| |||
 |
Rayomz | |
Acheter le Pack Méga Aventure |
| |||
 |
Splinter Ray | (Précommande Xbox 360 uniquement) Disponible dès le début d'une partie (Switch uniquement) |
Acheter le Pack Tom Clancy, le Mégapack Ubisoft ou le Pack Splinter Ray |
| |||
 |
Rayssassin (alias Ray Assassin) |
Disponible dès le début d'une partie (Précommande PlayStation 3 uniquement) (PlayStation 4 uniquement) Disponible dès le début d'une partie (Switch uniquement) |
Acheter le Pack de Départ, le Must-have Pack, le Pack Assassin ou le Mégapack Ubisoft Achat dans la Boutique |
| |||
 |
Ray of Persia | Terminer le dernier Défi de Murfy (PlayStation Vita uniquement) Disponible dès le début d'une partie (Switch uniquement) |
Acheter le Mégapack Ubisoft |
| |||
 |
Funky Ray | Avoir téléchargé Rayman Legends Challenges App (Wii U uniquement) 100 points Uplay (PlayStation 4 et Xbox One uniquement) Disponible dès le début d'une partie (Switch uniquement) |
Acheter le Pack Groovy |
||||
 |
Ray champion (alias Ray Dev Team et UbiRay) |
Devenir un VIP (PlayStation 4 et Xbox One uniquement) Disponible dès le début d'une partie (Switch uniquement) |
|||||
 |
Raynoel | |
|||||
 |
Ray-Noël | Acheter le Pack Noël (Décembre 2015 et 2016 uniquement) |
| ||||
 |
Raynoel 2 | (iOS uniquement) |
|||||
 |
Ray-Fucius | Acheter le Pack Dojo |
| ||||
 |
Ray Noir & Blanc (alias Shadow Ray et Dark Rayman) |
Acheter un pack spécial Atteindre la première place du classement du marathon pour la première fois (Évènement du Marathon du donjon uniquement, du 22 octobre au 6 novembre 2018) |
| ||||
.png) |
Shayman | Acheter le Pack J.O | |||||
.png) |
(Rayman)RED | Acheter le Pack (RED) (iOS uniquement) | |||||
 |
Raygarou | Terminer le mode Cauchemar |
| ||||
 |
Raylatine | |
|||||
 |
Rayphaël |  (Évènement de la Chasse au Gobelet doré uniquement) (Évènement de la Chasse au Gobelet doré uniquement) |
| ||||
 |
Rayéclair |  (Évènement du Marathon de l'été uniquement) (Évènement du Marathon de l'été uniquement) |
|||||
 |
Raybarbe |  (Évènement de la Chasse au trésor de Raybarbe uniquement) (Évènement de la Chasse au trésor de Raybarbe uniquement)Achat dans la Boutique |
|||||
 |
Raydamnation | Acheter le Méga Pack Roue Infernale (Évènement de la Roue Infernale uniquement) |
| ||||
 |
Rayfrigérateur | Acheter le Pack Chaleur de Noël ou le Pack glacé Rayfrigérateur | |||||
 |
Raysiris | Acheter le Méga Pack Marathon (Évènement du Marathon du désert uniquement) Atteindre le top 10% du classement du marathon pour la première fois (Évènement du Marathon du donjon uniquement, du 9 au 22 octobre 2018) |
|||||
 |
Le Pr. Fa-Rayday | Acheter le Pack Électrisant | |||||
 |
Samuray | Acheter le Méga Pack Marathon (Évènement du Marathon du printemps uniquement) | |||||
 |
Ray-One |  (Évènement de la Roue Spatiale uniquement) (Évènement de la Roue Spatiale uniquement) |
|||||
 |
Raystidigitateur | Gemmes (Évènement du Marathon du donjon uniquement) |
|||||
 |
Arayvazteur | Acheter le Pack Aventure du donjon | |||||
 |
Rayhistorik | Acheter le Pack Expédition Préhistorique (Évènement de l'Expédition Rayhistorik uniquement) | |||||
 |
Globox (alias Globox classique) |
Disponible dès le début d'une partie | Acheter le pack de Costumes (iOS et Android) Disponible dès le début d'une partie (Windows) |
Disponible dès le début d'une partie | |
Acheter le Pack Ambitieux Aventurier |
Disponible dès le début d'une partie |
 |
Globox | |
| ||||
 |
Globox rouge | (PC, Mac, Wii, Xbox 360, PlayStation 3, PlayStation Vita) (Nintendo 3DS) |
(PC, Xbox 360, PlayStation 3, PlayStation Vita) (Wii U, Xbox One, PlayStation 4, Switch) |
|
|
| |
 |
Glombrox (alias Glomoche) |
(PC, Mac, Wii, Xbox 360, PlayStation 3, PlayStation Vita) (Nintendo 3DS) |
(PC, Xbox 360, PlayStation 3, PlayStation Vita) (PlayStation 4) (Wii U, Switch) (Xbox One) |
|
| ||
 |
Sire Globrax | Disponible dès le début d'une partie | Acheter le Pack Ambitieux Aventurier |
| |||
 |
Glob-plombier | (Wii U et Switch uniquement) |
|||||
 |
Far Glob (alias Glovaas) |
(Xbox One uniquement) Disponible dès le début d'une partie (Switch uniquement) |
Acheter le Pack Primal ou le Mégapack Ubisoft | ||||
 |
Globolk | (PC, Xbox 360, PlayStation 3, PlayStation Vita) (PlayStation 4) (Wii U, Switch) (Xbox One) |
Acheter le Pack Primal ou le Pack Explorateur de l'Extrême |
| |||
 |
Poglox | (PC, Xbox 360, PlayStation 3, PlayStation Vita) (Wii U, PlayStation 4, Switch) (Xbox One) |
|
| |||
 |
Glob Cell | Terminer le deuxième Défi de Murfy (PlayStation Vita uniquement) Disponible dès le début d'une partie (Switch uniquement) |
Acheter le Pack Tom Clancy ou le Mégapack Ubisoft Atteindre le top 10% du classement du marathon pour la première fois (Évènement du Marathon du donjon uniquement, du 22 octobre au 6 novembre 2018) |
| |||
 |
Globois | Acheter le Pack J.O |
| ||||
 |
Globeach |  (Évènement de la Chasse aux ballons de plage uniquement) (Évènement de la Chasse aux ballons de plage uniquement) |
|||||
.png) |
Glombie |  (Évènement de la Chasse aux citrouilles uniquement) (Évènement de la Chasse aux citrouilles uniquement)Acheter le Pack Sauvetage Non-Stop ou le Pack Aventurier Ambitieux Atteindre le top 25% du classement du marathon pour la première fois (Évènement du Marathon du donjon uniquement, du 9 au 22 octobre 2018) |
| ||||
 |
Glombrero |  (Évènement de la Roue de la Fiesta uniquement) (Évènement de la Roue de la Fiesta uniquement) |
|||||
.png) |
(Globox)RED | Acheter le Pack (RED) (iOS uniquement) | |||||
 |
Globoel (alias le Glo des neiges) |
(iOS uniquement) |
(Entre mai et juillet 2018 uniquement) Achat dans la Boutique |
| |||
 |
Sandbox |  (Évènement du Marathon du désert uniquement) (Évènement du Marathon du désert uniquement) |
|||||
 |
Un Ptizêtre vert | Disponible dès le début d'une partie (sauf dans la version Nintendo 3DS) | |||||
 |
Le Ptizêtre gothique | Disponible dès le début d'une partie (sauf dans la version Nintendo 3DS) | Disponible dès le début d'une partie | |
|
| |
 |
Ptizêt-Ray (alias le Ptizêtre en Ray) |
(sauf dans la version Nintendo 3DS) |
|
| |||
 |
PtiGlob (alias Pti-Glob) |
(sauf dans la version Nintendo 3DS) |
(PC, Xbox 360, PlayStation 3, PlayStation Vita) (Wii U, Xbox One, PlayStation 4, Switch) |
| |||
 |
La Reine Ptizêtre | (sauf dans la version Nintendo 3DS) |
(PC, Xbox 360, PlayStation 3, PlayStation Vita) (PlayStation 4) (Wii U, Switch) (Xbox One) |
|
|
| |
 |
Le Mage Ptizêtre | (sauf dans la version Nintendo 3DS) |
(PC, Xbox 360, PlayStation 3, PlayStation Vita) (PlayStation 4) (Wii U, Switch) (Xbox One) |
|
| ||
 |
Un Grand Minimus | (sauf dans la version Nintendo 3DS) |
Disponible dès le début d'une partie | |
Atteindre le top 2% du classement du marathon pour la première fois (Évènement du Marathon du donjon uniquement, du 22 octobre au 6 novembre 2018) |
||
 |
Le Ptizêtre Ninja (alias le Ptininja) |
(sauf dans la version Nintendo 3DS) |
(PC, Xbox 360, PlayStation 3, PlayStation Vita) (PlayStation 4) (Wii U, Switch) (Xbox One) |
Acheter le Pack Dojo Atteindre le top 10% du classement du marathon pour la première fois (Évènement du Marathon du donjon uniquement, du 6 au 14 novembre 2018) |
| ||
 |
Le Ptizêtre enflammé | (sauf dans la version Nintendo 3DS) |
(PC, Xbox 360, PlayStation 3, PlayStation Vita) (PlayStation 4) (Wii U, Switch) (Xbox One) |
| |||
 |
Le Primus Grand Minimus (alias le premier roi) |
(sauf dans la version Nintendo 3DS) |
(PC, Xbox 360, PlayStation 3, PlayStation Vita, PlayStation 4, Wii U, Switch) (Xbox One) |
| |||
 |
Le Ptizêtre ermite | (PC, Xbox 360, PlayStation 3, PlayStation Vita) (PlayStation 4) (Wii U, Switch) (Xbox One) |
Acheter le Pack Primal ou le Pack Méga Aventure |
| |||
 |
Un Ptizêtre en or |  (PC, Xbox 360, PlayStation 3, PlayStation Vita, PlayStation 4, Wii U, Xbox One) (Switch) (PC, Xbox 360, PlayStation 3, PlayStation Vita, PlayStation 4, Wii U, Xbox One) (Switch) |
Atteindre le 11ème niveau de Génialitude | ||||
.png) |
Pti-lote | |
| ||||
 |
Le Pti'lapin | œufs de Pâques (Évènement de la Chasse aux œufs de Pâques uniquement) Achat dans la Boutique |
|||||
 |
Le Pti-prophète | Acheter le Pack J.O | |||||
.png) |
(Ptizêtre)RED | Acheter le Pack (RED) (iOS uniquement) | |||||
 |
Le Ptizêtre lutin | |
|||||
 |
Le Ptizêtre lutin 2 (alias Pti-papa) |
(iOS uniquement) |
| ||||
 |
Ptizêlatine | |
|||||
 |
Barbara (alias Barbara classique) |
Terminer Course dans le donjon | |
Disponible dès le début d'une partie | |||
 |
Barbara | Disponible dès le début d'une partie |
| ||||
 |
Élysia | Terminer Poursuite dans le donjon | Disponible dès le début d'une partie |
| |||
 |
Aurora | Terminer 600 pieds sous terre | |
| |||
 |
Twila | Terminer 6000 pieds sous terre | Atteindre le top 2% du classement du marathon pour la première fois (Évènement du Marathon du donjon uniquement, du 6 au 14 novembre 2018) |
| |||
 |
Estellia | Terminer Cours si tu tiens à la vie | |
| |||
 |
Sélénia | Terminer Fuis si tu tiens à la vie | |
| |||
 |
Ursula | Terminer Le dojo du ninja | Acheter le Pack Tom Clancy, le Pack Ambitieux Aventurier, le Pack Explorateur de l'Extrême ou le Pack Ursula Atteindre la première place du classement du marathon pour la première fois (Évènement du Marathon du donjon uniquement, du 6 au 14 novembre 2018) |
| |||
 |
Emma | Terminer Le dojo du maître Shaolin | |
| |||
 |
Olympia | Terminer Plus haut ! | Disponible dès le début d'une partie |
| |||
 |
Sibylla | Terminer Toujours plus haut ! | |
| |||
 |
Avelina | Disponible dès le début d'une partie (Précommande sur Wii U uniquement) Disponible dès le début d'une partie (Switch uniquement) |
Acheter le Pack de Départ, le Pack Assassin ou le Mégapack Ubisoft |
| |||
.png) |
Noëlle | Acheter le Pack Noël (Décembre 2015 et 2016 uniquement) |
| ||||
.png) |
Amazonia | Acheter le Pack J.O |
| ||||
 |
Sabrineige |  (Évènement de la Chasse d'hiver uniquement) (Évènement de la Chasse d'hiver uniquement)Acheter le Pack Grâce d'Éléphant ou le Pack Puissamment Déjanté |
|||||
 |
Speedrillon | Acheter le Méga Pack Marathon (Évènement du Marathon de l'été uniquement) |
| ||||
 |
Hadèsia |  (Évènement de la Roue Infernale uniquement) (Évènement de la Roue Infernale uniquement) |
|||||
 |
Sakura |  (Évènement du Marathon du printemps uniquement) (Évènement du Marathon du printemps uniquement) |
|||||
 |
Candy-cane | Acheter le Pack Sucré | |||||
 |
Barbarrrrr | morceaux de viande préhistorique (Évènement de l'Expédition Rayhistorik uniquement) |
|||||
| Personnages de Rayman Origins |
|---|
| Personnages jouables de Rayman Origins |
| Rayman | Globox | Ptizêtre vert | Ptizêtre gothique | Raybox | Globox rouge | Ptizêt-Ray | PtiGlob | Reine Ptizêtre | Mage Ptizêtre | Grand Minimus | Ptininja | Ptizêtre enflammé | Primus Grand Minimus | Dark Ray | Glomoche |
| Amis de Rayman Origins |
| Le Bulleur de Rêves | Murfy | Le Magicien | Bétilla | Électoons | Moskitos | Aline Louïa | Sandra Misu | Dora Dodemer | Ambre Écueil | Quatre Rois | Fée de la Mort |
| Boss de Rayman Origins |
| Boss Oiseau | Murène géante | Golem | Carnivora | Oiseau moqueur | El Stomacho | Creveton | Mecha Carnivora | Mecha Oiseau moqueur | Le Magicien | Big Mama |
| Personnages de Rayman Legends |
|---|
| Personnages jouables de Rayman Legends |
| Rayman | Globox | Grand Minimus | Ptizêtre gothique | Funky Ray | Avelina | Rayssassin | Sire Globrax | Sire Rayelot | Ptizêtre en Ray | Globox rouge | Ray-plombier | Ray Vaas | Pti-Glob | Ray-box | Splinter Ray | Reine Ptizêtre | Glob-plombier | Glombrox | Far Glob | Mage Ptizêtre | Raymésis | Ptizêtre ermite | Raymolk | Ptizêtre Ninja | Globolk | Ptizêtre enflammé | Poglox | Le premier roi | Rayomz | Barbara | Élysia | Aurora | Twila | Estellia | Sélénia | Ursula | Emma | Olympia | Sibylla | Ptizêtre en or | Glob Cell | Ray of Persia | Ray champion | Murfy |
| Amis de Rayman Legends |
| Le Bulleur de Rêves | Moskitos | Quatre Rois | Ancien Ptizêtre |
| Boss de Rayman Legends |
| Ptizêtres maléfiques | Grundermord | Crapaud blindé | Lucha | El Luchador | Seabreather | Dragon mécanique | Nuée maléfique | Boss Oiseau | Carnivora | Oiseau moqueur | Murène géante | El Stomacho | Creveton | Golem | Big Mama |
| Personnages de Rayman Adventures |
|---|
| Personnages jouables de Rayman Adventures |
|
Rayman | Barbara | Globox | Pti-lote | Ray-box | Sire Rayelot | Raymésis | Raymolk | Rayomz | Ray Assassin | Ray-Noël | Ray-Fucius | Funky Ray | Splinter Ray | Ray Vaas | Ray of Persia | Ray Noir & Blanc | Shayman | Rayphaël | Rayéclair | Raybarbe | Raydamnation | Rayfrigérateur | Raysiris | Pr. Fa-Rayday | Samuray | Ray-One | Raystidigitateur | Arayvazteur | Rayhistorik | Élysia | Aurora | Twila | Estellia | Sélénia | Ursula | Emma | Olympia | Sibylla | Avelina | Noëlle | Amazonia | Sabrineige | Speedrillon | Hadèsia | Sakura | Candy-cane | Barbarrrrr | Globox rouge | Sire Globrax | Poglox | Glob Cell | Globolk | Glovaas | Globois | Globeach | Glombie | Glombrero | Sandbox | Glo des neiges | Grand Minimus | Mage Ptizêtre | Ptizêtre gothique | Reine Ptizêtre | Ptizêtre ermite | Pti'lapin | Ptizêtre Ninja | Pti-prophète |
| Amis de Rayman Adventures |
| Incrediballs | Le Capitaine | Ancien Ptizêtre | Murfy |
| Personnages de Rayman Mini |
|---|
| Personnages jouables de Rayman Mini |
| Rayman • Barbara • Globox • Raymolk • Rayphaël • Raymésis • Splinter Ray • Ray-box • Raygarou • Rayssassin • Raydamnation • Rayomz • Ray Noir & Blanc • Ray Vaas • Ray-Noël • Ray-Fucius • Sire Rayelot • Ray of Persia • Ursula • Olympia • Sélénia • Emma • Avelina • Sibylla • Estellia • Aurora • Twila • Speedrillon • Élysia • Noëlle • Amazonia •Glombrox • Globox rouge • Sire Globrax • Globolk • Poglox • Glo des neiges • Globois • Glob Cell • Glombie • Grand Minimus • Reine Ptizêtre • Ptizêtre gothique • Ptizêtre ermite • Pti-lote • Ptizêtre enflammé • Ptizêtre Ninja • Mage Ptizêtre • Le premier roi • Ptizêtre en Ray • Pti-Glob • Pti-papa • Ptizêtre en or |
| Amis de Rayman Mini |
| Murfy • Électoons |
| Boss de Rayman Mini |
| Baudroie • Crapaud vert • Ronce géante • Ptizêtre enflammé |