Clearleaf Forest: Difference between revisions
→As a level: don't need this same pic twice |
Hunchman801 (talk | contribs) mNo edit summary |
||
| (28 intermediate revisions by 7 users not shown) | |||
| Line 1: | Line 1: | ||
{{R3Level | {{R3Level | ||
| name = Clearleaf Forest | | name = Clearleaf Forest | ||
| image = [[File:ClearleafForestPC.jpg|center|320px| | | icon = Mnu fore.png | ||
| preceded by = [[The Fairy Council]] | | image = [[File:ClearleafForestPC.jpg|center|320px|Clearleaf Forest]] | ||
| followed by = [[The Bog of Murk]] | | preceded by = [[File:Mnu jard.png|20px]] [[The Fairy Council]] | ||
| followed by = [[File:Mnu mara.png|20px]] [[The Bog of Murk]] | |||
| murfysscore = 44501 | | murfysscore = 44501 | ||
| maxscore = | | maxscore = 138580 | ||
| cages = 10 | | cages = 10 | ||
| matuvus = 6 | | matuvus = 6 | ||
| Line 14: | Line 14: | ||
* ''This article is about the level in ''[[Rayman 3]]''. For the level in ''[[Rayman: Hoodlums' Revenge]]'', see [[Clearleaf Forest (Rayman: Hoodlums' Revenge)]].'' | * ''This article is about the level in ''[[Rayman 3]]''. For the level in ''[[Rayman: Hoodlums' Revenge]]'', see [[Clearleaf Forest (Rayman: Hoodlums' Revenge)]].'' | ||
{{ | {{Quote|text=Once it was bustling with life. Now, this lush woodland is overrun with hordes of no-good [[Hoodlum]]s. They’ve built up towers, bunkers, and other obstacles to make [[Rayman]]’s trip here anything but a walk in the park.|sign=Press release|source=''[[Rayman 3]]''}} | ||
'''Clearleaf Forest''', also known as the '''Forest of Clear Leaves''', is a location found in ''[[Rayman 3]]'' and the Game Boy Advance game ''[[Rayman: Hoodlums' Revenge]]''. In the former game it follows [[the Fairy Council]], and introduces the player to the [[Heavy Metal Fist]], the [[ | '''Clearleaf Forest''', also known as the '''Forest of Clear Leaves''', is a location found in ''[[Rayman 3]]'' and the Game Boy Advance game ''[[Rayman: Hoodlums' Revenge]]''. In the former game it follows [[the Fairy Council]], and introduces the player to the [[Heavy Metal Fist]], the [[Lockjaw]] and the [[Shock Rocket]]. It is the first level to have a boss (the [[Master Kaag]]), and is also the first level in which [[Globox]] first discovers the infamous [[plum juice]] under the control of [[André]]. | ||
==Description== | ==Description== | ||
| Line 23: | Line 23: | ||
==As a level== | ==As a level== | ||
===Stage 1 - The first [[Teensie]] prisoner=== | ===Stage 1 - The first [[Teensie]] prisoner=== | ||
After [[Rayman]] and [[Globox]] fall down from reaching the end of the first [[Teensie Highway]], [[Globox]] questions: "Who turned off the nice music? Hope I didn’t break anything." [[André]] then tells him to shush, as he demands to get out of [[Globox]]'s stomach and to have some [[plum juice]]. In order to get to the barrel, [[Rayman]] must pass through a building after dealing with [[Hoodmonger]]s outside. He can then free his first ever [[Teensie]], a [[Sylkin]] who gives him a [[Vortex]] can of [[Laser-Washing Powder]] that he had stolen from the [[Hoodlum]]s. [[Rayman]] can then lower the nearby [[meadowscrew]] impeding his progress. [[Rayman]] and [[Globox]] go along a bridge, only to find a wooden door with the face of a [[Hoodlum]] carved onto it, in their way. As [[Rayman]] wonders how to get it open, a couple of [[Hoodmonger]]s come out from nowhere and ambush [[Rayman]]. One of them is in possession of a [[Heavy Metal Fist]] can; [[Rayman]] can use this to break down the door with a fully charged [[Telescopic fist|fist]] and [[helicopter]] down to the next section of the forest. | After [[Rayman]] and [[Globox]] fall down from reaching the end of the first [[Teensie Highway]], [[Globox]] questions: "Who turned off the nice music? Hope I didn’t break anything." [[André]] then tells him to shush, as he demands to get out of [[Globox]]'s stomach and to have some [[plum juice]]. In order to get to the barrel, [[Rayman]] must pass through a building after dealing with [[Hoodmonger]]s outside. He can then free his first ever [[Teensie]], a [[Sylkin]] who gives him a [[Vortex]] can of [[Laser-Washing Powder]] that he had stolen from the [[Hoodlum]]s. [[Rayman]] can then lower the nearby [[meadowscrew]] impeding his progress. [[Rayman]] and [[Globox]] go along a bridge, only to find a wooden door with the face of a [[Hoodlum]] carved onto it, in their way. As [[Rayman]] wonders how to get it open, a couple of [[Hoodmonger]]s come out from nowhere and ambush [[Rayman]]. One of them is in possession of a [[Heavy Metal Fist]] can; [[Rayman]] can use this to break down the door with a fully charged [[Telescopic fist|fist]] and [[helicopter]] down to the next section of the forest. | ||
As the two reach the bottom, [[Rayman]] must defeat a gang of [[Hoodmonger]]s who guard a barrel of [[plum juice]]. After all are defeated, [[Globox]] goes to the barrel, and immediately drinks it down, per [[André]]'s demand. As he finishes, he takes [[Rayman]] to a waterfall teeming with [[piranha]]s and starts to [[Swimming|swim]] upwards with [[Rayman]] clinging onto his back. Now at the top, [[Rayman]] then leaves through a cave. | As the two reach the bottom, [[Rayman]] must defeat a gang of [[Hoodmonger]]s who guard a barrel of [[plum juice]]. After all are defeated, [[Globox]] goes to the barrel, and immediately drinks it down, per [[André]]'s demand. As he finishes, he takes [[Rayman]] to a waterfall teeming with [[piranha]]s and starts to [[Swimming|swim]] upwards with [[Rayman]] clinging onto his back. Now at the top, [[Rayman]] then leaves through a cave. | ||
<gallery | The score thresholds for this stage are 1450 points for 25% (2 stars), 2900 points for 50% (3 stars), 4350 points for 75% (4 stars) and 5800 points for 100% (5 stars). | ||
<gallery widths="320px" heights="240px"> | |||
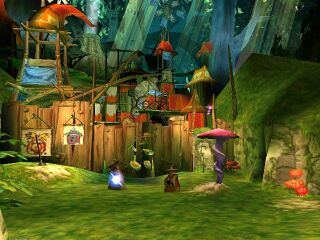
Hoodlum Second Install Clearleaf Forest.jpg|The [[Hoodlum]] camp. | Hoodlum Second Install Clearleaf Forest.jpg|The [[Hoodlum]] camp. | ||
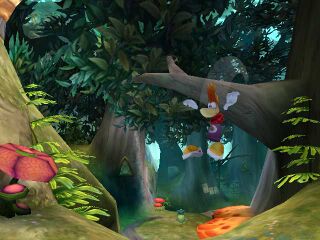
R3 Piranha FR.png|[[Globox]] [[swimming]] upwards a waterfall. | R3 Piranha FR.png|[[Globox]] [[swimming]] upwards a waterfall. | ||
| Line 33: | Line 35: | ||
===Stage 2 – The clearings=== | ===Stage 2 – The clearings=== | ||
[[Rayman]] and [[Globox]] land in a small area surrounded by [[mushroom]]s. Several [[Hoodlum]]s arrive by [[Hoodlum | [[Rayman]] and [[Globox]] land in a small area surrounded by [[mushroom]]s. Several [[Hoodlum]]s arrive by [[Hoodlum airship|airships]], one drinking heavily from a [[keg]] of [[plum juice]]. [[Rayman]] must destroy them to gain a [[Vortex]] can of [[Laser-Washing Powder]]; with it he must lower a [[meadowscrew]] to gain access to the higher levels of the forest, where there are a couple more remaining [[Hoodmonger]]s. After defeating one of them that has the dollar ($) sign, a [[Heavy Metal Fist]] appears, which [[Rayman]] uses to smash through a barricade to get to a waterfall-filled area. Meanwhile, [[Globox]] drinks down the [[plum juice]], inflates as a side effect, and floats away. [[Rayman]] has to advance and as he [[helicopter]]s a good distance, he then smashes a [[cage]] containing a [[Sylkin]] that gives him his first can of the [[Lockjaw]]. With it, he makes it safely to the other end of the creek, where he finds [[Globox]], still intoxicated, standing in front of a [[Hoodlum]] camp. [[Rayman]] must fight off the many [[Hoodmonger]]s and a [[Slapdash]] that guard the area before smashing down a wooden barricade. With [[Globox]] no longer intoxicated, [[Rayman]] has to stick a [[plum]] on its post to get up to a [[Hoodlum]] fortress. | ||
<gallery | The score thresholds for this stage are 3250 points for 25% (2 stars), 6500 points for 50% (3 stars), 9750 points for 75% (4 stars) and 13000 points for 100% (5 stars). | ||
<gallery widths="320px" heights="240px"> | |||
R3HH PC-CF-Part2.png|The second section. | R3HH PC-CF-Part2.png|The second section. | ||
Hoodlum Install Clearleaf Forest Section2.jpg|The first clearing. | Hoodlum Install Clearleaf Forest Section2.jpg|The first clearing. | ||
Drinking Hoodmonger.jpg|A [[Hoodmonger]] drinking [[plum juice]]. | Drinking Hoodmonger.jpg|A [[Hoodmonger]] drinking [[plum juice]]. | ||
Metalbird R3.jpg|The head of a metal bird. | Metalbird R3.jpg|The head of a metal bird. | ||
Rayman Attacking MetalBird.jpg|When [[Rayman]] hits the metal [[bird]]'s head, it spins on itself. | Rayman Attacking MetalBird.jpg|When [[Rayman]] hits the metal [[bird]]'s head, it spins on itself. | ||
Ray3 globox float.png|[[Globox]] flies into the air after drinking [[plum juice]]. | Ray3 globox float.png|[[Globox]] flies into the air after drinking [[plum juice]]. | ||
Hoodlum's second camp Section2.jpg|The second clearing. | Hoodlum's second camp Section2.jpg|The second clearing. | ||
Hoodlums play cards Clearleaf Forest.jpg|Two [[Hoodmonger]]s playing cards. | Hoodlums play cards Clearleaf Forest.jpg|Two [[Hoodmonger]]s playing cards. | ||
| Line 50: | Line 52: | ||
===Stage 3 – The [[Hoodlum]] fortress=== | ===Stage 3 – The [[Hoodlum]] fortress=== | ||
[[Rayman]] and [[Globox]] walk along hallways filled with crates of [[plum juice]] bottles. In the center of a circular room lies the first [[Hoodmonger Soldier]]. Defeating him rewards [[Rayman]] with his first ever [[Shock Rocket]] can of [[Laser-Washing Powder]]. This power makes his [[Telescopic fist|fist]] as a rocket. Even with [[Globox]]'s displeasure of the use of the costumes, [[Rayman]] uses the [[Shock Rocket]] to maneuver through three obstacle courses to hit three targets of himself and [[Globox]] to open three doors. Moving through the hallways, [[Rayman]] encounters a [[Hoodboom]], but has no time to defeat him as he quickly runs through a gate which closes sharply. [[Rayman]] is trapped unless he uses a [[Vortex]] and [[ | [[Rayman]] and [[Globox]] walk along hallways filled with crates of [[plum juice]] bottles. In the center of a circular room lies the first [[Hoodmonger Soldier]]. Defeating him rewards [[Rayman]] with his first ever [[Shock Rocket]] can of [[Laser-Washing Powder]]. This power makes his [[Telescopic fist|fist]] as a rocket. Even with [[Globox]]'s displeasure of the use of the costumes, [[Rayman]] uses the [[Shock Rocket]] to maneuver through three obstacle courses to hit three targets of himself and [[Globox]] to open three doors. Moving through the hallways, [[Rayman]] encounters a [[Hoodboom]], but has no time to defeat him as he quickly runs through a gate which closes sharply. [[Rayman]] is trapped unless he uses a [[Vortex]] and [[Lockjaw]] (dropped by two [[Hoodmonger]]s) to lower a [[meadowscrew]] and swing on a [[flying hook]]. Once he is across, he will need to activate a [[switch]] that opens the gate so [[Globox]] can get through. A band of [[Hoodlum]]s is inside, naturally, and [[Rayman]] will have to defeat them all for the aforementioned [[Hoodboom]] to appear. He is too high up for [[Rayman]] to reach, so [[Rayman]] will need to find and kill a [[Slapdash]] to obtain another can of [[Shock Rocket]] and use it to hit the [[Hoodboom]]. After every [[Hoodlum]] is defeated, [[Globox]] drinks a barrel full of [[plum juice]] and belches out a purple [[bubble]] - [[Rayman]] can bounce onto it to help him reach the higher level of the fortress. Inside is a mass of crates; [[Rayman]] must make his way through the fortress, freeing every [[Sylkin]] he comes across. Each will give him a [[Heavy Metal Fist]] can, useful for smashing down wooden barricades with more [[Sylkin]] [[Teensie]]s hidden inside. Eventually, he will have enough cans to take him through a barricade at the far end of the fortress. | ||
In the first room, above [[Globox]], is an air vent, hiding a lever. If [[Rayman]] can maneuver a [[Shock Rocket]] to activate the lever, a trap door will open up, containing yellow and red [[Jewel|gems]]. | In the first room, above [[Globox]], is an air vent, hiding a lever. If [[Rayman]] can maneuver a [[Shock Rocket]] to activate the lever, a trap door will open up, containing yellow and red [[Jewel|gems]]. | ||
<gallery | The score thresholds for this stage are 4000 points for 25% (2 stars), 8000 points for 50% (3 stars), 12000 points for 75% (4 stars) and 16000 points for 100% (5 stars). | ||
<gallery widths="320px" heights="240px"> | |||
R3HH PC-CF-Part3.png|The beginning of the third section. | R3HH PC-CF-Part3.png|The beginning of the third section. | ||
R3 Soldier.png|thumb|The first [[Hoodmonger Soldier]]. | R3 Soldier.png|thumb|The first [[Hoodmonger Soldier]]. | ||
Rayman Using Laser-Washing Powder.jpg|[[Rayman]] must use the orange [[Laser-Washing Powder]] to get the [[Shock Rocket]]. | Rayman Using Laser-Washing Powder.jpg|[[Rayman]] must use the orange [[Laser-Washing Powder]] to get the [[Shock Rocket]]. | ||
Clearleaf Forest Secret Area Section3 (Switch).jpg|[[Rayman]] must use the [[Shock Rocket]] to activate this lever. | Clearleaf Forest Secret Area Section3 (Switch).jpg|[[Rayman]] must use the [[Shock Rocket]] to activate this lever. | ||
Clearleaf Forest Secret Area Section3.jpg|A trap door opens up when the lever is activated. | Clearleaf Forest Secret Area Section3.jpg|A trap door opens up when the lever is activated. | ||
Hoodbomber.jpg|The first [[Hoodboom]]. | Hoodbomber.jpg|The first [[Hoodboom]]. | ||
Clearleaf Forest The store rooms1.jpg|Outside the [[Hoodlum]] fortress. | Clearleaf Forest The store rooms1.jpg|Outside the [[Hoodlum]] fortress. | ||
Clearleaf Forest The store rooms2.jpg|The first room of the [[Hoodlum]] fortress. | Clearleaf Forest The store rooms2.jpg|The first room of the [[Hoodlum]] fortress. | ||
| Line 68: | Line 70: | ||
</gallery> | </gallery> | ||
===Stage 4 – | ===Stage 4 – [[Master Kaag]]=== | ||
[[Rayman]] and [[Globox]] defeat a [[Hoodmonger Soldier]] and drop down a hole into a dark cave, filled with [[Red Lum]]s. The cave only has one exit: Into the Clearleaf Arena, where a small [[Hoodlum]] rides atop his stomping machine, the | [[Rayman]] and [[Globox]] defeat a [[Hoodmonger Soldier]] and drop down a hole into a dark cave, filled with [[Red Lum]]s. The cave only has one exit: Into the Clearleaf Arena, where a small [[Hoodlum]], [[Master Kaag]] rides atop his stomping machine, the Hoodstomper. [[Rayman]] must trigger three [[switch]]es at a time to make a [[Laser-Washing Powder|can]] of [[Shock Rocket]] appear. Once [[Rayman]] has obtained the power, he must shoot [[Master Kaag]] in the back, and then repeat this process two more times to defeat him (on the third time, [[Slapdash]]es appear on the [[switch]]es). [[Rayman]] then takes control of the Hoodstomper and rides it into battle, destroying three waves of ten [[Hoodmonger Soldier]]s to open a gate. Once the gate is opened, [[Rayman]] drops off from the Hoodstomper and continues to the gate where [[Globox]] comes out from hiding, and the duo enters [[Otto Psi]]'s office. | ||
<gallery | The score thresholds for this stage are 2000 points for 25% (2 stars), 4000 points for 50% (3 stars), 6000 points for 75% (4 stars) and 8000 points for 100% (5 stars). | ||
<gallery widths="320px" heights="240px"> | |||
R3HH PC-CF-Part4.png|The beginning of the fourth section. | R3HH PC-CF-Part4.png|The beginning of the fourth section. | ||
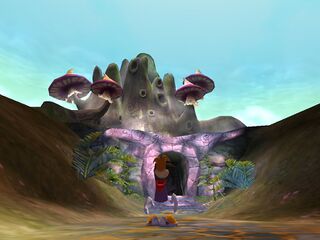
Clearleaf Forest Section4 Underground.jpg|The cave. | Clearleaf Forest Section4 Underground.jpg|The cave. | ||
RaymanFightsMasterKaag.jpg|[[Rayman]] battling | RaymanFightsMasterKaag.jpg|[[Rayman]] battling [[Master Kaag]]. | ||
Slapdash Clearleaf Stadium.jpg|An [[Slapdash]] in the [[Clearleaf Stadium]]. | Slapdash Clearleaf Stadium.jpg|An [[Slapdash]] in the [[Clearleaf Stadium]]. | ||
RaymanUsingMasterKaag.jpg|[[Rayman]] using the [[Master Kaag]]. | RaymanUsingMasterKaag.jpg|[[Rayman]] using the [[Master Kaag|Hoodstomper]]. | ||
MasterKaag (Unused).jpg|The [[Master Kaag]] is abandoned after the defeat of the [[Hoodmonger Soldier]]s. | MasterKaag (Unused).jpg|The [[Master Kaag|Hoodstomper]] is abandoned after the defeat of the [[Hoodmonger Soldier]]s. | ||
Wanted Xowar.jpg|A "Wanted" poster depicting the [[Xowar]]. | Wanted Xowar.jpg|A "Wanted" poster depicting the [[Xowar]]. | ||
The office of Otto.jpg|[[Otto Psi]]'s office. | The office of Otto.jpg|[[Otto Psi]]'s office. | ||
| Line 85: | Line 87: | ||
===Stage 5 – [[Otto Psi|Otto]]'s office=== | ===Stage 5 – [[Otto Psi|Otto]]'s office=== | ||
[[Rayman]] and [[Globox]] enter the office of [[Otto Psi]] only to find a group of [[Hoodmonger]]s running around inside. [[Rayman]] must kill all of them to open the door. | [[Rayman]] and [[Globox]] enter the office of [[Otto Psi]] only to find a group of [[Hoodmonger]]s running around inside. [[Rayman]] must kill all of them to open the door. | ||
After [[Rayman]] and [[Globox]] enter the office, a cutscene plays, in which [[Otto Psi|Otto]] is examining [[Globox]] in his theatre, and attempts to coax [[André]] out of his stomach by raising his arm, and playing it as if his arm was an electric guitar. Unfortunately, while [[André]] is annoyed with this music, it fails to remove him from [[Globox]]'s stomach, so [[Otto Psi|Otto]] finally sends the duo away to [[The Land of the Livid Dead (Rayman 3)|the Land of the Livid Dead]] to meet his friend [[Roméo Patti]], the second [[Teensie doctor]]. | After [[Rayman]] and [[Globox]] enter the office, a cutscene plays, in which [[Otto Psi|Otto]] is examining [[Globox]] in his theatre, and attempts to coax [[André]] out of his stomach by raising his arm, and playing it as if his arm was an electric guitar. Unfortunately, while [[André]] is annoyed with this music, it fails to remove him from [[Globox]]'s stomach, so [[Otto Psi|Otto]] finally sends the duo away to [[The Land of the Livid Dead (Rayman 3)|the Land of the Livid Dead]] to meet his friend [[Roméo Patti]], the second [[Teensie doctor]]. | ||
| Line 91: | Line 93: | ||
Behind where [[Rayman]] starts is a hole in the wall. If examined, [[Rayman]] falls down into a room with several [[Jewel|gems]], including [[Jewel|a green one]]. | Behind where [[Rayman]] starts is a hole in the wall. If examined, [[Rayman]] falls down into a room with several [[Jewel|gems]], including [[Jewel|a green one]]. | ||
<gallery | The score thresholds for this stage are 895 points for 25% (2 stars), 1790 points for 50% (3 stars), 2685 points for 75% (4 stars) and 3580 points for 100% (5 stars). | ||
<gallery widths="320px" heights="240px"> | |||
R3HH PC-CF-Part5.png|The beginning of the fifth section. | R3HH PC-CF-Part5.png|The beginning of the fifth section. | ||
Clearleaf Forest Section 5 Secret Area (Entrence).jpg|The entrance to the secret room. | Clearleaf Forest Section 5 Secret Area (Entrence).jpg|The entrance to the secret room. | ||
Clearleaf Forest Section5 Secret Area.jpg|The secret room. | Clearleaf Forest Section5 Secret Area.jpg|The secret room. | ||
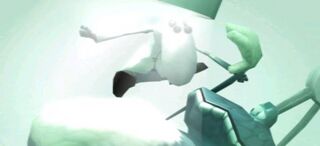
Otto-takes-drastic-steps.jpg|[[Otto Psi]] attempts to heal [[Globox]]. | Otto-takes-drastic-steps.jpg|[[Otto Psi]] attempts to heal [[Globox]]. | ||
</gallery> | </gallery> | ||
===Stage 6 – The second [[Teensie Highway]]=== | ===Stage 6 – The second [[Teensie Highway]]=== | ||
This [[Teensie Highway]] is supposed to take [[Rayman]] and [[Globox]] to [[The Land of the Livid Dead (Rayman 3)|the Land of the Livid Dead]], in which [[Roméo Patti]]'s office is situated in. But at the end of the wormhole, [[Rayman]] fails to reach a series of staves that happen to be too high for him, and tumbles away from the dimension, leading him into [[the Bog of Murk]], and separating him from [[Globox]]. | This [[Teensie Highway]] is supposed to take [[Rayman]] and [[Globox]] to [[The Land of the Livid Dead (Rayman 3)|the Land of the Livid Dead]], in which [[Roméo Patti]]'s office is situated in. But at the end of the wormhole, [[Rayman]] fails to reach a series of staves that happen to be too high for him, and tumbles away from the dimension, leading him into [[the Bog of Murk]], and separating him from [[Globox]]. | ||
The score thresholds for this stage are 2000 points for 25% (2 stars), 4000 points for 50% (3 stars), 6000 points for 75% (4 stars) and 8000 points for 100% (5 stars). | |||
<gallery widths="320px" heights="240px"> | |||
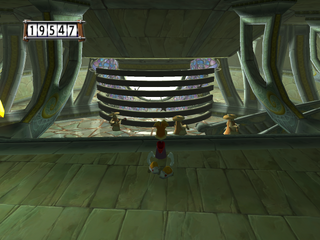
R3HH PC-CF-Part6.png|The sixth and final stage of Clearleaf Forest | |||
</gallery> | |||
==Images from [[Rayman 3 (early production)|the early production of ''Rayman 3'']]== | ==Images from [[Rayman 3 (early production)|the early production of ''Rayman 3'']]== | ||
<gallery | <gallery widths="320px" heights="240px"> | ||
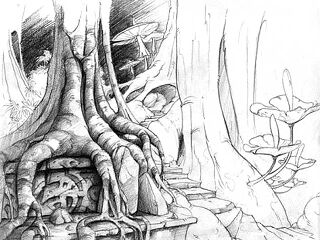
Concept Forest 4.jpg|Concept art of Clearleaf Forest. | |||
Concept Forest 3.jpg|Concept art of Clearleaf Forest. | |||
Concept Forest 1.jpg|Concept art of Clearleaf Forest. | Concept Forest 1.jpg|Concept art of Clearleaf Forest. | ||
Concept Forest 2.jpg|Concept art of Clearleaf Forest. | Concept Forest 2.jpg|Concept art of Clearleaf Forest. | ||
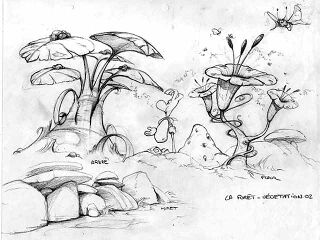
Concept Forest 5.jpg|Concept art of Clearleaf Forest vegetation. | Concept Forest 5.jpg|Concept art of Clearleaf Forest vegetation. | ||
Concept Forest 6.jpg|Concept art of Clearleaf Forest vegetation. | Concept Forest 6.jpg|Concept art of Clearleaf Forest vegetation. | ||
Rayman3beta.jpeg|Ending part (stage 1). | Rayman3beta.jpeg|Ending part (stage 1). | ||
Rayman-3-Clearleaf-Forest.jpg|Beginning (stage 2). | Rayman-3-Clearleaf-Forest.jpg|Beginning (stage 2). | ||
Charged.jpg|The first [[Hoodmonger]] (stage 2). | Charged.jpg|The first [[Hoodmonger]] (stage 2). | ||
R3-Hoodblasters-attack-Rayman-from-airship.jpg|The canyon (stage 2). | R3-Hoodblasters-attack-Rayman-from-airship.jpg|The canyon (stage 2). | ||
Rayman-3-beta-000004.jpg|The [[Hoodlum]] fortress (stage 3). | Rayman-3-beta-000004.jpg|The [[Hoodlum]] fortress (stage 3). | ||
Master Kaag vs Rayman.jpg|Fight between [[Rayman]] and | Master Kaag vs Rayman.jpg|Fight between [[Rayman]] and [[Master Kaag]] (stage 4). | ||
</gallery> | </gallery> | ||
==Soundtracks== | |||
*[https://raytunes.raymanpc.com/music/R3/023%20-%20Clearleaf%20Forest.mp3 "Clearleaf Forest"] | |||
*[https://raytunes.raymanpc.com/music/R3/027%20-%20Clearleaf%20Forest%20~Forest%20Fisticuffs~.mp3 "Clearleaf Forest ~Forest Fisticuffs~"] | |||
*[https://raytunes.raymanpc.com/music/R3/025%20-%20Ascending%20the%20Waterfall.mp3 "Ascending the Waterfall"] | |||
*[https://raytunes.raymanpc.com/music/R3/026%20-%20The%20Ambush.mp3 "The Ambush"] | |||
*[https://raytunes.raymanpc.com/music/R3/022%20-%20Hoodmongers.mp3 "Hoodmongers"] | |||
*[https://raytunes.raymanpc.com/music/R3/029%20-%20The%20Hoodboom.mp3 "The Hoodboom"] | |||
*[https://raytunes.raymanpc.com/music/R3/030%20-%20The%20Hoodstomper%20~Lying%20in%20Wait~.mp3 "The Hoodstomper ~Lying in Wait~"] | |||
*[https://raytunes.raymanpc.com/music/R3/031%20-%20The%20Hoodstomper%20~Master%20Kaag~.mp3 "The Hoodstomper ~Master Kaag~"] | |||
*[https://raytunes.raymanpc.com/music/R3/032%20-%20The%20Hoodstomper%20~Rayman%20Takes%20Control~.mp3 "The Hoodstomper ~Rayman Takes Control~"] | |||
*[https://raytunes.raymanpc.com/music/R3/033%20-%20The%20Hoodstomper%20~Settling%20the%20Score~.mp3 "The Hoodstomper ~Settling the Score~"] | |||
==Saves== | |||
This section lists saves for the PC version of the game. Instructions on how to implement them can be found [https://raysaves.raymanpc.com/rayman3.html here]. | |||
*[https://raysaves.raymanpc.com/saves/rayman3/L2P1.sav Phase 1] | |||
*[https://raysaves.raymanpc.com/saves/rayman3/L2P2.sav Phase 2] | |||
*[https://raysaves.raymanpc.com/saves/rayman3/L2P3.sav Phase 3] | |||
*[https://raysaves.raymanpc.com/saves/rayman3/L2P4.sav Phase 4] | |||
*[https://raysaves.raymanpc.com/saves/rayman3/L2P5.sav Phase 5] | |||
*[https://raysaves.raymanpc.com/saves/rayman3/L2P6.sav Phase 6] | |||
==Trivia== | ==Trivia== | ||
| Line 128: | Line 153: | ||
==External links== | ==External links== | ||
*[ | *[https://www.youtube.com/watch?v=VJTaIxBcqhc Clearleaf Forest playthrough at YouTube (PC version)] | ||
{{Rayman3worlds}} | {{Rayman3worlds}} | ||
{{Rayman 3}} | |||
[[fr:La Forêt de Claire-Feuille]] | [[fr:La Forêt de Claire-Feuille]] | ||
| Line 136: | Line 162: | ||
[[hu:Leveledő Erdő]] | [[hu:Leveledő Erdő]] | ||
[[pl:Las Czystoliść]] | [[pl:Las Czystoliść]] | ||
[[es:El Bosque Hojaclara]] | |||
[[ru:Лес Прозрачных Листьев]] | |||
[[Category:Places from Rayman 3]] | [[Category:Places from Rayman 3]] | ||
Latest revision as of 06:07, 29 July 2025
 | |
| ← |
|
| Maximum score: | |
- This article is about the level in Rayman 3. For the level in Rayman: Hoodlums' Revenge, see Clearleaf Forest (Rayman: Hoodlums' Revenge).
Once it was bustling with life. Now, this lush woodland is overrun with hordes of no-good Hoodlums. They’ve built up towers, bunkers, and other obstacles to make Rayman’s trip here anything but a walk in the park.—Press release, Rayman 3
Clearleaf Forest, also known as the Forest of Clear Leaves, is a location found in Rayman 3 and the Game Boy Advance game Rayman: Hoodlums' Revenge. In the former game it follows the Fairy Council, and introduces the player to the Heavy Metal Fist, the Lockjaw and the Shock Rocket. It is the first level to have a boss (the Master Kaag), and is also the first level in which Globox first discovers the infamous plum juice under the control of André.
Description
Clearleaf Forest is a large, formerly peaceful forest that has been invaded by the Hoodlum army. Rayman must make his way past natural obstacles and Hoodlum installations in order to bring Globox to Otto Psi, the first of three Teensie doctors, whom the heroes hope will be able to extract André from Globox's stomach.
As a level
Stage 1 - The first Teensie prisoner
After Rayman and Globox fall down from reaching the end of the first Teensie Highway, Globox questions: "Who turned off the nice music? Hope I didn’t break anything." André then tells him to shush, as he demands to get out of Globox's stomach and to have some plum juice. In order to get to the barrel, Rayman must pass through a building after dealing with Hoodmongers outside. He can then free his first ever Teensie, a Sylkin who gives him a Vortex can of Laser-Washing Powder that he had stolen from the Hoodlums. Rayman can then lower the nearby meadowscrew impeding his progress. Rayman and Globox go along a bridge, only to find a wooden door with the face of a Hoodlum carved onto it, in their way. As Rayman wonders how to get it open, a couple of Hoodmongers come out from nowhere and ambush Rayman. One of them is in possession of a Heavy Metal Fist can; Rayman can use this to break down the door with a fully charged fist and helicopter down to the next section of the forest.
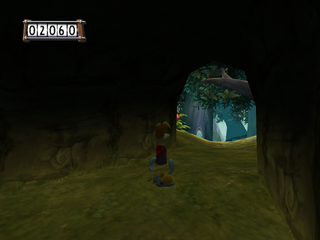
As the two reach the bottom, Rayman must defeat a gang of Hoodmongers who guard a barrel of plum juice. After all are defeated, Globox goes to the barrel, and immediately drinks it down, per André's demand. As he finishes, he takes Rayman to a waterfall teeming with piranhas and starts to swim upwards with Rayman clinging onto his back. Now at the top, Rayman then leaves through a cave.
The score thresholds for this stage are 1450 points for 25% (2 stars), 2900 points for 50% (3 stars), 4350 points for 75% (4 stars) and 5800 points for 100% (5 stars).
-
 The Hoodlum camp.
 -


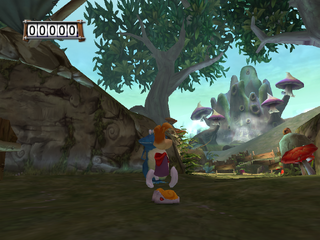
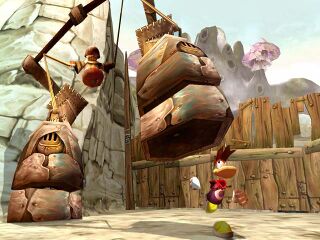
Stage 2 – The clearings
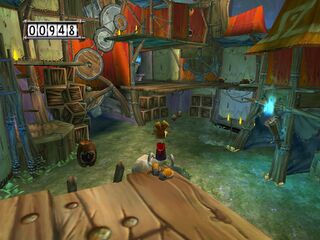
Rayman and Globox land in a small area surrounded by mushrooms. Several Hoodlums arrive by airships, one drinking heavily from a keg of plum juice. Rayman must destroy them to gain a Vortex can of Laser-Washing Powder; with it he must lower a meadowscrew to gain access to the higher levels of the forest, where there are a couple more remaining Hoodmongers. After defeating one of them that has the dollar ($) sign, a Heavy Metal Fist appears, which Rayman uses to smash through a barricade to get to a waterfall-filled area. Meanwhile, Globox drinks down the plum juice, inflates as a side effect, and floats away. Rayman has to advance and as he helicopters a good distance, he then smashes a cage containing a Sylkin that gives him his first can of the Lockjaw. With it, he makes it safely to the other end of the creek, where he finds Globox, still intoxicated, standing in front of a Hoodlum camp. Rayman must fight off the many Hoodmongers and a Slapdash that guard the area before smashing down a wooden barricade. With Globox no longer intoxicated, Rayman has to stick a plum on its post to get up to a Hoodlum fortress.
The score thresholds for this stage are 3250 points for 25% (2 stars), 6500 points for 50% (3 stars), 9750 points for 75% (4 stars) and 13000 points for 100% (5 stars).
-
 The second section.
 -
 The first clearing.
 -
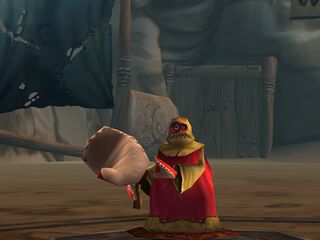
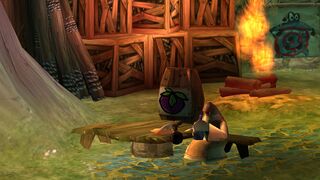 A Hoodmonger drinking plum juice.
 -
 The head of a metal bird.
 -

-
 Globox flies into the air after drinking plum juice.
 -
 The second clearing.
 -
 Two Hoodmongers playing cards.
 -
 These plum posts that are scattered throughout the game bear images of a Livingstone, in reference to their role in the original Rayman game.


Stage 3 – The Hoodlum fortress
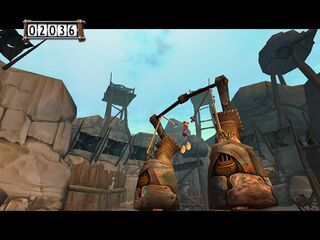
Rayman and Globox walk along hallways filled with crates of plum juice bottles. In the center of a circular room lies the first Hoodmonger Soldier. Defeating him rewards Rayman with his first ever Shock Rocket can of Laser-Washing Powder. This power makes his fist as a rocket. Even with Globox's displeasure of the use of the costumes, Rayman uses the Shock Rocket to maneuver through three obstacle courses to hit three targets of himself and Globox to open three doors. Moving through the hallways, Rayman encounters a Hoodboom, but has no time to defeat him as he quickly runs through a gate which closes sharply. Rayman is trapped unless he uses a Vortex and Lockjaw (dropped by two Hoodmongers) to lower a meadowscrew and swing on a flying hook. Once he is across, he will need to activate a switch that opens the gate so Globox can get through. A band of Hoodlums is inside, naturally, and Rayman will have to defeat them all for the aforementioned Hoodboom to appear. He is too high up for Rayman to reach, so Rayman will need to find and kill a Slapdash to obtain another can of Shock Rocket and use it to hit the Hoodboom. After every Hoodlum is defeated, Globox drinks a barrel full of plum juice and belches out a purple bubble - Rayman can bounce onto it to help him reach the higher level of the fortress. Inside is a mass of crates; Rayman must make his way through the fortress, freeing every Sylkin he comes across. Each will give him a Heavy Metal Fist can, useful for smashing down wooden barricades with more Sylkin Teensies hidden inside. Eventually, he will have enough cans to take him through a barricade at the far end of the fortress.
In the first room, above Globox, is an air vent, hiding a lever. If Rayman can maneuver a Shock Rocket to activate the lever, a trap door will open up, containing yellow and red gems.
The score thresholds for this stage are 4000 points for 25% (2 stars), 8000 points for 50% (3 stars), 12000 points for 75% (4 stars) and 16000 points for 100% (5 stars).
-
 The beginning of the third section.
 -
 The first Hoodmonger Soldier.
 -

-
 Rayman must use the Shock Rocket to activate this lever.
 -
 A trap door opens up when the lever is activated.
 -
 The first Hoodboom.
 -
 Outside the Hoodlum fortress.
 -
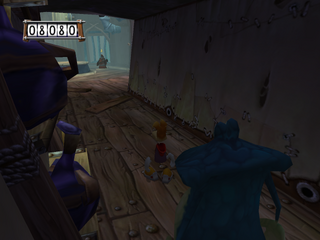
 The first room of the Hoodlum fortress.
 -
 The latest room of the Hoodlum fortress.


.jpg)


Stage 4 – Master Kaag
Rayman and Globox defeat a Hoodmonger Soldier and drop down a hole into a dark cave, filled with Red Lums. The cave only has one exit: Into the Clearleaf Arena, where a small Hoodlum, Master Kaag rides atop his stomping machine, the Hoodstomper. Rayman must trigger three switches at a time to make a can of Shock Rocket appear. Once Rayman has obtained the power, he must shoot Master Kaag in the back, and then repeat this process two more times to defeat him (on the third time, Slapdashes appear on the switches). Rayman then takes control of the Hoodstomper and rides it into battle, destroying three waves of ten Hoodmonger Soldiers to open a gate. Once the gate is opened, Rayman drops off from the Hoodstomper and continues to the gate where Globox comes out from hiding, and the duo enters Otto Psi's office.
The score thresholds for this stage are 2000 points for 25% (2 stars), 4000 points for 50% (3 stars), 6000 points for 75% (4 stars) and 8000 points for 100% (5 stars).
-
 The beginning of the fourth section.
 -
 The cave.
 -
 Rayman battling Master Kaag.
 -
 An Slapdash in the Clearleaf Stadium.
 -
 Rayman using the Hoodstomper.
 -
 The Hoodstomper is abandoned after the defeat of the Hoodmonger Soldiers.
 -
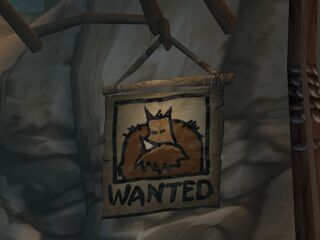 A "Wanted" poster depicting the Xowar.
 -
 Otto Psi's office.


.jpg)


Stage 5 – Otto's office
Rayman and Globox enter the office of Otto Psi only to find a group of Hoodmongers running around inside. Rayman must kill all of them to open the door.
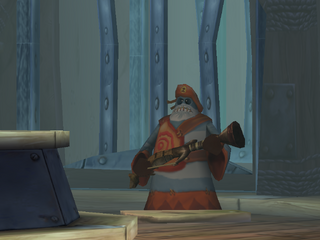
After Rayman and Globox enter the office, a cutscene plays, in which Otto is examining Globox in his theatre, and attempts to coax André out of his stomach by raising his arm, and playing it as if his arm was an electric guitar. Unfortunately, while André is annoyed with this music, it fails to remove him from Globox's stomach, so Otto finally sends the duo away to the Land of the Livid Dead to meet his friend Roméo Patti, the second Teensie doctor.
Behind where Rayman starts is a hole in the wall. If examined, Rayman falls down into a room with several gems, including a green one.
The score thresholds for this stage are 895 points for 25% (2 stars), 1790 points for 50% (3 stars), 2685 points for 75% (4 stars) and 3580 points for 100% (5 stars).
-
 The beginning of the fifth section.
 -
 The entrance to the secret room.
 -
 The secret room.
 -

.jpg)


Stage 6 – The second Teensie Highway
This Teensie Highway is supposed to take Rayman and Globox to the Land of the Livid Dead, in which Roméo Patti's office is situated in. But at the end of the wormhole, Rayman fails to reach a series of staves that happen to be too high for him, and tumbles away from the dimension, leading him into the Bog of Murk, and separating him from Globox.
The score thresholds for this stage are 2000 points for 25% (2 stars), 4000 points for 50% (3 stars), 6000 points for 75% (4 stars) and 8000 points for 100% (5 stars).
-
 The sixth and final stage of Clearleaf Forest

Images from the early production of Rayman 3
-
 Concept art of Clearleaf Forest.
 -
 Concept art of Clearleaf Forest.
 -
 Concept art of Clearleaf Forest.
 -
 Concept art of Clearleaf Forest.
 -
 Concept art of Clearleaf Forest vegetation.
 -
 Concept art of Clearleaf Forest vegetation.
 -
 Ending part (stage 1).
 -
 Beginning (stage 2).
 -
 The first Hoodmonger (stage 2).
 -
 The canyon (stage 2).
 -
 The Hoodlum fortress (stage 3).
 -
 Fight between Rayman and Master Kaag (stage 4).


Soundtracks
- "Clearleaf Forest"
- "Clearleaf Forest ~Forest Fisticuffs~"
- "Ascending the Waterfall"
- "The Ambush"
- "Hoodmongers"
- "The Hoodboom"
- "The Hoodstomper ~Lying in Wait~"
- "The Hoodstomper ~Master Kaag~"
- "The Hoodstomper ~Rayman Takes Control~"
- "The Hoodstomper ~Settling the Score~"
Saves
This section lists saves for the PC version of the game. Instructions on how to implement them can be found here.
Trivia
- Clearleaf Forest is one of the levels featured in the demo version of Rayman 3. The demo version of the level contains numerous differences from that used in the final game.
