Mecha No Mistake!: Difference between revisions
Jump to navigation
Jump to search
No edit summary |
Added images |
||
| Line 19: | Line 19: | ||
'''Mecha No Mistake!''' is the third level of the [[Moody Clouds]], a world in ''[[Rayman Origins]]''. | '''Mecha No Mistake!''' is the third level of the [[Moody Clouds]], a world in ''[[Rayman Origins]]''. | ||
== | == Original version == | ||
<gallery> | <gallery> | ||
File:Sciedémentesection2.jpg|Second section | File:Sciedémentesection2.jpg|Second section | ||
File:Sciedémentesection3.jpg|Third section | File:Sciedémentesection3.jpg|Third section | ||
| Line 30: | Line 28: | ||
File:SciedémentesectionFinal.jpg|Seventh section | File:SciedémentesectionFinal.jpg|Seventh section | ||
</gallery> | </gallery> | ||
{{Template:RLLevel | |||
| name = Mecha No Mistake! | |||
| difficulty = [[File:DifficultySkull.png|32px|''Skull'']][[File:DifficultySkull.png|32px|''Skull'']][[File:DifficultySkull.png|32px|''Skull'']] | |||
| image = [[File:Mecha No Mistake! - Back to Origins.png|center|320px|''Mecha No Mistake!'']] | |||
| preceded by = [[On Top of Old Smokey#Back to Origins|On Top of Old Smokey]] | |||
| followed by = [[The Reveal#Back to Origins|The Reveal]] | |||
| world = [[Mystical Pique]] | |||
| teensies = [[File:Icon1RO.png|15px|''1'']][[File:Icon0RO.png|15px|''0'']] | |||
| bronze cup = [[File:Icon1RO.png|15px|''1'']][[File:Icon5RO.png|15px|''5'']][[File:Icon0RO.png|15px|''0'']] [[File:RO-Lums.png|30px|Lums]] | |||
| silver cup = [[File:Icon3RO.png|15px|''3'']][[File:Icon0RO.png|15px|''0'']][[File:Icon0RO.png|15px|''0'']] [[File:RO-Lums.png|30px|Lums]] | |||
| lucky ticket = [[File:Icon4RO.png|15px|''4'']][[File:Icon5RO.png|15px|''5'']][[File:Icon0RO.png|15px|''0'']] [[File:RO-Lums.png|30px|Lums]] | |||
| gold cup = [[File:Icon6RO.png|15px|''6'']][[File:Icon0RO.png|15px|''0'']][[File:Icon0RO.png|15px|''0'']] [[File:RO-Lums.png|30px|Lums]] | |||
}} | |||
==Back to Origins== | |||
In the [[Back to Origins]] version, there aren't many differences between the original version; except of the notable elements from ''[[Rayman Legends]]'' replacing some of the elements from ''[[Rayman Origins|Origins]]''. | |||
{| | |||
|- | |||
| [[File:Mecha No Mistake! - Back to Origins 1.jpg|thumb|left|The start of the level.]] | |||
| [[File:Mecha No Mistake! - Back to Origins 2.jpg|thumb|center|The machinery in this area will attempt to crush the player.]] | |||
|- | |||
| [[File:Mecha No Mistake! - Back to Origins 3.jpg|thumb|left|The first secret area.]] | |||
| [[File:Mecha No Mistake! - Back to Origins 4.jpg|thumb|center|A [[Lum (UbiArt games)|Lum]] chain.]] | |||
|- | |||
| [[File:Mecha No Mistake! - Back to Origins 5.jpg|thumb|left|A [[Teensie]] [[cage]].]] | |||
| [[File:Mecha No Mistake! - Back to Origins 6.jpg|thumb|center|The second secret area.]] | |||
|} | |||
{| | |||
|- | |||
| [[File:Mecha No Mistake! - Back to Origins 7.jpg|thumb|left|The [[cage]] in the second secret area.]] | |||
| [[File:Mecha No Mistake! - Back to Origins 8.jpg|thumb|center|A purple [[Lum (UbiArt games)|Lum]] chain.]] | |||
| [[File:Mecha No Mistake! - Back to Origins 9.jpg|thumb|right|An overview of the fifth part.]] | |||
|- | |||
| [[File:Mecha No Mistake! - Back to Origins 10.jpg|thumb|left|[[Rayman]] jumping on appearing platforms.]] | |||
| [[File:Mecha No Mistake! - Back to Origins 11.jpg|thumb|center|[[Rayman]] running in a loop while collecting [[Lum (UbiArt games)|Lum]]s.]] | |||
| [[File:Mecha No Mistake! - Back to Origins 12.jpg|thumb|right|The final area, now with an added [[Teensie]] [[cage]].]] | |||
|} | |||
==External links== | ==External links== | ||
Revision as of 12:31, 30 March 2017
| Mecha No Mistake! | |||||||||||
|---|---|---|---|---|---|---|---|---|---|---|---|
 | |||||||||||
| ← On Top of Old Smokey | The Reveal → | ||||||||||
 Moody Clouds Moody Clouds
| |||||||||||
   
|

|

| |||||||||
   
|
|
  
| |||||||||

|

| ||||||||||

 This article is a stub, please share your knowledge by expanding it!
Mecha No Mistake! is the third level of the Moody Clouds, a world in Rayman Origins.
Original version
-
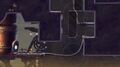 Second section
 -
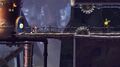 Third section
 -
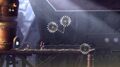 Fourth section
 -
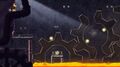 Fifth section
 -
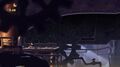 Sixth section
 -
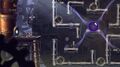 Seventh section


| Mecha No Mistake! | ||||||||
|---|---|---|---|---|---|---|---|---|
 | ||||||||

| ||||||||
| ← On Top of Old Smokey | The Reveal → | |||||||
| Mystical Pique
| ||||||||

|
||||||||

|

| |||||||

|

| |||||||
Back to Origins
In the Back to Origins version, there aren't many differences between the original version; except of the notable elements from Rayman Legends replacing some of the elements from Origins.
 |
 |
 |
 |
 |
 |
 |
 |
 |
 |
 |
 |
External links
- Mecha No Mistake! playthrough at YouTube (PC version) (Normal walkthrough + Lums Medal)
- Mecha No Mistake! playthrough at YouTube (PC version) (Speed Trophy)