Beware of Mini-Murray: Difference between revisions
Boomboleros7 (talk | contribs) Language link |
Improvements and added links |
||
| Line 18: | Line 18: | ||
}} | }} | ||
'''Beware of Mini-Murray''' is the fourth level of the [[Angsty Abyss]], a world in ''[[Rayman Origins]]''. In this level, [[Rayman]] and the team | '''Beware of Mini-Murray''' is the fourth level of the [[Angsty Abyss]], a world in ''[[Rayman Origins]]''. In this level, [[Rayman]] and the team continue to [[Swimming|swim]] in the sea, avoiding dangers along the way. This level is the third one from this world and twenty-ninth overall that's included in the [[Back to Origins]] mode in ''[[Rayman Legends]]''. | ||
==Original version== | ==Original version== | ||
==Area 1== | ==Area 1== | ||
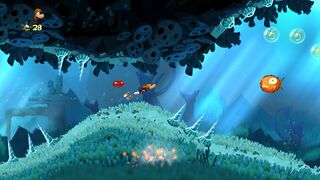
After falling into the water because of a platform collapsing, the first [[Skull Coin]] can already be found. It | After falling into the water because of a platform collapsing, the first [[Skull Coin]] can already be found. It is located to the far left. After a short time of [[swimming]], deadly [[Dragonfly|dragonflies]] appear, and the heroes must get to the exit before the [[Dragonfly|dragonflies]] come into contact with them. The second [[Skull Coin]] can be collected by taking the higher path during the escape. | ||
<gallery widths="320px" heights="180px"> | |||
Beware of Mini-Murray 2.jpg|A [[Blowfish]]. | |||
Beware of Mini-Murray 3.jpg|A [[Skull Coin]]. | |||
</gallery> | |||
==Area 2== | ==Area 2== | ||
[[File:Beware of Mini-Murray 4.jpg|320px|thumb|right|The second part has the player once again being chased by [[Dragonfly| | [[File:Beware of Mini-Murray 4.jpg|320px|thumb|right|The second part has the player once again being chased by [[Dragonfly|dragonflies]].]] | ||
The [[Dragonfly| | The [[Dragonfly|dragonflies]] are still hot on the team's trail, and now they must get away faster as rock platforms will collapse on each other. The third [[Skull Coin]] can be found by going left in between the wall and a rock platform. Later on, the rock platforms will shut tight together, making the [[Dragonfly|dragonflies]] get stuck, allowing the team to continue on to the exit with ease. | ||
{{Clear}} | {{Clear}} | ||
==Area 3== | ==Area 3== | ||
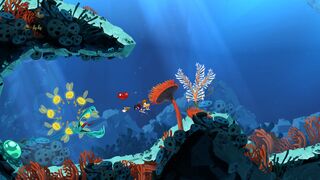
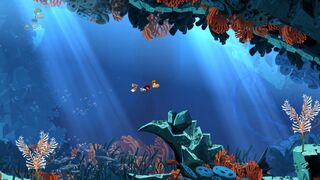
The team now arrives to a more peaceful area. Though there are still [[Blowfish]], rock statues that suck in air and later on, [[Swordfish]]. The first secret area can be found by dodging a [[Swordfish]] from up high, then going to the path of where it originally was. Once done, the heroes can advance to the exit. | |||
The team now arrives to a more peaceful area. Though there are still [[Blowfish]], rock statues that suck in air and later on, [[Swordfish]]. The first secret area can be found by dodging a | |||
<gallery widths="320px" heights="180px"> | |||
Beware of Mini-Murray 5.jpg|A group of [[Lum (UbiArt games)|Lums]]. | |||
Beware of Mini-Murray 6.jpg|The player must try not getting inhaled. | |||
</gallery> | |||
===Secret | ===Secret area 1=== | ||
[[File:Beware of Mini-Murray 7.jpg|320px|thumb| | [[File:Beware of Mini-Murray 7.jpg|320px|thumb|left|The first secret area.]] | ||
In this maze looking area, the players need to hurry as they destroy the [[Blowfish]] and [[Redfish]], as a large purple [[Murray]] is following nearby. Once the enemies are defeated, the [[cage]] can be broken open. | In this maze looking area, the players need to hurry as they destroy the [[Blowfish]] and [[Redfish]], as a large purple [[Murray]] is following nearby. Once the enemies are defeated, the [[cage]] can be broken open. | ||
| Line 50: | Line 50: | ||
==Area 4== | ==Area 4== | ||
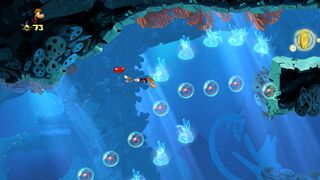
Shortly, the fourth [[Skull Coin]] can be acquired by going up, while passing two groups of [[ | Shortly, the fourth [[Skull Coin]] can be acquired by going up, while passing two groups of [[jellyfish]]. Later, the heroes need to be quick if they want to defeat the [[sea anemone]]. The second secret area is located down through a small gap, close to a scenery piece. The fifth [[Skull Coin]] can be collected by passing through a rock creature near the exit. | ||
<gallery widths="320px" heights="180px"> | |||
Beware of Mini-Murray 8.jpg|A [[Skull Coin]]. | |||
Beware of Mini-Murray 9.jpg|A [[sea anemone]]. | |||
Beware of Mini-Murray 11.jpg|Another [[Skull Coin]]. | |||
</gallery> | |||
===Secret | ===Secret area 2=== | ||
[[File:Beware of Mini-Murray 10.jpg|320px|thumb|right|The second secret area.]] | [[File:Beware of Mini-Murray 10.jpg|320px|thumb|right|The second secret area.]] | ||
Here, [[Rayman]] and his team | Here, [[Rayman]] and his team need to safely get by the moving [[spiky fish]]es, to the group of [[Redfish]] that must be defeated to break open the [[Electoon]] [[cage]]. | ||
{{Clear}} | {{Clear}} | ||
==Area 5== | ==Area 5== | ||
The team now needs to swim downwards to continue on. There are many [[Blowfish]] and some purple [[Murray]]s in the pathway. | The team now needs to [[Swimming|swim]] downwards to continue on. There are many [[Blowfish]] and some purple [[Murray]]s in the pathway. | ||
<gallery widths="320px" heights="180px"> | |||
Beware of Mini-Murray 12.jpg|A bunch of [[Blowfish]]. | |||
Beware of Mini-Murray 13.jpg|The end of the fifth area. | |||
</gallery> | |||
==Area 6== | ==Area 6== | ||
[[File:Beware of Mini-Murray 14.jpg|320px|thumb|left|The sixth area.]] | [[File:Beware of Mini-Murray 14.jpg|320px|thumb|left|The sixth area.]] | ||
From the beginning, a purple [[Murray]] will be following the players from a certain distance. Then, a different Murray will now follow the players for a certain amount of distance. The sixth [[Skull Coin]] can be retrieved by safely swimming through [[ | From the beginning, a purple [[Murray]] will be following the players from a certain distance. Then, a different [[Murray]] will now follow the players for a certain amount of distance. The sixth [[Skull Coin]] can be retrieved by safely swimming through [[sea anemone]]. The exit is close by. | ||
{{Clear}} | {{Clear}} | ||
| Line 80: | Line 80: | ||
==Area 7== | ==Area 7== | ||
[[File:Beware of Mini-Murray 15.jpg|320px|thumb|right|The final area.]] | [[File:Beware of Mini-Murray 15.jpg|320px|thumb|right|The final area.]] | ||
The heroes have to destroy the [[Blowfish]] in the area, while being followed by a purple [[Murray]]. Once all [[Blowfish]] are defeated, the [[Electoon]] [[cage]] can be broken to end the level. The players will then pose on the [[The Photographer|photoboard]] as [[the Magician]] waits for the total amount of [[Lum (UbiArt games)|Lums]] that were collected in the level. | |||
{{Clear}} | {{Clear}} | ||
| Line 98: | Line 98: | ||
}} | }} | ||
==Back to Origins== | ==[[Back to Origins]]== | ||
This level is playable in the [[Back to Origins]] mode in ''[[Rayman Legends]]'' as the fifth one from [[Sea of Serendipity]]. There aren't many notable differences between the versions; except the notable differences that appear in every other Back to Origins level. It is renamed '''Beware of the Mini-Murray'''. | This level is playable in the [[Back to Origins]] mode in ''[[Rayman Legends]]'' as the fifth one from [[Sea of Serendipity]]. There aren't many notable differences between the versions; except the notable differences that appear in every other [[Back to Origins]] level. It is renamed '''Beware of the Mini-Murray'''. | ||
<gallery widths="320px" heights="180px"> | |||
Beware of the Mini-Murray - Back to Origins 1.jpg|The starting point of the level. | |||
Beware of the Mini-Murray - Back to Origins 2.jpg|[[Dragonfly|Dragonflies]] chase the players in the first area. | |||
Beware of the Mini-Murray - Back to Origins 3.jpg|The [[Dragonfly|Dragonflies]] do the same in the second area. | |||
Beware of the Mini-Murray - Back to Origins 4.jpg|The third area. | |||
Beware of the Mini-Murray - Back to Origins 5.jpg|An air sucking rock creature. | |||
Beware of the Mini-Murray - Back to Origins 6.jpg|[[Swordfish]]. | |||
Beware of the Mini-Murray - Back to Origins 7.jpg|The first secret area of the level. | |||
Beware of the Mini-Murray - Back to Origins 8.jpg|A purple [[Murray]] follows the team in the first secret area. | |||
Beware of the Mini-Murray - Back to Origins 9.jpg|The second secret area. | |||
Beware of the Mini-Murray - Back to Origins 10.jpg|The fifth area of the level. | |||
Beware of the Mini-Murray - Back to Origins 11.jpg|The sixth area. | |||
Beware of the Mini-Murray - Back to Origins 12.jpg|A [[giant jellyfish]]. | |||
Beware of the Mini-Murray - Back to Origins 13.jpg|The seventh and final area. | |||
Beware of the Mini-Murray - Back to Origins 14.jpg|A purple [[Murray]] follows the team in this area. | |||
</gallery> | |||
==External links== | ==External links== | ||
* [http://www.youtube.com/watch?v=W9maZUgmVZc Beware of Mini-Murray playthrough at YouTube (PC version) (Normal walkthrough + Lums Medal)] | * [http://www.youtube.com/watch?v=W9maZUgmVZc Beware of Mini-Murray playthrough at YouTube (PC version) (Normal walkthrough + Lums Medal)] | ||
* [http://www.youtube.com/watch?v=bY4cSK28PCI Beware of Mini-Murray playthrough at YouTube (PC version) (Speed Trophy)] | * [http://www.youtube.com/watch?v=bY4cSK28PCI Beware of Mini-Murray playthrough at YouTube (PC version) (Speed Trophy)] | ||
* [https://www.youtube.com/watch?v=u_-qprdzTCk Beware of the Mini-Murray's ''Rayman Legends'' playthrough at YouTube (PC version)] | |||
* [https://www.youtube.com/watch?v=u_-qprdzTCk Beware of the Mini-Murray's Rayman Legends playthrough at YouTube (PC version)] | |||
{{RaymanOriginslocations}} | {{RaymanOriginslocations}} | ||
Revision as of 15:49, 4 April 2018
| Beware of Mini-Murray | |||||||||||
|---|---|---|---|---|---|---|---|---|---|---|---|
 | |||||||||||
| ← Scuba Shootout | Murray of the Deep → | ||||||||||
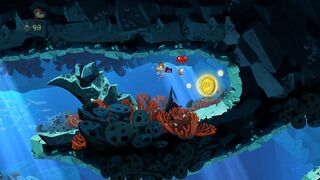
Beware of Mini-Murray is the fourth level of the Angsty Abyss, a world in Rayman Origins. In this level, Rayman and the team continue to swim in the sea, avoiding dangers along the way. This level is the third one from this world and twenty-ninth overall that's included in the Back to Origins mode in Rayman Legends.
Original version
Area 1
After falling into the water because of a platform collapsing, the first Skull Coin can already be found. It is located to the far left. After a short time of swimming, deadly dragonflies appear, and the heroes must get to the exit before the dragonflies come into contact with them. The second Skull Coin can be collected by taking the higher path during the escape.
-
 A Blowfish.
 -
 A Skull Coin.


Area 2

The dragonflies are still hot on the team's trail, and now they must get away faster as rock platforms will collapse on each other. The third Skull Coin can be found by going left in between the wall and a rock platform. Later on, the rock platforms will shut tight together, making the dragonflies get stuck, allowing the team to continue on to the exit with ease.
Area 3
The team now arrives to a more peaceful area. Though there are still Blowfish, rock statues that suck in air and later on, Swordfish. The first secret area can be found by dodging a Swordfish from up high, then going to the path of where it originally was. Once done, the heroes can advance to the exit.
-
 A group of Lums.
 -
 The player must try not getting inhaled.


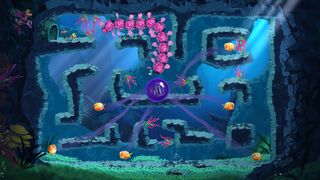
Secret area 1

In this maze looking area, the players need to hurry as they destroy the Blowfish and Redfish, as a large purple Murray is following nearby. Once the enemies are defeated, the cage can be broken open.
Area 4
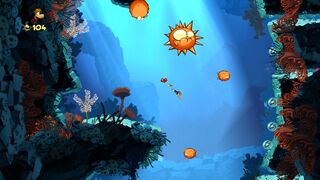
Shortly, the fourth Skull Coin can be acquired by going up, while passing two groups of jellyfish. Later, the heroes need to be quick if they want to defeat the sea anemone. The second secret area is located down through a small gap, close to a scenery piece. The fifth Skull Coin can be collected by passing through a rock creature near the exit.
-
 A Skull Coin.
 -
 A sea anemone.
 -
 Another Skull Coin.


Secret area 2

Here, Rayman and his team need to safely get by the moving spiky fishes, to the group of Redfish that must be defeated to break open the Electoon cage.
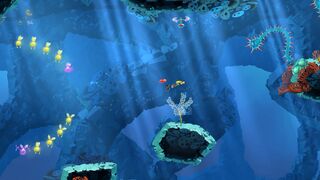
Area 5
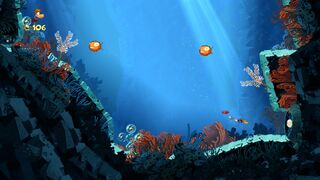
The team now needs to swim downwards to continue on. There are many Blowfish and some purple Murrays in the pathway.
-
 A bunch of Blowfish.
 -
 The end of the fifth area.


Area 6

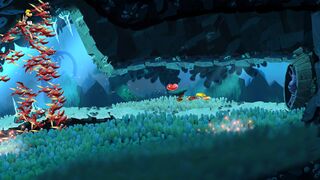
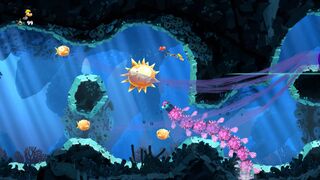
From the beginning, a purple Murray will be following the players from a certain distance. Then, a different Murray will now follow the players for a certain amount of distance. The sixth Skull Coin can be retrieved by safely swimming through sea anemone. The exit is close by.
Area 7

The heroes have to destroy the Blowfish in the area, while being followed by a purple Murray. Once all Blowfish are defeated, the Electoon cage can be broken to end the level. The players will then pose on the photoboard as the Magician waits for the total amount of Lums that were collected in the level.
| Beware of the Mini-Murray | ||||||||
|---|---|---|---|---|---|---|---|---|
 | ||||||||
| ← Fire When Wetty | Scuba Shootout → | |||||||
Back to Origins
This level is playable in the Back to Origins mode in Rayman Legends as the fifth one from Sea of Serendipity. There aren't many notable differences between the versions; except the notable differences that appear in every other Back to Origins level. It is renamed Beware of the Mini-Murray.
-
 The starting point of the level.
 -
 Dragonflies chase the players in the first area.
 -
 The Dragonflies do the same in the second area.
 -
 The third area.
 -
 An air sucking rock creature.
 -

-
 The first secret area of the level.
 -
 A purple Murray follows the team in the first secret area.
 -
 The second secret area.
 -
 The fifth area of the level.
 -
 The sixth area.
 -
-
 The seventh and final area.
 -
 A purple Murray follows the team in this area.


External links
- Beware of Mini-Murray playthrough at YouTube (PC version) (Normal walkthrough + Lums Medal)
- Beware of Mini-Murray playthrough at YouTube (PC version) (Speed Trophy)
- Beware of the Mini-Murray's Rayman Legends playthrough at YouTube (PC version)