Aim for the Eel!: Difference between revisions
Hunchman801 (talk | contribs) mNo edit summary |
Hunchman801 (talk | contribs) m Fixed links to redirects |
||
| (14 intermediate revisions by the same user not shown) | |||
| Line 1: | Line 1: | ||
'''Aim for the Eel!''' is the sixth and final level of [[Gourmand Land]], the third world in ''[[Rayman Origins]]''. It acts as a transition between [[Gourmand Land]] and the [[Sea of Serendipity]], similarly to the first part of [[Bongo Hills]] in the PC version of [[Rayman 1|the original ''Rayman'' game]] and its ports. Once the heroes reach the ocean, they must battle a [[Murray|giant eel]]. This is the third level from this world, and the nineteenth overall, to be included in the [[Back to Origins]] painting in ''[[Rayman Legends]]''. | |||
==Original version== | |||
{{ROLevel | {{ROLevel | ||
| name = Aim for the Eel! | | name = Aim for the Eel! | ||
| Line 5: | Line 8: | ||
| followed by = [[Port 'O Panic]] | | followed by = [[Port 'O Panic]] | ||
| world = [[Gourmand Land]] | | world = [[Gourmand Land]] | ||
| medallion slot 1 = Cage | |||
| medallion slot 1 = | | medallion slot 2 = Lums | ||
| medallion slot 2 = | | medallion slot 2 number = 150 | ||
| medallion slot 3 = | | medallion slot 3 = Lums | ||
| medal = | | medallion slot 3 number = 300 | ||
| medal = 350 | |||
| format numbers = true | |||
}} | }} | ||
This level begins in the Infernal Kitchens area of [[Gourmand Land]]. The heroes soon encounter [[giant mosquito]]es and climb aboard. Throughout the flight, they must avoid flames, while watching out for [[flying dragon]]s and [[Baby Dragon Chef]]s. As the heroes progress, they must also avoid [[Knife|knives]], [[fork]]s that fly across the area, falling ice cubes, and glowing hot objects. Eventually, just past a [[chilli pepper]], the heroes enter a new area, which ends the transition between [[Gourmand Land]] and the [[Sea of Serendipity]]. After flying through a short cave, the heroes find themselves over the [[Sea of Serendipity]], where they must defeat a [[Murray|giant eel]] by shooting the pink part on the end of each segment. If the heroes defeat the [[Murray|eel]] within 60 seconds, they will unlock the [[Blue Baron!]] trophy/achievement. Once defeated, the heroes can disband their [[giant mosquito]]es and break the [[Electoon]] [[cage]] to finish the level. The heroes then pose on the [[The Photographer|photoboard]] as [[The Magician (Rayman Origins)|the Magician]] counts the total number of [[Lum (UbiArt games)|Lums]] collected throughout the level. | |||
This level begins in the Infernal | |||
<gallery widths="320px" heights="180px"> | <gallery widths="320px" heights="180px"> | ||
Aim for the Eel! 1.jpg|Flames | Aim for the Eel! 1.jpg|Flames must be avoided at all costs. | ||
Aim for the Eel! 2.jpg|A group of [[ | Aim for the Eel! 2.jpg|A group of [[flying dragon]]s. | ||
Aim for the Eel! 3.jpg|A large group of [[ | Aim for the Eel! 3.jpg|A large group of [[flying dragon]]s right above a body of fire. | ||
Aim for the Eel! 4.jpg|The two must avoid the red-hot metal. | |||
Aim for the Eel! 4.jpg|The two | |||
Aim for the Eel! 5.jpg|If the lasers are touched, [[Knife|knives]] will come soaring in their direction. | Aim for the Eel! 5.jpg|If the lasers are touched, [[Knife|knives]] will come soaring in their direction. | ||
Aim for the Eel! 6.jpg|Blocks of ice melting as they sink down the body of fire. | Aim for the Eel! 6.jpg|Blocks of ice melting as they sink down the body of fire. | ||
Aim for the Eel! 7.jpg|A [[chilli pepper]] relaxing. | |||
Aim for the Eel! 7.jpg|A [[ | Aim for the Eel! 8.jpg|The end of the Infernal Kitchens section of [[Gourmand Land]]. | ||
Aim for the Eel! 8.jpg|The | |||
Aim for the Eel! 9.jpg|The transition to the [[Sea of Serendipity]] ends. | Aim for the Eel! 9.jpg|The transition to the [[Sea of Serendipity]] ends. | ||
Aim for the Eel! 10.jpg|The [[Murray|giant eel]]. | |||
Aim for the Eel! 10.jpg|The [[Murray| | Aim for the Eel! 11.jpg|The pink parts are the [[Murray|giant eel]]'s weakness. | ||
Aim for the Eel! 11.jpg|The | Aim for the Eel! 12.jpg|The [[Murray|giant eel]] will get smaller and smaller as more segments are destroyed. | ||
Aim for the Eel! 12.jpg|The [[Murray| | Aim for the Eel! 13.jpg|After the last segment is destroyed, the [[Murray|giant eel]] will be [[Bubble|bubblized]]. | ||
Aim for the Eel! 13.jpg|After the last | |||
</gallery> | </gallery> | ||
==Back to Origins== | |||
{{RLLevel | {{RLLevel | ||
| name = Aim for the Eel! | | name = Aim for the Eel! | ||
| difficulty = | | difficulty = 2 | ||
| image = [[File:Aim for the Eel! - Back to Origins.png|center|320px|Aim for the Eel!]] | | image = [[File:Aim for the Eel! - Back to Origins.png|center|320px|Aim for the Eel!]] | ||
| preceded by = [[Piping Hot!#Back to Origins|Piping Hot!]] | | preceded by = [[Piping Hot!#Back to Origins|Piping Hot!]] | ||
| followed by = [[Ice-Fishing Folly#Back to Origins|Ice-Fishing Folly]] | | followed by = [[Ice-Fishing Folly#Back to Origins|Ice-Fishing Folly]] | ||
| world = [[Gourmand Land]] | | world = [[Gourmand Land]] | ||
| teensies = | | teensies = 3 | ||
| bronze cup = | | bronze cup = 75 | ||
| silver cup = | | silver cup = 150 | ||
| lucky ticket = | | lucky ticket = 225 | ||
| gold cup = | | gold cup = 300 | ||
| format numbers = true | |||
}} | }} | ||
This level is playable in the [[Back to Origins]] mode in ''[[Rayman Legends]]''. There are no notable differences between the versions apart from the notable elements from ''[[Rayman Legends]]'' replacing some elements from the original game. | |||
<gallery widths="320px" heights="180px"> | <gallery widths="320px" heights="180px"> | ||
Aim for the Eel! - Back to Origins 1.jpg|A group of [[ | Aim for the Eel! - Back to Origins 1.jpg|A group of [[flying dragon]]s. | ||
Aim for the Eel! - Back to Origins 2.jpg|A [[Baby Dragon Chef]] about to | Aim for the Eel! - Back to Origins 2.jpg|A [[Baby Dragon Chef]] about to breathe fire at [[Rayman]] and the [[giant mosquito]]. | ||
Aim for the Eel! - Back to Origins 3.jpg|Flames coming out of small vents from the pipes. | Aim for the Eel! - Back to Origins 3.jpg|Flames coming out of small vents from the pipes. | ||
Aim for the Eel! - Back to Origins 4.jpg|Larger groups of [[flying dragon]]s. | |||
Aim for the Eel! - Back to Origins 4.jpg|Larger groups of [[ | Aim for the Eel! - Back to Origins 5.jpg|Red-hot metal next to [[Baby Dragon Chef]]s. | ||
Aim for the Eel! - Back to Origins 5.jpg| | |||
Aim for the Eel! - Back to Origins 6.jpg|Ice cubes melting as they sink into the body of fire. | Aim for the Eel! - Back to Origins 6.jpg|Ice cubes melting as they sink into the body of fire. | ||
Aim for the Eel! - Back to Origins 7.jpg|[[Lum (UbiArt games)|Lum]] chains between red-hot metal. | |||
Aim for the Eel! - Back to Origins 7.jpg|[[Lum (UbiArt games)|Lum]] chains | Aim for the Eel! - Back to Origins 8.jpg|A [[Teensie]] [[cage]] close to a [[chilli pepper]]. | ||
Aim for the Eel! - Back to Origins 8.jpg|A [[Teensie]] [[cage]] close to a [[ | |||
Aim for the Eel! - Back to Origins 9.jpg|The transition to the [[Sea of Serendipity]] ends. | Aim for the Eel! - Back to Origins 9.jpg|The transition to the [[Sea of Serendipity]] ends. | ||
Aim for the Eel! - Back to Origins 10.jpg|The [[Murray|giant eel]]. | |||
Aim for the Eel! - Back to Origins 10.jpg|The [[Murray| | Aim for the Eel! - Back to Origins 11.jpg|The pink parts are the [[Murray|giant eel]]'s weak spot. | ||
Aim for the Eel! - Back to Origins 11.jpg|The | Aim for the Eel! - Back to Origins 12.jpg|The [[Murray|giant eel]] becomes smaller and smaller after each segment is destroyed. | ||
Aim for the Eel! - Back to Origins 12.jpg|The [[Murray| | Aim for the Eel! - Back to Origins 13.jpg|[[Lum (UbiArt games)|Lums]] appear after the [[Murray|giant eel]] is defeated. | ||
Aim for the Eel! - Back to Origins 13.jpg|[[Lum (UbiArt games)|Lums]] appear after the [[Murray| | |||
Aim for the Eel! - Back to Origins 14.jpg|The final [[Teensie]] [[cage]] of the level. | Aim for the Eel! - Back to Origins 14.jpg|The final [[Teensie]] [[cage]] of the level. | ||
</gallery> | </gallery> | ||
==Names in other languages== | |||
{{Names | |||
|en=Aim for the Eel! | |||
|ar=صوب على ثعبان البحر! | |||
|zh_hans=狙击电鳗 | |||
|cs=Miř na úhoře! | |||
|da=Sigt på ålen! | |||
|nl=Richt op die paling! | |||
|fi=Tähtää ankeriaaseen! | |||
|fr=Murène en boîte | |||
|de=Wer den Aal hat, hat die Qual! | |||
|hu=Célozz az angolnára! | |||
|it=Mira all'anguilla! | |||
|ja=うなぎを ねらえ! | |||
|ja_S=''[[Rayman Origins]]'' | |||
|ja_2=「高熱に耐えて撃て!」 | |||
|ja_2_S=''[[Rayman Legends]]'' | |||
|no=Sikt på ålen! | |||
|pl=Celuj w Węgorza! | |||
|pl_S=''[[Rayman Origins]]'' | |||
|pl_2=Celuj w węgorza! | |||
|pl_2_S=''[[Rayman Legends]]'' | |||
|pt=Enguia e companhia | |||
|pt_S=''[[Rayman Origins]]'' | |||
|pt_2=De olho na enguia! | |||
|pt_2_S=''[[Rayman Legends]]'' | |||
|ru=Цель - морская змея! | |||
|es=Receta marinera | |||
|sv=Dansar med ålar | |||
}} | |||
==External links== | ==External links== | ||
| Line 84: | Line 110: | ||
[[fr:Murène en boîte]] | [[fr:Murène en boîte]] | ||
[[hu:Célozz az | [[hu:Célozz az angolnára!]] | ||
[[pl:Celuj w węgorza!]] | [[pl:Celuj w węgorza!]] | ||
[[Category:Places from Rayman Origins]] | [[Category:Places from Rayman Origins]] | ||
[[Category:Places from Rayman Legends]] | |||
Latest revision as of 07:49, 8 November 2025
Aim for the Eel! is the sixth and final level of Gourmand Land, the third world in Rayman Origins. It acts as a transition between Gourmand Land and the Sea of Serendipity, similarly to the first part of Bongo Hills in the PC version of the original Rayman game and its ports. Once the heroes reach the ocean, they must battle a giant eel. This is the third level from this world, and the nineteenth overall, to be included in the Back to Origins painting in Rayman Legends.
Original version
| Aim for the Eel! | |||||||||||
|---|---|---|---|---|---|---|---|---|---|---|---|
 | |||||||||||
| ← Mending the Rift | Port 'O Panic → | ||||||||||
 Gourmand Land Gourmand Land
| |||||||||||
   
|
   
|

| |||||||||

|
|||||||||||

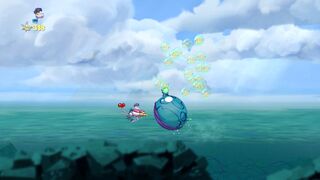
This level begins in the Infernal Kitchens area of Gourmand Land. The heroes soon encounter giant mosquitoes and climb aboard. Throughout the flight, they must avoid flames, while watching out for flying dragons and Baby Dragon Chefs. As the heroes progress, they must also avoid knives, forks that fly across the area, falling ice cubes, and glowing hot objects. Eventually, just past a chilli pepper, the heroes enter a new area, which ends the transition between Gourmand Land and the Sea of Serendipity. After flying through a short cave, the heroes find themselves over the Sea of Serendipity, where they must defeat a giant eel by shooting the pink part on the end of each segment. If the heroes defeat the eel within 60 seconds, they will unlock the Blue Baron! trophy/achievement. Once defeated, the heroes can disband their giant mosquitoes and break the Electoon cage to finish the level. The heroes then pose on the photoboard as the Magician counts the total number of Lums collected throughout the level.
-
 Flames must be avoided at all costs.
 -
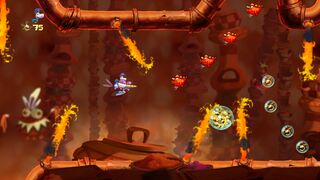 A group of flying dragons.
 -
 A large group of flying dragons right above a body of fire.
 -
 The two must avoid the red-hot metal.
 -
 If the lasers are touched, knives will come soaring in their direction.
 -
 Blocks of ice melting as they sink down the body of fire.
 -
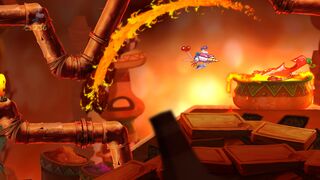 A chilli pepper relaxing.
 -
 The end of the Infernal Kitchens section of Gourmand Land.
 -
 The transition to the Sea of Serendipity ends.
 -
 The giant eel.
 -
 The pink parts are the giant eel's weakness.
 -
 The giant eel will get smaller and smaller as more segments are destroyed.
 -


Back to Origins
| Aim for the Eel! | ||||||||
|---|---|---|---|---|---|---|---|---|
 | ||||||||

| ||||||||
| ← Piping Hot! | Ice-Fishing Folly → | |||||||
| Gourmand Land
| ||||||||

|
||||||||
 
|

| |||||||

|

| |||||||
This level is playable in the Back to Origins mode in Rayman Legends. There are no notable differences between the versions apart from the notable elements from Rayman Legends replacing some elements from the original game.
-
 A group of flying dragons.
 -

-
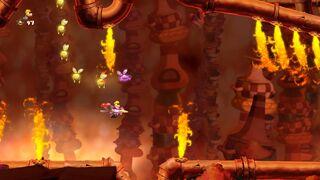 Flames coming out of small vents from the pipes.
 -
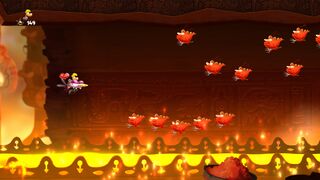 Larger groups of flying dragons.
 -
 Red-hot metal next to Baby Dragon Chefs.
 -
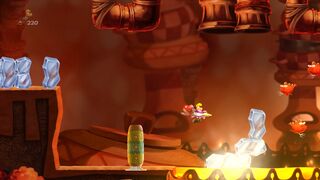 Ice cubes melting as they sink into the body of fire.
 -
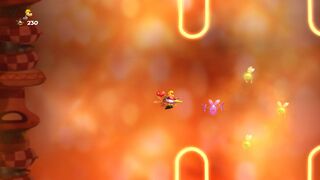 Lum chains between red-hot metal.
 -

-
 The transition to the Sea of Serendipity ends.
 -
 The giant eel.
 -
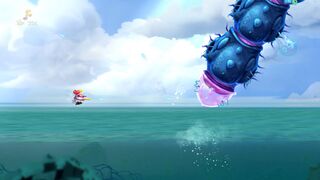 The pink parts are the giant eel's weak spot.
 -
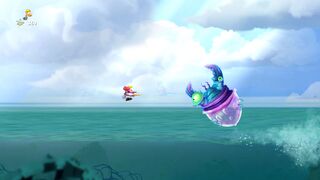 The giant eel becomes smaller and smaller after each segment is destroyed.
 -

-


Names in other languages
| Language | Name |
|---|---|
| English | Aim for the Eel! |
| Arabic | صوب على ثعبان البحر! |
| Chinese (simplified) | 狙击电鳗 |
| Czech | Miř na úhoře! |
| Danish | Sigt på ålen! |
| Dutch | Richt op die paling! |
| Finnish | Tähtää ankeriaaseen! |
| French | Murène en boîte |
| German | Wer den Aal hat, hat die Qual! |
| Hungarian | Célozz az angolnára! |
| Italian | Mira all'anguilla! |
| Japanese | うなぎを ねらえ! (Rayman Origins)
「高熱に耐えて撃て!」 (Rayman Legends) |
| Norwegian | Sikt på ålen! |
| Polish | Celuj w Węgorza! (Rayman Origins)
Celuj w węgorza! (Rayman Legends) |
| Portuguese | Enguia e companhia (Rayman Origins)
De olho na enguia! (Rayman Legends) |
| Russian | Цель - морская змея! |
| Spanish | Receta marinera |
| Swedish | Dansar med ålar |
External links
- Aim for the Eel! playthrough at YouTube (PC version) (Normal walkthrough + Lums Medal)
- Aim for the Eel! playthrough at YouTube (PS3's DEMO version) (Normal walkthrough + Lums Medal)
- Aim for the Eel!'s Rayman Legends playthrough at YouTube (PC version)