Skyward Sonata: Difference between revisions
Hunchman801 (talk | contribs) m Manual of style, replaced: 're → are, aren't → are not |
Clean up; added relics |
||
| Line 18: | Line 18: | ||
}} | }} | ||
'''Skyward Sonata''' is the fifth level of the [[Desert of Dijiridoos]], the second world in ''[[Rayman Origins]]''. Its name is a spoof of the 2011 ''Zelda'' game, ''Skyward Sword''. This level is mostly about riding on the [[serpent flute]]s to get across most areas. This level is the second one from this world and eleventh overall that | '''Skyward Sonata''' is the fifth level of the [[Desert of Dijiridoos]], the second world in ''[[Rayman Origins]]''. Its name is a spoof of the 2011 ''Zelda'' game, ''Skyward Sword''. This level is mostly about riding on the [[serpent flute]]s to get across most areas. This level is the second one from this world and eleventh overall that is included in the [[Back to Origins]] painting in ''[[Rayman Legends]]''. | ||
==Original version== | ==Original version== | ||
==Area 1== | ==Area 1== | ||
All the | The first area is fairly short. All the heroes will need to do in order to reach the exit, is to slide down a water current, perform a walljump, then crush attack a [[Red Bird]] and wooden barrier. This area is most likely a transition to the second area, where the first [[serpent flute]] is located. | ||
<gallery widths="320px" heights="180px"> | <gallery widths="320px" heights="180px"> | ||
| Line 29: | Line 29: | ||
==Area 2== | ==Area 2== | ||
As the heroes battle the | As the heroes battle the [[Red Bird]]s, a [[serpent flute]] is on the move beneath the cloud platforms; the heroes will need to quickly climb aboard it, as the [[Serpent flute|flute]] will not remain stationary. Once aboard, the heroes to keep up with the [[Serpent flute|flute]], while jumping onto different platforms throughout the area. The first [[Skull Coin]] of the level can be found in this area; it can be collected by performing a walljump between 2 didgeridoos, one of which moves vertically. As the heroes disband the [[serpent flute]], the first secret area can be found above, by simply performing a walljump above the exit. Once the [[Electoon]]s are saved, the heroes can proceed to the next area. | ||
<gallery widths="320px" heights="180px"> | <gallery widths="320px" heights="180px"> | ||
| Line 35: | Line 35: | ||
Skyward Sonata 3.jpg|A [[Skull Coin]] located slightly off the main path. | Skyward Sonata 3.jpg|A [[Skull Coin]] located slightly off the main path. | ||
</gallery> | </gallery> | ||
===Relic 1=== | |||
[[File:Skyward Sonata first relic.png|thumb|right|320px|The first relic can be found just in front of [[Rayman]].]] | |||
The first [[relic]] can be found in this area as the heroes approach the exit; a cloud will disperse, revealing its location. | |||
{{clear}} | |||
===Secret area 1=== | ===Secret area 1=== | ||
[[File:Skyward Sonata 4.jpg|320px|thumb| | [[File:Skyward Sonata 4.jpg|320px|thumb|left|The first secret area.]] | ||
The heroes will pass some moving bongos; they will need to defeat three [[Red Bird]]s along the way. Once defeated, the [[Electoon]] [[cage]] at the end can be broken. | |||
{{Clear}} | {{Clear}} | ||
==Area 3== | ==Area 3== | ||
The second [[serpent flute]] appears | The second [[serpent flute]] appears as the heroes perform a walljump and break a wooden barrier. Just like in the first area, the heroes will need to avoid obstacles and board nearby platforms, while quickly boarding the [[Serpent flute|flute]] again. The second and third [[Skull Coin]]s of the level are right next to each other; the second one can be collected by performing a walljump just left of where the third [[Skull Coin|coin]] is seen, while the third can be obtained by performing some walljumps on another didgeridoo, then sliding down while carefully avoiding the [[spiky bird]]. As the heroes proceed, they will need to perform walljumps in order to keep up with the [[serpent flute|flute]]; didgeridoos will also attempt to crush the heroes, they will need to carefully avoid getting crushed by the didgeridoos. Afterwards, the heroes can disband the [[serpent flute]]. The second secret area can be found here; it is located above the exit. | ||
<gallery widths="320px" heights="180px"> | <gallery widths="320px" heights="180px"> | ||
| Line 52: | Line 58: | ||
===Secret area 2=== | ===Secret area 2=== | ||
[[File:Skyward Sonata 7.jpg|320px|thumb|left|The second secret area.]] | [[File:Skyward Sonata 7.jpg|320px|thumb|left|The second secret area.]] | ||
In this secret area, there are sleeping [[Red Bird]]s scattered around several [[serpent flute]]s | In this secret area, there are sleeping [[Red Bird]]s scattered around several [[serpent flute]]s; which are useful in order to reach the [[Red Bird|birds]] above. Once all of the enemies are defeated, the [[cage]] can be broken. | ||
{{Clear}} | {{Clear}} | ||
==Area 4== | ==Area 4== | ||
The heroes will once again board the [[serpent flute]], repeating a similar process to the other areas. The fourth [[Skull Coin]] of the level can be found between two didgeridoos near a [[spiky bird]] and some sleeping [[Red Bird]]s. This [[serpent flute|flute]] will not need to travel as far as the others, as this area is shorter than the previous two. The heroes will encounter a [[Red Bird]] guarding the exit; they can defeat it, the proceed to the next area. | |||
<gallery widths="320px" heights="180px"> | <gallery widths="320px" heights="180px"> | ||
| Line 63: | Line 69: | ||
Skyward Sonata 9.jpg|The fourth [[Skull Coin]] of the level. | Skyward Sonata 9.jpg|The fourth [[Skull Coin]] of the level. | ||
</gallery> | </gallery> | ||
===Relic 2=== | |||
[[File:Skyward Sonata second relic.png|thumb|right|320px|The Second [[relic]] can be found just above [[Rayman]].]] | |||
The second [[relic]] can be found in this area, it is situated just above the exit. | |||
{{clear}} | |||
==Area 5== | ==Area 5== | ||
The fifth [[Skull Coin]] can be found | The fifth [[Skull Coin]] can be found just as the heroes enter this area; they will need to perform walljumps against the two didgeridoos directly above the entrance. A [[serpent flute]] will appear again; the heroes will need to board it before it leaves. The heroes must keep on their toes, as more enemies, including [[Red Bird]]s, [[spiky bird]]s, and crushing didgeridoos stand in their way. The heroes will soon encounter the sixth [[Skull Coin]] of the level; it can be collected by properly timing a crush attack on the little bongos, while avoiding being hit by the stationary [[Antitoon|Darktoons]] on the horizontally moving didgeridoos above. Afterwards, the heroes will need to duck, in order to avoid the crushing didgeridoos with more Darktoons attached to them. The heroes can now disband the flute and proceed to the final area. | ||
<gallery widths="320px" heights="180px"> | <gallery widths="320px" heights="180px"> | ||
| Line 74: | Line 86: | ||
==Area 6== | ==Area 6== | ||
[[File:Skyward Sonata 12.jpg|320px|thumb|right|The final area.]] | [[File:Skyward Sonata 12.jpg|320px|thumb|right|The final area.]] | ||
All the | All the heroes will need to do in this area, is destroy the four [[Red Bird]]s. Once they have been defeated, the [[Electoon]] [[cage]] can be broken, thus ending the level; the heroes pose for a picture on the [[The Photographer|photoboard]] as [[the Magician]] waits to see how may [[Lum (UbiArt games)|Lums]] were collected throughout the level. | ||
{{Clear}} | {{Clear}} | ||
Revision as of 21:02, 27 August 2019
| Skyward Sonata | |||||||||||
|---|---|---|---|---|---|---|---|---|---|---|---|
 | |||||||||||
| ← Wind or Lose | No Turning Back → | ||||||||||
 Desert of Dijiridoos Desert of Dijiridoos
| |||||||||||
   
|

|

| |||||||||
   
|
|
  
| |||||||||

|

| ||||||||||

Skyward Sonata is the fifth level of the Desert of Dijiridoos, the second world in Rayman Origins. Its name is a spoof of the 2011 Zelda game, Skyward Sword. This level is mostly about riding on the serpent flutes to get across most areas. This level is the second one from this world and eleventh overall that is included in the Back to Origins painting in Rayman Legends.
Original version
Area 1
The first area is fairly short. All the heroes will need to do in order to reach the exit, is to slide down a water current, perform a walljump, then crush attack a Red Bird and wooden barrier. This area is most likely a transition to the second area, where the first serpent flute is located.
-
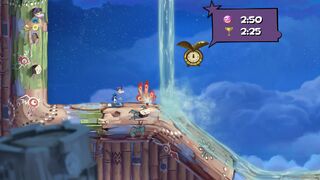 Rayman standing in front of a waterfall.

Area 2
As the heroes battle the Red Birds, a serpent flute is on the move beneath the cloud platforms; the heroes will need to quickly climb aboard it, as the flute will not remain stationary. Once aboard, the heroes to keep up with the flute, while jumping onto different platforms throughout the area. The first Skull Coin of the level can be found in this area; it can be collected by performing a walljump between 2 didgeridoos, one of which moves vertically. As the heroes disband the serpent flute, the first secret area can be found above, by simply performing a walljump above the exit. Once the Electoons are saved, the heroes can proceed to the next area.
-
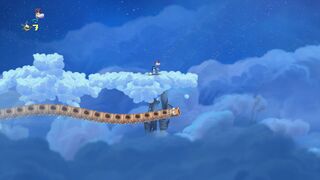 A serpent flute showing up beneath a group of collapsing clouds.
 -
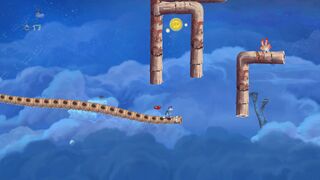 A Skull Coin located slightly off the main path.


Relic 1

The first relic can be found in this area as the heroes approach the exit; a cloud will disperse, revealing its location.
Secret area 1

The heroes will pass some moving bongos; they will need to defeat three Red Birds along the way. Once defeated, the Electoon cage at the end can be broken.
Area 3
The second serpent flute appears as the heroes perform a walljump and break a wooden barrier. Just like in the first area, the heroes will need to avoid obstacles and board nearby platforms, while quickly boarding the flute again. The second and third Skull Coins of the level are right next to each other; the second one can be collected by performing a walljump just left of where the third coin is seen, while the third can be obtained by performing some walljumps on another didgeridoo, then sliding down while carefully avoiding the spiky bird. As the heroes proceed, they will need to perform walljumps in order to keep up with the flute; didgeridoos will also attempt to crush the heroes, they will need to carefully avoid getting crushed by the didgeridoos. Afterwards, the heroes can disband the serpent flute. The second secret area can be found here; it is located above the exit.
-
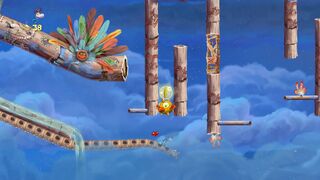 A Skull Coin right above a spiky bird.
 -
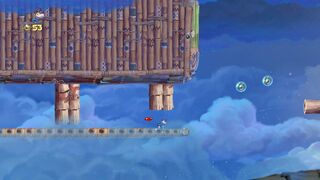 These pillars will crush the players if they stay underneath them for too long.


Secret area 2

In this secret area, there are sleeping Red Birds scattered around several serpent flutes; which are useful in order to reach the birds above. Once all of the enemies are defeated, the cage can be broken.
Area 4
The heroes will once again board the serpent flute, repeating a similar process to the other areas. The fourth Skull Coin of the level can be found between two didgeridoos near a spiky bird and some sleeping Red Birds. This flute will not need to travel as far as the others, as this area is shorter than the previous two. The heroes will encounter a Red Bird guarding the exit; they can defeat it, the proceed to the next area.
-
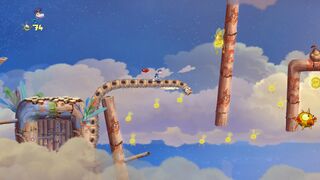 This Serpent flute will go in different directions around the Lums.
 -
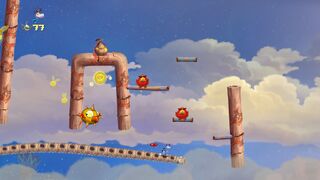 The fourth Skull Coin of the level.


Relic 2

The second relic can be found in this area, it is situated just above the exit.
Area 5
The fifth Skull Coin can be found just as the heroes enter this area; they will need to perform walljumps against the two didgeridoos directly above the entrance. A serpent flute will appear again; the heroes will need to board it before it leaves. The heroes must keep on their toes, as more enemies, including Red Birds, spiky birds, and crushing didgeridoos stand in their way. The heroes will soon encounter the sixth Skull Coin of the level; it can be collected by properly timing a crush attack on the little bongos, while avoiding being hit by the stationary Darktoons on the horizontally moving didgeridoos above. Afterwards, the heroes will need to duck, in order to avoid the crushing didgeridoos with more Darktoons attached to them. The heroes can now disband the flute and proceed to the final area.


Area 6

All the heroes will need to do in this area, is destroy the four Red Birds. Once they have been defeated, the Electoon cage can be broken, thus ending the level; the heroes pose for a picture on the photoboard as the Magician waits to see how may Lums were collected throughout the level.
| Skyward Sonata | ||||||||
|---|---|---|---|---|---|---|---|---|
 | ||||||||

| ||||||||
| ← Tricky Winds | Shooting Me Softly → | |||||||
| Desert of Dijiridoos
| ||||||||

|
||||||||

|

| |||||||

|

| |||||||
Back to Origins
This level is playable in the Back to Origins mode in Rayman Legends as the third one from the Desert of Dijiridoos. There are not many notable differences between the versions; except the notable differences that appear in every other Back to Origins level.
-
 The starting scene, as it appears in Back to Origins.
 -
 The second area where the first serpent flute appears.
 -
 Elements from Rayman Legends like the Lum chains appear.
 -
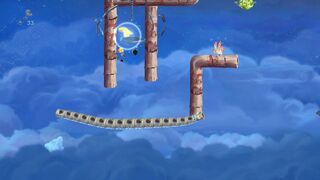
-
 The first secret area, this time in Rayman Legends.
 -
 A Teensie and Skull Coin nearby each other.
 -
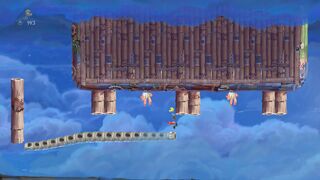 Crushing pillars.
 -
 The second secret area of the level.
 -
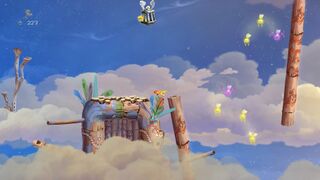
-
 The end of the fourth area.
 -
 A plentiful of crushing pillars.
 -
 The player will have to time a body slam to reach the cage.
 -
 The final area of the level.


External links
- Skyward Sonata playthrough at YouTube (PC version) (Normal walkthrough + Lums Medal)
- Skyward Sonata playthrough at YouTube (PC version) (Speed Trophy)