Hunter Gatherer: Difference between revisions
Added information |
Improvements and added links |
||
| Line 12: | Line 12: | ||
}} | }} | ||
'''Hunter Gatherer''' is the fourth level of the [[Ticklish Temples]], a world in ''[[Rayman Origins]]''. This level centers around | '''Hunter Gatherer''' is the fourth level of the [[Ticklish Temples]], a world in ''[[Rayman Origins]]''. This level centers around the team of heroes riding on [[mosquito]]es in order to progress. This is the second level from this world and seventh overall that is included in the [[Back to Origins]] mode in ''[[Rayman Legends]]''. | ||
==Original version== | ==Original version== | ||
This level takes place in a forested area, with a misty background. Just past a group of [[ | This level takes place in a forested area, with a misty background. Just past a group of [[spiky flower]]s is where [[Rayman]] and his team ride on [[mosquito]]es. Throughout much of this area, they must deal with many groups of [[Small fly|small flies]], [[Baby Piranhas|Baby Piranha]] infested water, [[Livingstone|Lividstones]] with spiky protective hats, and [[spiky flower]]s that are swaying around in their way, many of which cannot be retracted. After awhile, they go to the background, where everything is seen as black silhouettes. Here, they must avoid many thorns covering the ground and ceiling, while the area around them moves. Many spiky vines grow out of the ground and ceiling, as well. In the background, thick, thorny vines can be seen. After a bit, they return to the foreground. After a short time here, the heroes can get off their [[mosquito]]es, go through a door, and break an [[Electoon]] [[cage]] to finish the level. They will pose on the [[The Photographer|photoboard]] as [[the Magician]] waits for the total amount of [[Lum (UbiArt games)|Lums]] that were collected in the level. | ||
<gallery widths="320px" heights="180px"> | |||
Hunter Gatherer 2.jpg|Two groups of [[Small fly|small flies]]. | |||
Hunter Gatherer 3.jpg|A large group of [[Small fly|small flies]]. | |||
Hunter Gatherer 4.jpg|Many [[spiky flower]]s appear in the level. | |||
Hunter Gatherer 5.jpg|Some of the [[spiky flower]]s can be temporarily defeated by shooting at a blue [[bulb]]. | |||
Hunter Gatherer 6.jpg|Geysers appear from the water. | |||
Hunter Gatherer 7.jpg|The water has [[Baby Piranhas]] infested in it. | |||
Hunter Gatherer 8.jpg|The [[Baby Piranhas]] follow the players. | |||
Hunter Gatherer 9.jpg|At one point, there are many spiky vines surrounding the players. | |||
Hunter Gatherer 10.jpg|A dark shadow casts on a certain area. | |||
Hunter Gatherer 11.jpg|More spiky vines grow. | |||
Hunter Gatherer 12.jpg|Some of the vines will attempt to grab the players. | |||
Hunter Gatherer 13.jpg|Later, they will begin to close. | |||
Hunter Gatherer 14.jpg|More geysers and [[spiky flower]]s. | |||
Hunter Gatherer 15.jpg|The explosive [[flower bomb]] needs to be shot in order to continue. | |||
Hunter Gatherer 16.jpg|The ending part of the level. | |||
</gallery> | |||
{{Template:RLLevel | {{Template:RLLevel | ||
| Line 53: | Line 52: | ||
| gold cup = [[File:Icon3RO.png|15px|''3'']][[File:Icon0RO.png|15px|''0'']][[File:Icon0RO.png|15px|''0'']] [[File:RO-Lums.png|30px|Lums]] | | gold cup = [[File:Icon3RO.png|15px|''3'']][[File:Icon0RO.png|15px|''0'']][[File:Icon0RO.png|15px|''0'']] [[File:RO-Lums.png|30px|Lums]] | ||
}} | }} | ||
==[[Back to Origins]]== | |||
In the [[Back to Origins]] version, there aren't many differences between the original version; except of the notable elements from ''[[Rayman Legends]]'' replacing some of the elements from the game. | |||
<gallery widths="320px" heights="180px"> | |||
Hunter Gatherer - Back to Origins 1.jpg|The start of the level. | |||
Hunter Gatherer - Back to Origins 2.jpg|One of the many purple [[Lum (UbiArt games)|Lum]] chains. | |||
Hunter Gatherer - Back to Origins 3.jpg|The player is able to inhale enemies. | |||
Hunter Gatherer - Back to Origins 4.jpg|Another purple [[Lum (UbiArt games)|Lum]] chain. | |||
Hunter Gatherer - Back to Origins 5.jpg|A big shadow can be seen in the background. | |||
Hunter Gatherer - Back to Origins 6.jpg|A tight passage with spikes on the walls. | |||
Hunter Gatherer - Back to Origins 7.jpg|The walls will now move, making it harder to avoid the spikes. | |||
Hunter Gatherer - Back to Origins 8.jpg|The screen transitioning back to the foreground. | |||
Hunter Gatherer - Back to Origins 9.jpg|Shooting the [[flower bomb]] will cause the rocky platform to collapse, clearing the way. | |||
</gallery> | |||
==External links== | ==External links== | ||
* [http://www.youtube.com/watch?v=f4jlPxweJjk Hunter Gatherer playthrough at YouTube (PC version) (Normal walkthrough + Lums Medal)] | * [http://www.youtube.com/watch?v=f4jlPxweJjk Hunter Gatherer playthrough at YouTube (PC version) (Normal walkthrough + Lums Medal)] | ||
* [https://www.youtube.com/watch?v=uOa_EChjxyI Hunter Gatherer's Rayman Legends playthrough at YouTube (PC version)] | * [https://www.youtube.com/watch?v=uOa_EChjxyI Hunter Gatherer's ''Rayman Legends'' playthrough at YouTube (PC version)] | ||
{{RaymanOriginslocations}} | {{RaymanOriginslocations}} | ||
Revision as of 23:35, 28 March 2018
| Hunter Gatherer | |||||||||||
|---|---|---|---|---|---|---|---|---|---|---|---|
 | |||||||||||
| ← Up And Down | Climb Out → | ||||||||||
 Ticklish Temples Ticklish Temples
| |||||||||||
   
|
   
|

| |||||||||

|
|||||||||||

Hunter Gatherer is the fourth level of the Ticklish Temples, a world in Rayman Origins. This level centers around the team of heroes riding on mosquitoes in order to progress. This is the second level from this world and seventh overall that is included in the Back to Origins mode in Rayman Legends.
Original version
This level takes place in a forested area, with a misty background. Just past a group of spiky flowers is where Rayman and his team ride on mosquitoes. Throughout much of this area, they must deal with many groups of small flies, Baby Piranha infested water, Lividstones with spiky protective hats, and spiky flowers that are swaying around in their way, many of which cannot be retracted. After awhile, they go to the background, where everything is seen as black silhouettes. Here, they must avoid many thorns covering the ground and ceiling, while the area around them moves. Many spiky vines grow out of the ground and ceiling, as well. In the background, thick, thorny vines can be seen. After a bit, they return to the foreground. After a short time here, the heroes can get off their mosquitoes, go through a door, and break an Electoon cage to finish the level. They will pose on the photoboard as the Magician waits for the total amount of Lums that were collected in the level.
-
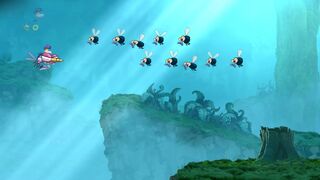 Two groups of small flies.
 -
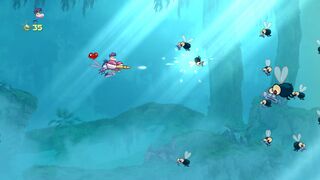 A large group of small flies.
 -
 Many spiky flowers appear in the level.
 -
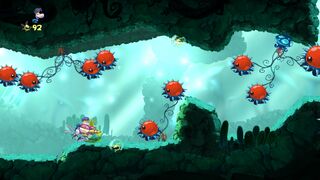 Some of the spiky flowers can be temporarily defeated by shooting at a blue bulb.
 -
 Geysers appear from the water.
 -
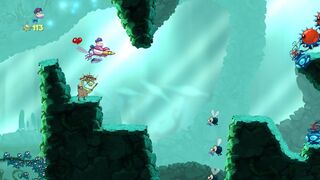 The water has Baby Piranhas infested in it.
 -
 The Baby Piranhas follow the players.
 -
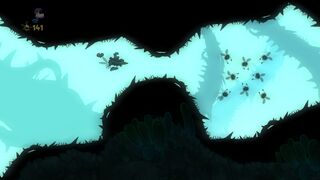 At one point, there are many spiky vines surrounding the players.
 -
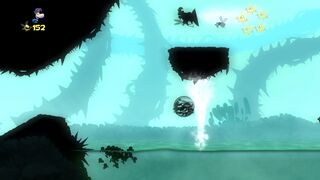 A dark shadow casts on a certain area.
 -
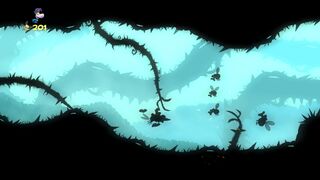 More spiky vines grow.
 -
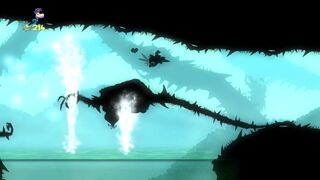 Some of the vines will attempt to grab the players.
 -
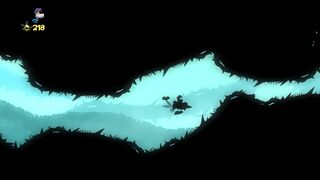 Later, they will begin to close.
 -
 More geysers and spiky flowers.
 -
 The explosive flower bomb needs to be shot in order to continue.
 -
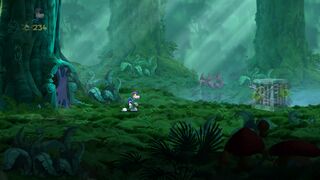 The ending part of the level.


| Hunter Gatherer | ||||||||
|---|---|---|---|---|---|---|---|---|
 | ||||||||

| ||||||||
| ← Still Flowing | Poor Little Daisy → | |||||||
| Jibberish Jungle
| ||||||||

|
||||||||
 
|

| |||||||

|

| |||||||
Back to Origins
In the Back to Origins version, there aren't many differences between the original version; except of the notable elements from Rayman Legends replacing some of the elements from the game.
-
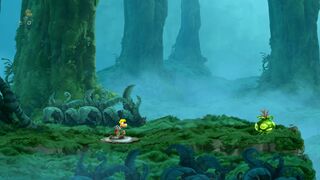 The start of the level.
 -
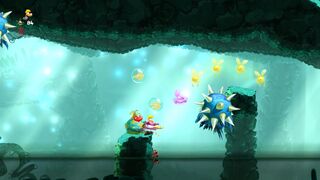 One of the many purple Lum chains.
 -
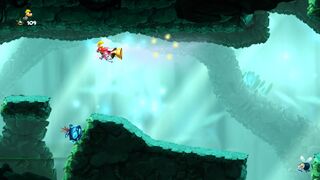 The player is able to inhale enemies.
 -
 Another purple Lum chain.
 -
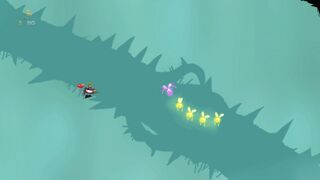 A big shadow can be seen in the background.
 -
 A tight passage with spikes on the walls.
 -
 The walls will now move, making it harder to avoid the spikes.
 -
 The screen transitioning back to the foreground.
 -
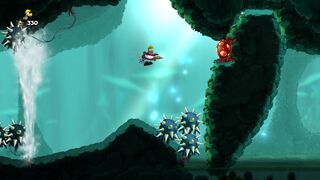 Shooting the flower bomb will cause the rocky platform to collapse, clearing the way.


