Tricky Winds: Difference between revisions
JackyBlooo (talk | contribs) No edit summary |
Improvements and added links |
||
| Line 1: | Line 1: | ||
{{Template:ROLevel | {{Template:ROLevel | ||
| name = Tricky Winds | | name = Tricky Winds | ||
| Line 19: | Line 17: | ||
| relic = [[File:Icon3RO.png|15px|''3'']] | | relic = [[File:Icon3RO.png|15px|''3'']] | ||
}} | }} | ||
'''Tricky Winds''' is the second level of the [[Grumbling Grottos]], a world in ''[[Rayman Origins]]''. [[Rayman]] and his team need to use wind currents and vents to progress throughout the level, similar to [[Wind or Lose]]. This level is the second one in this world and tenth overall that's included in the [[Back to Origins]] mode in ''[[Rayman Legends]]''. | |||
==Original version== | ==Original version== | ||
==Area 1== | ==Area 1== | ||
Right at the beginning of the level, [[Rayman]] and the heroes can use the [[ | Right at the beginning of the level, [[Rayman]] and the heroes can use the [[Swingman]] to reach the first [[Skull Coin]] of the level. This area is pretty straightforward from here on out; the players must use the green leaved air vents to get through the blocking pillars. | ||
<gallery widths="320px" heights="180px"> | |||
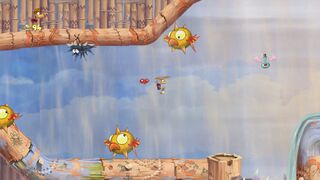
Tricky Winds 2.jpg|A [[spiky bird]]. | |||
Tricky Winds 3.jpg|A [[Lum King]]. | |||
</gallery> | |||
==Area 2== | ==Area 2== | ||
[[File:Tricky Winds 4.jpg|320px|thumb|right|Hitting the [[switch]] will make the wind appear.]] | [[File:Tricky Winds 4.jpg|320px|thumb|right|Hitting the [[switch]] will make the wind appear.]] | ||
The | The heroes now need to use more of the blowing wind currents to advance in this area. The second [[Skull Coin]] is located by a [[Darkroot]] with its end around the [[Skull Coin|coin]]. After crossing a short distance, the first secret area can be found. It can be reached by using the [[Swingman]] to jump left next to the door. | ||
{{Clear}} | {{Clear}} | ||
===Secret | ===Secret area 1=== | ||
The three [[Red Bird]]s can be reached by using the air vents, leading to them one by one. Once they are defeated, the [[Electoon]] [[cage]] | The three [[Red Bird]]s can be reached by using the air vents, leading to them one by one. Once they are defeated, the [[Electoon]] [[cage]] can broken open. | ||
<gallery widths="320px" heights="180px"> | |||
Tricky Winds 5.jpg|The first secret area has the player going through several air vents to find all [[Red Bird]]s. | |||
Tricky Winds 6.jpg|All [[Red Bird]]s will have to be defeated. | |||
Tricky Winds 7.jpg|The [[cage]] in the first secret area. | |||
</gallery> | |||
==Area 3== | ==Area 3== | ||
[[Rayman]] and his friends will aid the wind current to continue upwards, using the [[Helicopter|glide]] power, naturally. The third [[Skull Coin]] can be collected by dropping down to a platform with two scenery pieces near each other. While the team is flying, they need to avoid the many [[Antitoon|Darktoons]] attached to the pillars, as well as [[spiky bird]]s. The fourth [[Skull Coin]] can be acquired by flying near the electric wire to a [[Darkroot]] with the [[Skull Coin|coin]] in the middle of it. After awhile more of flying, the exit can be found next to a barricade. | |||
[[Rayman]] and his friends will aid the wind current to continue upwards, using the [[Helicopter|glide]] power, naturally. The third [[Skull Coin]] can be collected by dropping down to a platform with two scenery pieces near each other. While the team is flying, they | |||
<gallery widths="320px" heights="180px"> | |||
Tricky Winds 8.jpg|The player will have to fly up a tight passage. | |||
Tricky Winds 9.jpg|A [[Skull Coin]]. | |||
</gallery> | |||
==Area 4== | ==Area 4== | ||
Like the third area, the team must use the [[Helicopter|glide]] on the wind current to get across, but this time in a horizontal way. More [[spiky bird]]s appear compared to the previous area. The fifth [[Skull Coin]] can be found by [[Helicopter|flying]] under two stationary [[spiky bird]]s and a moving one. Near the exit, the players can [[Helicopter|fly]] up near a [[Antitoon|Darktoon]] through a gap between two platforms, with the second secret area located to the right. | |||
Like the third area, the team | |||
<gallery widths="320px" heights="180px"> | |||
Tricky Winds 10.jpg|Several small [[spiky bird]]s. | |||
Tricky Winds 11.jpg|A big [[spiky bird]]. | |||
</gallery> | |||
===Secret | ===Secret area 2=== | ||
The team has to be careful when crossing the moving pillars with [[Antitoon|Darktoons]] attached to them. When they get through, the [[Red Bird]]s can be destroyed for the [[cage]] to be broken. | |||
<gallery widths="320px" heights="180px"> | |||
Tricky Winds 12.jpg|The second secret area. | |||
Tricky Winds 13.jpg|Three [[Red Bird]]s will need to be defeated in order to get to the [[cage]]. | |||
</gallery> | |||
==Area 5== | ==Area 5== | ||
Once again, the heroes | Once again, the heroes need to use the wind current to get to the exit, in a horizontal way. This time, many more [[Darkroot]]s appear along with [[spiky bird]]s and [[Antitoon|Darktoons]]. To reach the exit, a player will need to hit a [[switch]] to stop the air vents. | ||
<gallery widths="320px" heights="180px"> | |||
Tricky Winds 14.jpg|A [[Darkroot]]. | |||
Tricky Winds 15.jpg|The [[switch]] will need to be hit in order to make the wind stop blowing. | |||
</gallery> | |||
==Area 6== | ==Area 6== | ||
[[File:Tricky Winds 16.jpg|320px|thumb|left|A passage filled with [[Darkroot]]s.]] | [[File:Tricky Winds 16.jpg|320px|thumb|left|A passage filled with [[Darkroot]]s.]] | ||
Now with the wind current, the team | Now with the wind current, the team needs to go up now. The sixth [[Skull Coin]] can be retrieved by going down while avoiding a [[spiky bird]] and two [[Antitoon|Darktoons]]. After awhile, the heroes will then need to continue flying up, but avoiding many [[Darkroot]]s. | ||
{{Clear}} | {{Clear}} | ||
| Line 83: | Line 84: | ||
==Area 7== | ==Area 7== | ||
[[File:Tricky Winds 17.jpg|320px|thumb|right|The final area.]] | [[File:Tricky Winds 17.jpg|320px|thumb|right|The final area.]] | ||
All the team needs to do is destroy the four [[Red Bird]]s hovering above the [[Electoon]] [[cage]]. Once defeated, the cage can be broken open to end the level to where the team poses on the [[Photographer|photoboard]] as [[the Magician]] waits for the total amount of [[Lum (UbiArt games)|Lums]] that were collected. | All the team needs to do is destroy the four [[Red Bird]]s hovering above the [[Electoon]] [[cage]]. Once defeated, the [[cage]] can be broken open to end the level to where the team poses on the [[The Photographer|photoboard]] as [[the Magician]] waits for the total amount of [[Lum (UbiArt games)|Lums]] that were collected. | ||
{{Clear}} | {{Clear}} | ||
| Line 101: | Line 102: | ||
}} | }} | ||
==Back to Origins== | ==[[Back to Origins]]== | ||
This level is playable in the [[Back to Origins]] mode in ''[[Rayman Legends]]'' as the first one from [[Desert of Dijiridoos]]. There aren't many notable differences between the versions; except the notable differences that appear in every other Back to Origins level. | This level is playable in the [[Back to Origins]] mode in ''[[Rayman Legends]]'' as the first one from [[Desert of Dijiridoos]]. There aren't many notable differences between the versions; except the notable differences that appear in every other [[Back to Origins]] level. | ||
<gallery widths="320px" heights="180px"> | |||
Tricky Winds - Back to Origins 1.jpg|The first area of the level. | |||
Tricky Winds - Back to Origins 2.jpg|The second [[Skull Coin]]. | |||
Tricky Winds - Back to Origins 3.jpg|The first secret area. | |||
Tricky Winds - Back to Origins 4.jpg|The third area of the level. | |||
Tricky Winds - Back to Origins 5.jpg|The fourth area. | |||
Tricky Winds - Back to Origins 6.jpg|The second secret area. | |||
Tricky Winds - Back to Origins 7.jpg|The sixth area. | |||
Tricky Winds - Back to Origins 8.jpg|The seventh and final area of the level. | |||
</gallery> | |||
==External links== | ==External links== | ||
* [http://www.youtube.com/watch?v=8E36FmQSkC0 Tricky Winds playthrough at YouTube (PC version) (Normal walkthrough + Lums Medal)] | * [http://www.youtube.com/watch?v=8E36FmQSkC0 Tricky Winds playthrough at YouTube (PC version) (Normal walkthrough + Lums Medal)] | ||
* [http://www.youtube.com/watch?v=Pa0uAQ5HxoU Tricky Winds playthrough at YouTube (PC version) (Speed Trophy)] | * [http://www.youtube.com/watch?v=Pa0uAQ5HxoU Tricky Winds playthrough at YouTube (PC version) (Speed Trophy)] | ||
* [https://www.youtube.com/watch?v=h1tWFDyyvk8 Tricky Winds' ''Rayman Legends'' playthrough at YouTube (PC version)] | |||
* [https://www.youtube.com/watch?v=h1tWFDyyvk8 Tricky Winds' Rayman Legends playthrough at YouTube (PC version)] | |||
{{RaymanOriginslocations}} | {{RaymanOriginslocations}} | ||
Revision as of 00:37, 30 March 2018
| Tricky Winds | |||||||||||
|---|---|---|---|---|---|---|---|---|---|---|---|
 | |||||||||||
| ← Savage Swarms | Don't Shoot the DJ → | ||||||||||
Tricky Winds is the second level of the Grumbling Grottos, a world in Rayman Origins. Rayman and his team need to use wind currents and vents to progress throughout the level, similar to Wind or Lose. This level is the second one in this world and tenth overall that's included in the Back to Origins mode in Rayman Legends.
Original version
Area 1
Right at the beginning of the level, Rayman and the heroes can use the Swingman to reach the first Skull Coin of the level. This area is pretty straightforward from here on out; the players must use the green leaved air vents to get through the blocking pillars.
-
 A spiky bird.
 -
 A Lum King.


Area 2

The heroes now need to use more of the blowing wind currents to advance in this area. The second Skull Coin is located by a Darkroot with its end around the coin. After crossing a short distance, the first secret area can be found. It can be reached by using the Swingman to jump left next to the door.
Secret area 1
The three Red Birds can be reached by using the air vents, leading to them one by one. Once they are defeated, the Electoon cage can broken open.
-
 The first secret area has the player going through several air vents to find all Red Birds.
 -
 All Red Birds will have to be defeated.
 -
 The cage in the first secret area.


Area 3
Rayman and his friends will aid the wind current to continue upwards, using the glide power, naturally. The third Skull Coin can be collected by dropping down to a platform with two scenery pieces near each other. While the team is flying, they need to avoid the many Darktoons attached to the pillars, as well as spiky birds. The fourth Skull Coin can be acquired by flying near the electric wire to a Darkroot with the coin in the middle of it. After awhile more of flying, the exit can be found next to a barricade.
-
 The player will have to fly up a tight passage.
 -
 A Skull Coin.


Area 4
Like the third area, the team must use the glide on the wind current to get across, but this time in a horizontal way. More spiky birds appear compared to the previous area. The fifth Skull Coin can be found by flying under two stationary spiky birds and a moving one. Near the exit, the players can fly up near a Darktoon through a gap between two platforms, with the second secret area located to the right.
-
 Several small spiky birds.
 -
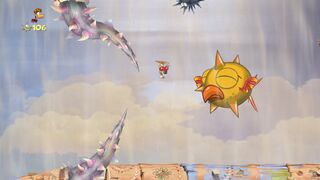 A big spiky bird.


Secret area 2
The team has to be careful when crossing the moving pillars with Darktoons attached to them. When they get through, the Red Birds can be destroyed for the cage to be broken.
-
 The second secret area.
 -


Area 5
Once again, the heroes need to use the wind current to get to the exit, in a horizontal way. This time, many more Darkroots appear along with spiky birds and Darktoons. To reach the exit, a player will need to hit a switch to stop the air vents.


Area 6

Now with the wind current, the team needs to go up now. The sixth Skull Coin can be retrieved by going down while avoiding a spiky bird and two Darktoons. After awhile, the heroes will then need to continue flying up, but avoiding many Darkroots.
Area 7

All the team needs to do is destroy the four Red Birds hovering above the Electoon cage. Once defeated, the cage can be broken open to end the level to where the team poses on the photoboard as the Magician waits for the total amount of Lums that were collected.
| Tricky Winds | ||||||||
|---|---|---|---|---|---|---|---|---|
 | ||||||||
| ← Best Original Score | Skyward Sonata → | |||||||
Back to Origins
This level is playable in the Back to Origins mode in Rayman Legends as the first one from Desert of Dijiridoos. There aren't many notable differences between the versions; except the notable differences that appear in every other Back to Origins level.
-
 The first area of the level.
 -
 The second Skull Coin.
 -
 The first secret area.
 -
 The third area of the level.
 -
 The fourth area.
 -
 The second secret area.
 -
 The sixth area.
 -
 The seventh and final area of the level.


External links
- Tricky Winds playthrough at YouTube (PC version) (Normal walkthrough + Lums Medal)
- Tricky Winds playthrough at YouTube (PC version) (Speed Trophy)
- Tricky Winds' Rayman Legends playthrough at YouTube (PC version)