Murray of the Deep: Difference between revisions
Hunchman801 (talk | contribs) Added language links |
|||
| (13 intermediate revisions by 4 users not shown) | |||
| Line 1: | Line 1: | ||
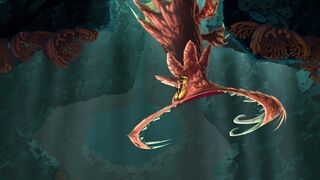
{{ | '''Murray of the Deep''' is the fifth and final level of the [[Sea of Serendipity|Angsty Abyss]], a world in ''[[Rayman Origins]]''. It consists of a boss battle against [[Creveton]], the last of the [[four Kings]] that were turned into monsters whom [[Rayman]] and his team of heroes must defeat in order to return them to their original forms. This level is the fifth one from this world and thirty-second overall to be included in the [[Back to Origins]] mode in ''[[Rayman Legends]]''. | ||
==Original version== | |||
{{ROLevel | |||
| name = Murray of the Deep | | name = Murray of the Deep | ||
| image = [[ | | image = [[File:Murray of the Deep 1.jpg|center|320px|Murray of the Deep]] | ||
| preceded by = [[Beware of Mini-Murray]] | | preceded by = [[Beware of Mini-Murray]] | ||
| followed by = [[Riding the Storm]] | | followed by = [[Riding the Storm]] | ||
| world = [[Angsty Abyss | | world = [[Sea of Serendipity|Angsty Abyss]] | ||
| medallion slot 1 = Cage | |||
| medallion slot 1 = | | medallion slot 2 = Lums | ||
| medallion slot 2 = | | medallion slot 2 number = 50 | ||
| medallion slot 3 = | | medallion slot 3 = Lums | ||
| medal = | | medallion slot 3 number = 100 | ||
| | | medal = 150 | ||
| | | skull coins = 2 | ||
| relics = 3 | |||
| format numbers = true | |||
}} | }} | ||
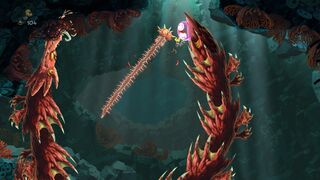
From the start, the heroes are on docks where some [[Red Wizard]]s live. They then drop down into the water and advance past the [[jellyfish]]. The first [[Skull Coin]] can be found among a somewhat large group of [[jellyfish]]. Shortly after that, the heroes are chased by two [[Murray]]s and then finds themselves facing a sea dragon, the mutated [[Creveton]]. In this battle, the heroes must avoid him as he swims around. He will also snap his jaws, and a red [[giant jellyfish]] will emerge. After a brief amount of time, a [[bubo]] appears on [[Creveton]]'s tail, and when a hero attacks it, [[Creveton]] leaves the area for a short time. When he returns, the team must avoid him and two red [[giant jellyfish]] until they can hit another [[bubo]] on his tail. When [[Creveton]] returns for the third time, he charges at the team with his mouth open. A [[bubo]] is in his mouth, and when a hero hits it, [[Creveton]] is defeated and returns to his original form. The heroes then pose on the [[The Photographer|photoboard]] as [[The Magician (Rayman Origins)|the Magician]] counts the total number of [[Lum (UbiArt games)|Lums]] collected in the level. | |||
From the start, | |||
<gallery widths="320px" heights="180px"> | <gallery widths="320px" heights="180px"> | ||
Murray of the Deep 2.jpg|The beginning | Murray of the Deep 2.jpg|The beginning of the level. | ||
Murray of the Deep 3.jpg|The first [[Skull Coin]], surrounded by [[jellyfish]]. | Murray of the Deep 3.jpg|The first [[Skull Coin]], surrounded by [[jellyfish]]. | ||
Murray of the Deep 4.jpg|[[Spiky fish]] | Murray of the Deep 4.jpg|[[Spiky fish]]. | ||
Murray of the Deep 5.jpg|Two [[Murray]]s approaching from behind. | |||
Murray of the Deep 5.jpg|Two [[Murray | Murray of the Deep 6.jpg|Rocky platforms fall as the [[Murray]]s chase the heroes. | ||
Murray of the Deep 6.jpg|Rocky platforms | Murray of the Deep 7.jpg|The geyser pushes the heroes out of the water. | ||
Murray of the Deep 7.jpg|The geyser | |||
Murray of the Deep 8.jpg|The second and final [[Skull Coin]] of the level. | Murray of the Deep 8.jpg|The second and final [[Skull Coin]] of the level. | ||
Murray of the Deep 9.jpg| | Murray of the Deep 9.jpg|These geysers will push the heroes to where they can escape from the [[Murray]]s. | ||
Murray of the Deep 10.jpg|The mutated [[Creveton]]. | Murray of the Deep 10.jpg|The mutated [[Creveton]]. | ||
Murray of the Deep 11.jpg|The first [[bubo]] that must be hit. | Murray of the Deep 11.jpg|The first [[bubo]] that must be hit. | ||
Murray of the Deep 12.jpg|The second [[bubo]] that must be hit. | Murray of the Deep 12.jpg|The second [[bubo]] that must be hit. | ||
Murray of the Deep 13.jpg|The third and final [[bubo]], inside [[Creveton]]'s mouth. | Murray of the Deep 13.jpg|The third and final [[bubo]], inside [[Creveton]]'s mouth. | ||
Murray of the Deep 14.jpg|[[Creveton]] returning to normal. | Murray of the Deep 14.jpg|[[Creveton]] returning to normal. | ||
Murray of the Deep 15.jpg|[[Creveton]] in his original form. | Murray of the Deep 15.jpg|[[Creveton]] in his original form. | ||
</gallery> | </gallery> | ||
== | ====Relic 1==== | ||
[[File:Murray of the Deep first relic.png|320px|thumb|The first [[relic]], located in the water below the position of a [[Red Wizard]].]] | |||
The first [[relic]] can be found just as the heroes enter the level, located at the bottom of the water to their left. | |||
{{Clear}} | |||
====Relic 2==== | |||
[[File:Murray of the Deep second relic.png|320px|thumb|The second [[relic]], located in front of [[Rayman]].]] | |||
The second [[relic]] can be found at the bottom of the water near some [[jellyfish]]. | |||
{{Clear}} | |||
====Relic 3==== | |||
[[File:Murray of the Deep third relic.png|320px|thumb|The third [[relic]], located in front of [[Rayman]].]] | |||
The third [[relic]] can be found camouflaged behind some branches. | |||
{{Clear}} | |||
{{ | ==Back to Origins== | ||
{{RLLevel | |||
| name = Murray of the Deep | | name = Murray of the Deep | ||
| difficulty = | | difficulty = 4 | ||
| image = [[File:Murray of the Deep - Back to Origins.png|center|320px| | | image = [[File:Murray of the Deep - Back to Origins.png|center|320px|Murray of the Deep]] | ||
| preceded by = [[Risky Ruin#Back to Origins|Risky Ruin]] | | preceded by = [[Risky Ruin#Back to Origins|Risky Ruin]] | ||
| followed by = [[Mystical Munkeys#Back to Origins|Mystical Munkeys]] | | followed by = [[Mystical Munkeys#Back to Origins|Mystical Munkeys]] | ||
| world = [[Sea of Serendipity]] | | world = [[Sea of Serendipity]] | ||
| teensies = | | teensies = 3 | ||
| bronze cup = | | bronze cup = 75 | ||
| silver cup = | | silver cup = 150 | ||
| lucky ticket = | | lucky ticket = 225 | ||
| gold cup = | | gold cup = 300 | ||
| format numbers = true | |||
}} | }} | ||
In the [[Back to Origins]] version, there are not many differences between it and the original version, except that notable elements from ''[[Rayman Legends]]'' replace some elements from the game. Additionally, as [[Creveton]] reverts to his original form, he appears upside down. | |||
In the [[Back to Origins]] version, there | |||
<gallery widths="320px" heights="180px"> | <gallery widths="320px" heights="180px"> | ||
Murray of the Deep - Back to Origins 1.jpg|The starting point of the level. | Murray of the Deep - Back to Origins 1.jpg|The starting point of the level. | ||
Murray of the Deep - Back to Origins 2.jpg| | Murray of the Deep - Back to Origins 2.jpg|Several [[Lum (UbiArt games)|Lum]] chains. | ||
Murray of the Deep - Back to Origins 3.jpg|[[Murray | Murray of the Deep - Back to Origins 3.jpg|[[Murray]]s follow the team for a while. | ||
Murray of the Deep - Back to Origins 4.jpg|The [[Murray]]s continue to follow the heroes. | |||
Murray of the Deep - Back to Origins 4.jpg|The [[Murray | |||
Murray of the Deep - Back to Origins 5.jpg|A trapped [[Teensie]]. | Murray of the Deep - Back to Origins 5.jpg|A trapped [[Teensie]]. | ||
Murray of the Deep - Back to Origins 6.jpg|Geysers will take the | Murray of the Deep - Back to Origins 6.jpg|Geysers will take the heroes to safety. | ||
Murray of the Deep - Back to Origins 7.jpg|The battle against the mutated [[Creveton]]. | Murray of the Deep - Back to Origins 7.jpg|The battle against the mutated [[Creveton]]. | ||
Murray of the Deep - Back to Origins 8.jpg|A [[bubo]] that will weaken | Murray of the Deep - Back to Origins 8.jpg|A [[bubo]] that will weaken [[Creveton]] once hit. | ||
Murray of the Deep - Back to Origins 9.jpg|Another [[bubo]]. | Murray of the Deep - Back to Origins 9.jpg|Another [[bubo]]. | ||
Murray of the Deep - Back to Origins 10.jpg|The last [[bubo]], located in [[Creveton]]'s mouth. | Murray of the Deep - Back to Origins 10.jpg|The last [[bubo]], located in [[Creveton]]'s mouth. | ||
Murray of the Deep - Back to Origins 11.jpg|[[Creveton]] back to his original form. | Murray of the Deep - Back to Origins 11.jpg|[[Creveton]] back to his original form. | ||
</gallery> | </gallery> | ||
==Trivia== | |||
*This level appeared in an E3 2011 showcase for the game, but in this version, the heroes chased a [[Tricky Treasure]], and the level ended just before the boss fight. This version of the level, albeit without the [[Tricky Treasure]], appeared in a [[List of Rayman demos|demo]] version of the game, also ending the level before the boss fight and playing a trailer for the full game. | |||
==Names in other languages== | |||
{{Names | |||
|en=Murray of the Deep | |||
|ar=موراي من الأعماق | |||
|zh_hans=深海小鱼 | |||
|cs=Mumraj hlubin | |||
|da=Dybets Murray | |||
|nl=Murray uit de diepte | |||
|fi=Syvyyksien Murray | |||
|fr=Boss à dent | |||
|de=Muräne aus der Tiefe | |||
|hu=A mélységi garnéla | |||
|it=Il Murray dell'abisso | |||
|ja=うみの そこの マリー | |||
|ja_S=''[[Rayman Origins]]'' | |||
|ja_2=BOSS「アビシウス」 | |||
|ja_2_S=''[[Rayman Legends]]'' | |||
|no=Murray fra dypet | |||
|pl=Murray z Głębin | |||
|pl_S=''[[Rayman Origins]]'' | |||
|pl_2=Murray z głębin | |||
|pl_2_S=''[[Rayman Legends]]'' | |||
|pt=Murray das profundezas | |||
|ru=Глубинный Марри | |||
|es=Un profundo picor | |||
|sv=Murray i djupet | |||
}} | |||
==External links== | ==External links== | ||
* [ | * [https://www.youtube.com/watch?v=EhddqllGmWg Murray of the Deep playthrough at YouTube (PC version) (Normal walkthrough + Lums Medal)] | ||
* [https://www.youtube.com/watch?v= | * [https://www.youtube.com/watch?v=ZU6IwNGmvYE Murray of the Deep playthrough at YouTube (PS3's DEMO version) (Normal walkthrough + Lums Medal)] | ||
* [https://www.youtube.com/watch?v=p3TziTcBiWg Murray of the Deep's ''Rayman Legends'' playthrough at YouTube (PC version)] | |||
{{RaymanOriginslocations}} | {{RaymanOriginslocations}} | ||
| Line 85: | Line 131: | ||
[[fr:Boss à dent]] | [[fr:Boss à dent]] | ||
[[hu:A mélységi garnéla]] | |||
[[pl:Murray z głębin]] | [[pl:Murray z głębin]] | ||
[[Category:Places from Rayman Origins]] | [[Category:Places from Rayman Origins]] | ||
[[Category:Places from Rayman Legends]] | |||
Latest revision as of 15:44, 27 March 2026
Murray of the Deep is the fifth and final level of the Angsty Abyss, a world in Rayman Origins. It consists of a boss battle against Creveton, the last of the four Kings that were turned into monsters whom Rayman and his team of heroes must defeat in order to return them to their original forms. This level is the fifth one from this world and thirty-second overall to be included in the Back to Origins mode in Rayman Legends.
Original version
| Murray of the Deep | ||||||||
|---|---|---|---|---|---|---|---|---|
 | ||||||||
| ← Beware of Mini-Murray | Riding the Storm → | |||||||
From the start, the heroes are on docks where some Red Wizards live. They then drop down into the water and advance past the jellyfish. The first Skull Coin can be found among a somewhat large group of jellyfish. Shortly after that, the heroes are chased by two Murrays and then finds themselves facing a sea dragon, the mutated Creveton. In this battle, the heroes must avoid him as he swims around. He will also snap his jaws, and a red giant jellyfish will emerge. After a brief amount of time, a bubo appears on Creveton's tail, and when a hero attacks it, Creveton leaves the area for a short time. When he returns, the team must avoid him and two red giant jellyfish until they can hit another bubo on his tail. When Creveton returns for the third time, he charges at the team with his mouth open. A bubo is in his mouth, and when a hero hits it, Creveton is defeated and returns to his original form. The heroes then pose on the photoboard as the Magician counts the total number of Lums collected in the level.
-
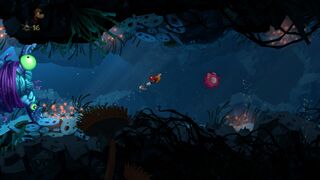
 The beginning of the level.
 -
 The first Skull Coin, surrounded by jellyfish.
 -

-
 Two Murrays approaching from behind.
 -
 Rocky platforms fall as the Murrays chase the heroes.
 -
 The geyser pushes the heroes out of the water.
 -
 The second and final Skull Coin of the level.
 -
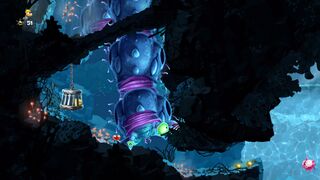
 These geysers will push the heroes to where they can escape from the Murrays.
 -
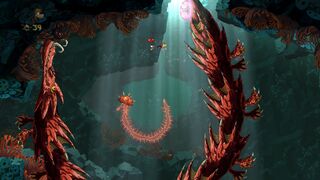
 The mutated Creveton.
 -
 The first bubo that must be hit.
 -
 The second bubo that must be hit.
 -

-
 Creveton returning to normal.
 -
 Creveton in his original form.


Relic 1

The first relic can be found just as the heroes enter the level, located at the bottom of the water to their left.
Relic 2

The second relic can be found at the bottom of the water near some jellyfish.
Relic 3

The third relic can be found camouflaged behind some branches.
Back to Origins
| Murray of the Deep | ||||||||
|---|---|---|---|---|---|---|---|---|
 | ||||||||
| ← Risky Ruin | Mystical Munkeys → | |||||||
In the Back to Origins version, there are not many differences between it and the original version, except that notable elements from Rayman Legends replace some elements from the game. Additionally, as Creveton reverts to his original form, he appears upside down.
-
 The starting point of the level.
 -
 Several Lum chains.
 -
 Murrays follow the team for a while.
 -
 The Murrays continue to follow the heroes.
 -
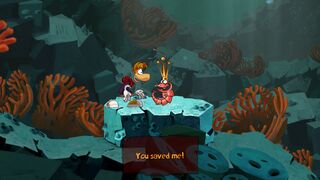
 A trapped Teensie.
 -
 Geysers will take the heroes to safety.
 -
 The battle against the mutated Creveton.
 -
-
 Another bubo.
 -

-
 Creveton back to his original form.


Trivia
- This level appeared in an E3 2011 showcase for the game, but in this version, the heroes chased a Tricky Treasure, and the level ended just before the boss fight. This version of the level, albeit without the Tricky Treasure, appeared in a demo version of the game, also ending the level before the boss fight and playing a trailer for the full game.
Names in other languages
| Language | Name |
|---|---|
| English | Murray of the Deep |
| Arabic | موراي من الأعماق |
| Chinese (simplified) | 深海小鱼 |
| Czech | Mumraj hlubin |
| Danish | Dybets Murray |
| Dutch | Murray uit de diepte |
| Finnish | Syvyyksien Murray |
| French | Boss à dent |
| German | Muräne aus der Tiefe |
| Hungarian | A mélységi garnéla |
| Italian | Il Murray dell'abisso |
| Japanese | うみの そこの マリー (Rayman Origins)
BOSS「アビシウス」 (Rayman Legends) |
| Norwegian | Murray fra dypet |
| Polish | Murray z Głębin (Rayman Origins)
Murray z głębin (Rayman Legends) |
| Portuguese | Murray das profundezas |
| Russian | Глубинный Марри |
| Spanish | Un profundo picor |
| Swedish | Murray i djupet |
External links
- Murray of the Deep playthrough at YouTube (PC version) (Normal walkthrough + Lums Medal)
- Murray of the Deep playthrough at YouTube (PS3's DEMO version) (Normal walkthrough + Lums Medal)
- Murray of the Deep's Rayman Legends playthrough at YouTube (PC version)