Dragon Soup: Difference between revisions
Hunchman801 (talk | contribs) mNo edit summary |
Hunchman801 (talk | contribs) Added language links |
||
| (17 intermediate revisions by 4 users not shown) | |||
| Line 1: | Line 1: | ||
'''Dragon Soup''' is the first level of the [[Gourmand Land|Luscious Lakes]], a world in ''[[Rayman Origins]]''. This level takes place in the Infernal Kitchens environment, filled with both friendly and hostile kitchen elements. It is the first level from this world and twenty-first overall to be included in the [[Back to Origins]] mode in ''[[Rayman Legends]]''. | |||
==Original version== | |||
{{ROLevel | {{ROLevel | ||
| name = Dragon Soup | | name = Dragon Soup | ||
| image = [[ | | image = [[File:Dragon Soup 1.jpg|center|320px|Dragon Soup]] | ||
| preceded by = [[To Bubblize a Mocking Bird]] | | preceded by = [[To Bubblize a Mocking Bird]] | ||
| followed by = [[You're on Fire!]] | | followed by = [[You're on Fire!]] | ||
| world = [[Luscious Lakes | | world = [[Gourmand Land|Luscious Lakes]] | ||
| medallion slot 1 = Cage | |||
| medallion slot 1 = | | medallion slot 2 = Cage | ||
| medallion slot 2 = | | medallion slot 3 = Cage | ||
| medallion slot 3 = | | medallion slot 4 = Lums | ||
| medallion slot 4 = | | medallion slot 4 number = 150 | ||
| medallion slot 5 = | | medallion slot 5 = Lums | ||
| medallion slot 6 = | | medallion slot 5 number = 300 | ||
| medal = | | medallion slot 6 = Time | ||
| | | medallion slot 6 number = 2:25 | ||
| | | medal = 350 | ||
| | | cup = 2:00 | ||
| skull coins = 5 | |||
| relics = 3 | |||
| format numbers = true | |||
}} | }} | ||
===Area 1=== | |||
The level starts with the team of heroes coming across a couple of [[Baby Dragon Chef]]s. Near the second one is a pot vent that will propel the heroes upwards to continue. Then, the team has to avoid falling into the fire in a bowl and use the [[bean]]s to get across. The first secret area can be found by grabbing onto a hanging zip-line and then performing a wall jump to the platform leading up to the door. After the [[Electoon]]s are saved, the heroes can proceed to the nearby exit. If the [[Bulb-o-Lum|piñata]] near the exit is destroyed, the heroes can acquire the [[Flying Punch]]. | |||
==Area 1== | |||
The level starts | |||
<gallery widths="320px" heights="180px"> | <gallery widths="320px" heights="180px"> | ||
| Line 29: | Line 32: | ||
</gallery> | </gallery> | ||
===Secret area 1=== | ====Relic 1==== | ||
In this secret area, [[Rayman]] and his team must ride on the [[mosquito]]es to reach the [[Electoon]] [[cage]]. During the flight, they have to avoid fireballs and flames appearing from vents on pipes. Once they reach the end, and the four [[Antitoon|Darktoons]] are | The first [[relic]] can be found in this area, located near the first [[Bulb-o-Lum]] the heroes encounter. | ||
<gallery widths="320px" heights="180px"> | |||
Dragon Soup first relic.png|The first [[relic]], located below [[Rayman]]. | |||
</gallery> | |||
====Secret area 1==== | |||
In this secret area, [[Rayman]] and his team must ride on the [[giant mosquito]]es to reach the [[Electoon]] [[cage]]. During the flight, they have to avoid fireballs and flames appearing from vents on pipes. Once they reach the end, and the four [[Antitoon|Darktoons]] are defeated, the [[cage]] can be broken open. | |||
<gallery widths="320px" heights="180px"> | <gallery widths="320px" heights="180px"> | ||
Dragon Soup 3.jpg|The first secret area has the player riding a [[mosquito]]. | Dragon Soup 3.jpg|The first secret area has the player riding a [[giant mosquito]]. | ||
Dragon Soup 4.jpg|The player must avoid the flames and make it to the end. | Dragon Soup 4.jpg|The player must avoid the flames and make it to the end. | ||
Dragon Soup 5.jpg|The [[cage]] in the | Dragon Soup 5.jpg|The [[cage]] in the first secret area. | ||
</gallery> | </gallery> | ||
==Area 2== | ====Relic 2==== | ||
Throughout the first part of this area, the heroes must avoid fire in bowls, [[ | [[File:Dragon Soup second relic.png|320px|thumb|The second [[relic]], located below [[Rayman]].]] | ||
The second [[relic]] can be found near the exit, located to the right of a [[sausage]]. | |||
{{Clear}} | |||
===Area 2=== | |||
Throughout the first part of this area, the heroes must avoid the fire in bowls, the flames projected by tubes of [[pepperpaste]], and red-hot metal. The first [[Skull Coin]] can be collected by touching a scenery piece on the floor. This [[Skull Coin|coin]] will travel in a [[bubble]] near the fire in a bowl, so the heroes have to be quick to get it. The second [[Skull Coin]] can be collected by going back and [[crush attack]]ing a [[sausage]] up to a pipe. The exit is past the fire in several bowls. | |||
<gallery widths="320px" heights="180px"> | <gallery widths="320px" heights="180px"> | ||
Dragon Soup 7.jpg|Three groups of [[bean]]s. | Dragon Soup 7.jpg|Three groups of [[bean]]s. | ||
Dragon Soup 8.jpg|A [[pepperpaste]]. | Dragon Soup 8.jpg|A tube of [[pepperpaste]]. | ||
</gallery> | </gallery> | ||
==Area 3== | ===Area 3=== | ||
[[File:Dragon Soup 11.jpg|320px|thumb | [[File:Dragon Soup 11.jpg|320px|thumb|A [[Lum King]].]] | ||
If the team performs a | |||
If the team performs a wall jump onto the first pipe, they can find the second secret area. Afterwards, the team will shrink, and they must avoid falling. The third [[Skull Coin]] can be retrieved by safely jumping between two swinging platforms. The exit is not far from there. | |||
{{Clear}} | {{Clear}} | ||
===Secret area 2=== | ====Secret area 2==== | ||
The team needs to time their | The team needs to time their wall jumps to reach the [[Baby Dragon Chef]]s that need to be defeated. Once this is completed, the [[cage]] can be broken open. | ||
<gallery widths="320px" heights="180px"> | <gallery widths="320px" heights="180px"> | ||
| Line 60: | Line 78: | ||
</gallery> | </gallery> | ||
==Area 4== | ===Area 4=== | ||
While still shrunken, the heroes have to take advantage of the moving pepper shakers to advance. If a player performs a wall jump on a golden pepper shaker above, the fourth [[Skull Coin]] can be reached. The fifth [[Skull Coin]] is very close to the fourth, between the last pepper shaker and a pipe. After the team uses the [[spoon]]s to get across, the exit is right there. | |||
<gallery widths="320px" heights="180px"> | <gallery widths="320px" heights="180px"> | ||
| Line 69: | Line 87: | ||
</gallery> | </gallery> | ||
==Area 5== | ===Area 5=== | ||
[[File:Dragon Soup 15.jpg|320px|thumb | [[File:Dragon Soup 15.jpg|320px|thumb|A [[Lum King]].]] | ||
Now the | |||
Now, the heroes have to safely drop down, avoiding getting crushed by the moving platforms. The exit is not far away. | |||
{{Clear}} | {{Clear}} | ||
==Area 6== | ===Area 6=== | ||
[[File:Dragon Soup 16.jpg|320px|thumb | [[File:Dragon Soup 16.jpg|320px|thumb|Near the exit of the sixth area.]] | ||
The fifth [[Skull Coin]] can be collected by using the second pepper shaker. Shortly, the heroes need to hurry to pass the golden pepper shakers | |||
The fifth [[Skull Coin]] can be collected by using the second pepper shaker. Shortly after, the heroes need to hurry to pass the golden pepper shakers or else they will get crushed. Then, they must hurry again to avoid getting hit by the [[Knife|knives]]. The exit is to the right of where the [[Knife|knives]] stop. | |||
{{Clear}} | {{Clear}} | ||
==Area 7== | ===Area 7=== | ||
[[File:Dragon Soup 18.jpg|320px|thumb | [[File:Dragon Soup 18.jpg|320px|thumb|The player must use the [[spoon]]s to get across.]] | ||
In this short area, the team must use the [[spoon]]s and zip-lines to reach the nearby exit | |||
In this short area, the team must use the [[spoon]]s and zip-lines to reach the nearby exit while avoiding flames spewed out of a [[chilli pepper]]. | |||
{{Clear}} | {{Clear}} | ||
== | ====Relic 3==== | ||
[[File:Dragon Soup | [[File:Dragon Soup third relic.png|320px|thumb|The third [[relic]], located to the left of [[Rayman]].]] | ||
The third [[relic]] can be found near the entrance to this area, located just to the lower left of the [[Darkblocker]]. | |||
{{Clear}} | {{Clear}} | ||
===Area 8=== | |||
[[File:Dragon Soup 17.jpg|320px|thumb|The final area.]] | |||
All the team has to do is defeat the two [[Baby Dragon Chef]]s while dodging the [[fork]]s. When completed, the [[Electoon]] [[cage]] can be broken open to end the level. The heroes will then pose on the [[The Photographer|photoboard]] as [[The Magician (Rayman Origins)|the Magician]] counts the total number of [[Lum (UbiArt games)|Lums]] that were collected. | |||
{{Clear}} | |||
==Back to Origins== | |||
{{RLLevel | {{RLLevel | ||
| name = Dragon Soup | | name = Dragon Soup | ||
| difficulty = | | difficulty = 3 | ||
| image = [[File:Dragon Soup - Back to Origins.png|center|320px| | | image = [[File:Dragon Soup - Back to Origins.png|center|320px|Dragon Soup]] | ||
| preceded by = [[Ice-Fishing Folly#Back to Origins|Ice-Fishing Folly]] | | preceded by = [[Ice-Fishing Folly#Back to Origins|Ice-Fishing Folly]] | ||
| followed by = [[Fickle Fruit#Back to Origins|Fickle Fruit]] | | followed by = [[Fickle Fruit#Back to Origins|Fickle Fruit]] | ||
| world = [[Gourmand Land]] | | world = [[Gourmand Land]] | ||
| teensies = | | teensies = 10 | ||
| bronze cup = | | bronze cup = 150 | ||
| silver cup = | | silver cup = 300 | ||
| lucky ticket = | | lucky ticket = 450 | ||
| gold cup = | | gold cup = 600 | ||
| format numbers = true | |||
}} | }} | ||
This level is playable in the [[Back to Origins]] mode in ''[[Rayman Legends]]'' as the fifth one from [[Gourmand Land]]. There are not many notable differences between the versions, except for the usual differences that appear in every other [[Back to Origins]] level. | |||
This level is playable in the [[Back to Origins]] mode in ''[[Rayman Legends]]'' as the fifth one from [[Gourmand Land]]. There are not many notable differences between the versions | |||
<gallery widths="320px" heights="180px"> | <gallery widths="320px" heights="180px"> | ||
Dragon Soup - Back to Origins 1.jpg|The first area of the level, this time in ''[[Rayman Legends]]''. | Dragon Soup - Back to Origins 1.jpg|The first area of the level, this time in ''[[Rayman Legends]]''. | ||
Dragon Soup - Back to Origins 2.jpg|The first secret area. | Dragon Soup - Back to Origins 2.jpg|The first secret area. | ||
Dragon Soup - Back to Origins 3.jpg|The part in the first secret area where the [[Antitoon|Darktoons]] | Dragon Soup - Back to Origins 3.jpg|The part in the first secret area where the [[Antitoon|Darktoons]] must be defeated to break open the [[cage]]. | ||
Dragon Soup - Back to Origins 4.jpg|The second area. | Dragon Soup - Back to Origins 4.jpg|The second area. | ||
Dragon Soup - Back to Origins 5.jpg|The third area of the level. | Dragon Soup - Back to Origins 5.jpg|The third area of the level. | ||
Dragon Soup - Back to Origins 6.jpg|The second secret area. | Dragon Soup - Back to Origins 6.jpg|The second secret area. | ||
Dragon Soup - Back to Origins 7.jpg|The fourth area, where the heroes are shrunken. | |||
Dragon Soup - Back to Origins 7.jpg|The fourth area, where the | |||
Dragon Soup - Back to Origins 8.jpg|A trapped [[Teensie]]. | Dragon Soup - Back to Origins 8.jpg|A trapped [[Teensie]]. | ||
Dragon Soup - Back to Origins 9.jpg|The fifth area of the level. | Dragon Soup - Back to Origins 9.jpg|The fifth area of the level. | ||
Dragon Soup - Back to Origins 10.jpg|The sixth area. | Dragon Soup - Back to Origins 10.jpg|The sixth area. | ||
Dragon Soup - Back to Origins 11.jpg|The seventh area of the level. | Dragon Soup - Back to Origins 11.jpg|The seventh area of the level. | ||
Dragon Soup - Back to Origins 12.jpg|A [[ | Dragon Soup - Back to Origins 12.jpg|A [[chilli pepper]] relaxing in fire. | ||
Dragon Soup - Back to Origins 13.jpg|The eighth and final area. | Dragon Soup - Back to Origins 13.jpg|The eighth and final area. | ||
</gallery> | </gallery> | ||
==Names in other languages== | |||
{{Names | |||
|en=Dragon Soup | |||
|ar=حساء التنين | |||
|zh_hans=全龙汤 | |||
|cs=Dračí polévka | |||
|da=Dragesuppe | |||
|nl=Drakensoep | |||
|fi=Lohikäärmekeitto | |||
|fr=Soupe de dragon | |||
|de=Drachensuppe | |||
|hu=Sárkányleves | |||
|it=Zuppa di drago | |||
|ja=りゅうの スープ | |||
|ja_S=''[[Rayman Origins]]'' | |||
|ja_2=「ドラゴンたちの調理場」 | |||
|ja_2_S=''[[Rayman Legends]]'' | |||
|no=Dragesuppe | |||
|pl=Smocza zupa | |||
|pt=Sopa de dragão | |||
|ru=Драконовый суп | |||
|es=Sopa de dragón | |||
|sv=Draksoppa | |||
}} | |||
==External links== | ==External links== | ||
* [ | * [https://www.youtube.com/watch?v=ViepSMxahdM Dragon Soup playthrough at YouTube (PC version) (Normal walkthrough + Lums Medal)] | ||
* [ | * [https://www.youtube.com/watch?v=zWJDoVkrWQc Dragon Soup playthrough at YouTube (PC version) (Speed Trophy)] | ||
* [https://www.youtube.com/watch?v= | * [https://www.youtube.com/watch?v=cUf6sujxUNo Dragon Soup's ''Rayman Legends'' playthrough at YouTube (PC version)] | ||
{{RaymanOriginslocations}} | {{RaymanOriginslocations}} | ||
| Line 140: | Line 191: | ||
[[fr:Soupe de dragon]] | [[fr:Soupe de dragon]] | ||
[[hu:Sárkányleves]] | |||
[[pl:Smocza zupa]] | [[pl:Smocza zupa]] | ||
[[Category:Places from Rayman Origins]] | [[Category:Places from Rayman Origins]] | ||
[[Category:Places from Rayman Legends]] | |||
Latest revision as of 15:42, 27 March 2026
Dragon Soup is the first level of the Luscious Lakes, a world in Rayman Origins. This level takes place in the Infernal Kitchens environment, filled with both friendly and hostile kitchen elements. It is the first level from this world and twenty-first overall to be included in the Back to Origins mode in Rayman Legends.
Original version
| Dragon Soup | |||||
|---|---|---|---|---|---|
 | |||||
| ← To Bubblize a Mocking Bird | You're on Fire! → | ||||
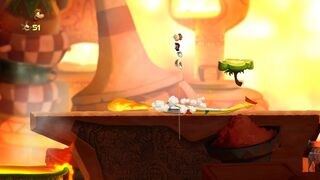
Area 1
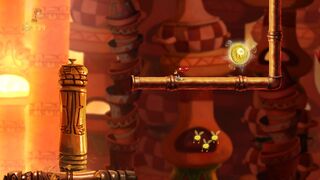
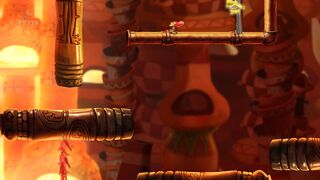
The level starts with the team of heroes coming across a couple of Baby Dragon Chefs. Near the second one is a pot vent that will propel the heroes upwards to continue. Then, the team has to avoid falling into the fire in a bowl and use the beans to get across. The first secret area can be found by grabbing onto a hanging zip-line and then performing a wall jump to the platform leading up to the door. After the Electoons are saved, the heroes can proceed to the nearby exit. If the piñata near the exit is destroyed, the heroes can acquire the Flying Punch.


Relic 1
The first relic can be found in this area, located near the first Bulb-o-Lum the heroes encounter.

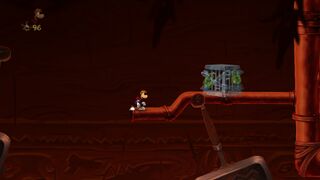
Secret area 1
In this secret area, Rayman and his team must ride on the giant mosquitoes to reach the Electoon cage. During the flight, they have to avoid fireballs and flames appearing from vents on pipes. Once they reach the end, and the four Darktoons are defeated, the cage can be broken open.
-
 The first secret area has the player riding a giant mosquito.
 -
 The player must avoid the flames and make it to the end.
 -
 The cage in the first secret area.


Relic 2

The second relic can be found near the exit, located to the right of a sausage.
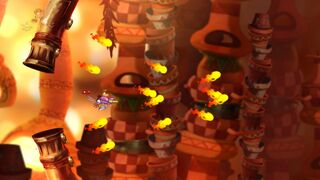
Area 2
Throughout the first part of this area, the heroes must avoid the fire in bowls, the flames projected by tubes of pepperpaste, and red-hot metal. The first Skull Coin can be collected by touching a scenery piece on the floor. This coin will travel in a bubble near the fire in a bowl, so the heroes have to be quick to get it. The second Skull Coin can be collected by going back and crush attacking a sausage up to a pipe. The exit is past the fire in several bowls.
-
 Three groups of beans.
 -
 A tube of pepperpaste.


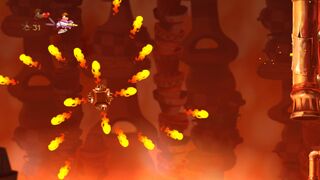
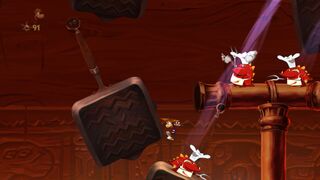
Area 3

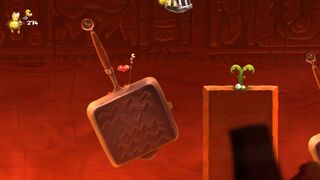
If the team performs a wall jump onto the first pipe, they can find the second secret area. Afterwards, the team will shrink, and they must avoid falling. The third Skull Coin can be retrieved by safely jumping between two swinging platforms. The exit is not far from there.
Secret area 2
The team needs to time their wall jumps to reach the Baby Dragon Chefs that need to be defeated. Once this is completed, the cage can be broken open.
-
 The second secret area has the player defeat Baby Dragon Chefs.
 -
 The cage in the second secret area.


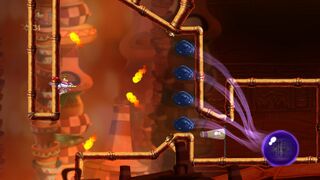
Area 4
While still shrunken, the heroes have to take advantage of the moving pepper shakers to advance. If a player performs a wall jump on a golden pepper shaker above, the fourth Skull Coin can be reached. The fifth Skull Coin is very close to the fourth, between the last pepper shaker and a pipe. After the team uses the spoons to get across, the exit is right there.
-
 The pepper shakers will shake and rotate.
 -
 A hidden Skull Coin.
 -
 A row of spoons moving to the left.


Area 5

Now, the heroes have to safely drop down, avoiding getting crushed by the moving platforms. The exit is not far away.
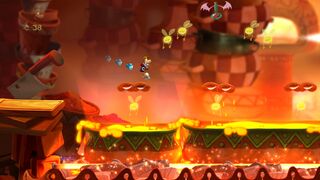
Area 6

The fifth Skull Coin can be collected by using the second pepper shaker. Shortly after, the heroes need to hurry to pass the golden pepper shakers or else they will get crushed. Then, they must hurry again to avoid getting hit by the knives. The exit is to the right of where the knives stop.
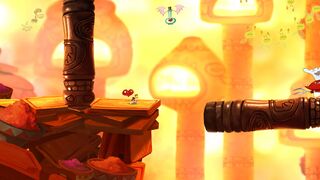
Area 7

In this short area, the team must use the spoons and zip-lines to reach the nearby exit while avoiding flames spewed out of a chilli pepper.
Relic 3

The third relic can be found near the entrance to this area, located just to the lower left of the Darkblocker.
Area 8

All the team has to do is defeat the two Baby Dragon Chefs while dodging the forks. When completed, the Electoon cage can be broken open to end the level. The heroes will then pose on the photoboard as the Magician counts the total number of Lums that were collected.
Back to Origins
| Dragon Soup | ||||||||
|---|---|---|---|---|---|---|---|---|
 | ||||||||
| ← Ice-Fishing Folly | Fickle Fruit → | |||||||
This level is playable in the Back to Origins mode in Rayman Legends as the fifth one from Gourmand Land. There are not many notable differences between the versions, except for the usual differences that appear in every other Back to Origins level.
-
 The first area of the level, this time in Rayman Legends.
 -
 The first secret area.
 -

-
 The second area.
 -
 The third area of the level.
 -
 The second secret area.
 -
 The fourth area, where the heroes are shrunken.
 -
 A trapped Teensie.
 -
 The fifth area of the level.
 -
 The sixth area.
 -
 The seventh area of the level.
 -
 A chilli pepper relaxing in fire.
 -
 The eighth and final area.


Names in other languages
| Language | Name |
|---|---|
| English | Dragon Soup |
| Arabic | حساء التنين |
| Chinese (simplified) | 全龙汤 |
| Czech | Dračí polévka |
| Danish | Dragesuppe |
| Dutch | Drakensoep |
| Finnish | Lohikäärmekeitto |
| French | Soupe de dragon |
| German | Drachensuppe |
| Hungarian | Sárkányleves |
| Italian | Zuppa di drago |
| Japanese | りゅうの スープ (Rayman Origins)
「ドラゴンたちの調理場」 (Rayman Legends) |
| Norwegian | Dragesuppe |
| Polish | Smocza zupa |
| Portuguese | Sopa de dragão |
| Russian | Драконовый суп |
| Spanish | Sopa de dragón |
| Swedish | Draksoppa |
External links
- Dragon Soup playthrough at YouTube (PC version) (Normal walkthrough + Lums Medal)
- Dragon Soup playthrough at YouTube (PC version) (Speed Trophy)