Snake Eyes: Difference between revisions
No edit summary |
No edit summary |
||
| Line 18: | Line 18: | ||
}} | }} | ||
'''Snake Eyes''' is the sixth level of the [[Grumbling Grottos]], a world | '''Snake Eyes''' is the sixth level of the [[Grumbling Grottos]], a world from ''[[Rayman Origins]]''. This level is somewhat similar to [[Skyward Sonata]]; in order to progress, the heroes must ride on some [[serpent flute]]s. This level is the fourth one in this world, and thirteenth overall that is included in the [[Back to Origins]] painting from ''[[Rayman Legends]]''. | ||
==Original version== | ==Original version== | ||
==Area 1== | ==Area 1== | ||
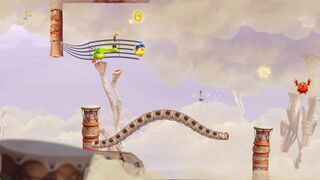
The heroes must board a [[serpent flute]] near the beginning of this area in order to proceed. The first [[Skull Coin]] can be collected by crush attacking onto a [[Drum (UbiArt games)|drum]] which will lead the heroes to a green [[bird]], where then can find the [[Skull Coin|coin]] near a [[Helmet Bird]]. Once the heroes reach the end of this area and disband the [[serpent flute]], they can find the first secret area; it will be located above the exit. | |||
<gallery widths="320px" heights="180px"> | <gallery widths="320px" heights="180px"> | ||
| Line 28: | Line 28: | ||
Snake Eyes 3.jpg|[[Spiky bird]]s will appear throughout the level. | Snake Eyes 3.jpg|[[Spiky bird]]s will appear throughout the level. | ||
</gallery> | </gallery> | ||
===[[Relic]] 1=== | |||
[[File:Snake Eyes first relic.png|320px|thumb|right|The first [[relic]], directly in front of [[Rayman]].]] | |||
The first [[relic]] can be found in this area, located in the background near the exit. | |||
{{Clear}} | |||
===Secret area 1=== | ===Secret area 1=== | ||
[[File:Snake Eyes 4.jpg|320px|thumb| | [[File:Snake Eyes 4.jpg|320px|thumb|left|The first secret area.]] | ||
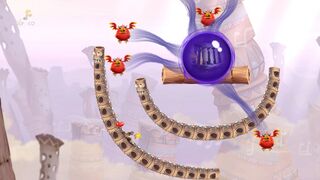
The | The heroes will need to carefully board a circling [[serpent flute]] in order to reach and defeat some [[Red Bird]]s. Once all of them have beenn defeated, the [[Electoon]] [[cage]] can be broken. | ||
{{Clear}} | {{Clear}} | ||
==Area 2== | ==Area 2== | ||
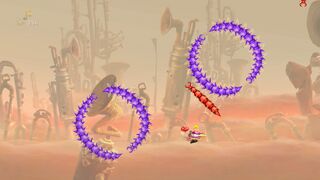
As the heroes crush attack through a wooden barricade, another [[Serpent flute]] will appear. The second [[Skull Coin]] can be found by crush attacking onto a [[Drum (UbiArt games)|drum]] near some [[Spiky birds]], where they can find it above an electrical wire. The [[serpent flute]] will soon decline into an abyss, while more [[serpent flute]]s will then appear. The heroes will need to avoid some [[red birds]] and more electrical wires on their journey towards the exit. Once he heroes reach the exit, they can use a [[Swingman]] in order to reach the third [[Skull Coin]]. | |||
<gallery widths="320px" heights="180px"> | <gallery widths="320px" heights="180px"> | ||
| Line 44: | Line 50: | ||
==Area 3== | ==Area 3== | ||
The heroes will need to climb through this area in order to reach the exit; [[serpent flute]]s will aid them in doing so. They will need to avoid electrical wires and [[spiky bird]]s as they proceed. The heroes will need to use another [[serpent flute]] in order to reach the exit as they approach it. If the heroes collide with a [[bubble bush]] near the exit, a [[Blue Punch]] will appear in a [[bubble]]. | |||
<gallery widths="320px" heights="180px"> | <gallery widths="320px" heights="180px"> | ||
| Line 51: | Line 57: | ||
Snake Eyes 9.jpg|The ending part of the area. | Snake Eyes 9.jpg|The ending part of the area. | ||
</gallery> | </gallery> | ||
===[[Relic]] 2=== | |||
[[File:Snake Eyes second relic.png|320px|thumb|right|The second [[relic]], located above [[Rayman]].]] | |||
The second [[relic]] can be found near the beginning of this area, located near a didgeridoo above the heroes just as they enter. | |||
{{Clear}} | |||
==Area 4== | ==Area 4== | ||
If the | If the heroes obtained the [[Blue Punch]] in the previous area, it will be useful for breaking barricades and defeating the enemy [[bird]]s. The fourth [[Skull Coin]] can be acquired by properly timing a crush attack onto the first [[Drum (UbiArt games)|drum]] which the heroes encounter in the area. The fifth [[Skull Coin]] can be retrieved by quickly shooting a [[switch]] which will make the [[Helmet Bird]]s disappear, then descending on the left hand side. The sixth [[Skull Coin|coin]] can be collected by hitting another [[switch]], then performing wall jumps on the didgeridoo next to the switch. Once the heroes reach the end of this area, the second secret area can be found by [[Helicopter|gliding]] down in between two big [[spiky bird]]s. | ||
<gallery widths="320px" heights="180px"> | <gallery widths="320px" heights="180px"> | ||
| Line 62: | Line 74: | ||
===Secret area 2=== | ===Secret area 2=== | ||
In this secret area, the | In this secret area, the heroes must ride on [[mosquito]]es in order to reach the [[cage]]. During their flight, they will encounter [[small bird]]s, along with red and purple [[spiky snake]]s. As the approach the end of the area, the heroes will need to defeat a red [[spiky snake]] before they can break the [[cage]]. | ||
<gallery widths="320px" heights="180px"> | <gallery widths="320px" heights="180px"> | ||
| Line 72: | Line 84: | ||
==Area 5== | ==Area 5== | ||
[[File:Snake Eyes 16.jpg|320px|thumb|left|The fifth and final area of the level.]] | [[File:Snake Eyes 16.jpg|320px|thumb|left|The fifth and final area of the level.]] | ||
All the heroes need to do is defeat the two [[Red Bird]]s. | All the heroes will need to do here is defeat the two [[Red Bird]]s. Once both have been defeated, the [[Electoon]] [[cage]] can be broken, ending the level. The heroes will then pose on the [[The Photographer|photoboard]] as [[the Magician]] waits for the total amount of [[Lum (UbiArt games)|Lums]] that were collected throughout the level. | ||
{{Clear}} | |||
===[[Relic]] 3=== | |||
[[File:Snake Eyes third relic.png|320px|thumb|right|The third [[relic]], located above [[Rayman]].]] | |||
The third [[relic]] can be found near the entrance to this area, located above the heroes as they enter. It will be camouflaging behind some clouds, which will be slowly drifting to the left, and some will be transparent. | |||
{{Clear}} | {{Clear}} | ||
Revision as of 02:35, 5 August 2020
| Snake Eyes | |||||||||||
|---|---|---|---|---|---|---|---|---|---|---|---|
 | |||||||||||
| ← High Voltage | To Bubblize a Mocking Bird → | ||||||||||
Snake Eyes is the sixth level of the Grumbling Grottos, a world from Rayman Origins. This level is somewhat similar to Skyward Sonata; in order to progress, the heroes must ride on some serpent flutes. This level is the fourth one in this world, and thirteenth overall that is included in the Back to Origins painting from Rayman Legends.
Original version
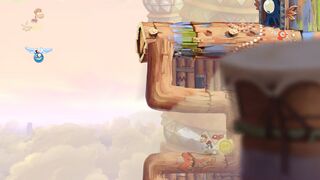
Area 1
The heroes must board a serpent flute near the beginning of this area in order to proceed. The first Skull Coin can be collected by crush attacking onto a drum which will lead the heroes to a green bird, where then can find the coin near a Helmet Bird. Once the heroes reach the end of this area and disband the serpent flute, they can find the first secret area; it will be located above the exit.
-
 The first area of the level.
 -
 Spiky birds will appear throughout the level.


Relic 1

The first relic can be found in this area, located in the background near the exit.
Secret area 1

The heroes will need to carefully board a circling serpent flute in order to reach and defeat some Red Birds. Once all of them have beenn defeated, the Electoon cage can be broken.
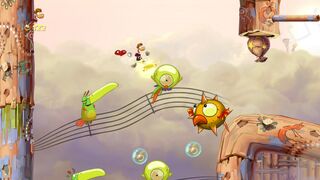
Area 2
As the heroes crush attack through a wooden barricade, another Serpent flute will appear. The second Skull Coin can be found by crush attacking onto a drum near some Spiky birds, where they can find it above an electrical wire. The serpent flute will soon decline into an abyss, while more serpent flutes will then appear. The heroes will need to avoid some red birds and more electrical wires on their journey towards the exit. Once he heroes reach the exit, they can use a Swingman in order to reach the third Skull Coin.
-
 The second Skull Coin, located in the second area.
 -
 The third Skull Coin.


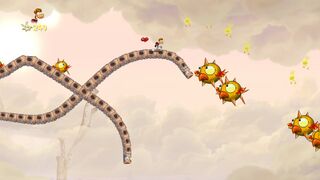
Area 3
The heroes will need to climb through this area in order to reach the exit; serpent flutes will aid them in doing so. They will need to avoid electrical wires and spiky birds as they proceed. The heroes will need to use another serpent flute in order to reach the exit as they approach it. If the heroes collide with a bubble bush near the exit, a Blue Punch will appear in a bubble.
-
 The third area of the level.
 -
 Green birds.
 -
 The ending part of the area.


Relic 2

The second relic can be found near the beginning of this area, located near a didgeridoo above the heroes just as they enter.
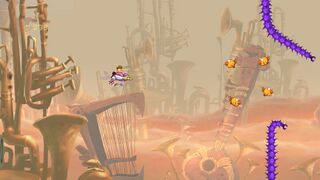
Area 4
If the heroes obtained the Blue Punch in the previous area, it will be useful for breaking barricades and defeating the enemy birds. The fourth Skull Coin can be acquired by properly timing a crush attack onto the first drum which the heroes encounter in the area. The fifth Skull Coin can be retrieved by quickly shooting a switch which will make the Helmet Birds disappear, then descending on the left hand side. The sixth coin can be collected by hitting another switch, then performing wall jumps on the didgeridoo next to the switch. Once the heroes reach the end of this area, the second secret area can be found by gliding down in between two big spiky birds.
-
 The fourth area of the level.
 -
 Many spiky birds.
 -
 A Lum King.


Secret area 2
In this secret area, the heroes must ride on mosquitoes in order to reach the cage. During their flight, they will encounter small birds, along with red and purple spiky snakes. As the approach the end of the area, the heroes will need to defeat a red spiky snake before they can break the cage.
-
 The second secret area.
 -
 Purple and red spiky snakes.
 -
 The red spiky snake is the enemy that needs to be destroyed to break open the cage.


Area 5

All the heroes will need to do here is defeat the two Red Birds. Once both have been defeated, the Electoon cage can be broken, ending the level. The heroes will then pose on the photoboard as the Magician waits for the total amount of Lums that were collected throughout the level.
Relic 3

The third relic can be found near the entrance to this area, located above the heroes as they enter. It will be camouflaging behind some clouds, which will be slowly drifting to the left, and some will be transparent.
| Snake Eyes | ||||||||
|---|---|---|---|---|---|---|---|---|
 | ||||||||
| ← Shooting Me Softly | Don't Shoot the DJ → | |||||||
Back to Origins
This level is playable in the Back to Origins mode in Rayman Legends as the fifth one from the Desert of Dijiridoos. There are not many notable differences between the versions; except the notable differences that appear in every other Back to Origins level.
-
 The starting area.
 -
 The first Skull Coin of the level.
 -
 The first secret area.
 -
 Turnips and Lum chains appear.
 -
 The second Skull Coin.
 -
 The fourth Skull Coin is hidden behind a scenery piece.
 -
 Multiple serpent flutes will sometimes appear at the same time.
 -
 The second secret area of the level.
 -
 A red spiky snake will need to be defeated in order to break open the cage.
 -
 The fifth and final area of the level.


External links
- Snake Eyes playthrough at YouTube (PC version) (Normal walkthrough + Lums Medal)
- Snake Eyes playthrough at YouTube (PC version) (Speed Trophy)