Geyser Blowout: Difference between revisions
No edit summary |
Hunchman801 (talk | contribs) I really had a hard time making sense of that in order to rephrase it; please use shorter sentences and punctuation |
||
| Line 19: | Line 19: | ||
}} | }} | ||
'''Geyser Blowout''' is the second level of the [[Jibberish Jungle]], the first world in ''[[Rayman Origins]]''. The level is located on a rainy landscape with multiple creature-shaped rocks, geysers and water areas filled with [[tentacle claw]]s. This is the first level to have hidden areas where the [[Electoon]] [[cage]]s reside. This level was formerly known as '''Geyser Blast'''. | '''Geyser Blowout''' is the second level of the [[Jibberish Jungle]], the first world in ''[[Rayman Origins]]''. The level is located on a rainy landscape with multiple creature-shaped rocks, geysers and water areas filled with [[tentacle claw]]s. This is the first level to have hidden areas where the [[Electoon]] [[cage]]s reside. This level was formerly known as '''Geyser Blast''', which is also its name in the [[Back to Origins]] mode of ''[[Rayman Legends]]''. | ||
==Original version== | ==Original version== | ||
| Line 37: | Line 37: | ||
Geyser Blowout 11.jpg|A [[Swingman]]. | Geyser Blowout 11.jpg|A [[Swingman]]. | ||
Firstsecretdoor.jpg|thumb|right|320px|The first secret area location. | Firstsecretdoor.jpg|thumb|right|320px|The first secret area location. | ||
Geyser Blowout 13.jpg|An [[explosive bulb]]. | Geyser Blowout 13.jpg|An [[explosive bulb]]. | ||
</gallery> | </gallery> | ||
| Line 43: | Line 42: | ||
===[[Relic]] 1=== | ===[[Relic]] 1=== | ||
[[File:Geyser Blowout first relic.png|thumb|right|320px|The first [[relic]] can be found in the statue's tongue.]] | [[File:Geyser Blowout first relic.png|thumb|right|320px|The first [[relic]] can be found in the statue's tongue.]] | ||
In the PlayStation Vita version, [[the Magician]]'s hat is in the middle of this area, after the second [[Lum King]]. The [[relic]] is found in middle of the statue near his hat. | In the PlayStation Vita version, [[the Magician]]'s hat is in the middle of this area, after the second [[Lum King]]. The [[relic]] is found in middle of the statue near his hat. | ||
| Line 65: | Line 65: | ||
===Secret area 2=== | ===Secret area 2=== | ||
[[File:Secondsecretarea.jpg|thumb|left|320px|The second secret area.]] | [[File:Secondsecretarea.jpg|thumb|left|320px|The second secret area.]] | ||
The heroes must defeat the four [[Livingstone|Lividstones]] guarding the [[cage]]. They can either defeat them all manually, or they can hit the green [[bulb]], causing the [[nenuphar]]s that the three [[Livingstone|Lividstones]] are standing on to disappear, thus making them fall into the rapidly flowing water, pushing them into the [[spiky flower]]s, then the heroes can defeat the last one manually. The heroes must also be careful to not fall into the water and get bubblized by the [[spiky flower]]s themselves. | The heroes must defeat the four [[Livingstone|Lividstones]] guarding the [[cage]]. They can either defeat them all manually, or they can hit the green [[bulb]], causing the [[nenuphar]]s that the three [[Livingstone|Lividstones]] are standing on to disappear, thus making them fall into the rapidly flowing water, pushing them into the [[spiky flower]]s, then the heroes can defeat the last one manually. The heroes must also be careful to not fall into the water and get bubblized by the [[spiky flower]]s themselves. | ||
| Line 80: | Line 81: | ||
===[[Relic]] 2=== | ===[[Relic]] 2=== | ||
[[File:Geyser Blowout second relic.png|thumb|right|320px|The second [[relic]] can be found underwater, just left of [[Rayman]].]] | [[File:Geyser Blowout second relic.png|thumb|right|320px|The second [[relic]] can be found underwater, just left of [[Rayman]].]] | ||
[[The Magician]] at the entrance of the area introduces the ''pinch to zoom'' function, which might help finding the [[relic]]s easier. The second one is found underwater next to the platform on the right. | [[The Magician]] at the entrance of the area introduces the ''pinch to zoom'' function, which might help finding the [[relic]]s easier. The second one is found underwater next to the platform on the right. | ||
| Line 86: | Line 88: | ||
==Area 5== | ==Area 5== | ||
[[File:Geyser Blowout 20.jpg|320px|thumb|left|The fifth and final area.]] | [[File:Geyser Blowout 20.jpg|320px|thumb|left|The fifth and final area.]] | ||
Finally, the heroes must defeat the four moving [[Psychlops]] guarding the last [[Electoon]] [[cage]] by using the geyser provided for them. After doing so, then breaking the [[cage]], the [[The Photographer|photoboard]] will appear and the level will end, taking them to where [[the Magician]] watches the rising amount of [[Lum (UbiArt games)|Lums]] that were collected throughout the level. | Finally, the heroes must defeat the four moving [[Psychlops]] guarding the last [[Electoon]] [[cage]] by using the geyser provided for them. After doing so, then breaking the [[cage]], the [[The Photographer|photoboard]] will appear and the level will end, taking them to where [[the Magician]] watches the rising amount of [[Lum (UbiArt games)|Lums]] that were collected throughout the level. | ||
| Line 104: | Line 107: | ||
==Back to Origins== | ==Back to Origins== | ||
This level is playable in the [[Back to Origins]] mode of ''[[Rayman Legends]]''. It is the first level of the [[Jibberish Jungle]] in the mode, and the first overall [[Back to Origins]] level that can be unlocked. It is named Geyser Blast, which also happens to be its original name. Besides the graphical and lighting update, the list of differences is as follows: | |||
*The | |||
* | *The [[Skull Coin]] by the [[tentacle claw]]s has been changed to a [[Teensie|Teensy]] and there is only one of them. | ||
*When hitting the first explosive bulb only the platform on the left moves and not the one at the bottom. | *In the first secret area, [[Livingstone|Lividstones]] and moving platforms have been replaced with [[Psychlops]]es. | ||
*All moving platforms rise and fall subtly slower than in Origins. | *In the second secret area, there is only one [[Livingstone|Lividstone]], two [[Psychlops]]es, and a single [[spiky flower]]. Additionally, the vine has been replaced with a chain. | ||
*Most of the tentacle | *The final area has undergone three changes: the [[cage]] is now at the bottom, the [[Psychlops]]es move more slowly, making it easier to defeat them, and the platform is stationary to prevent instant death. | ||
*When hitting the first [[explosive bulb]], only the platform on the left moves and not the one at the bottom. | |||
*All moving platforms rise and fall subtly slower than in ''[[Rayman Origins]]''. | |||
*Most of the [[tentacle claw]]s in the penultimate area have been removed and the vine has once again been replaced by a chain. | |||
<gallery widths="320px" heights="180px"> | <gallery widths="320px" heights="180px"> | ||
Geyser Blowout - Back to Origins 1.jpg|The first scene in Geyser Blowout in [[Back to Origins]]. | Geyser Blowout - Back to Origins 1.jpg|The first scene in Geyser Blowout in [[Back to Origins]]. | ||
Geyser Blowout - Back to Origins 2.jpg|Several enemies have been removed and the heroes can [[Swimming|swim]] from the start. | Geyser Blowout - Back to Origins 2.jpg|Several enemies have been removed and the heroes can [[Swimming|swim]] from the start. | ||
Geyser Blowout - Back to Origins 3.jpg|Several [[Skull | Geyser Blowout - Back to Origins 3.jpg|Several [[Skull Coin]]s have been replaced by [[Teensie]]s. | ||
Geyser Blowout - Back to Origins 4.jpg|[[Lum (UbiArt games)|Lum]] chains have been added to increase the amount of [[Lum (UbiArt games)|Lums]] available. | Geyser Blowout - Back to Origins 4.jpg|[[Lum (UbiArt games)|Lum]] chains have been added to increase the amount of [[Lum (UbiArt games)|Lums]] available. | ||
</gallery> | </gallery> | ||
Revision as of 10:52, 26 July 2024
| Geyser Blowout | ||||||||
|---|---|---|---|---|---|---|---|---|
 | ||||||||
| ← It's a Jungle Out There... | Punching Plateaus → | |||||||
 Jibberish Jungle Jibberish Jungle
| ||||||||
   
|

|

| ||||||
   
|
|
  
| ||||||

|

| |||||||

| ||||||||

Geyser Blowout is the second level of the Jibberish Jungle, the first world in Rayman Origins. The level is located on a rainy landscape with multiple creature-shaped rocks, geysers and water areas filled with tentacle claws. This is the first level to have hidden areas where the Electoon cages reside. This level was formerly known as Geyser Blast, which is also its name in the Back to Origins mode of Rayman Legends.
Original version
Area 1
Upon entering the level, the heroes can see the Magician to their left, who will tell them about Lums and Skull Coins if they hit or jump on top of his hat. As the heroes progress through the level, they can use the geysers to gain extra height. The first Skull Coin can be found in the lowest section after the geysers, floating over a small pond; one of the heroes must fall on a floating nenuphar to reach it, without touching the water plagued by tentacle claws.
-
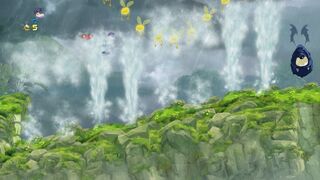 The first area of the level.
 -
 The first Skull Coin.


Area 2
Upon entering, the heroes must slide down a waterfall onto some moving platforms near a geyser. After going up said geyser, they encounter some Lums circling around a Swingman who helps them across a huge abyss; however, below to the right is the first secret area of the level, and the first of the game, which the heroes can access to find the first Electoon cage. After that, the second Skull Coin can be seen, inside of a small tunnel located under a platform where some Psychlops can be seen jumping. If the heroes get close or enter the tunnel, it will start collapsing; the heroes must run after the coin and quickly escape by the other side before they get crushed. Afterwards, they can head back up by going through more geysers, and then using an explosive bulb to continue on to the next area.
-
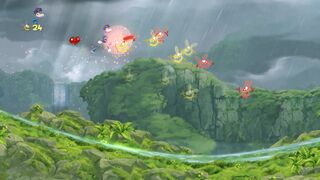 The second area.
 -
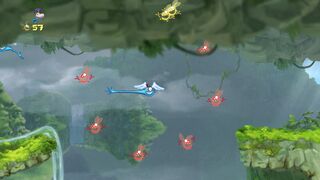 A Swingman.
 -
 The first secret area location.
 -
 An explosive bulb.


Relic 1

In the PlayStation Vita version, the Magician's hat is in the middle of this area, after the second Lum King. The relic is found in middle of the statue near his hat.
Secret area 1
The heroes must simply defeat the four Lividstones on moving platforms guarding the cage. Once they have been defeated, the cage can be broken.
-
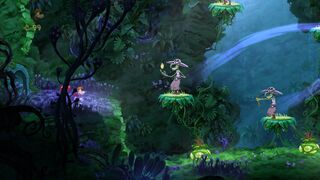 The first secret area.
 -
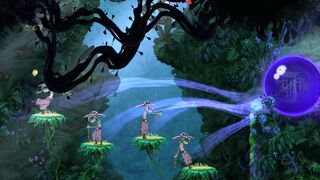 The cage being unable to be broken until all enemies are defeated.


Area 3
Moving platforms expand greatly in this area through the effect of the explosive bulb. The heroes need to be careful throughout this area, as the platforms can crush them. The third and fourth Skull Coins are covered by plants in the upper areas, where the heroes are able to perform walljumps. At the end of the area, the second secret area can be found at the bottom being guarded by a Psychlops.
-
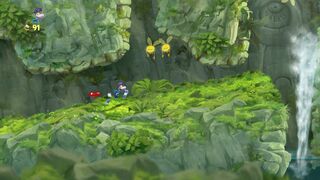 The third area of the level.
 -
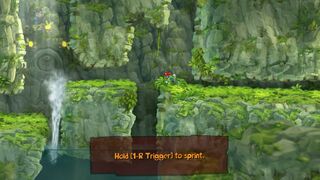 Platforms will crush the heroes if they are not quick.


Secret area 2

The heroes must defeat the four Lividstones guarding the cage. They can either defeat them all manually, or they can hit the green bulb, causing the nenuphars that the three Lividstones are standing on to disappear, thus making them fall into the rapidly flowing water, pushing them into the spiky flowers, then the heroes can defeat the last one manually. The heroes must also be careful to not fall into the water and get bubblized by the spiky flowers themselves.
Area 4
Now the heroes must put their skills to the test by conquering a mix of moving platforms and geysers, while being careful to avoid falling in dangerous water containing tentacle claws. The sixth Skull Coin is located underwater; the heroes must take it and use a geyser to escape from the tentacle claw quickly. The last Skull Coin is located under a rocky platform after the grabbing vine. To get it, the heroes must stand on said platform, and wait until it slowly collapses. When the coin is obtained, the heroes must quickly perform a walljump to go back to the land and avoid falling into the abyss.
-
 The fourth area of the level.
 -
 Tentacle claw infested water.
 -
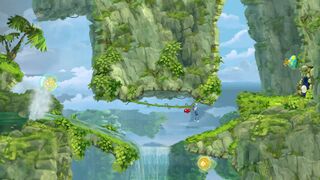 The seventh Skull Coin.


Relic 2

The Magician at the entrance of the area introduces the pinch to zoom function, which might help finding the relics easier. The second one is found underwater next to the platform on the right.
Area 5

Finally, the heroes must defeat the four moving Psychlops guarding the last Electoon cage by using the geyser provided for them. After doing so, then breaking the cage, the photoboard will appear and the level will end, taking them to where the Magician watches the rising amount of Lums that were collected throughout the level.
| Geyser Blast | ||||||||
|---|---|---|---|---|---|---|---|---|
 | ||||||||

| ||||||||
| Hi-Ho Moskito! → | ||||||||
| Jibberish Jungle
| ||||||||

|
||||||||

|

| |||||||

|

| |||||||
Back to Origins
This level is playable in the Back to Origins mode of Rayman Legends. It is the first level of the Jibberish Jungle in the mode, and the first overall Back to Origins level that can be unlocked. It is named Geyser Blast, which also happens to be its original name. Besides the graphical and lighting update, the list of differences is as follows:
- The Skull Coin by the tentacle claws has been changed to a Teensy and there is only one of them.
- In the first secret area, Lividstones and moving platforms have been replaced with Psychlopses.
- In the second secret area, there is only one Lividstone, two Psychlopses, and a single spiky flower. Additionally, the vine has been replaced with a chain.
- The final area has undergone three changes: the cage is now at the bottom, the Psychlopses move more slowly, making it easier to defeat them, and the platform is stationary to prevent instant death.
- When hitting the first explosive bulb, only the platform on the left moves and not the one at the bottom.
- All moving platforms rise and fall subtly slower than in Rayman Origins.
- Most of the tentacle claws in the penultimate area have been removed and the vine has once again been replaced by a chain.
-
 The first scene in Geyser Blowout in Back to Origins.
 -
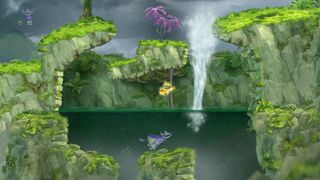 Several enemies have been removed and the heroes can swim from the start.
 -
 Several Skull Coins have been replaced by Teensies.
 -


External links
- Geyser Blowout playthrough at YouTube (PC version) (Normal walkthrough + Lums Medal)
- Geyser Blowout playthrough at YouTube (PC version) (Speed Trophy)
- Geyser Blast's Rayman Legends playthrough at YouTube (PC version)