Piping Hot!: Difference between revisions
Added relic count |
Improvements and added links |
||
| Line 18: | Line 18: | ||
}} | }} | ||
'''Piping Hot!''' is the fourth level of the [[Gourmand Land]], the third world in ''[[Rayman Origins]]''. This is first level where the players enter into the [[Infernal Kitchen]], a place composing of fire, [[fork]]s, and [[Baby Dragon Chef]]s. This is the second level from this world and eighteenth overall that's included in the [[Back to Origins]] mode in ''[[Rayman Legends]]''. | '''Piping Hot!''' is the fourth level of the [[Gourmand Land]], the third world in ''[[Rayman Origins]]''. This is first level where the players enter into the [[Infernal Kitchen]], a place composing of fire, pipes, [[fork]]s, and [[Baby Dragon Chef]]s. This is the second level from this world and eighteenth overall that's included in the [[Back to Origins]] mode in ''[[Rayman Legends]]''. | ||
==Original version== | ==Original version== | ||
==Area 1== | ==Area 1== | ||
Still in the [[Frosty Delights]] area, [[Rayman]] and his friends shrink down to where they have to go downwards by destroying the blocks of ice. Some of the ice blocks have [[Lum (UbiArt games)|Lums]] frozen inside. Once they get through the ice blocks, the exit is nearby. | |||
Still in the [[Frosty Delights]] area, [[Rayman]] and his friends | |||
<gallery widths="320px" heights="180px"> | |||
Piping Hot! 1.jpg|Some of the many blocks of ice contain frozen [[Lum (UbiArt games)|Lums]]. | |||
</gallery> | |||
==Area 2== | ==Area 2== | ||
More of a transition phase to the [[Infernal Kitchen]], the team stands on a platform that's about to collapse, and when it does, the team | More of a transition phase to the [[Infernal Kitchen]], the team stands on a platform that's about to collapse, and when it does, the team falls down to where the exit is close by. | ||
<gallery widths="320px" heights="180px"> | |||
Piping Hot! 2.jpg|The icy platform will collapse. | |||
Piping Hot! 3.jpg|The transition to the [[Infernal Kitchen]]. | |||
</gallery> | |||
==Area 3== | ==Area 3== | ||
Now in the [[Infernal Kitchen]], [[Rayman]] and his friends encounter a fire breathing [[Baby Dragon Chef]]. This enemy can be defeated more easily by waiting for it to stop breathing fire. As the heroes continue, different kinds of foods appear, as well as more [[Baby Dragon Chef]]s. One specifically blows fire to a platform, which can be useful later on. Then the team shrinks again, and they have to defeat the [[Antitoon|Darktoons]] that stand in the way. The first [[Skull Coin]] can be collected by performing walljumps on two pipes close to a pinata. A [[Baby Dragon Chef]] is blocking access to the [[Skull Coin|coin]]. After dropping back down, the first secret area can be found by dropping down again. Once the [[Electoon]]s are saved, the team can move on and face more [[Antitoon|Darktoons]]. The second [[Skull Coin]] is located next to a large sleeping [[Psychlops]]. The players can continue on past the collapsing pipe to the exit. | |||
Now in the [[Infernal Kitchen]], [[Rayman]] and his friends encounter a fire breathing [[Baby Dragon Chef]]. This enemy can be defeated more easily by waiting for it to stop breathing fire. As the heroes continue, different kinds of foods appear | |||
===Secret | <gallery widths="320px" heights="180px"> | ||
[[File:Piping Hot! 8.jpg|thumb| | Piping Hot! 4.jpg|[[Baby Dragon Chef]]s breath fire from their mouths. | ||
There are several [[Baby Dragon Chef]]s on moving pillars. The players | Piping Hot! 5.jpg|A [[Baby Dragon Chef]] on top of a large block of cheese. | ||
Piping Hot! 6.jpg|Fire will cause the pot to rise up, creating an air current. | |||
Piping Hot! 7.jpg|The first [[Skull Coin]] behind a [[Baby Dragon Chef]]. | |||
</gallery> | |||
===Secret area 1=== | |||
[[File:Piping Hot! 8.jpg|320px|thumb|right|[[Baby Dragon Chef]]s on vertical moving pillars.]] | |||
There are several [[Baby Dragon Chef]]s on moving pillars. The players need to time when to attack to avoid getting hit by the fire the [[Baby Dragon Chef]]s breath out. Once all are destroyed, the [[cage]] can be broken open. | |||
{{Clear}} | {{Clear}} | ||
==Area 4== | ==Area 4== | ||
The gap is too far to reach, so the team needs to grab onto a swinging vine to make a small platform appear. This will continue on for quite a while, as the heroes need to avoid touching the hot led that's underneath. Next, a [[Baby Dragon Chef]] appears on a platform that supposedly breathes fire when the players stand on it. [[Rayman]] and his friends need to destroy the [[Baby Dragon Chef]] to advance past the vent that was blocking the way. Then the heroes shrink back down to size. They will continue on by destroying [[Antitoon|Darktoons]] to where they see another platform that breaths fire if body slammed on. This is useful for reaching the third [[Skull Coin]] of the level and for getting to the second secret area. After that, the gang can go to the exit that's not too far away. | |||
The gap is too far to reach, so the team needs to grab onto a swinging vine to make a small platform appear. This will continue on for quite a while, as the heroes need to avoid touching the hot led that's underneath. Next, a [[Baby Dragon Chef]] appears on a platform that supposedly breathes fire when | |||
<gallery widths="320px" heights="180px"> | |||
Piping Hot! 9.jpg|Biting [[Antitoon|Darktoons]]. | |||
| [[ | Piping Hot! 10.jpg|Pots that have fire bodies in them. | ||
Piping Hot! 11.jpg|If body slammed, the little platform will breath fire. | |||
===Secret | Piping Hot! 13.jpg|The door leading up to the second secret area. | ||
[[File:Piping Hot! 12.jpg|thumb| | </gallery> | ||
There are sharp [[fork]]s that will attempt to hurt the player if a red line that connects to the fork is touched. The team needs to dodge the | |||
===Secret area 2=== | |||
[[File:Piping Hot! 12.jpg|320px|thumb|left|If a player touches one of the red lines, a [[fork]] will attempt to hurt the player.]] | |||
There are sharp [[fork]]s that will attempt to hurt the player if a red line that connects to the fork is touched. The team needs to dodge the [[fork]]s while destroying the [[Baby Dragon Chef]]s. Once the players defeat the enemies, the [[Electoon]] [[cage]] will be able to be broken. | |||
{{Clear}} | {{Clear}} | ||
| Line 73: | Line 72: | ||
Back to their original size, [[Rayman]] and his team need to use the zip-lines to cross the hot led at the bottom. Along the way, there will be [[Baby Dragon Chef]]s attempting to breath fire at the players. Near the end, if the team takes the higher zip-line, the fourth [[Skull Coin]] can be collected. | Back to their original size, [[Rayman]] and his team need to use the zip-lines to cross the hot led at the bottom. Along the way, there will be [[Baby Dragon Chef]]s attempting to breath fire at the players. Near the end, if the team takes the higher zip-line, the fourth [[Skull Coin]] can be collected. | ||
<gallery widths="320px" heights="180px"> | |||
Piping Hot! 14.jpg|The player will have to time when to use the zip-lines to avoid the [[Baby Dragon Chef]]'s flame. | |||
Piping Hot! 15.jpg|The fourth [[Skull Coin]]. | |||
</gallery> | |||
==Area 6== | ==Area 6== | ||
[[File:Piping Hot! 18.jpg|thumb|right|The players will have to use the zip-lines to avoid the body of fire.]] | [[File:Piping Hot! 18.jpg|320px|thumb|right|The players will have to use the zip-lines to avoid the body of fire.]] | ||
The players will have to do the same as the last area | The players will have to do the same as the last area; use zip-lines to cross the hot body of fire. This time, flames will appear from the body, making timing more key to not get hurt from it. | ||
{{Clear}} | {{Clear}} | ||
==Area 7== | ==Area 7== | ||
[[File:Piping Hot! 16.jpg|thumb|left|A large body of fire that has flames appearing from it.]] | [[File:Piping Hot! 16.jpg|320px|thumb|left|A large body of fire that has flames appearing from it.]] | ||
As the team advances this area, they | As the team advances this area, they have to time when the flames blown from vents and the body of fire in order to not get hit by it. Collapsing pipes will sink down into the fire, so the team needs hurry when they can. The fifth [[Skull Coin]] can be located by using a tea pot vent blowing upwards to reach the pipe that has the [[Skull Coin|coin]]. Now to get to the exit, the players once again need to use the zip-lines to escape from the flames. Then team has to destroy the [[Baby Dragon Chef]]s that block the exit. | ||
{{Clear}} | {{Clear}} | ||
==Area 8== | ==Area 8== | ||
[[File:Piping Hot! 17.jpg|thumb|right|The final area.]] | [[File:Piping Hot! 17.jpg|320px|thumb|right|The final area.]] | ||
The key here to destroy the [[Baby Dragon Chef]]s is to use the [[funnel]] to shrink, then stand on the small pipe that has no enemies on it. This | The key here to destroy the [[Baby Dragon Chef]]s is to use the [[funnel]] to shrink, then stand on the small pipe that has no enemies on it. This causes the pipes connected to sink down, breathing flames of fire on the [[Baby Dragon Chef]]s. That will make the [[cage]] breakable, thus ending the level. The team then poses on the [[The Photographer|photoboard]] as [[the Magician]] waits for the total amount of [[Lum (UbiArt games)|Lums]] that were collected. | ||
{{Clear}} | {{Clear}} | ||
| Line 110: | Line 109: | ||
}} | }} | ||
==Back to Origins== | ==[[Back to Origins]]== | ||
This level is playable in the [[Back to Origins]] mode in ''[[Rayman Legends]]'' as the second one from [[Gourmand Land]]. There aren't many notable differences between the versions; except the notable differences that appear in every other Back to Origins level. | This level is playable in the [[Back to Origins]] mode in ''[[Rayman Legends]]'' as the second one from [[Gourmand Land]]. There aren't many notable differences between the versions; except the notable differences that appear in every other [[Back to Origins]] level. | ||
<gallery widths="320px" heights="180px"> | |||
Piping Hot! - Back to Origins 1.jpg|The start of the level, this time in ''[[Rayman Legends]]''. | |||
Piping Hot! - Back to Origins 2.jpg|The transition to the [[Infernal Kitchen]]. | |||
Piping Hot! - Back to Origins 3.jpg|The second area of the level. | |||
Piping Hot! - Back to Origins 4.jpg|A [[Baby Dragon Chef]] guarding a [[Teensie]]. | |||
Piping Hot! - Back to Origins 5.jpg|The first secret area of the level. | |||
Piping Hot! - Back to Origins 6.jpg|The [[Infernal Kitchen]] with its HD look. | |||
Piping Hot! - Back to Origins 7.jpg|Fire will make the pot create an air current. | |||
Piping Hot! - Back to Origins 8.jpg|The second secret area. | |||
Piping Hot! - Back to Origins 9.jpg|A [[Baby Dragon Chef]] can breath fire vertically and horizontally. | |||
Piping Hot! - Back to Origins 10.jpg|The zip-lines can be useful to reach pass the hot led. | |||
Piping Hot! - Back to Origins 11.jpg|Taking the higher zip-line will result in being able to destroy the [[cage]]. | |||
Piping Hot! - Back to Origins 12.jpg|A [[Teensie]] [[cage]]. | |||
</gallery> | |||
==External links== | ==External links== | ||
* [http://www.youtube.com/watch?v=cNqYG6HWl4A Piping Hot! playthrough at YouTube (PC version) (Normal walkthrough + Lums Medal)] | * [http://www.youtube.com/watch?v=cNqYG6HWl4A Piping Hot! playthrough at YouTube (PC version) (Normal walkthrough + Lums Medal)] | ||
* [http://www.youtube.com/watch?v=mY2XnInjydI Piping Hot! playthrough at YouTube (PC version) (Speed Trophy)] | * [http://www.youtube.com/watch?v=mY2XnInjydI Piping Hot! playthrough at YouTube (PC version) (Speed Trophy)] | ||
* [https://www.youtube.com/watch?v=cYVqEvUD2MM Piping Hot!'s ''Rayman Legends'' playthrough at YouTube (PC version)] | |||
* [https://www.youtube.com/watch?v=cYVqEvUD2MM Piping Hot!'s Rayman Legends playthrough at YouTube (PC version)] | |||
{{RaymanOriginslocations}} | {{RaymanOriginslocations}} | ||
Revision as of 18:08, 26 March 2018
| Piping Hot! | |||||||||||
|---|---|---|---|---|---|---|---|---|---|---|---|
 | |||||||||||
| ← Dashing Thru the Snow | Mending the Rift → | ||||||||||
 Gourmand Land Gourmand Land
| |||||||||||
   
|

|

| |||||||||
   
|
|
  
| |||||||||

|

| ||||||||||

Piping Hot! is the fourth level of the Gourmand Land, the third world in Rayman Origins. This is first level where the players enter into the Infernal Kitchen, a place composing of fire, pipes, forks, and Baby Dragon Chefs. This is the second level from this world and eighteenth overall that's included in the Back to Origins mode in Rayman Legends.
Original version
Area 1
Still in the Frosty Delights area, Rayman and his friends shrink down to where they have to go downwards by destroying the blocks of ice. Some of the ice blocks have Lums frozen inside. Once they get through the ice blocks, the exit is nearby.
-
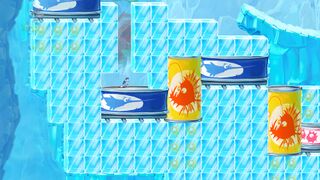 Some of the many blocks of ice contain frozen Lums.

Area 2
More of a transition phase to the Infernal Kitchen, the team stands on a platform that's about to collapse, and when it does, the team falls down to where the exit is close by.
-
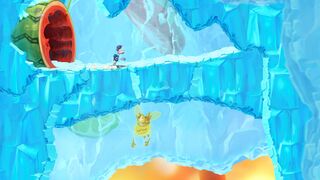 The icy platform will collapse.
 -
 The transition to the Infernal Kitchen.


Area 3
Now in the Infernal Kitchen, Rayman and his friends encounter a fire breathing Baby Dragon Chef. This enemy can be defeated more easily by waiting for it to stop breathing fire. As the heroes continue, different kinds of foods appear, as well as more Baby Dragon Chefs. One specifically blows fire to a platform, which can be useful later on. Then the team shrinks again, and they have to defeat the Darktoons that stand in the way. The first Skull Coin can be collected by performing walljumps on two pipes close to a pinata. A Baby Dragon Chef is blocking access to the coin. After dropping back down, the first secret area can be found by dropping down again. Once the Electoons are saved, the team can move on and face more Darktoons. The second Skull Coin is located next to a large sleeping Psychlops. The players can continue on past the collapsing pipe to the exit.
-
 Baby Dragon Chefs breath fire from their mouths.
 -
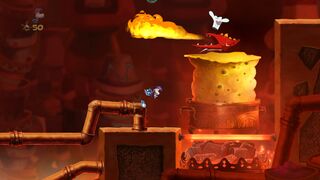 A Baby Dragon Chef on top of a large block of cheese.
 -
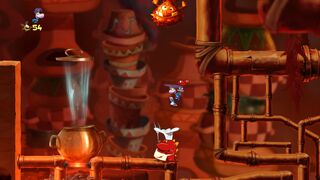 Fire will cause the pot to rise up, creating an air current.
 -
 The first Skull Coin behind a Baby Dragon Chef.


Secret area 1

There are several Baby Dragon Chefs on moving pillars. The players need to time when to attack to avoid getting hit by the fire the Baby Dragon Chefs breath out. Once all are destroyed, the cage can be broken open.
Area 4
The gap is too far to reach, so the team needs to grab onto a swinging vine to make a small platform appear. This will continue on for quite a while, as the heroes need to avoid touching the hot led that's underneath. Next, a Baby Dragon Chef appears on a platform that supposedly breathes fire when the players stand on it. Rayman and his friends need to destroy the Baby Dragon Chef to advance past the vent that was blocking the way. Then the heroes shrink back down to size. They will continue on by destroying Darktoons to where they see another platform that breaths fire if body slammed on. This is useful for reaching the third Skull Coin of the level and for getting to the second secret area. After that, the gang can go to the exit that's not too far away.
-
 Biting Darktoons.
 -
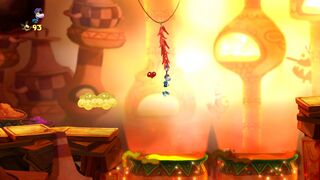 Pots that have fire bodies in them.
 -
 If body slammed, the little platform will breath fire.
 -
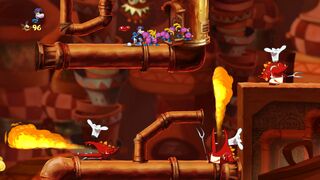 The door leading up to the second secret area.


Secret area 2

There are sharp forks that will attempt to hurt the player if a red line that connects to the fork is touched. The team needs to dodge the forks while destroying the Baby Dragon Chefs. Once the players defeat the enemies, the Electoon cage will be able to be broken.
Area 5
Back to their original size, Rayman and his team need to use the zip-lines to cross the hot led at the bottom. Along the way, there will be Baby Dragon Chefs attempting to breath fire at the players. Near the end, if the team takes the higher zip-line, the fourth Skull Coin can be collected.
-
 The player will have to time when to use the zip-lines to avoid the Baby Dragon Chef's flame.
 -
 The fourth Skull Coin.


Area 6

The players will have to do the same as the last area; use zip-lines to cross the hot body of fire. This time, flames will appear from the body, making timing more key to not get hurt from it.
Area 7

As the team advances this area, they have to time when the flames blown from vents and the body of fire in order to not get hit by it. Collapsing pipes will sink down into the fire, so the team needs hurry when they can. The fifth Skull Coin can be located by using a tea pot vent blowing upwards to reach the pipe that has the coin. Now to get to the exit, the players once again need to use the zip-lines to escape from the flames. Then team has to destroy the Baby Dragon Chefs that block the exit.
Area 8

The key here to destroy the Baby Dragon Chefs is to use the funnel to shrink, then stand on the small pipe that has no enemies on it. This causes the pipes connected to sink down, breathing flames of fire on the Baby Dragon Chefs. That will make the cage breakable, thus ending the level. The team then poses on the photoboard as the Magician waits for the total amount of Lums that were collected.
| Piping Hot! | ||||||||
|---|---|---|---|---|---|---|---|---|
 | ||||||||

| ||||||||
| ← Dashing Through the Snow | Aim for the Eel! → | |||||||
| Gourmand Land
| ||||||||

|
||||||||

|

| |||||||

|

| |||||||
Back to Origins
This level is playable in the Back to Origins mode in Rayman Legends as the second one from Gourmand Land. There aren't many notable differences between the versions; except the notable differences that appear in every other Back to Origins level.
-
 The start of the level, this time in Rayman Legends.
 -
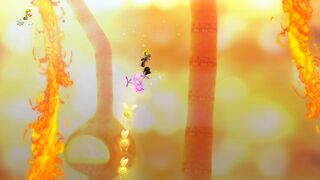 The transition to the Infernal Kitchen.
 -
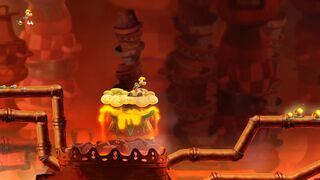 The second area of the level.
 -
 A Baby Dragon Chef guarding a Teensie.
 -
 The first secret area of the level.
 -
 The Infernal Kitchen with its HD look.
 -
 Fire will make the pot create an air current.
 -
 The second secret area.
 -
 A Baby Dragon Chef can breath fire vertically and horizontally.
 -
 The zip-lines can be useful to reach pass the hot led.
 -
 Taking the higher zip-line will result in being able to destroy the cage.
 -


External links
- Piping Hot! playthrough at YouTube (PC version) (Normal walkthrough + Lums Medal)
- Piping Hot! playthrough at YouTube (PC version) (Speed Trophy)
- Piping Hot!'s Rayman Legends playthrough at YouTube (PC version)