Snake Eyes: Difference between revisions
No edit summary |
Improvements and added links |
||
| Line 18: | Line 18: | ||
}} | }} | ||
'''Snake Eyes''' is the sixth level of the [[Grumbling Grottos]], a world in ''[[Rayman Origins]]''. The level draws a similar goal from [[Skyward Sonata]] in order to reach the end; the players must ride on the [[ | '''Snake Eyes''' is the sixth level of the [[Grumbling Grottos]], a world in ''[[Rayman Origins]]''. The level draws a similar goal from [[Skyward Sonata]] in order to reach the end; the players must ride on the [[serpent flute]]s. This level is the fourth one in this world and thirteenth overall that's included in the [[Back to Origins]] mode in ''[[Rayman Legends]]''. | ||
==Original version== | ==Original version== | ||
==Area 1== | ==Area 1== | ||
Right from the very start, | Right from the very start, the heroes must get onto the [[serpent flute]] to advance. The first [[Skull Coin]] can be collected by body slamming on a bongo that leads to a green [[bird]], along with the [[Skull Coin|coin]] and a [[Helmet Bird]]. When the team get off of the [[serpent flute]], the first secret area can be found. It is located above the exit. | ||
<gallery widths="320px" heights="180px"> | |||
Snake Eyes 2.jpg|The first area of the level. | |||
Snake Eyes 3.jpg|[[Spiky bird]]s will appear throughout the level. | |||
</gallery> | |||
===Secret | ===Secret area 1=== | ||
[[File:Snake Eyes 4.jpg|320px|thumb|right|The first secret area.]] | [[File:Snake Eyes 4.jpg|320px|thumb|right|The first secret area.]] | ||
The team | The team has to wait for the right time to get onto a circling [[serpent flute]] to destroy the [[Red Bird]]s. Once done, the [[Electoon]] [[cage]] can be broken. | ||
{{Clear}} | {{Clear}} | ||
==Area 2== | ==Area 2== | ||
After body slamming a wooden barricade, another [[Serpent flute]] will appear. The second [[Skull Coin]] can be found by going to the left where [[Antitoon|Darktoons]] are attached to a high pillar and an electrical wire. The players will have to be quick in getting back on the Serpent flute. Shortly, another Serpent flute will appear, and can be useful for avoiding the electrical shocks. Once the team gets to the exit, they can first use the [[Swingman]] to reach the third coin. | After body slamming a wooden barricade, another [[Serpent flute]] will appear. The second [[Skull Coin]] can be found by going to the left where [[Antitoon|Darktoons]] are attached to a high pillar and an electrical wire. The players will have to be quick in getting back on the Serpent flute. Shortly, another Serpent flute will appear, and can be useful for avoiding the electrical shocks. Once the team gets to the exit, they can first use the [[Swingman]] to reach the third coin. | ||
<gallery widths="320px" heights="180px"> | |||
Snake Eyes 5.jpg|The second [[Skull Coin]], located in the second area. | |||
Snake Eyes 6.jpg|The third [[Skull Coin]]. | |||
</gallery> | |||
==Area 3== | ==Area 3== | ||
This time, to get to the exit, | This time, to get to the exit, the team must progress vertically, still with the assistance of different [[serpent flute]]s. As the heroes continue, they will have to avoid electrical shocks and [[spiky bird]]s. Later, the team will aid the help of another [[serpent flute]] to get to the exit. If the player touches the grass scenery near the exit, a [[Blue Punch]] appears in the form of a [[bubble]]. | ||
<gallery widths="320px" heights="180px"> | |||
Snake Eyes 7.jpg|The third area of the level. | |||
Snake Eyes 8.jpg|Green [[bird]]s. | |||
Snake Eyes 9.jpg|The ending part of the area. | |||
</gallery> | |||
==Area 4== | ==Area 4== | ||
If the player collected the [[Blue Punch]] in the last area, it will prove to be very useful for destroying barricades and bad [[bird]]s. The fourth [[Skull Coin]] can be acquired by timing a body slam on the first bongo of the area. The fifth Skull Coin can be retrieved by quickly shooting a [[switch]] to make the [[Helmet Bird]]s disappear and dropping down to the left side. The sixth coin can be collected by hitting a different switch and performing walljumps on the pillar next to the switch. The [[ | If the player collected the [[Blue Punch]] in the last area, it will prove to be very useful for destroying barricades and bad [[bird]]s. The fourth [[Skull Coin]] can be acquired by timing a body slam on the first bongo of the area. The fifth [[Skull Coin]] can be retrieved by quickly shooting a [[switch]] to make the [[Helmet Bird]]s disappear and dropping down to the left side. The sixth [[Skull Coin|coin]] can be collected by hitting a different [[switch]] and performing walljumps on the pillar next to the switch. The [[serpent flute]]s continues to help the heroes move on to the exit. Once the end is reached, the second secret area can be found by [[Helicopter|gliding]] down in between two big [[spiky bird]]s. | ||
<gallery widths="320px" heights="180px"> | |||
Snake Eyes 10.jpg|The fourth area of the level. | |||
Snake Eyes 11.jpg|Many [[spiky bird]]s. | |||
Snake Eyes 12.jpg|A [[Lum King]]. | |||
</gallery> | |||
===Secret | ===Secret area 2=== | ||
In this secret area, the team | In this secret area, the team must ride on the [[mosquito]]es to reach the [[cage]]. During the flight, they come across [[small bird]]s, as well as red and purple [[spiky snake]]s. After awhile, the players need to destroy a red [[spiky snake]] to be able to break the [[cage]] open. | ||
<gallery widths="320px" heights="180px"> | |||
Snake Eyes 13.jpg|The second secret area. | |||
Snake Eyes 14.jpg|Purple and red [[spiky snake]]s. | |||
Snake Eyes 15.jpg|The red [[spiky snake]] is the enemy that needs to be destroyed to break open the [[cage]]. | |||
</gallery> | |||
==Area 5== | ==Area 5== | ||
[[File:Snake Eyes 16.jpg|320px|thumb| | [[File:Snake Eyes 16.jpg|320px|thumb|left|The fifth and final area of the level.]] | ||
All the heroes need to do is defeat the two [[Red Bird]]s. When completed, the [[Electoon]] [[cage]] can be broken open to end the level. The players will then pose on the [[Photographer|photoboard]] as [[the Magician]] waits for the total amount of [[Lum (UbiArt games)|Lums]] that were collected. | All the heroes need to do is defeat the two [[Red Bird]]s. When completed, the [[Electoon]] [[cage]] can be broken open to end the level. The players will then pose on the [[The Photographer|photoboard]] as [[the Magician]] waits for the total amount of [[Lum (UbiArt games)|Lums]] that were collected. | ||
{{Clear}} | {{Clear}} | ||
| Line 90: | Line 90: | ||
}} | }} | ||
==Back to Origins== | ==[[Back to Origins]]== | ||
This level is playable in the [[Back to Origins]] mode in ''[[Rayman Legends]]'' as the fifth one from the [[Desert of Dijiridoos]]. There aren't many notable differences between the versions; except the notable differences that appear in every other | This level is playable in the [[Back to Origins]] mode in ''[[Rayman Legends]]'' as the fifth one from the [[Desert of Dijiridoos]]. There aren't many notable differences between the versions; except the notable differences that appear in every other [[Back to Origins]] level. | ||
<gallery widths="320px" heights="180px"> | |||
Snake Eyes - Back to Origins 1.jpg|The starting area. | |||
Snake Eyes - Back to Origins 2.jpg|The first [[Skull Coin]] of the level. | |||
Snake Eyes - Back to Origins 3.jpg|The first secret area. | |||
Snake Eyes - Back to Origins 5.jpg|[[Turnip]]s and [[Lum (UbiArt games)|Lum chains]] appear. | |||
Snake Eyes - Back to Origins 7.jpg|The second [[Skull Coin]]. | |||
Snake Eyes - Back to Origins 8.jpg|The fourth [[Skull Coin]] is hidden behind a scenery piece. | |||
Snake Eyes - Back to Origins 10.jpg|Multiple [[serpent flute]]s will sometimes appear at the same time. | |||
Snake Eyes - Back to Origins 11.jpg|The second secret area of the level. | |||
Snake Eyes - Back to Origins 12.jpg|A red [[spiky snake]] will need to be defeated in order to break open the [[cage]]. | |||
Snake Eyes - Back to Origins 13.jpg|The fifth and final area of the level. | |||
</gallery> | |||
==External links== | ==External links== | ||
| Line 118: | Line 113: | ||
* [http://www.youtube.com/watch?v=LpzWY7BV21s Snake Eyes playthrough at YouTube (PC version) (Speed Trophy)] | * [http://www.youtube.com/watch?v=LpzWY7BV21s Snake Eyes playthrough at YouTube (PC version) (Speed Trophy)] | ||
* [https://www.youtube.com/watch?v=9qYIkcE6AXM Snake Eyes' Rayman Legends playthrough at YouTube (PC version)] | * [https://www.youtube.com/watch?v=9qYIkcE6AXM Snake Eyes' ''Rayman Legends'' playthrough at YouTube (PC version)] | ||
{{RaymanOriginslocations}} | {{RaymanOriginslocations}} | ||
Revision as of 15:50, 31 March 2018
| Snake Eyes | |||||||||||
|---|---|---|---|---|---|---|---|---|---|---|---|
 | |||||||||||
| ← High Voltage | To Bubblize a Mocking Bird → | ||||||||||
Snake Eyes is the sixth level of the Grumbling Grottos, a world in Rayman Origins. The level draws a similar goal from Skyward Sonata in order to reach the end; the players must ride on the serpent flutes. This level is the fourth one in this world and thirteenth overall that's included in the Back to Origins mode in Rayman Legends.
Original version
Area 1
Right from the very start, the heroes must get onto the serpent flute to advance. The first Skull Coin can be collected by body slamming on a bongo that leads to a green bird, along with the coin and a Helmet Bird. When the team get off of the serpent flute, the first secret area can be found. It is located above the exit.
-
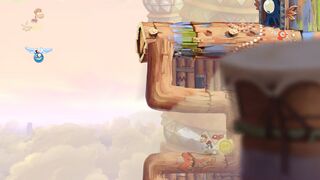
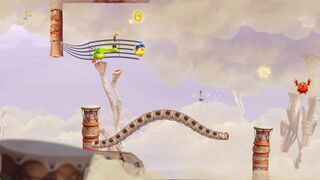
 The first area of the level.
 -
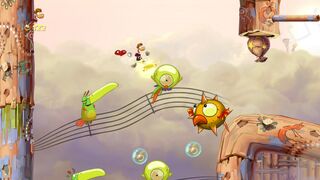
 Spiky birds will appear throughout the level.


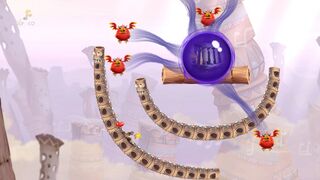
Secret area 1

The team has to wait for the right time to get onto a circling serpent flute to destroy the Red Birds. Once done, the Electoon cage can be broken.
Area 2
After body slamming a wooden barricade, another Serpent flute will appear. The second Skull Coin can be found by going to the left where Darktoons are attached to a high pillar and an electrical wire. The players will have to be quick in getting back on the Serpent flute. Shortly, another Serpent flute will appear, and can be useful for avoiding the electrical shocks. Once the team gets to the exit, they can first use the Swingman to reach the third coin.
-
 The second Skull Coin, located in the second area.
 -
 The third Skull Coin.


Area 3
This time, to get to the exit, the team must progress vertically, still with the assistance of different serpent flutes. As the heroes continue, they will have to avoid electrical shocks and spiky birds. Later, the team will aid the help of another serpent flute to get to the exit. If the player touches the grass scenery near the exit, a Blue Punch appears in the form of a bubble.
-
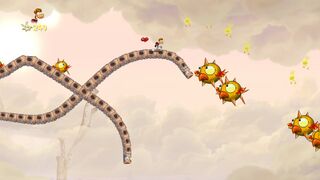
 The third area of the level.
 -
 Green birds.
 -
 The ending part of the area.


Area 4
If the player collected the Blue Punch in the last area, it will prove to be very useful for destroying barricades and bad birds. The fourth Skull Coin can be acquired by timing a body slam on the first bongo of the area. The fifth Skull Coin can be retrieved by quickly shooting a switch to make the Helmet Birds disappear and dropping down to the left side. The sixth coin can be collected by hitting a different switch and performing walljumps on the pillar next to the switch. The serpent flutes continues to help the heroes move on to the exit. Once the end is reached, the second secret area can be found by gliding down in between two big spiky birds.
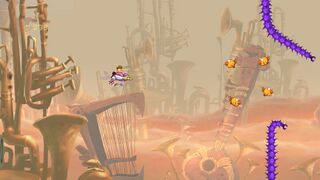
-
 The fourth area of the level.
 -
 Many spiky birds.
 -
 A Lum King.


Secret area 2
In this secret area, the team must ride on the mosquitoes to reach the cage. During the flight, they come across small birds, as well as red and purple spiky snakes. After awhile, the players need to destroy a red spiky snake to be able to break the cage open.
-
 The second secret area.
 -
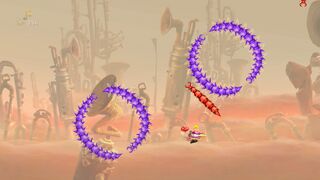
 Purple and red spiky snakes.
 -
 The red spiky snake is the enemy that needs to be destroyed to break open the cage.


Area 5

All the heroes need to do is defeat the two Red Birds. When completed, the Electoon cage can be broken open to end the level. The players will then pose on the photoboard as the Magician waits for the total amount of Lums that were collected.
| Snake Eyes | ||||||||
|---|---|---|---|---|---|---|---|---|
 | ||||||||
| ← Shooting Me Softly | Don't Shoot the DJ → | |||||||
Back to Origins
This level is playable in the Back to Origins mode in Rayman Legends as the fifth one from the Desert of Dijiridoos. There aren't many notable differences between the versions; except the notable differences that appear in every other Back to Origins level.
-
 The starting area.
 -
 The first Skull Coin of the level.
 -
 The first secret area.
 -
 Turnips and Lum chains appear.
 -
 The second Skull Coin.
 -
 The fourth Skull Coin is hidden behind a scenery piece.
 -
 Multiple serpent flutes will sometimes appear at the same time.
 -
 The second secret area of the level.
 -
 A red spiky snake will need to be defeated in order to break open the cage.
 -
 The fifth and final area of the level.


External links
- Snake Eyes playthrough at YouTube (PC version) (Normal walkthrough + Lums Medal)
- Snake Eyes playthrough at YouTube (PC version) (Speed Trophy)