Swinging Caves: Difference between revisions
Tags: Mobile edit Mobile web edit |
Hunchman801 (talk | contribs) There are several conflicting accounts of Rayman's birth. This revision clarifies it. Also, a pillar is not a nymph. |
||
| Line 18: | Line 18: | ||
}} | }} | ||
'''Swinging Caves''' is the sixth level of the [[Jibberish Jungle]], the first world in ''[[Rayman Origins]]''. It is part of the [[List of Rayman demos|demo]] that was released on the PlayStation Network and Xbox Live on November 9, 2011 | '''Swinging Caves''' is the sixth level of the [[Jibberish Jungle]], the first world in ''[[Rayman Origins]]''. It is mostly set in forest caves, and centers around timing jumps when avoiding [[tentacle claw]]-infested water. | ||
This level is part of the [[List of Rayman demos|demo]] that was released on the PlayStation Network and Xbox Live on November 9, 2011. The PlayStation Vita version of ''[[Rayman Origins]]'' features a [[Ghost Mode]] of it, and it is also the third playable level from the [[Jibberish Jungle]] in the [[Back to Origins]] mode of ''[[Rayman Legends]]''. | |||
Swinging Caves is notable for featuring the location of [[Rayman]]'s birth as shown in the ''[[Rayman Origins]]'' E3 2010 trailer, where he is created by [[Betilla]] the fairy. This story however contradicts other accounts of [[Rayman]]'s birth, such as the one from the ''[[Rayman 2]]'' manual and the one from the ''[[Rayman Origins]]'' website and manual. | |||
==Original version== | ==Original version== | ||
==Area 1== | ==Area 1== | ||
The heroes land, | The heroes land in a clearing, surrounded by five mysterious pillars with [[Lum (UbiArt games)|Lums]] on top. This is the location of [[Rayman]]'s birth in the ''[[Rayman Origins]]'' E3 2010 trailer, although there are several conflicting accounts of [[Rayman]]'s creation. There are many [[nenuphar]]s ahead, along with two [[Livingstone|Lividstones]]. There are two [[Skull Coin]]s near the end of the area; for the first one, the heroes will have to drop down with caution, as there is an abyss below, and the [[nenuphar]] that the heroes need to land on moves horizontally. The second [[Skull Coin|coin]] can be found to the far left of where the the first [[Skull Coin|coin]] was, hiding behind some foreground vines; coming into contact with the vines will make them disappear, making the [[Skull Coin|coin]] visible. The exit is not far from here, the heroes will need to make use of the remaining [[nenuphar]]s and perform walljumps in order to get there. | ||
<gallery widths="320px" heights="180px"> | <gallery widths="320px" heights="180px"> | ||
| Line 30: | Line 34: | ||
===[[Relic]] 1=== | ===[[Relic]] 1=== | ||
[[File:Swinging Caves first relic.png|thumb|right|320px|The first [[relic]] can be found in the foreground.]] | [[File:Swinging Caves first relic.png|thumb|right|320px|The first [[relic]] can be found in the foreground.]] | ||
The first [[relic]] can be found in the foreground directly below a [[Livingstone|Lividstone]]. | The first [[relic]] can be found in the foreground directly below a [[Livingstone|Lividstone]]. | ||
| Line 44: | Line 49: | ||
===Secret area 1=== | ===Secret area 1=== | ||
[[File:Swinging Caves 3.jpg|320px|thumb|right|The first secret area.]] | [[File:Swinging Caves 3.jpg|320px|thumb|right|The first secret area.]] | ||
There are seven [[Livingstone|Lividstones]] in this area, they all stand between wooden barriers. The heroes need to crush attack onto a large [[flower bulb]] in order to reach the top and destroy the [[Livingstone|Lividstones]]. The [[Electoon]] [[cage]] is at the bottom left of the area. | There are seven [[Livingstone|Lividstones]] in this area, they all stand between wooden barriers. The heroes need to crush attack onto a large [[flower bulb]] in order to reach the top and destroy the [[Livingstone|Lividstones]]. The [[Electoon]] [[cage]] is at the bottom left of the area. | ||
| Line 49: | Line 55: | ||
===[[Relic]] 2=== | ===[[Relic]] 2=== | ||
[[File:Swinging Caves second relic.png|thumb|left|320px|The second [[relic]] can be found just to the right of [[Rayman]].]] | |||
The second [[relic]] can be found in the background just over a pond. It is camouflaged, so it can be hard to spot. | The second [[relic]] can be found in the background just over a pond. It is camouflaged, so it can be hard to spot. | ||
{{Clear}} | {{Clear}} | ||
| Line 56: | Line 63: | ||
==Area 3== | ==Area 3== | ||
[[File:Swinging Caves 5.jpg|320px|thumb|left|The third area of the level.]] | [[File:Swinging Caves 5.jpg|320px|thumb|left|The third area of the level.]] | ||
As the heroes enter this very short area, they will encounter some water currents, and eventually descend to a vine. Once the heroes grab onto the vine and drop down to a [[nenuphar]], they will need to be careful, as there is an abyss below. The fourth [[Skull Coin]] is in this area at the bottom left of a wall, the heroes will need to walljump as soon as they collect it. The second secret area is located to the right of the [[nenuphar]], and like the first secret, there are foreground vines hiding the door. Once completed, the heroes can use the [[Swingman]] to advance to the exit, guarded by a [[Livingstone|Lividstone]]. | As the heroes enter this very short area, they will encounter some water currents, and eventually descend to a vine. Once the heroes grab onto the vine and drop down to a [[nenuphar]], they will need to be careful, as there is an abyss below. The fourth [[Skull Coin]] is in this area at the bottom left of a wall, the heroes will need to walljump as soon as they collect it. The second secret area is located to the right of the [[nenuphar]], and like the first secret, there are foreground vines hiding the door. Once completed, the heroes can use the [[Swingman]] to advance to the exit, guarded by a [[Livingstone|Lividstone]]. | ||
| Line 62: | Line 70: | ||
===Secret area 2=== | ===Secret area 2=== | ||
[[File:Swinging Caves 6.jpg|320px|thumb|right|The second secret area.]] | [[File:Swinging Caves 6.jpg|320px|thumb|right|The second secret area.]] | ||
In this relatively dark place, the heroes will have to destroy three [[Livingstone|Lividstones]], and a [[hunter]]. Once all are defeated, the [[cage]] at the far left of the area can be broken. | In this relatively dark place, the heroes will have to destroy three [[Livingstone|Lividstones]], and a [[hunter]]. Once all are defeated, the [[cage]] at the far left of the area can be broken. | ||
| Line 68: | Line 77: | ||
==Area 4== | ==Area 4== | ||
[[File:Swinging Caves 7.jpg|320px|thumb|left|The fourth area.]] | [[File:Swinging Caves 7.jpg|320px|thumb|left|The fourth area.]] | ||
In this final area before reaching the [[cage]], the heroes will need to ascend in order to reach the exit. First, the [[Swingman]] will assist them in reaching a [[flower bulb]], and then they will be lead to another [[Swingman]]. After using it to ascend to a vine, the heroes continue to pass a couple of platforms; the second platform has a geyser at the end, which will push the heroes to the exit. | In this final area before reaching the [[cage]], the heroes will need to ascend in order to reach the exit. First, the [[Swingman]] will assist them in reaching a [[flower bulb]], and then they will be lead to another [[Swingman]]. After using it to ascend to a vine, the heroes continue to pass a couple of platforms; the second platform has a geyser at the end, which will push the heroes to the exit. | ||
| Line 101: | Line 111: | ||
Swinging Caves - Back to Origins 2.jpg|A [[Psychlops]] has been added to this location. | Swinging Caves - Back to Origins 2.jpg|A [[Psychlops]] has been added to this location. | ||
Swinging Caves - Back to Origins 3.jpg|The platform needed to reach the [[Skull Coin]] has been increased in size making it easier to land on it. | Swinging Caves - Back to Origins 3.jpg|The platform needed to reach the [[Skull Coin]] has been increased in size making it easier to land on it. | ||
Swinging Caves - Back to Origins 4.jpg|[[Teensie]]s have replaced many of the [[Skull Coin]] locations. | Swinging Caves - Back to Origins 4.jpg|[[Teensie]]s have replaced many of the [[Skull Coin]] locations. | ||
Swinging Caves - Back to Origins 5.jpg|The lightning has been improved in several areas. | Swinging Caves - Back to Origins 5.jpg|The lightning has been improved in several areas. | ||
Swinging Caves - Back to Origins 6.jpg|[[Turnip]]s have been added. | Swinging Caves - Back to Origins 6.jpg|[[Turnip]]s have been added. | ||
Swinging Caves - Back to Origins 8.jpg|There are no [[Spiky platform (Rayman Origins)|spiky platforms]] to be found in [[Back to Origins]]. | Swinging Caves - Back to Origins 8.jpg|There are no [[Spiky platform (Rayman Origins)|spiky platforms]] to be found in [[Back to Origins]]. | ||
Swinging Caves - Back to Origins 9.jpg|Many of the foreground elements have been removed or re-positioned to show more of the level. | Swinging Caves - Back to Origins 9.jpg|Many of the foreground elements have been removed or re-positioned to show more of the level. | ||
Revision as of 16:25, 10 November 2023
| Swinging Caves | |||||||||||
|---|---|---|---|---|---|---|---|---|---|---|---|
 | |||||||||||
| ← Go With The Flow | Over the Rainbow → | ||||||||||
 Jibberish Jungle Jibberish Jungle
| |||||||||||
   
|

|

| |||||||||
   
|
|
  
| |||||||||

|

| ||||||||||

Swinging Caves is the sixth level of the Jibberish Jungle, the first world in Rayman Origins. It is mostly set in forest caves, and centers around timing jumps when avoiding tentacle claw-infested water.
This level is part of the demo that was released on the PlayStation Network and Xbox Live on November 9, 2011. The PlayStation Vita version of Rayman Origins features a Ghost Mode of it, and it is also the third playable level from the Jibberish Jungle in the Back to Origins mode of Rayman Legends.
Swinging Caves is notable for featuring the location of Rayman's birth as shown in the Rayman Origins E3 2010 trailer, where he is created by Betilla the fairy. This story however contradicts other accounts of Rayman's birth, such as the one from the Rayman 2 manual and the one from the Rayman Origins website and manual.
Original version
Area 1
The heroes land in a clearing, surrounded by five mysterious pillars with Lums on top. This is the location of Rayman's birth in the Rayman Origins E3 2010 trailer, although there are several conflicting accounts of Rayman's creation. There are many nenuphars ahead, along with two Lividstones. There are two Skull Coins near the end of the area; for the first one, the heroes will have to drop down with caution, as there is an abyss below, and the nenuphar that the heroes need to land on moves horizontally. The second coin can be found to the far left of where the the first coin was, hiding behind some foreground vines; coming into contact with the vines will make them disappear, making the coin visible. The exit is not far from here, the heroes will need to make use of the remaining nenuphars and perform walljumps in order to get there.
-
 The first area.

Relic 1

The first relic can be found in the foreground directly below a Lividstone.
Area 2
The heroes must use the Swingman to pass the water. The first secret area can be found to the top left of a platform where three Lividstones are located. Afterwards, the heroes can proceed to a large body of tentacle claw-infested water. In order proceed, the heroes will need to jump on the moving nenuphars. Taking the higher path will result in having to activate a flower bulb; using it will lead to the third Skull Coin located underneath a platform, which will attempt to crush the heroes. The exit can be found nearby, but the heroes will need to dodge a tentacle claw in another body of water, then climb up and defeat two Lividstones along the way.
-
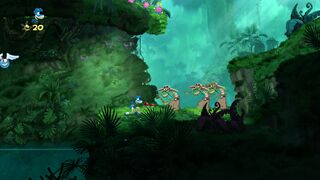 A group of Lividstones in the second area.
 -
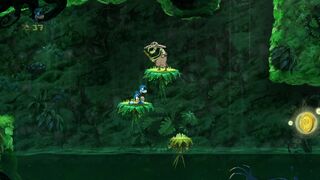 The third Skull Coin, guarded by a tentacle claw.


Secret area 1

There are seven Lividstones in this area, they all stand between wooden barriers. The heroes need to crush attack onto a large flower bulb in order to reach the top and destroy the Lividstones. The Electoon cage is at the bottom left of the area.
Relic 2

The second relic can be found in the background just over a pond. It is camouflaged, so it can be hard to spot.
Area 3

As the heroes enter this very short area, they will encounter some water currents, and eventually descend to a vine. Once the heroes grab onto the vine and drop down to a nenuphar, they will need to be careful, as there is an abyss below. The fourth Skull Coin is in this area at the bottom left of a wall, the heroes will need to walljump as soon as they collect it. The second secret area is located to the right of the nenuphar, and like the first secret, there are foreground vines hiding the door. Once completed, the heroes can use the Swingman to advance to the exit, guarded by a Lividstone.
Secret area 2

In this relatively dark place, the heroes will have to destroy three Lividstones, and a hunter. Once all are defeated, the cage at the far left of the area can be broken.
Area 4

In this final area before reaching the cage, the heroes will need to ascend in order to reach the exit. First, the Swingman will assist them in reaching a flower bulb, and then they will be lead to another Swingman. After using it to ascend to a vine, the heroes continue to pass a couple of platforms; the second platform has a geyser at the end, which will push the heroes to the exit.
Area 5
The heroes have to battle several Lividstones scattered throughout the area. Once they are defeated, the cage can be broken , thus ending the level. The Magician will then wait as the total amount of Lums that were collected throughout the level are counted, as the heroes pose on a photoboard.
-
 The final area.
 -
 The cage in the final area.


| Swinging Caves | ||||||||
|---|---|---|---|---|---|---|---|---|
 | ||||||||

| ||||||||
| ← Hi-Ho Moskito! | Playing in the Shade → | |||||||
| Jibberish Jungle
| ||||||||

|
||||||||

|

| |||||||

|

| |||||||
Back to Origins
In the Back to Origins version, the only notable differences are some of the Rayman Legends elements that replace some from the game.
-
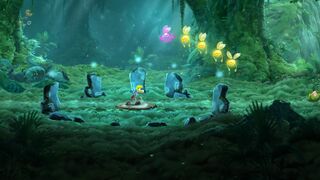 More Lums have been added to the level.
 -
 A Psychlops has been added to this location.
 -
 The platform needed to reach the Skull Coin has been increased in size making it easier to land on it.
 -
 Teensies have replaced many of the Skull Coin locations.
 -
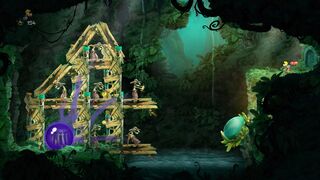 The lightning has been improved in several areas.
 -
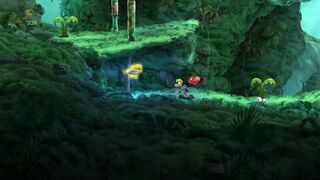 Turnips have been added.
 -
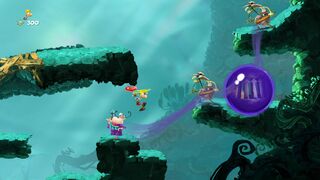 There are no spiky platforms to be found in Back to Origins.
 -
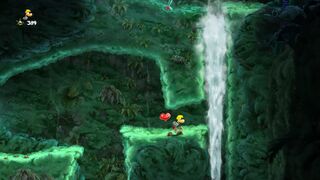 Many of the foreground elements have been removed or re-positioned to show more of the level.
 -
 The final area of the level.


Trivia
- If the player collects all of the Electoons in this level and the previous levels, the count will be at 27. It would be enough for the first Tricky Treasure level, Can't Catch Me! to be unlocked.
External links
- Swinging Caves playthrough at YouTube (PC version) (Normal walkthrough + Lums Medal)
- Swinging Caves playthrough at YouTube (PC version) (Speed Trophy)
- Swinging Caves playthrough at YouTube (Sony PlayStation 3's DEMO version) (Normal walkthrough + Lums Medal)
- Swinging Caves playthrough at YouTube (Sony PlayStation 3's DEMO version) (Speed Trophy)