Freaking Flipper: Difference between revisions
Spiraldoor (talk | contribs) mNo edit summary |
Hunchman801 (talk | contribs) Added language links |
||
| (29 intermediate revisions by 10 users not shown) | |||
| Line 1: | Line 1: | ||
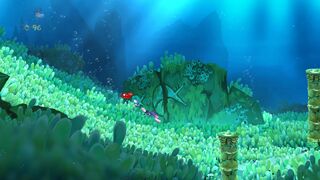
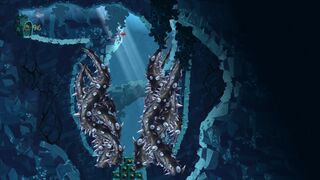
'''Freaking Flipper''' is the fourth level of the [[Sea of Serendipity]], the fourth world in ''[[Rayman Origins]]''. Here, the heroes continue to [[Swimming|swim]] through the underwater caverns. The PlayStation Vita version of ''[[Rayman Origins]]'' features a [[Ghost Mode]] of this level. This level is the second from this world, and the twenty-fifth overall, to be included in the [[Back to Origins]] mode in ''[[Rayman Legends]]''. | |||
==Original version== | |||
{{ROLevel | |||
| name = Freaking Flipper | |||
| image = [[File:25 freaking flipper.jpg|center|320px|Freaking Flipper]] | |||
| preceded by = [[Pirate's Treasure!]] | |||
| followed by = [[Bad Bubbles and Beyond]] | |||
| world = [[Sea of Serendipity]] | |||
| medallion slot 1 = Cage | |||
| medallion slot 2 = Cage | |||
| medallion slot 3 = Cage | |||
| medallion slot 4 = Lums | |||
| medallion slot 4 number = 150 | |||
| medallion slot 5 = Lums | |||
| medallion slot 5 number = 300 | |||
| medallion slot 6 = Time | |||
| medallion slot 6 number = 2:20 | |||
| medal = 350 | |||
| cup = 1:57 | |||
| skull coins = 6 | |||
| relics = 3 | |||
| format numbers = true | |||
}} | |||
{{ | ===Area 1=== | ||
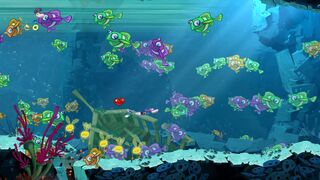
The heroes begin by dropping down into water where a school of [[friendly fish]] can be found. The [[Friendly fish|fish]] sing their tune once the heroes enter the water. The first [[Skull Coin]] can be collected by [[swimming]] downwards through a tight space between two platforms. As the heroes progress, no more [[fish]] can be seen. There are [[jellyfish]] and a [[rockfish]] that will try to eat the heroes by attempting to inhale them. The exit can be found not too far from here. | |||
<gallery widths="320px" heights="180px"> | |||
Freaking Flipper 1.jpg|The school of singing [[friendly fish]]. | |||
Freaking Flipper 2.jpg|[[Jellyfish]] are dangerous to touch. | |||
</gallery> | |||
====Relic 1==== | |||
Just after the heroes enter this area, the first [[relic]] can be found below, next to a vertical tight space where the first [[Skull Coin]] is found. | |||
<gallery widths="320px" heights="180px"> | |||
Freaking Flipper first relic.png|The first relic can be found below [[Rayman]], just to the right of the tight space. | |||
</gallery> | |||
===Area 2=== | |||
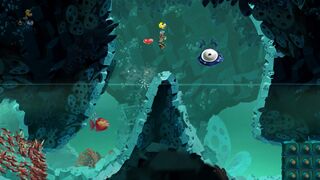
The heroes will need to avoid the [[swordfish]], which are hiding near the beginning of the area. The second [[Skull Coin]] is located around several [[spiky shell]]s and a [[jellyfish]]. As the heroes begin to [[Swimming|swim]] deeper, they will encounter more [[swordfish]] and [[rockfish]]. The first secret area can be found to the right of the first [[rockfish]] by [[swimming]] over it. The heroes will then need to [[Swimming|swim]] downwards, past all the [[rockfish]], in order to find the exit. | |||
<gallery widths="320px" heights="180px"> | |||
Freaking Flipper 3.jpg|A [[swordfish]]. | |||
Freaking Flipper 4.jpg|Spikes will protrude from a [[spiky shell]] if the heroes are nearby. | |||
Freaking Flipper 5.jpg|The first secret area is hiding behind the sea foreground. | |||
Freaking Flipper 8.jpg|These [[rockfish]] will attempt to inhale the heroes and eat them. | |||
</gallery> | |||
====Secret area 1==== | |||
The heroes need to hurry as they defeat several kinds of enemies, as a swarm of fatal-to-the-touch [[flying fish]] are following them. Once they escape the swarm and defeat the enemies, the [[Electoon]] [[cage]] can be broken. | |||
<gallery widths="320px" heights="180px"> | |||
Freaking Flipper 6.jpg|The first secret area. | |||
Freaking Flipper 7.jpg|[[Psychlops]] will need to be defeated along the way. | |||
</gallery> | |||
===Area 3=== | |||
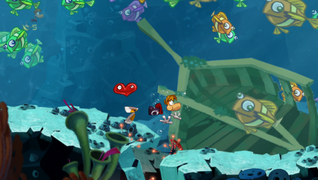
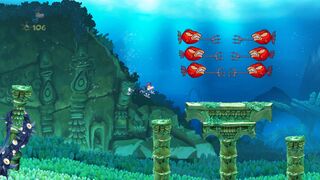
The heroes will need to break the blocks which obstruct their path in order to proceed. The third [[Skull Coin]] can be retrieved by hitting two TNT crates and waiting for them to explode, then quickly collecting the [[Skull Coin|coin]] before the solid wooden crate crushes the heroes. Afterwards, a strong current will push the heroes close to the exit, where they will need to watch out for a [[blowfish]] standing in their way. | |||
<gallery widths="320px" heights="180px"> | |||
Freaking Flipper 9.jpg|The TNT crates will explode after a few seconds if the heroes hit them. | |||
Freaking Flipper 10.jpg|A [[blowfish]] blowing up. | |||
</gallery> | |||
====Relic 2==== | |||
[[File:Freaking Flipper second relic.png|thumb|320px|The second [[relic]] can be found in the window below the TNT crate and the [[Skull Coin]].]] | |||
The second [[relic]] can be found in this area, just below the third [[Skull Coin]] and the TNT crates. | |||
{{clear}} | |||
===Area 4=== | |||
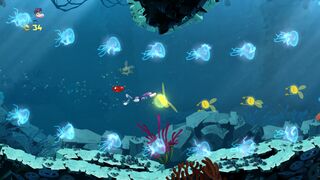
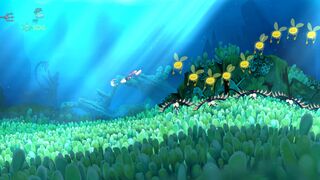
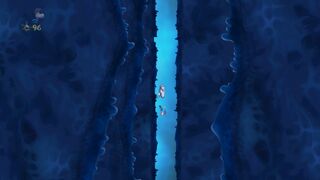
This area tests the [[swimming]] ability of the heroes. Another strong current takes them downwards, but this time there are several [[sea anemone]]s along the way. The fourth [[Skull Coin]] can be found in the middle of two [[Sea anemone|anemones]]. After the heroes get through the current, they will need to [[Swimming|swim]] deeper while passing more [[rockfish]] and [[sea anemone]]s. | |||
<gallery widths="320px" heights="180px"> | |||
Freaking Flipper 11.jpg|[[Sea anemone]]s. | |||
Freaking Flipper 12.jpg|The [[sea anemone]]s will vary in length. | |||
</gallery> | |||
===Area 5=== | |||
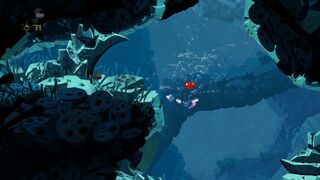
As the heroes enter this area, an [[Electoon]] immediately cries out for help. The second secret area can be found by destroying the lower pillar at the start of the area. Once the [[Electoon]]s have been saved, the heroes can proceed. Throughout the area, the heroes will encounter more pillars and many of this world's enemies. Some of those pillars may crush the heroes if their lower area is broken. The fifth [[Skull Coin]] of the level can be found by waiting for two large pillars being held by [[Darkroot]]s to move out of the way. Then, the [[Skull Coin|coin]] can be collected. The sixth [[Skull Coin]] can be collected by quickly destroying part of two small pillars. The exit can be found not too far from the [[Skull Coin|coin]]. | |||
<gallery widths="320px" heights="180px"> | |||
Freaking Flipper 13.jpg|The fifth area. | |||
Freaking Flipper 16.jpg|A group of [[jellyfish]] moving around in a circle. | |||
Freaking Flipper 17.jpg|[[Darkroot]]s hold some pillars. | |||
Freaking Flipper 18.jpg|Several [[redfish]]. | |||
Freaking Flipper 19.jpg|Little [[Antitoon|Darktoons]]. | |||
</gallery> | |||
====Secret area 2==== | |||
All the heroes will need to do is perform a [[crush attack]] in the right spot, dropping a long distance and crushing through many blocks. Once they reach the bottom, they will also crush the [[Psychlops]] and the [[Electoon]] [[cage]]. | |||
<gallery widths="320px" heights="180px"> | |||
Freaking Flipper 14.jpg|The [[crush attack]] will need to be right on target. | |||
Freaking Flipper 15.jpg|The deep pit that will eventually lead to the [[Electoon]] [[cage]]. | |||
</gallery> | |||
====Relic 3==== | |||
[[File:Freaking Flipper third relic.png|thumb|320px|The third relic can be found in the foreground, just below [[Rayman]]'s feet.]] | |||
The third [[relic]] can be found in this area. It is located in the foreground, just past the [[jellyfish]]. This one is camouflaged in the reef, so it can be difficult to spot. | |||
{{clear}} | |||
===Area 6=== | |||
[[File:Freaking Flipper 20.jpg|thumb|320px|The sixth and final area.]] | |||
The heroes will need to defeat the lone [[blowfish]] and the several [[redfish]] in order to break the [[Electoon]] [[cage]], which will end the level. Afterwards, they will pose on the [[The Photographer|photoboard]] while [[The Magician (Rayman Origins)|the Magician]] counts the total number of [[Lum (UbiArt games)|Lums]] collected throughout the level. | |||
{{Clear}} | |||
==Back to Origins== | |||
{{RLLevel | |||
| name = Freaking Flipper | |||
| difficulty = 2 | |||
| image = [[File:Freaking Flipper - Back to Origins.png|center|320px|Freaking Flipper]] | |||
| preceded by = [[My Heartburn's for You#Back to Origins|My Heartburn's for You]] | |||
| followed by = [[Swimming with Stars#Back to Origins|Swimming with the Stars]] | |||
| world = [[Sea of Serendipity]] | |||
| teensies = 10 | |||
| bronze cup = 150 | |||
| silver cup = 300 | |||
| lucky ticket = 450 | |||
| gold cup = 600 | |||
| format numbers = true | |||
}} | |||
This level is playable in the [[Back to Origins]] mode in ''[[Rayman Legends]]'' as the first one from the [[Sea of Serendipity]]. There are not many notable differences between the versions, except for the usual differences that appear in every other [[Back to Origins]] level. | |||
<gallery widths="320px" heights="180px"> | |||
Freaking Flipper - Back to Origins 1.jpg|A group of singing [[friendly fish]]. | |||
Freaking Flipper - Back to Origins 2.jpg|[[Lum (UbiArt games)|Lum]] chains in between [[jellyfish]]. | |||
Freaking Flipper - Back to Origins 3.jpg|[[Spiky shell]]s can be dangerous if a hero gets close to them. | |||
Freaking Flipper - Back to Origins 4.jpg|A [[cage]]d [[Teensie]] next to the first secret area. | |||
Freaking Flipper - Back to Origins 5.jpg|The first secret area of the level. | |||
Freaking Flipper - Back to Origins 6.jpg|thumb|center|TNT crates will explode if a hero hits one. | |||
Freaking Flipper - Back to Origins 7.jpg|TNT crates around a [[Skull Coin]]. | |||
Freaking Flipper - Back to Origins 8.jpg|A strong current will push the heroes down. | |||
Freaking Flipper - Back to Origins 9.jpg|A [[sea anemone]] around a [[Teensie]] [[cage]]. | |||
Freaking Flipper - Back to Origins 10.jpg|The second secret area with its long pit. | |||
Freaking Flipper - Back to Origins 11.jpg|The fifth area of the level. | |||
Freaking Flipper - Back to Origins 12.jpg|Several [[blowfish]]. | |||
Freaking Flipper - Back to Origins 13.jpg|The final area. | |||
</gallery> | |||
==Names in other languages== | |||
{{Names | |||
|en=Freaking Flipper | |||
|ar=زعنفة استثنائية | |||
|zh_hans=恼人海鳍 | |||
|cs=Zatracená ploutev | |||
|da=Forbandede flipper | |||
|nl=Geflipte flipper | |||
|fi=Senkin delfiini | |||
|fr=Palme farfelue | |||
|de=Flinke Flosse | |||
|hu=Rémült uszonyos | |||
|it=Pinna da paura | |||
|ja=フリッパー! | |||
|ja_S=''[[Rayman Origins]]'' | |||
|ja_2=「海に潜むワナ」 | |||
|ja_2_S=''[[Rayman Legends]]'' | |||
|no=Forbaskede Flipper | |||
|pl=Przeklęta płetwa | |||
|pt=Golfinho marinho | |||
|pt_S=''[[Rayman Origins]]'' | |||
|pt_2=Aloprando o golfinho | |||
|pt_2_S=''[[Rayman Legends]]'' | |||
|ru=Вот так плавник | |||
|es=El delfín sinfín | |||
|sv=Som fisken i vattnet | |||
}} | |||
==External links== | |||
* [https://www.youtube.com/watch?v=exp4d1TS7Os Freaking Flipper playthrough at YouTube (PC version) (Normal walkthrough + Lums Medal)] | |||
* [https://www.youtube.com/watch?v=wLZVOvFDZ50 Freaking Flipper playthrough at YouTube (PC version) (Speed Trophy)] | |||
* [https://www.youtube.com/watch?v=cXJZzL5vc8k Freaking Flipper's ''Rayman Legends'' playthrough at YouTube (PC version)] | |||
{{RaymanOriginslocations}} | |||
{{RaymanLegendsLocations}} | |||
[[fr:Palme farfelue]] | [[fr:Palme farfelue]] | ||
[[hu:Rémült uszonyos]] | |||
[[pl:Przeklęta płetwa]] | |||
[[Category:Places from Rayman Origins]] | [[Category:Places from Rayman Origins]] | ||
[[Category:Places from Rayman Legends]] | |||
Latest revision as of 15:43, 27 March 2026
Freaking Flipper is the fourth level of the Sea of Serendipity, the fourth world in Rayman Origins. Here, the heroes continue to swim through the underwater caverns. The PlayStation Vita version of Rayman Origins features a Ghost Mode of this level. This level is the second from this world, and the twenty-fifth overall, to be included in the Back to Origins mode in Rayman Legends.
Original version
| Freaking Flipper | |||||
|---|---|---|---|---|---|
 | |||||
| ← Pirate's Treasure! | Bad Bubbles and Beyond → | ||||
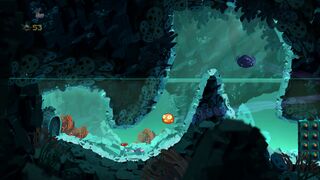
Area 1
The heroes begin by dropping down into water where a school of friendly fish can be found. The fish sing their tune once the heroes enter the water. The first Skull Coin can be collected by swimming downwards through a tight space between two platforms. As the heroes progress, no more fish can be seen. There are jellyfish and a rockfish that will try to eat the heroes by attempting to inhale them. The exit can be found not too far from here.
-
 The school of singing friendly fish.
 -
 Jellyfish are dangerous to touch.


Relic 1
Just after the heroes enter this area, the first relic can be found below, next to a vertical tight space where the first Skull Coin is found.
-
 The first relic can be found below Rayman, just to the right of the tight space.

Area 2
The heroes will need to avoid the swordfish, which are hiding near the beginning of the area. The second Skull Coin is located around several spiky shells and a jellyfish. As the heroes begin to swim deeper, they will encounter more swordfish and rockfish. The first secret area can be found to the right of the first rockfish by swimming over it. The heroes will then need to swim downwards, past all the rockfish, in order to find the exit.
-
 A swordfish.
 -
 Spikes will protrude from a spiky shell if the heroes are nearby.
 -
 The first secret area is hiding behind the sea foreground.
 -
 These rockfish will attempt to inhale the heroes and eat them.


Secret area 1
The heroes need to hurry as they defeat several kinds of enemies, as a swarm of fatal-to-the-touch flying fish are following them. Once they escape the swarm and defeat the enemies, the Electoon cage can be broken.
-
 The first secret area.
 -
 Psychlops will need to be defeated along the way.


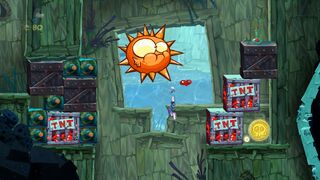
Area 3
The heroes will need to break the blocks which obstruct their path in order to proceed. The third Skull Coin can be retrieved by hitting two TNT crates and waiting for them to explode, then quickly collecting the coin before the solid wooden crate crushes the heroes. Afterwards, a strong current will push the heroes close to the exit, where they will need to watch out for a blowfish standing in their way.
-
 The TNT crates will explode after a few seconds if the heroes hit them.
 -
 A blowfish blowing up.


Relic 2

The second relic can be found in this area, just below the third Skull Coin and the TNT crates.
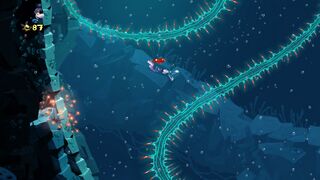
Area 4
This area tests the swimming ability of the heroes. Another strong current takes them downwards, but this time there are several sea anemones along the way. The fourth Skull Coin can be found in the middle of two anemones. After the heroes get through the current, they will need to swim deeper while passing more rockfish and sea anemones.
-
-
 The sea anemones will vary in length.


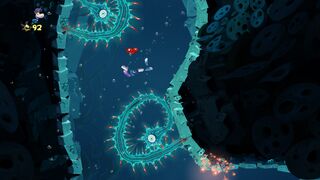
Area 5
As the heroes enter this area, an Electoon immediately cries out for help. The second secret area can be found by destroying the lower pillar at the start of the area. Once the Electoons have been saved, the heroes can proceed. Throughout the area, the heroes will encounter more pillars and many of this world's enemies. Some of those pillars may crush the heroes if their lower area is broken. The fifth Skull Coin of the level can be found by waiting for two large pillars being held by Darkroots to move out of the way. Then, the coin can be collected. The sixth Skull Coin can be collected by quickly destroying part of two small pillars. The exit can be found not too far from the coin.
-
 The fifth area.
 -
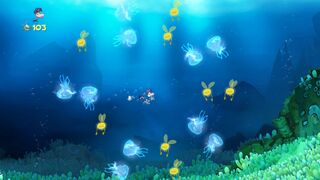 A group of jellyfish moving around in a circle.
 -
 Darkroots hold some pillars.
 -
 Several redfish.
 -
 Little Darktoons.


Secret area 2
All the heroes will need to do is perform a crush attack in the right spot, dropping a long distance and crushing through many blocks. Once they reach the bottom, they will also crush the Psychlops and the Electoon cage.
-
 The crush attack will need to be right on target.
 -


Relic 3

The third relic can be found in this area. It is located in the foreground, just past the jellyfish. This one is camouflaged in the reef, so it can be difficult to spot.
Area 6

The heroes will need to defeat the lone blowfish and the several redfish in order to break the Electoon cage, which will end the level. Afterwards, they will pose on the photoboard while the Magician counts the total number of Lums collected throughout the level.
Back to Origins
| Freaking Flipper | ||||||||
|---|---|---|---|---|---|---|---|---|
 | ||||||||
| ← My Heartburn's for You | Swimming with the Stars → | |||||||
This level is playable in the Back to Origins mode in Rayman Legends as the first one from the Sea of Serendipity. There are not many notable differences between the versions, except for the usual differences that appear in every other Back to Origins level.
-
 A group of singing friendly fish.
 -

-
 Spiky shells can be dangerous if a hero gets close to them.
 -

-
 The first secret area of the level.
 -
 TNT crates will explode if a hero hits one.
 -
 TNT crates around a Skull Coin.
 -
 A strong current will push the heroes down.
 -

-
 The second secret area with its long pit.
 -
 The fifth area of the level.
 -
 Several blowfish.
 -
 The final area.


Names in other languages
| Language | Name |
|---|---|
| English | Freaking Flipper |
| Arabic | زعنفة استثنائية |
| Chinese (simplified) | 恼人海鳍 |
| Czech | Zatracená ploutev |
| Danish | Forbandede flipper |
| Dutch | Geflipte flipper |
| Finnish | Senkin delfiini |
| French | Palme farfelue |
| German | Flinke Flosse |
| Hungarian | Rémült uszonyos |
| Italian | Pinna da paura |
| Japanese | フリッパー! (Rayman Origins)
「海に潜むワナ」 (Rayman Legends) |
| Norwegian | Forbaskede Flipper |
| Polish | Przeklęta płetwa |
| Portuguese | Golfinho marinho (Rayman Origins)
Aloprando o golfinho (Rayman Legends) |
| Russian | Вот так плавник |
| Spanish | El delfín sinfín |
| Swedish | Som fisken i vattnet |
External links
- Freaking Flipper playthrough at YouTube (PC version) (Normal walkthrough + Lums Medal)
- Freaking Flipper playthrough at YouTube (PC version) (Speed Trophy)