Climb Out: Difference between revisions
Hunchman801 (talk | contribs) mNo edit summary |
Hunchman801 (talk | contribs) m Auto-formatting numbers |
||
| Line 1: | Line 1: | ||
'''Climb Out''' is the fifth level of the [[Ticklish Temples]], a world in ''[[Rayman Origins]]''. The level focuses on progressing upwards while avoiding the many [[spiky flower]]s, as demonstrated in the level selection hub. The PlayStation Vita version of ''[[Rayman Origins]]'' features a [[Ghost Mode]] of this level. This is the third level from this world and the fifth overall included in the [[Back to Origins]] mode in ''[[Rayman Legends]]''. | |||
==Original version== | |||
{{ROLevel | {{ROLevel | ||
| name = Climb Out | | name = Climb Out | ||
| Line 5: | Line 8: | ||
| followed by = [[Still Flowing]] | | followed by = [[Still Flowing]] | ||
| world = [[Jibberish Jungle|Ticklish Temples]] | | world = [[Jibberish Jungle|Ticklish Temples]] | ||
| medallion slot 1 = | | medallion slot 1 = Cage | ||
| medallion slot 2 = | | medallion slot 2 = Cage | ||
| medallion slot 3 = | | medallion slot 3 = Cage | ||
| medallion slot 4 = | | medallion slot 4 = Lums | ||
| medallion slot 5 = | | medallion slot 4 number = 150 | ||
| medallion slot 6 = | | medallion slot 5 = Lums | ||
| medal = | | medallion slot 5 number = 300 | ||
| cup = | | medallion slot 6 = Time | ||
| skull | | medallion slot 6 number = 2:40 | ||
| | | medal = 350 | ||
| cup = 2:12 | |||
| skull coins = 5 | |||
| relics = 3 | |||
| format numbers = true | |||
}} | }} | ||
===Area 1=== | |||
= | |||
==Area 1== | |||
The heroes start in a relatively quiet and dark place, but [[Darkroot]]s quickly begin to ambush them. They will need to board the collapsing platform and safely descend to a body of water below. The exit can be found to their right. | The heroes start in a relatively quiet and dark place, but [[Darkroot]]s quickly begin to ambush them. They will need to board the collapsing platform and safely descend to a body of water below. The exit can be found to their right. | ||
| Line 27: | Line 31: | ||
</gallery> | </gallery> | ||
===Relic 1=== | ====Relic 1==== | ||
The first [[relic]] can be found near the exit. | The first [[relic]] can be found near the exit. | ||
<gallery widths="320px" heights="180px"> | |||
Climb Out first relic.png|The first [[relic]] is located in front of [[Rayman]] at eye level. | |||
</gallery> | |||
==Area 2== | ===Area 2=== | ||
The heroes will now begin to climb in this area. [[Nenuphar]]s and [[Caterpillar (UbiArt Games)|caterpillars]] will aid them in the process. The [[#Secret area 1|first secret area]] can be found by using the [[Swingman]] to reach a platform covered with dark foreground vines. As the heroes continue to climb, the first [[Skull Coin]] can be collected by using a nearby [[Swingman]] while avoiding the [[spiky flower]]s. The second [[Skull Coin]] can be acquired by proceeding left from where the first [[Skull Coin]] was found and using [[nenuphar]]s to reach it. The exit can be found nearby, next to three [[Antitoon|Darktoons]]. | The heroes will now begin to climb in this area. [[Nenuphar]]s and [[Caterpillar (UbiArt Games)|caterpillars]] will aid them in the process. The [[#Secret area 1|first secret area]] can be found by using the [[Swingman]] to reach a platform covered with dark foreground vines. As the heroes continue to climb, the first [[Skull Coin]] can be collected by using a nearby [[Swingman]] while avoiding the [[spiky flower]]s. The second [[Skull Coin]] can be acquired by proceeding left from where the first [[Skull Coin]] was found and using [[nenuphar]]s to reach it. The exit can be found nearby, next to three [[Antitoon|Darktoons]]. | ||
| Line 42: | Line 46: | ||
</gallery> | </gallery> | ||
===Secret area 1=== | ====Secret area 1==== | ||
The heroes will need to use the [[wall run]]ning power to reach two [[Livingstone|Lividstones]]. They can then [[crush attack]] them, breaking the [[Electoon]] [[cage]] in the process. | The heroes will need to use the [[wall run]]ning power to reach two [[Livingstone|Lividstones]]. They can then [[crush attack]] them, breaking the [[Electoon]] [[cage]] in the process. | ||
| Line 50: | Line 54: | ||
</gallery> | </gallery> | ||
==Area 3== | ===Area 3=== | ||
The heroes will need to advance by climbing again; [[nenuphar]]s help in the process. The third [[Skull Coin]] can be retrieved to the right by jumping from [[nenuphar]] to [[nenuphar]] while avoiding contact with the [[spiky flower]]s. The exit can be found once the heroes reach the top of the area. | The heroes will need to advance by climbing again; [[nenuphar]]s help in the process. The third [[Skull Coin]] can be retrieved to the right by jumping from [[nenuphar]] to [[nenuphar]] while avoiding contact with the [[spiky flower]]s. The exit can be found once the heroes reach the top of the area. | ||
| Line 58: | Line 62: | ||
</gallery> | </gallery> | ||
==Area 4== | ===Area 4=== | ||
Throughout the area, there are rolling stone platforms with [[Antitoon|Darktoons]] attached to them. They can be used by the heroes to wall jump to proceed. The fourth [[Skull Coin]] can be collected by using a [[crush attack]] on a [[flower bumper]], then wall jumping against the stone platforms to their right. As they proceed, the heroes will need to use the large moving grassy platforms to perform wall jumps. The exit can be found to the left as they reach the top of the area. | Throughout the area, there are rolling stone platforms with [[Antitoon|Darktoons]] attached to them. They can be used by the heroes to wall jump to proceed. The fourth [[Skull Coin]] can be collected by using a [[crush attack]] on a [[flower bumper]], then wall jumping against the stone platforms to their right. As they proceed, the heroes will need to use the large moving grassy platforms to perform wall jumps. The exit can be found to the left as they reach the top of the area. | ||
| Line 66: | Line 70: | ||
</gallery> | </gallery> | ||
===Relic 2=== | ====Relic 2==== | ||
[[File:Climb Out second relic.png|thumb|320px|The second [[relic]] is located in the background, just in front of [[Rayman]].]] | [[File:Climb Out second relic.png|thumb|320px|The second [[relic]] is located in the background, just in front of [[Rayman]].]] | ||
| Line 73: | Line 77: | ||
{{clear}} | {{clear}} | ||
==Area 5== | ===Area 5=== | ||
This area is full of [[Antitoon|Darktoons]]. As the heroes proceed, they will be aided by more [[Caterpillar (UbiArt games)|caterpillars]], but this time, some of them are purple. These will retract once a hero lands on them, so the heroes will need to move quickly. If the heroes take the left path and perform wall jumps, they will pass some [[spiky flower]]s, where they can obtain the fifth [[Skull Coin]]. As they continue to climb, the heroes will need to use geysers to approach the exit. If the heroes board a platform on their right, which has some foreground vines, they can find the [[#Secret area 2|second secret area]]. | This area is full of [[Antitoon|Darktoons]]. As the heroes proceed, they will be aided by more [[Caterpillar (UbiArt games)|caterpillars]], but this time, some of them are purple. These will retract once a hero lands on them, so the heroes will need to move quickly. If the heroes take the left path and perform wall jumps, they will pass some [[spiky flower]]s, where they can obtain the fifth [[Skull Coin]]. As they continue to climb, the heroes will need to use geysers to approach the exit. If the heroes board a platform on their right, which has some foreground vines, they can find the [[#Secret area 2|second secret area]]. | ||
| Line 81: | Line 85: | ||
</gallery> | </gallery> | ||
===Relic 3=== | ====Relic 3==== | ||
[[File:Climb Out third relic.png|thumb|320px|The third [[relic]] is located in the center of the rolling stone platform, just above [[Rayman]].]] | [[File:Climb Out third relic.png|thumb|320px|The third [[relic]] is located in the center of the rolling stone platform, just above [[Rayman]].]] | ||
| Line 88: | Line 92: | ||
{{clear}} | {{clear}} | ||
===Secret area 2=== | ====Secret area 2==== | ||
The heroes need to ride on [[mosquito]]es to reach the [[Electoon]] [[cage]]. Throughout their flight, they must avoid being crushed by collapsing platforms. The heroes will then need to shoot projectiles at two [[hunter]]s and a [[Livingstone|Lividstone]] to disband their [[mosquito]]es and break the [[cage]]. | The heroes need to ride on [[mosquito]]es to reach the [[Electoon]] [[cage]]. Throughout their flight, they must avoid being crushed by collapsing platforms. The heroes will then need to shoot projectiles at two [[hunter]]s and a [[Livingstone|Lividstone]] to disband their [[mosquito]]es and break the [[cage]]. | ||
| Line 96: | Line 100: | ||
</gallery> | </gallery> | ||
==Area 6== | ===Area 6=== | ||
[[File:Climb Out 15.jpg|320px|thumb|The sixth area of the level.]] | [[File:Climb Out 15.jpg|320px|thumb|The sixth area of the level.]] | ||
| Line 103: | Line 107: | ||
{{Clear}} | {{Clear}} | ||
==Area 7== | ===Area 7=== | ||
[[File:Climb Out 16.jpg|320px|thumb|The seventh and final area.]] | [[File:Climb Out 16.jpg|320px|thumb|The seventh and final area.]] | ||
| Line 114: | Line 118: | ||
| name = Climb Out | | name = Climb Out | ||
| image = [[File:Climb Out - Back to Origins.png|center|320px|Climb Out]] | | image = [[File:Climb Out - Back to Origins.png|center|320px|Climb Out]] | ||
| difficulty = | | difficulty = 2 | ||
| preceded by = [[Playing in the Shade#Back to Origins|Playing in the Shade]] | | preceded by = [[Playing in the Shade#Back to Origins|Playing in the Shade]] | ||
| followed by = [[Still Flowing#Back to Origins|Still Flowing]] | | followed by = [[Still Flowing#Back to Origins|Still Flowing]] | ||
| world = [[Jibberish Jungle]] | | world = [[Jibberish Jungle]] | ||
| teensies = | | teensies = 10 | ||
| bronze cup = | | bronze cup = 150 | ||
| silver cup = | | silver cup = 300 | ||
| lucky ticket = | | lucky ticket = 450 | ||
| gold cup = | | gold cup = 600 | ||
| format numbers = true | |||
}} | }} | ||
Revision as of 21:53, 6 September 2024
Climb Out is the fifth level of the Ticklish Temples, a world in Rayman Origins. The level focuses on progressing upwards while avoiding the many spiky flowers, as demonstrated in the level selection hub. The PlayStation Vita version of Rayman Origins features a Ghost Mode of this level. This is the third level from this world and the fifth overall included in the Back to Origins mode in Rayman Legends.
Original version
| Climb Out | |||||
|---|---|---|---|---|---|
 | |||||
| ← Hunter Gatherer | Still Flowing → | ||||
Area 1
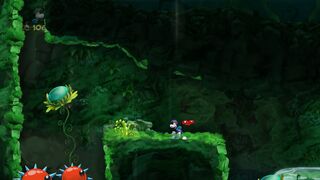
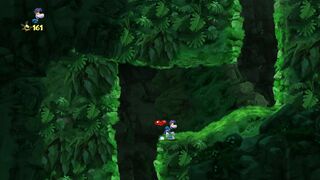
The heroes start in a relatively quiet and dark place, but Darkroots quickly begin to ambush them. They will need to board the collapsing platform and safely descend to a body of water below. The exit can be found to their right.
-
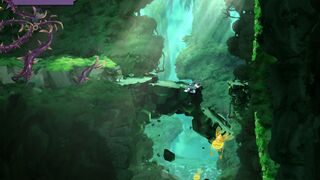 The ground will collapse here, revealing a passage beneath it.

Relic 1
The first relic can be found near the exit.

Area 2
The heroes will now begin to climb in this area. Nenuphars and caterpillars will aid them in the process. The first secret area can be found by using the Swingman to reach a platform covered with dark foreground vines. As the heroes continue to climb, the first Skull Coin can be collected by using a nearby Swingman while avoiding the spiky flowers. The second Skull Coin can be acquired by proceeding left from where the first Skull Coin was found and using nenuphars to reach it. The exit can be found nearby, next to three Darktoons.
-
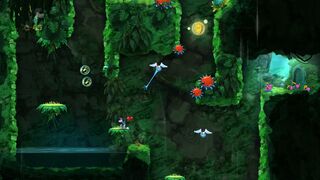 The first Skull Coin and the first secret area.
 -
 The second area of the level.


Secret area 1
The heroes will need to use the wall running power to reach two Lividstones. They can then crush attack them, breaking the Electoon cage in the process.
-
 The first secret area.
 -
 The area lights up after the Electoons are saved.


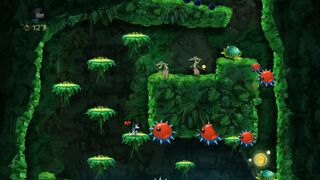
Area 3
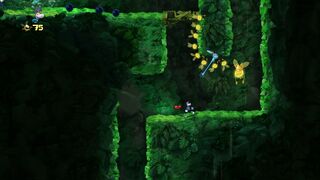
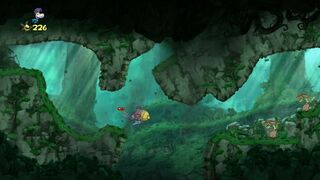
The heroes will need to advance by climbing again; nenuphars help in the process. The third Skull Coin can be retrieved to the right by jumping from nenuphar to nenuphar while avoiding contact with the spiky flowers. The exit can be found once the heroes reach the top of the area.
-
 The third area of the level.
 -
 The third Skull Coin.


Area 4
Throughout the area, there are rolling stone platforms with Darktoons attached to them. They can be used by the heroes to wall jump to proceed. The fourth Skull Coin can be collected by using a crush attack on a flower bumper, then wall jumping against the stone platforms to their right. As they proceed, the heroes will need to use the large moving grassy platforms to perform wall jumps. The exit can be found to the left as they reach the top of the area.
-
 The geysers will help the heroes in the fourth area.
 -
 The walls will begin to cave in as the heroes progress.


Relic 2

The second relic can be found near a nenuphar in this area as the heroes climb.
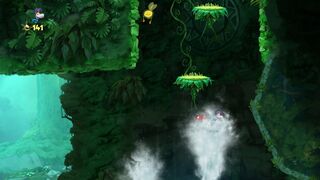
Area 5
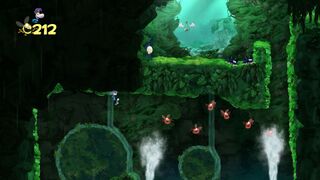
This area is full of Darktoons. As the heroes proceed, they will be aided by more caterpillars, but this time, some of them are purple. These will retract once a hero lands on them, so the heroes will need to move quickly. If the heroes take the left path and perform wall jumps, they will pass some spiky flowers, where they can obtain the fifth Skull Coin. As they continue to climb, the heroes will need to use geysers to approach the exit. If the heroes board a platform on their right, which has some foreground vines, they can find the second secret area.
-
 The fifth area.
 -
 The second secret area is hidden behind foreground vines.


Relic 3

The third relic can be found in this area; it is camouflaged in the middle of a rolling stone platform.
Secret area 2
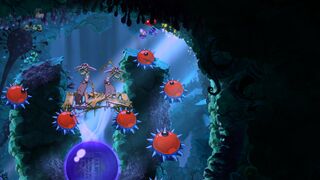
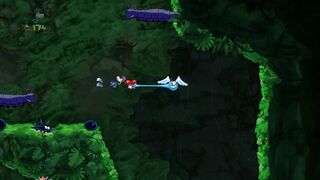
The heroes need to ride on mosquitoes to reach the Electoon cage. Throughout their flight, they must avoid being crushed by collapsing platforms. The heroes will then need to shoot projectiles at two hunters and a Lividstone to disband their mosquitoes and break the cage.
-
 The heroes will ride on the mosquitoes to reach the cage.
 -
 Two hunters and a Lividstone need to be defeated here.


Area 6

The heroes will need to move quickly, as all of the platforms with Darktoons attached will begin to collapse. Nenuphars and swingmen will aid the heroes in reaching the exit.
Area 7

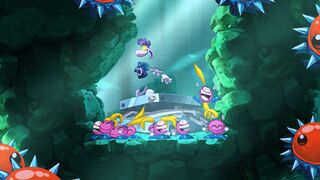
The heroes will have two options in this area; they can either defeat the four Lividstones manually or optionally hit an explosive bulb, making the platform collapse and crush them. Once all of them have been defeated, the Electoon cage can be broken, ending the level. The heroes will pose on the photoboard as the Magician counts the total number of Lums collected throughout the level.
Back to Origins
| Climb Out | ||||||||
|---|---|---|---|---|---|---|---|---|
 | ||||||||
| ← Playing in the Shade | Still Flowing → | |||||||
In the Back to Origins version, there are not many differences from the original version, except for the notable elements from Rayman Legends replacing some of the elements from the original game.
-
 The start of the level, as seen in Rayman Legends.
 -

-
 The first secret area.
 -
 To get to the Teensie, the heroes will need to take another path.
 -
 As seen between the Lividstones, turnips have been added.
 -
 The second secret area.
 -
 The end of the second secret area.
 -
 The Teensie cage is flying upwards.
 -
 The final area.


Names in other languages
| Language | Name |
|---|---|
| English | Climb Out |
| Chinese (simplified) | 爬出深渊 |
| Czech | Výlez |
| Danish | Kravl ud |
| Dutch | Klim eruit |
| Finnish | Kiivetään pois |
| French | Grimpette |
| German | Augen zu und durch |
| Hungarian | Mássz ki! |
| Italian | Fuori da lì! |
| Japanese | おりろ! (Rayman Origins)
「お落としあな穴のそこ底」 (Rayman Legends) |
| Norwegian | Klatringen |
| Polish | Wspinaczka |
| Portuguese | Escalar daqui para fora (Rayman Origins)
Escalada afora (Rayman Legends) |
| Russian | Выкарабкаться |
| Spanish | Salir trepando |
| Swedish | Klättringen |
External links
- Climb Out playthrough at YouTube (PC version) (Normal walkthrough + Lums Medal)
- Climb Out playthrough at YouTube (PC version) (Speed Trophy)