Golly G. Golem: Difference between revisions
No edit summary |
Hunchman801 (talk | contribs) "Strangely" is a bit too subjective for an encyclopedia |
||
| (41 intermediate revisions by 16 users not shown) | |||
| Line 1: | Line 1: | ||
* ''This article is about the level in [[Rayman Origins]]. For the boss, see [[Golem]].'' | |||
* ''This article is about the level in ''[[Rayman Origins]]''. | |||
{{ | '''Golly G. Golem''' is the fifth level of [[Mystical Pique]], the fifth world in ''[[Rayman Origins]]''. In this level, the heroes battle the [[Golem]], a gigantic living rock statue. This is the second level from this world, and the thirty-fourth overall, to be included in the [[Back to Origins]] painting in ''[[Rayman Legends]]''. | ||
==Original version== | |||
{{ROLevel | |||
| name = Golly G. Golem | | name = Golly G. Golem | ||
| image = [[ | | image = [[File:32 golly g golem.jpg|center|320px|Golly G. Golem]] | ||
| preceded by = [[Way of the Electoons]] | | preceded by = [[Way of the Electoons]] | ||
| followed by = [[Outta My Way]] | | followed by = [[Outta My Way]] | ||
| world = [[Mystical Pique]] | | world = [[Mystical Pique]] | ||
| medallion slot 1 = Cage | |||
| medallion slot 1 = | | medallion slot 2 = Cage | ||
| medallion slot 2 = | | medallion slot 3 = Cage | ||
| medallion slot 3 = | | medallion slot 4 = Lums | ||
| medallion slot 4 = | | medallion slot 4 number = 150 | ||
| medallion slot 5 = | | medallion slot 5 = Lums | ||
| medallion slot 6 = | | medallion slot 5 number = 300 | ||
| medal = | | medallion slot 6 = Time | ||
| cup = | | medallion slot 6 number = 2:10 | ||
| medal = 350 | |||
| cup = 1:46 | |||
| skull coins = 6 | |||
| relics = 3 | |||
| format numbers = true | |||
}} | }} | ||
'''Golly G. Golem | ===Area 1=== | ||
The heroes arrive in a snowy environment. They will need to use the [[wall run]]ning ability to climb, and a couple of [[Stone man|stone men]] block their path. The exit can be found near the second [[stone man]]. Before exiting, the first [[Skull Coin]] can be collected by using a rope to reach a platform, where [[Wall run|the power to run on walls]] can be used to reach the [[Skull Coin]]. | |||
<gallery widths="320px" heights="180px"> | |||
Golly G. Golem 1.jpg|The first area of the level. | |||
</gallery> | |||
===Area 2=== | |||
Still in a snowy environment, the heroes will need to continue climbing. The second [[Skull Coin]] can be collected by jumping on an [[explosive bulb]] and quickly obtaining the [[Skull Coin|coin]] before it falls down with the collapsing platform. As the heroes grab onto the nearby rope, the first secret area can be found to their right. After the [[Electoon]]s have been saved, the heroes can continue climbing. To reach the exit, the heroes will need to carefully time when they use the [[wall run]]ning power, as they will need to avoid [[Darkroot]]s. | |||
<gallery widths="320px" heights="180px"> | |||
Golly G. Golem 2.jpg|The second [[Skull Coin]] of the level. | |||
Golly G. Golem 4.jpg|[[Darkroot]]s will need to be avoided when using the [[wall run]]ning power. | |||
</gallery> | |||
====Secret area 1==== | |||
[[File:Golly G. Golem 3.jpg|thumb|320px|The first secret area.]] | |||
The heroes need to properly time a [[crush attack]] to defeat all of the [[Psychlops]] and break the [[Electoon]] [[cage]]. | |||
{{Clear}} | |||
===Area 3=== | |||
The heroes arrive in a cave, where they must avoid the spikes as they take advantage of the [[wall run]]ning power and use the [[fakir]]s to proceed. The third [[Skull Coin]] can be safely retrieved by using the [[Helicopter|glide]] power to avoid the spikes directly beneath the [[Skull Coin|coin]] itself. The exit can be found just to the right of the spikes. | |||
<gallery widths="320px" heights="180px"> | |||
Golly G. Golem 5.jpg|The meditating [[fakir]]s have platforms on their heads. | |||
Golly G. Golem 6.jpg|This [[explosive bulb]] will need to be hit to advance. | |||
Golly G. Golem 7.jpg|Now the heroes can use the [[wall run]] ability to progress. | |||
</gallery> | |||
====Relic 1==== | |||
[[File:Golly G. Golem first relic.png|thumb|320px|The first [[relic]] can be found below the [[fakir]] that [[Rayman]] is standing on.]] | |||
The first [[relic]] can be found in this area below a meditating [[fakir]]. | |||
{{clear}} | |||
===Area 4=== | |||
[[File:Golly G. Golem 8.jpg|thumb|320px|The falling platforms are centered around this area.]] | |||
In this snowy area, the heroes will need to climb up the moving platforms. The fourth [[Skull Coin]] is located to the lower right of the area. The fifth [[Skull Coin]] is located to the upper left of the area. The exit can be found on a platform to the upper right. | |||
{{Clear}} | |||
===Area 5=== | |||
As the heroes enter this area, they will need to defeat the three [[Antitoon|Darktoons]] in their way. The second secret area can be found by dropping down to a black rope and then jumping to the right. Afterwards, the heroes will need to constantly use the [[wall run]] ability to climb and reach the exit, while avoiding [[Darkroot]]s along the way. | |||
<gallery widths="320px" heights="180px"> | |||
Golly G. Golem 10.jpg|More [[Darkroot]]s as well as a [[Antitoon|Darktoon]]. | |||
Golly G. Golem 11.jpg|The end of the fifth area. | |||
</gallery> | |||
====Secret area 2==== | |||
[[File:Golly G. Golem 9.jpg|thumb|320px|The second secret area, full of [[fakir]]s.]] | |||
To reach the [[Electoon]] [[cage]], the heroes will need to avoid or hit the incoming [[lava rock]]s being thrown by a [[stone man]] as they climb to the top of the area; [[fakir]]s can be used as platforms to help them reach the top. Once the [[stone man]] has been defeated, the [[cage]] can be broken. The area's layout and the role of the [[stone man]] are a reference to the "25m" level of the classic arcade game ''Donkey Kong''. | |||
{{Clear}} | |||
====Relic 2==== | |||
[[File:Golly G. Golem second relic.png|thumb|320px|The second [[relic]] can be found inside the wall, just to the right of [[Rayman]].]] | |||
The second [[relic]] can be found in this area. It is located inside a wall near the [[Lum King]]. | |||
{{clear}} | |||
===Area 6=== | |||
[[File:Golly G. Golem 12.jpg|thumb|320px|The sixth [[Skull Coin]] of the level.]] | |||
Similarly to the fourth area, the heroes will need to climb up using the moving platforms. The sixth [[Skull Coin]] can be found on a long pipe between two [[Antitoon|Darktoons]], attached to the side of the pipe. Once the heroes reach the top, the exit can be found to their right. | |||
{{Clear}} | |||
====Relic 3==== | |||
[[File:Golly G. Golem third relic.png|thumb|320px|The third [[relic]] can be found on the flag located directly above [[Rayman]].]] | |||
The third [[relic]] can be found in this area. It is located on a flag near the exit. | |||
{{clear}} | |||
===Area 7=== | |||
As the heroes proceed in this cave area, they encounter the boss of [[Mystical Pique]], the [[Golem]]. He can be defeated by waiting, then using paths to reach and punch the vulnerable [[bubo]]s. Once all three [[bubo]]s have been hit, the [[Golem]] will be defeated and sink down, causing platforms, including [[Water lily|water lilies]], to appear, which the heroes can use to climb towards the exit. | |||
<gallery widths="320px" heights="180px"> | |||
Golly G. Golem 13.jpg|The boss of [[Mystical Pique]], the [[Golem]]. | |||
Golly G. Golem 14.jpg|When his weak spots have been hit, his eyes will begin to disappear. | |||
Golly G. Golem 15.jpg|More [[Darkroot]]s will appear as the [[Golem]] keeps getting hit. | |||
Golly G. Golem 16.jpg|After the [[Golem]] has been hit three times, he will sink down, causing bulbs and [[Water lily|water lilies]] to appear. | |||
</gallery> | |||
===Area 8=== | |||
[[File:Golly G. Golem 17.jpg|thumb|320px|The final area only has the [[Electoon]] [[cage]], no enemies.]] | |||
All the heroes need to do here is break the [[Electoon]] [[cage]] to finish the level. The heroes pose on the [[The Photographer|photoboard]] as [[The Magician (Rayman Origins)|the Magician]] counts the total number of [[Lum (UbiArt games)|Lums]] collected throughout the level. | |||
{{Clear}} | |||
==Back to Origins== | |||
{{RLLevel | |||
| name = Golly G. Golem | |||
| difficulty = 2 | |||
| image = [[File:Golly G. Golem - Back to Origins.png|center|320px|Golly G. Golem]] | |||
| preceded by = [[Mystical Munkeys#Back to Origins|Mystical Munkeys]] | |||
| followed by = [[Riding the Storm#Back to Origins|Riding the Storm]] | |||
| world = [[Mystical Pique]] | |||
| teensies = 10 | |||
| bronze cup = 150 | |||
| silver cup = 300 | |||
| lucky ticket = 450 | |||
| gold cup = 600 | |||
| format numbers = true | |||
}} | |||
This level is playable in the [[Back to Origins]] mode in ''[[Rayman Legends]]''. There are no notable differences between the versions apart from elements from ''[[Rayman Legends]]'' replacing some from the original game. Unusually, on the level's painting, a [[Darkroot]] with its ''[[Rayman Origins]]'' design appears. | |||
<gallery widths="320px" heights="180px"> | |||
Golly G. Golem - Back to Origins 1.jpg|The start of the level. | |||
Golly G. Golem - Back to Origins 2.jpg|A purple [[Lum (UbiArt games)|Lum]] chain. | |||
Golly G. Golem - Back to Origins 3.jpg|A [[Teensie]] [[cage]]. | |||
Golly G. Golem - Back to Origins 4.jpg|The first secret area. | |||
Golly G. Golem - Back to Origins 5.jpg|A flying [[Teensie]] [[cage]]. | |||
Golly G. Golem - Back to Origins 6.jpg|Back in the cave environment with several added [[Lum (UbiArt games)|Lum]] chains. | |||
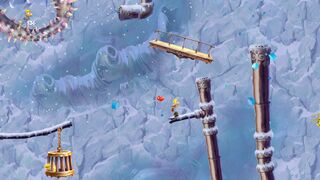
Golly G. Golem - Back to Origins 7.jpg|The [[Skull Coin]] here has been removed. | |||
Golly G. Golem - Back to Origins 8.jpg|A [[Teensie]] [[cage]] has been added here. | |||
Golly G. Golem - Back to Origins 9.jpg|The second secret area. | |||
Golly G. Golem - Back to Origins 10.jpg|Another flying [[Teensie]] [[cage]]. | |||
Golly G. Golem - Back to Origins 11.jpg|The fight against the [[Golem]] begins. | |||
Golly G. Golem - Back to Origins 12.jpg|The [[Golem]] with one hit taken. | |||
Golly G. Golem - Back to Origins 13.jpg|The [[Golem]] with two hits taken. | |||
Golly G. Golem - Back to Origins 14.jpg|The camera is more zoomed out when the [[Golem]] is defeated. | |||
Golly G. Golem - Back to Origins 15.jpg|The final area. | |||
</gallery> | |||
==Names in other languages== | |||
{{Names | |||
|en=Golly G. Golem | |||
|ar=غولي جي. غوليم | |||
|zh_hans=巨石魔像 | |||
|cs=Golem Golemácká | |||
|da=Du milde golem | |||
|nl=Achossie, golem | |||
|fi=Kappas K. Golem | |||
|fr=Un amour de golem | |||
|de=Gütiger Golem | |||
|hu=Golly G. Gólem | |||
|it=Golly G. Golem | |||
|ja=ゴーレム だって!? | |||
|ja_S=''[[Rayman Origins]]'' | |||
|ja_2=「ゴーレムのいる山奥」 | |||
|ja_2_S=''[[Rayman Legends]]'' | |||
|no=Golly G. Golem | |||
|pl=Ale w koło są Golemy | |||
|pl_S=''[[Rayman Origins]]'' | |||
|pl_2=Ale wkoło są golemy | |||
|pl_2_S=''[[Rayman Legends]]'' | |||
|pt=Poxa, Golem! | |||
|ru=Голем голимый | |||
|es=Vaya con el gólem | |||
|sv=Sten S. Stentroll | |||
}} | |||
==External links== | |||
* [https://www.youtube.com/watch?v=ivf__crRz4M Golly G. Golem playthrough at YouTube (PC version) (Normal walkthrough + Lums Medal)] | |||
* [https://www.youtube.com/watch?v=MAHrhFoTlUk Golly G. Golem playthrough at YouTube (PC version) (Speed Trophy)] | |||
* [https://www.youtube.com/watch?v=WUthQsPD_4E Golly G. Golem's ''Rayman Legends'' playthrough at YouTube (PC version)] | |||
{{ | {{RaymanOriginslocations}} | ||
{{RaymanLegendsLocations}} | |||
[[fr:Un amour de golem]] | [[fr:Un amour de golem]] | ||
[[hu:Golly G. Gólem]] | |||
[[pl:Ale wkoło są golemy]] | |||
[[Category:Places from Rayman Origins]] | [[Category:Places from Rayman Origins]] | ||
[[Category:Places from Rayman Legends]] | |||
Latest revision as of 13:07, 8 February 2026
- This article is about the level in Rayman Origins. For the boss, see Golem.
Golly G. Golem is the fifth level of Mystical Pique, the fifth world in Rayman Origins. In this level, the heroes battle the Golem, a gigantic living rock statue. This is the second level from this world, and the thirty-fourth overall, to be included in the Back to Origins painting in Rayman Legends.
Original version
| Golly G. Golem | |||||
|---|---|---|---|---|---|
 | |||||
| ← Way of the Electoons | Outta My Way → | ||||
 Mystical Pique Mystical Pique
| |||||
   
|

|

| |||
   
|
|
  
| |||

|

| ||||

|

| ||||

Area 1
The heroes arrive in a snowy environment. They will need to use the wall running ability to climb, and a couple of stone men block their path. The exit can be found near the second stone man. Before exiting, the first Skull Coin can be collected by using a rope to reach a platform, where the power to run on walls can be used to reach the Skull Coin.
-
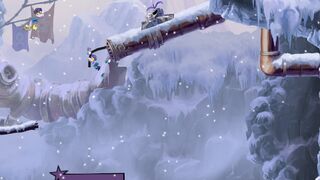 The first area of the level.

Area 2
Still in a snowy environment, the heroes will need to continue climbing. The second Skull Coin can be collected by jumping on an explosive bulb and quickly obtaining the coin before it falls down with the collapsing platform. As the heroes grab onto the nearby rope, the first secret area can be found to their right. After the Electoons have been saved, the heroes can continue climbing. To reach the exit, the heroes will need to carefully time when they use the wall running power, as they will need to avoid Darkroots.
-
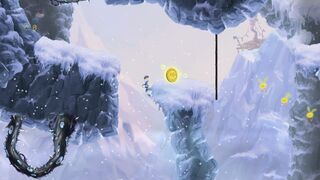 The second Skull Coin of the level.
 -
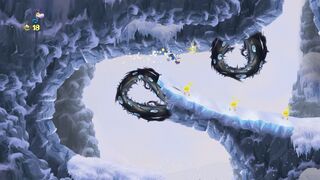 Darkroots will need to be avoided when using the wall running power.


Secret area 1

The heroes need to properly time a crush attack to defeat all of the Psychlops and break the Electoon cage.
Area 3
The heroes arrive in a cave, where they must avoid the spikes as they take advantage of the wall running power and use the fakirs to proceed. The third Skull Coin can be safely retrieved by using the glide power to avoid the spikes directly beneath the coin itself. The exit can be found just to the right of the spikes.
-
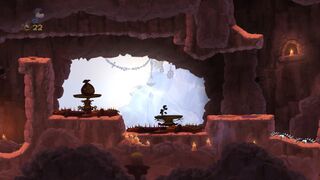 The meditating fakirs have platforms on their heads.
 -
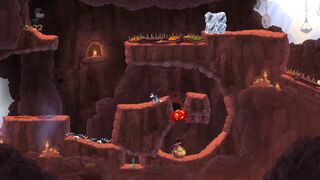 This explosive bulb will need to be hit to advance.
 -
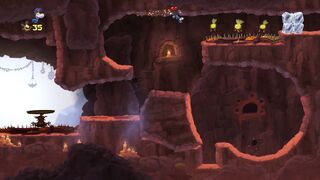 Now the heroes can use the wall run ability to progress.


Relic 1

The first relic can be found in this area below a meditating fakir.
Area 4

In this snowy area, the heroes will need to climb up the moving platforms. The fourth Skull Coin is located to the lower right of the area. The fifth Skull Coin is located to the upper left of the area. The exit can be found on a platform to the upper right.
Area 5
As the heroes enter this area, they will need to defeat the three Darktoons in their way. The second secret area can be found by dropping down to a black rope and then jumping to the right. Afterwards, the heroes will need to constantly use the wall run ability to climb and reach the exit, while avoiding Darkroots along the way.
-
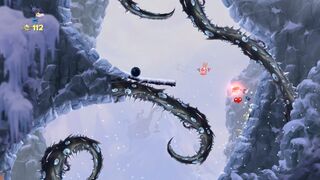
-
 The end of the fifth area.


Secret area 2

To reach the Electoon cage, the heroes will need to avoid or hit the incoming lava rocks being thrown by a stone man as they climb to the top of the area; fakirs can be used as platforms to help them reach the top. Once the stone man has been defeated, the cage can be broken. The area's layout and the role of the stone man are a reference to the "25m" level of the classic arcade game Donkey Kong.
Relic 2

The second relic can be found in this area. It is located inside a wall near the Lum King.
Area 6

Similarly to the fourth area, the heroes will need to climb up using the moving platforms. The sixth Skull Coin can be found on a long pipe between two Darktoons, attached to the side of the pipe. Once the heroes reach the top, the exit can be found to their right.
Relic 3

The third relic can be found in this area. It is located on a flag near the exit.
Area 7
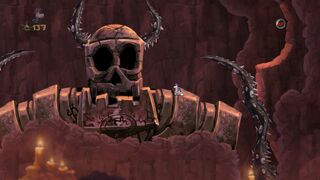
As the heroes proceed in this cave area, they encounter the boss of Mystical Pique, the Golem. He can be defeated by waiting, then using paths to reach and punch the vulnerable bubos. Once all three bubos have been hit, the Golem will be defeated and sink down, causing platforms, including water lilies, to appear, which the heroes can use to climb towards the exit.
-
 The boss of Mystical Pique, the Golem.
 -
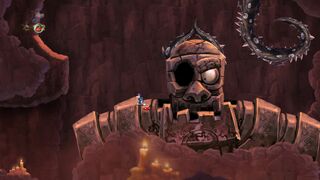 When his weak spots have been hit, his eyes will begin to disappear.
 -
-
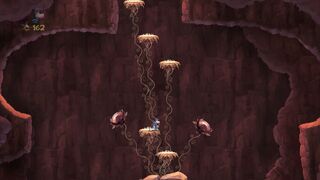 After the Golem has been hit three times, he will sink down, causing bulbs and water lilies to appear.


Area 8

All the heroes need to do here is break the Electoon cage to finish the level. The heroes pose on the photoboard as the Magician counts the total number of Lums collected throughout the level.
Back to Origins
| Golly G. Golem | ||||||||
|---|---|---|---|---|---|---|---|---|
 | ||||||||

| ||||||||
| ← Mystical Munkeys | Riding the Storm → | |||||||
| Mystical Pique
| ||||||||

|
||||||||

|

| |||||||

|

| |||||||
This level is playable in the Back to Origins mode in Rayman Legends. There are no notable differences between the versions apart from elements from Rayman Legends replacing some from the original game. Unusually, on the level's painting, a Darkroot with its Rayman Origins design appears.
-
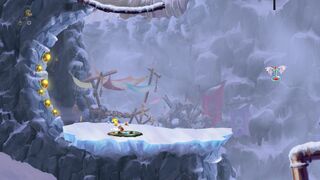 The start of the level.
 -
 A purple Lum chain.
 -

-
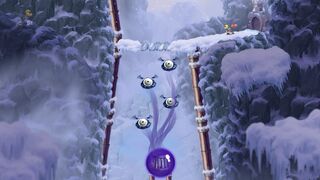 The first secret area.
 -

-
 Back in the cave environment with several added Lum chains.
 -
 The Skull Coin here has been removed.
 -
-
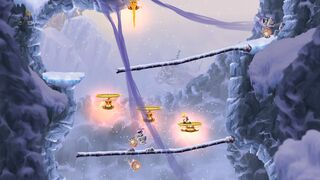 The second secret area.
 -

-
 The fight against the Golem begins.
 -
 The Golem with one hit taken.
 -
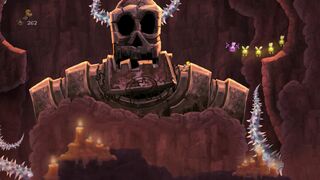 The Golem with two hits taken.
 -
 The camera is more zoomed out when the Golem is defeated.
 -
 The final area.


Names in other languages
| Language | Name |
|---|---|
| English | Golly G. Golem |
| Arabic | غولي جي. غوليم |
| Chinese (simplified) | 巨石魔像 |
| Czech | Golem Golemácká |
| Danish | Du milde golem |
| Dutch | Achossie, golem |
| Finnish | Kappas K. Golem |
| French | Un amour de golem |
| German | Gütiger Golem |
| Hungarian | Golly G. Gólem |
| Italian | Golly G. Golem |
| Japanese | ゴーレム だって!? (Rayman Origins)
「ゴーレムのいる山奥」 (Rayman Legends) |
| Norwegian | Golly G. Golem |
| Polish | Ale w koło są Golemy (Rayman Origins)
Ale wkoło są golemy (Rayman Legends) |
| Portuguese | Poxa, Golem! |
| Russian | Голем голимый |
| Spanish | Vaya con el gólem |
| Swedish | Sten S. Stentroll |
External links
- Golly G. Golem playthrough at YouTube (PC version) (Normal walkthrough + Lums Medal)
- Golly G. Golem playthrough at YouTube (PC version) (Speed Trophy)