Mystical Munkeys: Difference between revisions
Hunchman801 (talk | contribs) m →[[Back to Origins]]: Manual of style, replaced: aren't → are not |
Hunchman801 (talk | contribs) Added language links |
||
| (13 intermediate revisions by 6 users not shown) | |||
| Line 1: | Line 1: | ||
'''Mystical Munkeys''' is the second level of [[Mystical Pique]], the fifth world in ''[[Rayman Origins]]''. During the level, the heroes alternate between the inside of caves and the snowy mountains outside. The PlayStation Vita version of ''[[Rayman Origins]]'' features a [[Ghost Mode]] of this level. This is the first level from this world, and the thirty-third overall, to be included in the [[Back to Origins]] mode in ''[[Rayman Legends]]''. | |||
==Original version== | |||
{{ROLevel | {{ROLevel | ||
| name = Mystical Munkeys | | name = Mystical Munkeys | ||
| image = [[ | | image = [[File:29 mystical munkeys.jpg|center|320px|Mystical Munkeys]] | ||
| preceded by = [[Moseying the Mountain]] | | preceded by = [[Moseying the Mountain]] | ||
| followed by = [[ | | followed by = [[Tricky Treasure Temple]] | ||
| world = [[Mystical Pique]] | | world = [[Mystical Pique]] | ||
| medallion slot 1 = Cage | |||
| medallion slot 1 = | | medallion slot 2 = Cage | ||
| medallion slot 2 = | | medallion slot 3 = Cage | ||
| medallion slot 3 = | | medallion slot 4 = Lums | ||
| medallion slot 4 = | | medallion slot 4 number = 150 | ||
| medallion slot 5 = | | medallion slot 5 = Lums | ||
| medallion slot 6 = | | medallion slot 5 number = 300 | ||
| | | medallion slot 6 = Time | ||
| | | medallion slot 6 number = 3:00 | ||
| cup = | | medal = 350 | ||
| | | cup = 2:35 | ||
| skull coins = 6 | |||
| relics = 3 | |||
| format numbers = true | |||
}} | }} | ||
===Area 1=== | |||
The heroes need to use the power to [[Wall run|run on walls]] in order to progress, as they avoid the pits and spikes. The first [[Skull Coin]] can be collected by [[Helicopter|gliding]] between two [[Antitoon|Darktoons]] attached to a wall. The second [[Skull Coin]] can be found by [[Wall run|running up the wall]], which is located to the left of the exit. | |||
== | <gallery widths="320px" heights="180px"> | ||
Mystical Munkeys 1.jpg|The clothesline acts like a zip-line. | |||
The | Mystical Munkeys 2.jpg|The [[fakir]]s' long beards can be used to help the heroes get across. | ||
</gallery> | |||
====Relic 1==== | |||
The first [[relic]] can be found in this area. It is located to the right of the second [[fakir]] that the heroes encounter, embedded in a hole in the wall. | |||
<gallery widths="320px" heights="180px"> | <gallery widths="320px" heights="180px"> | ||
Mystical Munkeys | Mystical Munkeys first relic.png|The first [[relic]] can be found to the right of [[Rayman]]. | ||
</gallery> | </gallery> | ||
==Area 2== | ===Area 2=== | ||
[[File:Mystical Munkeys 3.jpg | [[File:Mystical Munkeys 3.jpg|thumb|320px|The [[stone man]] returns as an enemy.]] | ||
The heroes arrive at a snowy environment filled with icy platforms and chasms. Once on top, they encounter an enemy familiar to [[Rayman]]: the [[stone man]], who had not been seen since [[Rayman 1|the original ''Rayman'' game]]. He acts similarly to how he did in [[Rayman 1|the original game]], throwing [[lava rock]]s at the heroes. Once the [[stone man]] has been defeated, the heroes can proceed. The third [[Skull Coin]] is located to the left, in the middle of two ropes. The first secret area can be found directly underneath the third rope. The heroes can then proceed to the exit. | |||
{{Clear}} | {{Clear}} | ||
===Secret area 1=== | ====Secret area 1==== | ||
[[File:Mystical Munkeys 4.jpg | [[File:Mystical Munkeys 4.jpg|thumb|320px|The first secret area of the level.]] | ||
The | |||
The heroes can defeat the [[Livingstone|Lividstones]] in two ways: they can be defeated manually, or the heroes can break the ice blocks, causing the large platform to collapse and crush them. Once all the [[Livingstone|Lividstones]] have been defeated, the [[Electoon]] [[cage]] can be broken. | |||
{{Clear}} | {{Clear}} | ||
==Area 3== | ===Area 3=== | ||
The heroes enter the cave again, where they need the meditating [[fakir]]s to help them pass the dangerous spikes. The fourth [[Skull Coin]] is hidden behind pieces of clothing. The heroes face many [[Antitoon|Darktoons]] as they progress. The fifth [[Skull Coin]] is located between two jumping [[Antitoon|Darktoons]]. | |||
<gallery widths="320px" heights="180px"> | <gallery widths="320px" heights="180px"> | ||
Mystical Munkeys 5.jpg|A small group of [[Antitoon| | Mystical Munkeys 5.jpg|A small group of [[Antitoon|Darktoons]]. | ||
Mystical Munkeys 6.jpg|The fifth [[Skull Coin]] of the level. | Mystical Munkeys 6.jpg|The fifth [[Skull Coin]] of the level. | ||
</gallery> | </gallery> | ||
==Area 4== | ====Relic 2==== | ||
[[File:Mystical Munkeys 7.jpg | [[File:Mystical Munkeys second relic.png|thumb|320px|The second [[relic]] can be found to the left of [[Rayman]]'s feet.]] | ||
The second [[relic]] can be found in this area near a [[swingman]] and a [[fakir]] with a long beard. | |||
{{clear}} | |||
===Area 4=== | |||
[[File:Mystical Munkeys 7.jpg|thumb|320px|The [[Stone man|stone men]] throw [[lava rock]]s that can now bounce off the walls.]] | |||
Arriving back in a snowy environment, the heroes need to counter [[lava rock]]s being thrown by a [[stone man]]. The [[lava rock]]s can be attacked or avoided. As the heroes defeat the [[stone man]] and proceed, they need to defeat a second one before they can proceed to the exit. | |||
{{Clear}} | {{Clear}} | ||
==Area 5== | ===Area 5=== | ||
[[File:Mystical Munkeys 8.jpg | [[File:Mystical Munkeys 8.jpg|thumb|320px|A meditating [[fakir]].]] | ||
Once again | |||
Once again in the cave, more [[Antitoon|Darktoons]] appear, as well as [[Darkroot]]s. Using the [[wall run]] ability is useful to advance. After a while, the second secret area can be found by dropping down next to a small [[Darkroot]]. Once this is completed, the heroes can go to the nearby exit. | |||
{{Clear}} | {{Clear}} | ||
===Secret area 2=== | ====Relic 3==== | ||
[[File:Mystical Munkeys 9.jpg | [[File:Mystical Munkeys third relic.png|thumb|320px|The third [[relic]] can be found directly above [[Rayman]].]] | ||
The | |||
The third [[relic]] can be found just as the heroes enter this area. It is located on a flag in the background. | |||
{{clear}} | |||
====Secret area 2==== | |||
[[File:Mystical Munkeys 9.jpg|thumb|320px|The second secret area, which contains wheels.]] | |||
The heroes need to [[Running|run]] on the wheel in order to reach the [[Stone man|stone men]] in the area. A couple of them are even standing on the walls. Once all of them have been defeated, the [[cage]] can be broken. | |||
{{Clear}} | {{Clear}} | ||
==Area 6== | ===Area 6=== | ||
[[File:Mystical Munkeys 10.jpg | [[File:Mystical Munkeys 10.jpg|thumb|320px|The sixth area.]] | ||
In the snowy environment, two [[switch]]es attached to | |||
In the snowy environment, two [[switch]]es attached to an elevator need to be used in order to lift it. The [[switch]]es need to be used alternately, as [[Darkroot]]s appear on both sides. Once the elevator arrives at the top, the exit can be found to the right. | |||
{{Clear}} | {{Clear}} | ||
==Area 7== | ===Area 7=== | ||
The heroes remain in the snowy environment, where the process is similar to that of the previous area, except more difficult. The sixth [[Skull Coin]] can be collected by hitting the [[switch]], making the elevator rise to a higher elevation than the [[Skull Coin|coin]]'s position. The heroes can then drop down to the right to collect it. Once the elevator reaches the top, the exit can be found to the right. | |||
<gallery widths="320px" heights="180px"> | <gallery widths="320px" heights="180px"> | ||
| Line 81: | Line 111: | ||
</gallery> | </gallery> | ||
==Area 8== | ===Area 8=== | ||
[[File:Mystical Munkeys 13.jpg | [[File:Mystical Munkeys 13.jpg|thumb|320px|The eighth and final area of the level.]] | ||
All the | |||
All the heroes need to do is defeat the three [[Stone man|stone men]]. Once they have been defeated, the [[Electoon]] [[cage]] can be broken, ending the level. The heroes then pose on the [[The Photographer|photoboard]] as [[The Magician (Rayman Origins)|the Magician]] counts the total number of [[Lum (UbiArt games)|Lums]] collected throughout the level. | |||
{{Clear}} | {{Clear}} | ||
==Back to Origins== | |||
{{RLLevel | {{RLLevel | ||
| name = Mystical Munkeys | | name = Mystical Munkeys | ||
| difficulty = | | difficulty = 2 | ||
| image = [[File:Mystical Munkeys - Back to Origins.png|center|320px| | | image = [[File:Mystical Munkeys - Back to Origins.png|center|320px|Mystical Munkeys]] | ||
| preceded by = [[Murray of the Deep#Back to Origins|Murray of the Deep]] | | preceded by = [[Murray of the Deep#Back to Origins|Murray of the Deep]] | ||
| followed by = [[Golly G. Golem#Back to Origins|Golly G. Golem]] | | followed by = [[Golly G. Golem#Back to Origins|Golly G. Golem]] | ||
| world = [[Mystical Pique]] | | world = [[Mystical Pique]] | ||
| teensies = | | teensies = 10 | ||
| bronze cup = | | bronze cup = 150 | ||
| silver cup = | | silver cup = 300 | ||
| lucky ticket = | | lucky ticket = 450 | ||
| gold cup = | | gold cup = 600 | ||
| format numbers = true | |||
}} | }} | ||
This level is playable in the [[Back to Origins]] mode in ''[[Rayman Legends]]''. There are no notable differences between the versions, apart from elements from ''[[Rayman Legends]]'' replacing some from the original game. Additionally, all of the [[Red Wizard]]s with the [[Antitoon|Darktoons]] on their heads have been removed and replaced with regular [[Antitoon|Darktoons]]. | |||
<gallery widths="320px" heights="180px"> | <gallery widths="320px" heights="180px"> | ||
| Line 107: | Line 140: | ||
Mystical Munkeys - Back to Origins 2.jpg|A purple [[Lum (UbiArt games)|Lum]] chain. | Mystical Munkeys - Back to Origins 2.jpg|A purple [[Lum (UbiArt games)|Lum]] chain. | ||
Mystical Munkeys - Back to Origins 3.jpg|Two [[turnip]]s. | Mystical Munkeys - Back to Origins 3.jpg|Two [[turnip]]s. | ||
Mystical Munkeys - Back to Origins 4.jpg|A [[Lum (UbiArt games)|Lum]] cage. | Mystical Munkeys - Back to Origins 4.jpg|A [[Lum (UbiArt games)|Lum]] cage. | ||
Mystical Munkeys - Back to Origins 5.jpg|Two [[Antitoon|Darktoons]]. | Mystical Munkeys - Back to Origins 5.jpg|Two [[Antitoon|Darktoons]]. | ||
Mystical Munkeys - Back to Origins 6.jpg|The first secret area. | Mystical Munkeys - Back to Origins 6.jpg|The first secret area. | ||
Mystical Munkeys - Back to Origins 7.jpg|A [[Teensie]] in a [[cage]]. | Mystical Munkeys - Back to Origins 7.jpg|A [[Teensie]] in a [[cage]]. | ||
Mystical Munkeys - Back to Origins 8.jpg|Back in the cave again. | Mystical Munkeys - Back to Origins 8.jpg|Back in the cave again. | ||
Mystical Munkeys - Back to Origins 9.jpg|Another purple [[Lum (UbiArt games)|Lum]] chain. | Mystical Munkeys - Back to Origins 9.jpg|Another purple [[Lum (UbiArt games)|Lum]] chain. | ||
Mystical Munkeys - Back to Origins 10.jpg|[[Rayman]] is now back in the snowy environment. | Mystical Munkeys - Back to Origins 10.jpg|[[Rayman]] is now back in the snowy environment. | ||
Mystical Munkeys - Back to Origins 11.jpg|Two [[ | Mystical Munkeys - Back to Origins 11.jpg|Two [[fakir]]s can be used as platforms. | ||
Mystical Munkeys - Back to Origins 12.jpg|The second secret area. | Mystical Munkeys - Back to Origins 12.jpg|The second secret area. | ||
Mystical Munkeys - Back to Origins 13.jpg|A [[Teensie]] [[cage]] has been added underneath the elevator. | Mystical Munkeys - Back to Origins 13.jpg|A [[Teensie]] [[cage]] has been added underneath the elevator. | ||
Mystical Munkeys - Back to Origins 14.jpg|[[Darkroot]]s | Mystical Munkeys - Back to Origins 14.jpg|[[Darkroot]]s make advancing with the elevator more difficult. | ||
Mystical Munkeys - Back to Origins 15.jpg|The final area. | Mystical Munkeys - Back to Origins 15.jpg|The final area. | ||
</gallery> | </gallery> | ||
==Names in other languages== | |||
{{Names | |||
|en=Mystical Munkeys | |||
|ar=قردة غامضون | |||
|zh_hans=神秘苦行僧 | |||
|cs=Tajemní opičáci | |||
|da=Mystiske aber | |||
|nl=Mystieke mafkezen | |||
|fi=Mystiset munkkiapinat | |||
|fr=Babouins mystiques | |||
|de=Kletterwetter | |||
|hu=Misztikus majmok | |||
|it=Scimmie mistiche | |||
|ja=ふしぎな おさる | |||
|ja_S=''[[Rayman Origins]]'' | |||
|ja_2=「厳しい修行」 | |||
|ja_2_S=''[[Rayman Legends]]'' | |||
|no=Mystiske aper | |||
|pl=Magiczne Małpki | |||
|pl_S=''[[Rayman Origins]]'' | |||
|pl_2=Magiczne mołpy | |||
|pl_2_S=''[[Rayman Legends]]'' | |||
|pt=Macacos místicos | |||
|ru=Таинственные мартышки | |||
|ru_S=''[[Rayman Origins]]'' | |||
|ru_2=Загадочные мартышки | |||
|ru_2_S=''[[Rayman Legends]]'' | |||
|es=Silencio, se miedita | |||
|sv=Munk Everest | |||
}} | |||
==External links== | ==External links== | ||
* [ | * [https://www.youtube.com/watch?v=NEc3_Vd-SD0 Mystical Munkeys playthrough at YouTube (PC version) (Normal walkthrough + Lums Medal)] | ||
* [ | * [https://www.youtube.com/watch?v=hHRJKQLz4qo Mystical Munkeys playthrough at YouTube (PC version) (Speed Trophy)] | ||
* [https://www.youtube.com/watch?v= | * [https://www.youtube.com/watch?v=g5Wu67jUtL0 Munkeys' ''Rayman Legends'' playthrough at YouTube (PC version)] | ||
{{RaymanOriginslocations}} | {{RaymanOriginslocations}} | ||
| Line 135: | Line 195: | ||
[[fr:Babouins mystiques]] | [[fr:Babouins mystiques]] | ||
[[pl:Magiczne | [[hu:Misztikus majmok]] | ||
[[pl:Magiczne mołpy]] | |||
[[Category:Places from Rayman Origins]] | [[Category:Places from Rayman Origins]] | ||
[[Category:Places from Rayman Legends]] | |||
Latest revision as of 15:45, 27 March 2026
Mystical Munkeys is the second level of Mystical Pique, the fifth world in Rayman Origins. During the level, the heroes alternate between the inside of caves and the snowy mountains outside. The PlayStation Vita version of Rayman Origins features a Ghost Mode of this level. This is the first level from this world, and the thirty-third overall, to be included in the Back to Origins mode in Rayman Legends.
Original version
| Mystical Munkeys | |||||
|---|---|---|---|---|---|
 | |||||
| ← Moseying the Mountain | Tricky Treasure Temple → | ||||
 Mystical Pique Mystical Pique
| |||||
   
|

|

| |||
   
|
|
  
| |||

|

| ||||

|

| ||||

Area 1
The heroes need to use the power to run on walls in order to progress, as they avoid the pits and spikes. The first Skull Coin can be collected by gliding between two Darktoons attached to a wall. The second Skull Coin can be found by running up the wall, which is located to the left of the exit.
-
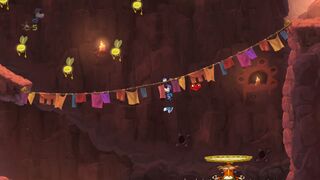 The clothesline acts like a zip-line.
 -
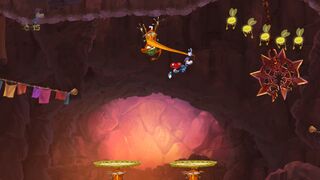 The fakirs' long beards can be used to help the heroes get across.


Relic 1
The first relic can be found in this area. It is located to the right of the second fakir that the heroes encounter, embedded in a hole in the wall.

Area 2

The heroes arrive at a snowy environment filled with icy platforms and chasms. Once on top, they encounter an enemy familiar to Rayman: the stone man, who had not been seen since the original Rayman game. He acts similarly to how he did in the original game, throwing lava rocks at the heroes. Once the stone man has been defeated, the heroes can proceed. The third Skull Coin is located to the left, in the middle of two ropes. The first secret area can be found directly underneath the third rope. The heroes can then proceed to the exit.
Secret area 1

The heroes can defeat the Lividstones in two ways: they can be defeated manually, or the heroes can break the ice blocks, causing the large platform to collapse and crush them. Once all the Lividstones have been defeated, the Electoon cage can be broken.
Area 3
The heroes enter the cave again, where they need the meditating fakirs to help them pass the dangerous spikes. The fourth Skull Coin is hidden behind pieces of clothing. The heroes face many Darktoons as they progress. The fifth Skull Coin is located between two jumping Darktoons.
-
 A small group of Darktoons.
 -
 The fifth Skull Coin of the level.


Relic 2

The second relic can be found in this area near a swingman and a fakir with a long beard.
Area 4

Arriving back in a snowy environment, the heroes need to counter lava rocks being thrown by a stone man. The lava rocks can be attacked or avoided. As the heroes defeat the stone man and proceed, they need to defeat a second one before they can proceed to the exit.
Area 5

Once again in the cave, more Darktoons appear, as well as Darkroots. Using the wall run ability is useful to advance. After a while, the second secret area can be found by dropping down next to a small Darkroot. Once this is completed, the heroes can go to the nearby exit.
Relic 3

The third relic can be found just as the heroes enter this area. It is located on a flag in the background.
Secret area 2

The heroes need to run on the wheel in order to reach the stone men in the area. A couple of them are even standing on the walls. Once all of them have been defeated, the cage can be broken.
Area 6

In the snowy environment, two switches attached to an elevator need to be used in order to lift it. The switches need to be used alternately, as Darkroots appear on both sides. Once the elevator arrives at the top, the exit can be found to the right.
Area 7
The heroes remain in the snowy environment, where the process is similar to that of the previous area, except more difficult. The sixth Skull Coin can be collected by hitting the switch, making the elevator rise to a higher elevation than the coin's position. The heroes can then drop down to the right to collect it. Once the elevator reaches the top, the exit can be found to the right.
-
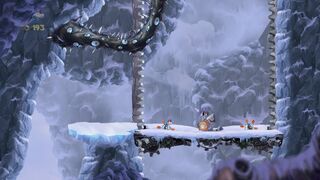 The seventh area is nearly the same as the sixth area.
 -
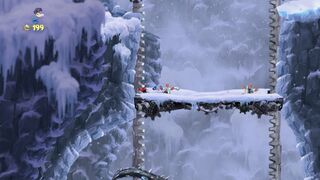 The switches will need to be repeatedly hit.


Area 8

All the heroes need to do is defeat the three stone men. Once they have been defeated, the Electoon cage can be broken, ending the level. The heroes then pose on the photoboard as the Magician counts the total number of Lums collected throughout the level.
Back to Origins
| Mystical Munkeys | ||||||||
|---|---|---|---|---|---|---|---|---|
 | ||||||||

| ||||||||
| ← Murray of the Deep | Golly G. Golem → | |||||||
| Mystical Pique
| ||||||||

|
||||||||

|

| |||||||

|

| |||||||
This level is playable in the Back to Origins mode in Rayman Legends. There are no notable differences between the versions, apart from elements from Rayman Legends replacing some from the original game. Additionally, all of the Red Wizards with the Darktoons on their heads have been removed and replaced with regular Darktoons.
-
 The start of the level.
 -
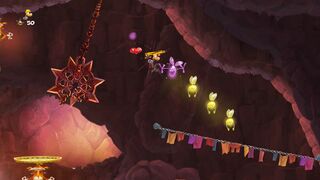 A purple Lum chain.
 -
 Two turnips.
 -
 A Lum cage.
 -
 Two Darktoons.
 -
 The first secret area.
 -

-
 Back in the cave again.
 -
 Another purple Lum chain.
 -
 Rayman is now back in the snowy environment.
 -
 Two fakirs can be used as platforms.
 -
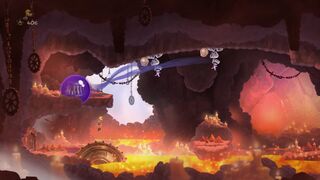 The second secret area.
 -

-
 Darkroots make advancing with the elevator more difficult.
 -
 The final area.


Names in other languages
| Language | Name |
|---|---|
| English | Mystical Munkeys |
| Arabic | قردة غامضون |
| Chinese (simplified) | 神秘苦行僧 |
| Czech | Tajemní opičáci |
| Danish | Mystiske aber |
| Dutch | Mystieke mafkezen |
| Finnish | Mystiset munkkiapinat |
| French | Babouins mystiques |
| German | Kletterwetter |
| Hungarian | Misztikus majmok |
| Italian | Scimmie mistiche |
| Japanese | ふしぎな おさる (Rayman Origins)
「厳しい修行」 (Rayman Legends) |
| Norwegian | Mystiske aper |
| Polish | Magiczne Małpki (Rayman Origins)
Magiczne mołpy (Rayman Legends) |
| Portuguese | Macacos místicos |
| Russian | Таинственные мартышки (Rayman Origins)
Загадочные мартышки (Rayman Legends) |
| Spanish | Silencio, se miedita |
| Swedish | Munk Everest |
External links
- Mystical Munkeys playthrough at YouTube (PC version) (Normal walkthrough + Lums Medal)
- Mystical Munkeys playthrough at YouTube (PC version) (Speed Trophy)