Still Flowing: Difference between revisions
Hunchman801 (talk | contribs) m Manual of style, replaced: aren't → are not |
No edit summary |
||
| Line 18: | Line 18: | ||
}} | }} | ||
'''Still Flowing''' is the sixth level of the [[Ticklish Temples]], a world | '''Still Flowing''' is the sixth level of the [[Ticklish Temples]], a world from ''[[Rayman Origins]]''. The heroes will need to get through a darkened jungle at night. This is the fourth level from this world, and sixth overall that is included in the [[Back to Origins]] painting in ''[[Rayman Legends]]''. | ||
==Original version== | ==Original version== | ||
==Area 1== | ==Area 1== | ||
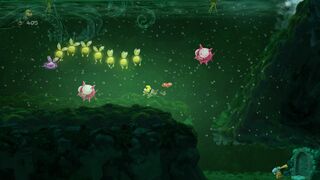
As the | As the heroes advance through this area of the jungle, they can hear the sound of many nighttime creatures. Danger is present in this area, such as [[spiky flower]]s and [[Livingstone|Lividstone]]s. The first [[Skull Coin]] can be acquired by bouncing on a [[flower bulb]], then carefully [[helicopter|gliding]] in order to avoid the [[spiky flower]]s. The exit will be guarded by two [[Livingstone|Lividstone]]s. | ||
<gallery widths="320px" heights="180px"> | <gallery widths="320px" heights="180px"> | ||
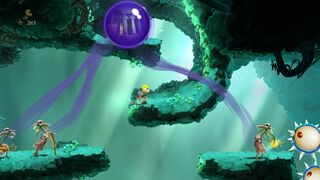
Still Flowing 2.jpg|A [[Lum King]] in a [[bubble]]. | Still Flowing 2.jpg|A [[Lum King]] in a [[bubble]]. | ||
</gallery> | </gallery> | ||
===[[Relic]] 1=== | |||
[[File:Still Flowing first relic.png|thumb|right|320px|The first [[relic]] is located in the abyss below [[Rayman]], camouflaged behind some leaves.]] | |||
The first [[relic]] can be found at the beginning of this area, camouflaging behind some leaves in the first abyss the heroes will encounter. | |||
{{clear}} | |||
==Area 2== | ==Area 2== | ||
The trees | The heroes can use the trees in this area to their advantage; the [[wall run]] ability needs to be used in order to proceed. The second [[Skull Coin]] can be collected by [[running]] up a tree next to a group of [[Lum (UbiArt games)|Lums]], which are next to the [[Skull Coin|coin]]. The exit can be found nearby, guarded by a [[Livingstone|Lividstone]]. | ||
<gallery widths="320px" heights="180px"> | <gallery widths="320px" heights="180px"> | ||
| Line 35: | Line 41: | ||
Still Flowing 4.jpg|Many of the trees in this level have small passages which the heroes can go through. | Still Flowing 4.jpg|Many of the trees in this level have small passages which the heroes can go through. | ||
</gallery> | </gallery> | ||
===[[Relic]] 2=== | |||
[[File:Still Flowing second relic.png|thumb|right|320px|The second [[relic]], as seen inside the tree trunk.]] | |||
The second [[relic]] can be found in this area, located in the centre of a tree trunk. | |||
{{clear}} | |||
==Area 3== | ==Area 3== | ||
[[File:Still Flowing 5.jpg|320px|thumb| | [[File:Still Flowing 5.jpg|320px|thumb|left|The alternative, but more difficult path on the left leads to a [[Skull Coin]].]] | ||
The heroes | The heroes will need to [[Helicopter|hover]] in order to traverse slowly through the [[spiky flower]]s. The [[#Secret area 1|first secret area]] can be found on a platform near the end of two water currents. The third [[Skull Coin]] can also be found to the far left on the bottom current; a different path will need to be taken in order to collect it, crush attacking the [[flower bulb]] on the right then [[Helicopter|hovering]] is the easiest way to reach it. The exit can be found to the right of the water currents. | ||
{{Clear}} | {{Clear}} | ||
===Secret area 1=== | ===Secret area 1=== | ||
[[File:Still Flowing 6.jpg|320px|thumb| | [[File:Still Flowing 6.jpg|320px|thumb|right|The first secret area.]] | ||
The heroes need to defeat the [[Livingstone| | The heroes will need to defeat the [[Livingstone|Lividstone]]s located on two platforms next to some [[spiky flower]]s. Once the [[Livingstone|Lividstone]]s have been defeated, the [[cage]] at the top can be broken. | ||
{{Clear}} | {{Clear}} | ||
==Area 4== | ==Area 4== | ||
[[File:Still Flowing 7.jpg|320px|thumb| | [[File:Still Flowing 7.jpg|320px|thumb|left|A body of water can be seen here.]] | ||
After defeating some nearby [[Livingstone| | After defeating some nearby [[Livingstone|Lividstone]]s, the heroes can drop down into a body of water and [[Swimming|swim]], where they can find the fourth [[Skull Coin]], guarded by [[spiky fish]]. The heroes can now climb back up and advance to the nearby exit. | ||
{{Clear}} | {{Clear}} | ||
==Area 5== | ==Area 5== | ||
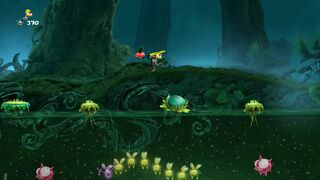
[[File:Still Flowing 8.jpg|320px|thumb| | [[File:Still Flowing 8.jpg|320px|thumb|right|The [[nenuphar]]s which move to the left have groups of [[Lum (UbiArt games)|Lums]] on them.]] | ||
The heroes will | The heroes will need to pass a large body of water, where [[nenuphar]]s and flower bulbs will continuously move horizontally. The fifth [[Skull Coin]] can be collected by swimming down to the left, close to a [[spiky fish]] and [[spiky flower]]s. The [[#Secret area 2|second secret area]] can be found by [[swim]]ing against the current in the water, where they can find a trench at the bottom. After completion, the heroes can swim back up to land and proceed to the exit. | ||
{{Clear}} | {{Clear}} | ||
===Secret area 2=== | ===Secret area 2=== | ||
[[File:Still Flowing 9.jpg|320px|thumb| | [[File:Still Flowing 9.jpg|320px|thumb|left|The second secret area.]] | ||
The heroes will need to reach the [[Livingstone|Lividstone]] above and defeat him. One of the two [[explosive bulb]]s will then need to be hit in order to reach the [[Electoon]] [[cage]]. | |||
{{Clear}} | |||
===[[Relic]] 3=== | |||
[[File:Still Flowing third relic.png|thumb|right|320px|The third [[relic]] is located in the background behind a [[spiky flower]].]] | |||
The third [[relic]] can be found in this area, located in the background near the exit. | |||
{{Clear}} | {{Clear}} | ||
| Line 68: | Line 86: | ||
==Area 6== | ==Area 6== | ||
[[File:Still Flowing 10.jpg|320px|thumb|left|The final area with the third [[cage]].]] | [[File:Still Flowing 10.jpg|320px|thumb|left|The final area with the third [[cage]].]] | ||
The heroes need to go through an opening to reach and | The heroes will need to go through an opening in order to reach and defeat some [[Livingstone|Lividstone]]s, which are standing on wooden barricades. Once they have all been defeated, the heroes can return to the [[cage]] and break it, ending the level. The heroes will pose on the [[The Photographer|photoboard]] as [[the Magician]] waits for the total amount of [[Lum (UbiArt games)|Lums]] that were collected throughout the level. | ||
{{Clear}} | {{Clear}} | ||
Revision as of 19:50, 13 June 2020
| Still Flowing | |||||||||||
|---|---|---|---|---|---|---|---|---|---|---|---|
 | |||||||||||
| ← Climb Out | Poor Little Daisy → | ||||||||||
Still Flowing is the sixth level of the Ticklish Temples, a world from Rayman Origins. The heroes will need to get through a darkened jungle at night. This is the fourth level from this world, and sixth overall that is included in the Back to Origins painting in Rayman Legends.
Original version
Area 1
As the heroes advance through this area of the jungle, they can hear the sound of many nighttime creatures. Danger is present in this area, such as spiky flowers and Lividstones. The first Skull Coin can be acquired by bouncing on a flower bulb, then carefully gliding in order to avoid the spiky flowers. The exit will be guarded by two Lividstones.

Relic 1

The first relic can be found at the beginning of this area, camouflaging behind some leaves in the first abyss the heroes will encounter.
Area 2
The heroes can use the trees in this area to their advantage; the wall run ability needs to be used in order to proceed. The second Skull Coin can be collected by running up a tree next to a group of Lums, which are next to the coin. The exit can be found nearby, guarded by a Lividstone.
-
 A Lividstone on a breakable platform.
 -
 Many of the trees in this level have small passages which the heroes can go through.


Relic 2

The second relic can be found in this area, located in the centre of a tree trunk.
Area 3

The heroes will need to hover in order to traverse slowly through the spiky flowers. The first secret area can be found on a platform near the end of two water currents. The third Skull Coin can also be found to the far left on the bottom current; a different path will need to be taken in order to collect it, crush attacking the flower bulb on the right then hovering is the easiest way to reach it. The exit can be found to the right of the water currents.
Secret area 1

The heroes will need to defeat the Lividstones located on two platforms next to some spiky flowers. Once the Lividstones have been defeated, the cage at the top can be broken.
Area 4

After defeating some nearby Lividstones, the heroes can drop down into a body of water and swim, where they can find the fourth Skull Coin, guarded by spiky fish. The heroes can now climb back up and advance to the nearby exit.
Area 5

The heroes will need to pass a large body of water, where nenuphars and flower bulbs will continuously move horizontally. The fifth Skull Coin can be collected by swimming down to the left, close to a spiky fish and spiky flowers. The second secret area can be found by swiming against the current in the water, where they can find a trench at the bottom. After completion, the heroes can swim back up to land and proceed to the exit.
Secret area 2

The heroes will need to reach the Lividstone above and defeat him. One of the two explosive bulbs will then need to be hit in order to reach the Electoon cage.
Relic 3

The third relic can be found in this area, located in the background near the exit.
Area 6

The heroes will need to go through an opening in order to reach and defeat some Lividstones, which are standing on wooden barricades. Once they have all been defeated, the heroes can return to the cage and break it, ending the level. The heroes will pose on the photoboard as the Magician waits for the total amount of Lums that were collected throughout the level.
| Still Flowing | ||||||||
|---|---|---|---|---|---|---|---|---|
 | ||||||||
| ← Climb Out | Hunter Gatherer → | |||||||
Back to Origins
In the Back to Origins version, there are not many differences between the original version; except of the notable elements from Rayman Legends replacing some of the elements from the game.
-
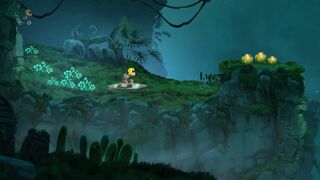 The start of the level.
 -
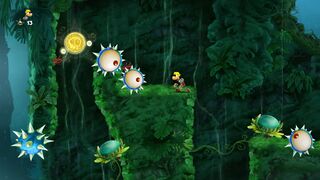 One of the Skull Coins in the level.
 -
 Wall running is available as a power from the start.
 -
 A trapped Teensie.
 -
 The first secret area.
 -
 Rayman above a body of water.
 -
 The second secret area.
 -
 Swimming is available as a power from the start.
 -
 The final area.


External links
- Still Flowing playthrough at YouTube (PC version) (Normal walkthrough + Lums Medal)
- Still Flowing playthrough at YouTube (PC version) (Speed Trophy)