Rayman 3 (early production): Difference between revisions
Added 3 images |
No edit summary |
||
| (122 intermediate revisions by 17 users not shown) | |||
| Line 1: | Line 1: | ||
[[File: | [[File:OldlogoRayman3.png|thumbnail|300px|An early logo using the ''[[Rayman M]]'' font.]] | ||
[[File:R3 LOGOBETA2.png|thumbnail|300px|An early logo using the ''[[Rayman 2]]'' font.]] | [[File:R3 LOGOBETA2.png|thumbnail|300px|An early logo using the ''[[Rayman 2]]'' font.]] | ||
| Line 5: | Line 5: | ||
==Early development== | ==Early development== | ||
[[File:Rayman-3-beta-000001.jpg|thumb|[[Rayman]] fighting [[ | ===''Rayman 2000''=== | ||
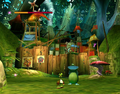
During the early production stage of ''[[Rayman 3]]'', early footage, screenshots and artwork show that development initially began with [[Rayman]] utilizing his design from ''[[Rayman 2]]'', as opposed to the new redesign that debuted with the final game. Other early elements include unused areas, such as an [[Aquatic world|underwater level]], and differences with the HUD, which resembles the HUD of ''[[Rayman 2]]'' in some early screenshots. Some screenshots appear fairly similar to [[Rayman 3|the final game]], but still show some differences in aesthetic and lighting. There was also several kinds of [[Hoodlum]]s that were going to appear, but got scrapped from [[Rayman 3|the final game]]. | {{Main|Rayman 2000}} | ||
'''''Rayman 2000''''' was a video game project that would serve as a direct sequel to ''[[Rayman 2]]''. | |||
Its development began shortly after the release of ''[[Rayman 2]]'', but was canceled. Several of its concepts were reused for ''[[Rayman 3]]''. | |||
===Early designs=== | |||
[[File:Rayman-3-beta-000001.jpg|thumb|[[Rayman]] fighting [[Razoff]], showing the early HUD (head-up display).]] | |||
[[File:R3Beta Murfy Render.png|thumb|A render of an early [[Murfy]] 3D model.]] | |||
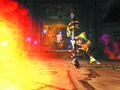
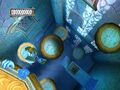
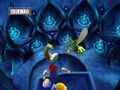
During the early production stage of ''[[Rayman 3]]'', early footage, screenshots and artwork show that development initially began with [[Rayman]] utilizing his design from ''[[Rayman 2]]'', as opposed to the new redesign that debuted with the final game. He also appeared in a design similar to that of ''[[Rayman 2]]'', with a yellow scarf and new shoes, and a design similar to that of ''[[Rayman 3]]'', with a yellow hood and his ''[[Rayman 2]]'' shoes, until he got to his final design. | |||
Other early elements include unused areas, such as an [[Aquatic world|underwater level]], and differences with the HUD, which resembles the HUD of ''[[Rayman 2]]'' in some early screenshots. Some screenshots appear fairly similar to [[Rayman 3|the final game]], but still show some differences in aesthetic and lighting. There was also several kinds of [[Hoodlum]]s that were going to appear, but got scrapped from [[Rayman 3|the final game]]. | |||
===Ghost levels=== | ===Ghost levels=== | ||
The third and fourth parts of [[the Bog of Murk]] appear to have originally been the same map, but ended up being separated. Both parts retained a prototype copy of the other where only a few gems are present, elements like [[meadowscrew]]s are non-functional, and there | The third and fourth parts of [[the Bog of Murk]] appear to have originally been the same map, but ended up being separated. Both parts retained a prototype copy of the other where only a few gems are present, elements like [[meadowscrew]]s are non-functional, and there are no enemies or [[cage]]s. These areas can be accessed in-game with hacks or glitches. | ||
===Cut Leptys statue behaviour=== | |||
As seen in the promotional video included in the final game, the [[Leptys]] statue in the second part of [[the Desert of the Knaaren]] was meant to attack [[Rayman]] with lightning, adding difficulty to this platforming section. The code for this behaviour is still present in the game's files and can be reactivated on PC.<ref>YouTube, ''Rayman 3 - Unused Leptys Statue Lightning Behaviour'', https://www.youtube.com/watch?v=vJPNu0FE8IU</ref> | |||
<gallery widths="320px" heights="240px"> | |||
LeptysLightning1.png | |||
LeptysLightning2.jpg | |||
</gallery> | |||
===Debugging features=== | ===Debugging features=== | ||
There are two debugging features mistakenly left in the GameCube version of the game. The first one is in the first part of [[the Fairy Council]]: holding R + Start will cause [[Murfy]] to stop flying until the player lets go. The second is in the fourth part of [[the Desert of the Knaaren]]: pressing the same buttons will cause the text "Salle 01" (French for "Room 01") to appear in the bottom left of the screen. If the player then holds the R button and presses Up or Down on the D-Pad, the number can be changed up to 05. Holding R and pressing Left on the D-Pad will then cause [[Rayman]] to be teleported to a specific location, depending on what number was displayed. | There are two debugging features mistakenly left in the GameCube version of the game. The first one is in the first part of [[the Fairy Council]]: holding R + Start will cause [[Murfy]] to stop flying until the player lets go. The second is in the fourth part of [[the Desert of the Knaaren]]: pressing the same buttons will cause the text "Salle 01" (French for "Room 01") to appear in the bottom left of the screen. If the player then holds the R button and presses Up or Down on the D-Pad, the number can be changed up to 05. Holding R and pressing Left on the D-Pad will then cause [[Rayman]] to be teleported to a specific location, depending on what number was displayed. | ||
<gallery> | <gallery> | ||
R3HH-EarlyRayman2Style-1.jpg|[[Rayman]] battling [[Reflux]] in the [[Destiny Arena]]. | |||
R3HH-EarlyRayman2Style-2.jpg|The [[Hoodlum Headquarters]]. | |||
Hoodlum Headquarters (early version).jpg|A screenshot of [[Hoodlum Headquarters]] that features an early [[Hoodmonger]] design. | |||
R3HH-EarlyRayman2Style-3.jpg|[[Rayman]] in [[Bégoniax]]'s house. | |||
R3HH-EarlyRayman2Style-4.jpg|[[The Land of the Livid Dead (Rayman 3)|The Land of the Livid Dead]]. | |||
R3 early production.png|[[The Summit Beyond the Clouds]]. | |||
Rayman-3-beta-000003.jpg|[[Rayman]] in [[the Bog of Murk]]. | |||
Rayman-3-beta-000004.jpg|[[Rayman]] in [[Clearleaf Forest]]. | |||
R3EarlyPW.png|[[Rayman]] in [[Clearleaf Forest]] with the [[Vortex|Vortex powerup]]. | |||
Rayman-3-beta-000005.jpg|Debug mode. | |||
Rayman-3-beta-000006.jpg|[[Rayman]] in [[the Desert of the Knaaren]]. | |||
Rayman-3-beta-000007.jpg|[[Rayman]] in [[the Summit Beyond the Clouds]]. | |||
Rayman-3-beta-000008.jpg|[[Rayman]] fighting [[Bégoniax]]. | |||
Rayman-3-beta-000009.jpg|[[Rayman]] in [[The Land of the Livid Dead (Rayman 3)|the Land of the Livid Dead]]. | |||
Rayman-3-Hoodblaster.jpg|[[The Land of the Livid Dead (Rayman 3)|The Land of the Livid Dead]]. | |||
Rayman-3-beta-000010.jpg|[[Rayman]] in an early version of [[the Summit Beyond the Clouds]]. | |||
EarlyLOTLD.jpg|[[The Land of the Livid Dead (Rayman 3)|The Land of the Livid Dead]]. | |||
R3unknown.jpg|Screenshots of an unknown area that was scrapped. | |||
Rayman3hh video.jpg|Screenshots of an early build of the game. | |||
</gallery> | </gallery> | ||
==Scrapped story== | |||
According to scrapped dialogues found in the beta demo's game files,<ref>[[Rayman Pirate-Community]] discussion forums, ''Rayman 3 - Scrapped Story'', https://raymanpc.com/forum/viewtopic.php?f=13&t=6766&p=542889</ref> the early plot differed significantly from that of the final game. Notable differences are, among others: | |||
*[[Murfy]] stayed with [[Rayman]] for a longer period. | |||
*A character called Ludivine also provided advice to [[Rayman]] and [[Globox]]. She could have been a [[Ludiv]]. | |||
*[[Clark]] appeared in the game. | |||
*[[Hoodlum]]s could talk. | |||
*[[Bonton]]s appeared in the game; one could be used to destroy a wooden door. | |||
*[[Rayman]] had to get to the top of a volcano to obtain a [[Silver Lum]]. An early version of the [[flying hook]], called the Lum Ring, was required to cross a stream and continue towards the mountain. | |||
*[[Rayman]] and [[Globox]] use a gigantic bird called the [[wooglah]] to go to the [[Clearleaf Forest]] to [[The Land of the Livid Dead (Rayman 3)|the Land of the Livid Dead]]. But when they fly over [[the Bog of Murk]], the [[wooglah]] becomes injured, forcing them to land. [[Globox]] decides to stay with the [[wooglah]] while [[Rayman]] seeks the able antidote to treat him. [[Murfy]] comes to meet [[Rayman]] and advises him to go ask [[Bégoniax]] to help him. [[Bégoniax]] has seen the [[wooglah]] when he was injured thanks to her magic mirror. She agrees to cure the [[wooglah]], provided [[Rayman]] brings her a beauty elixir that is hidden in [[The Bog of Murk|the swamps]]. | |||
*During the final battle, [[Rayman]] had to free the [[Leptys]] from [[Reflux]]'s control by breaking the mirrors directing magic rays towards him, and then destroy the sceptre by redirecting the four rays towards it. | |||
*[[Plum]]s could be destroyed with a fully charged [[Telescopic fist|shot]], spilling sticky juice around and allowing [[Rayman]] to climb onto otherwise slippery surfaces. | |||
*Permanent powers were obtained through [[Silver Lum]]s. Those powers included charging [[Rayman]]'s [[Telescopic fist|fists]] faster, shooting with both [[Telescopic fist|fists]] (bestowed by the ambidextrous [[Silver Lum]]), strafing, and a power called the Razibus allowing [[Rayman]] to shoot his [[Telescopic fist|fists]] further as well as hit multiple enemies (in order to use this power, [[Rayman]] had to shoot his [[Telescopic fist|fist]] when crouching). | |||
*The [[super helicopter]] power was obtained was obtained through [[super helicopter]] Lums. | |||
*An early version of the [[Shock Rocket]] was obtained through Snipe Lums. | |||
==Scrapped levels== | ==Scrapped levels== | ||
===[[Aquatic world]]=== | ===[[Aquatic world]]=== | ||
[[File:Zaq.jpg|320px|thumb|right|Official artwork of the Zaq from the scrapped [[Aquatic world]].]] | |||
{{Main|Aquatic world}} | |||
There were plans to have a level included in the game known as the ''[[Aquatic world]]''. It was scrapped before its official name could be revealed. | There were plans to have a level included in the game known as the ''[[Aquatic world]]''. It was scrapped before its official name could be revealed. | ||
===[[Chess minigame]]=== | ===[[Chess minigame]]=== | ||
{{Main|Chess minigame}} | |||
There were two minigames that were cut from the final version. One is called the [[Chess minigame]]. It was scrapped before its real title name could be revealed. | There were two minigames that were cut from the final version. One is called the [[Chess minigame]]. It was scrapped before its real title name could be revealed. | ||
===[[Xowar minigame]]=== | ===[[Xowar minigame]]=== | ||
{{Main|Xowar minigame}} | |||
The other minigame, which also can be found by examination of the game's disc, is called the [[Xowar minigame]]. Like the previous minigame, it was scrapped before its real title name could be revealed. | The other minigame, which also can be found by examination of the game's disc, is called the [[Xowar minigame]]. Like the previous minigame, it was scrapped before its real title name could be revealed. | ||
==Scrapped characters== | ==Scrapped characters== | ||
[[File:R3HH-ScrappedCreaturesConceptArt.jpg|thumb|500px|Concept art of creatures that did not make to the final version of the game.]] | [[File:R3HH-ScrappedCreaturesConceptArt.jpg|thumb|500px|Concept art of creatures that did not make it to the final version of the game.]] | ||
===[[Bonton]]=== | ===[[Bonton]]=== | ||
{{Main|Bonton}} | |||
A [[Bonton]] appears in the [[Xowar secret]] in [[the Tower of the Leptys]]. | A [[Bonton]] appears in the [[Xowar secret]] in [[the Tower of the Leptys]]. | ||
===[[Clark]]=== | ===[[Clark]]=== | ||
{{Main|Clark}} | |||
[[Clark]] was originally intended to appear according to ''[[L'Histoire de Rayman]]''. | [[Clark]] was originally intended to appear according to ''[[L'Histoire de Rayman]]''. | ||
===[[Glute]]=== | ===[[Glute]]=== | ||
{{Main|Glute}} | |||
A [[glute]] also appears in the [[Xowar secret]] in [[the Tower of the Leptys]]. | A [[glute]] also appears in the [[Xowar secret]] in [[the Tower of the Leptys]]. | ||
===[[Goaty]]=== | ===[[Goaty]]=== | ||
[[File:Goaty | [[File:Goaty-1-.gif|320px|thumb|right|A 3D rotation of the scrapped [[Goaty]], with drastic differences from its conceptual design.]] | ||
A [[Goaty]] was originally going to appear in the game, but it was scrapped to avoid overloading the universe with creatures. Despite this, the [[Goaty]] makes a cameo as a statue in [[ | {{Main|Goaty}} | ||
A [[Goaty]] was originally going to appear in the game, but it was scrapped to avoid overloading the universe with creatures. Despite this, the [[Goaty]] makes a cameo as a statue in [[Razoff]]'s mansion. | |||
===[[Gunslinger Hoodlum]]=== | ===[[Gunslinger Hoodlum]]=== | ||
{{Main|Gunslinger Hoodlum}} | |||
One of several scrapped [[Hoodlum]]s, the [[Gunslinger Hoodlum]] was planned to appear in the game. | One of several scrapped [[Hoodlum]]s, the [[Gunslinger Hoodlum]] was planned to appear in the game. | ||
===[[Hoodloon]]=== | ===[[Hoodloon]]=== | ||
{{Main|Hoodloon}} | |||
Another of the scrapped [[Hoodlum]]s, [[Hoodloon]]s do appear in the game as background objects in [[the Summit Beyond the Clouds]]. | Another of the scrapped [[Hoodlum]]s, [[Hoodloon]]s do appear in the game as background objects in [[the Summit Beyond the Clouds]]. | ||
===[[Hoover]]=== | ===[[Hoover]]=== | ||
{{Main|Hoover}} | |||
A carnivorous plant called [[Hoover]], was planned to be an enemy in the game. It was cut for unknown reasons. | A carnivorous plant called [[Hoover]], was planned to be an enemy in the game. It was cut for unknown reasons. | ||
===[[Kagoubinôme]]=== | ===[[Kagoubinôme]]=== | ||
{{Main|Kagoubinôme}} | |||
A variety of [[Hoodlum]]s that were supposed to be in the game called the [[Kagoubinôme]] were scrapped from the final release. | A variety of [[Hoodlum]]s that were supposed to be in the game called the [[Kagoubinôme]] were scrapped from the final release. | ||
===[[Ly]]=== | ===[[Ly]]=== | ||
{{Main|Ly}} | |||
[[Ly]] makes a cameo appearance in [[the Longest Shortcut]], though the presence of concept art showing a redesign might imply an intended larger role. | [[Ly]] makes a cameo appearance in [[the Longest Shortcut]], though the presence of concept art showing a redesign might imply an intended larger role. | ||
===[[Muddibog]]=== | ===[[Muddibog]]=== | ||
[[File: | [[File:Mudi02-1-.gif|320px|thumb|right|The [[Muddibog]]'s early appearance and attacks, featuring both the small and giant variants.]] | ||
{{Main|Muddibog}} | |||
[[Muddibog]]s appear as enemies in the final game, | Originally called '''Mudis''', the [[Muddibog]]s appear as enemies in the final game, although with a different appearance and an attack to throw rocks instead of the substance which they are covered in. A giant variant with an attack to slam the ground was scrapped. | ||
===[[Murkin]]=== | ===[[Murkin]]=== | ||
{{Main|Murkin}} | |||
[[Murkin]]s eventually appear in ''[[Rayman: | [[Murkin]]s eventually appear in ''[[Rayman: Hoodlums' Revenge]]''. | ||
===[[Scaleman]]=== | ===[[Scaleman]]=== | ||
{{Main|Scaleman}} | |||
[[Scaleman]] appears in [[Rayman 3 (Game Boy Advance)|the Game Boy Advance version of ''Rayman 3'']]. | [[Scaleman]] appears in [[Rayman 3 (Game Boy Advance)|the Game Boy Advance version of ''Rayman 3'']]. | ||
===[[ | ===[[Conjoined Hoodlum]]=== | ||
{{Main|Conjoined Hoodlum}} | |||
A pair of twin [[Hoodlum]]s | A pair of twin [[Hoodlum]]s, referred to as [[Conjoined Hoodlum]]s, was completely removed from the game. | ||
===[[Snoot]]=== | ===[[Snoot]]=== | ||
{{Main|Snoot}} | |||
A background creature called [[Snoot]] was supposed to appear, but was scrapped like the [[Goaty]] and [[Snorty]], to avoid overloading the universe with creatures. | A background creature called [[Snoot]] was supposed to appear, but was scrapped like the [[Goaty]] and [[Snorty]], to avoid overloading the universe with creatures. | ||
===[[Snorty]]=== | ===[[Snorty]]=== | ||
{{Main|Snorty}} | |||
The third of the creatures that were cut from the game to avoid overloading the universe with creatures, is called [[Snorty]]. | The third of the creatures that were cut from the game to avoid overloading the universe with creatures, is called [[Snorty]]. | ||
===[[Wooglah]]=== | ===[[Wooglah]]=== | ||
{{Main|Wooglah}} | |||
A [[Wooglah]] would | A [[Wooglah]] would have appeared in the game as a helper to [[Rayman]] and [[Globox]] in terms of advancing to other worlds, but it was scrapped for unknown reasons. | ||
===[[Xowar]]=== | ===[[Xowar]]=== | ||
[[File:Xowar-R3HH-PC-TTOTL.png|320px|thumb|right|The [[Xowar]] in its cell in [[the Tower of the Leptys]].]] | [[File:Xowar-R3HH-PC-TTOTL.png|320px|thumb|right|The [[Xowar]] in its cell in [[the Tower of the Leptys]].]] | ||
{{Main|Xowar}} | |||
The [[Xowar]] appears in the [[Xowar secret]]. | The [[Xowar]] appears in the [[Xowar secret]]. | ||
===[[Zaq]]=== | ===[[Zaq]]=== | ||
{{Main|Zaq}} | |||
The [[Zaq]]s were supposed to be in the game, but was later cut due to time constraints. | The [[Zaq]]s were supposed to be in the game, but was later cut due to time constraints. | ||
{{clear}} | {{clear}} | ||
==Scrapped objects== | ==Scrapped objects== | ||
===[[Lav-O-Matic]]=== | ===[[Lav-O-Matic]]=== | ||
{{Main|Lav-O-Matic}} | |||
The [[Lav-O-Matic]] was intended to appear in the ''[[Aquatic world]]'' along with the [[Zaq]]s, but all were scrapped due to the levels 'lacked rhythm' compared to other levels. | The [[Lav-O-Matic]] was intended to appear in the ''[[Aquatic world]]'' along with the [[Zaq]]s, but all were scrapped due to the levels 'lacked rhythm' compared to other levels. | ||
<gallery widths="320px" heights="240px"> | |||
Washing machine.jpg|Concept designs for the [[Lav-O-Matic]]. | |||
Hoodlum Washing Machine.png|Concept designs for the [[Lav-O-Matic]]. | |||
</gallery> | |||
===[[Plum]] container=== | ===[[Plum]] container=== | ||
An unused object that appeared to contain a [[plum]] was discovered by hacking the game. | An unused object that appeared to contain a [[plum]] was discovered by hacking the game. | ||
<gallery | <gallery widths="320px" heights="240px"> | ||
Trap Plum 1.png|A beta object which could contain [[plum]]s. | Trap Plum 1.png|A beta object which could contain [[plum]]s. | ||
Trap Plum 2.png|[[Rayman]] could [[Telescopic fist|shoot]] the object. | Trap Plum 2.png|[[Rayman]] could [[Telescopic fist|shoot]] the object. | ||
</gallery> | |||
==Prototype videos== | |||
On May 6th 2026, Yann Masson, a gameplay programmer for ''[[Rayman 3]]'', uploaded two videos on his YouTube channel featuring many scrapped features: | |||
* [https://www.youtube.com/watch?v=5ASC7rcMOAE Part 1] | |||
* [https://www.youtube.com/watch?v=VfTUjMbEwgk Part 2] | |||
<gallery> | |||
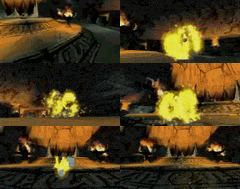
Rayman double fist charge.gif|[[Rayman]] originally had the ability to use both of his fists at the same time. | |||
Xowar chase prototype.gif|The scrapped [[Xowar]] boss fight | |||
</gallery> | |||
==E3 2002 prototype== | |||
[[File:Rayman3EarlyLogo.png|thumb|Early Logo of ''[[Rayman 3]]'' found in the archives of the E3 2002 demo]] | |||
On March 18, 2021, thanks to Project Deluge, many PlayStation 2 prototypes were found and leaked, including the 2002 E3 prototype of ''[[Rayman 3]]'' dated May 17, 2002. | |||
The preservation website Hidden Palace played this prototype on its Twitch channel along with other prototypes,<ref>Twitch, ''Highlight: Project Deluge: Rayman 3: Hoodlum Havoc'', https://www.twitch.tv/videos/957243402</ref> and later made them available for download on its website.<ref>Hidden Palace, ''Rayman 3: Hoodlum Havoc (May 17, 2002 prototype)'', https://hiddenpalace.org/Rayman_3:_Hoodlum_Havoc_(May_17,_2002_prototype)</ref> | |||
Through the use of export tools, several files have been discovered: | |||
* Preliminary cinematics, including "The idyll of [[Bégoniax]] and [[Razoff]]", "[[Gumsi]]'s grandeur", "[[André]] tempts [[Reflux]]", "The [[Hoodlum]]s get organized" and "The Power of [[Leptys]]", all of them with [[Rayman]] using his ''[[Rayman 2]]'' design. | |||
* Sound files including old voices from [[Bégoniax]], [[Razoff]], [[Globox]], [[Rayman]] and the [[Hoodlum]]s. | |||
* Textures dated to May 2002, including textures from [[Hoodlum]]s that did not make it to the final game, such as [[Kagalpha]] or [[Kagoubinôme]]. | |||
* Alternative [[Rayman]] textures using his second early design. | |||
* Textures reminiscent of ''[[Rayman 2]]'', including textures of effects, worlds, [[Ly]], [[Clark]], [[Sam]] and [[Murfy]]. | |||
* Textures dated November 2000, including textures from the early [[Hoodlum]] designs, scrapped character textures and even scrapped world textures. | |||
===Screenshots=== | |||
<gallery> | |||
Rayman3 2002demo1.jpeg|Second stage of [[The Land of the Livid Dead (Rayman 3)|the Land of the Livid Dead]] from the E3 2002 [[List of Rayman demos|demo]]. | |||
Rayman3 2002demo2.jpeg|Second stage of [[The Land of the Livid Dead (Rayman 3)|the Land of the Livid Dead]]. | |||
Rayman3 2002demo3.jpeg|Second stage of [[The Land of the Livid Dead (Rayman 3)|the Land of the Livid Dead]]. | |||
Rayman3 2002demo11.jpeg|Second stage of [[The Land of the Livid Dead (Rayman 3)|the Land of the Livid Dead]]. | |||
Rayman3 2002demo14.jpeg|Second stage of [[The Land of the Livid Dead (Rayman 3)|the Land of the Livid Dead]]. | |||
Rayman3 2002demo16.jpeg|Second stage of [[The Land of the Livid Dead (Rayman 3)|the Land of the Livid Dead]]. | |||
Rayman3 2002demo24.jpeg|Second stage of [[The Land of the Livid Dead (Rayman 3)|the Land of the Livid Dead]]. | |||
Rayman3 2002demo22.jpeg|[[Razoff]]'s mansion from the E3 2002 [[List of Rayman demos|demo]]. | |||
Rayman3 2002demo21.jpeg|[[Razoff]]'s mansion. | |||
Rayman3 2002demo20.jpeg|[[Razoff]]'s mansion. | |||
Rayman3 2002demo19.jpeg|[[Razoff]]'s mansion. | |||
Rayman3 2002demo18.jpeg|[[Razoff]]'s mansion. | |||
Rayman3 2002demo15.jpeg|[[Razoff]] fights with [[Rayman]]. | |||
Rayman3 2002demo13.jpeg|[[Razoff]]'s mansion. | |||
Rayman3 2002demo12.jpeg|[[Razoff]]'s mansion. | |||
Rayman3 2002demo10.jpeg|[[Razoff]]'s mansion. | |||
Rayman3 2002demo8.jpeg|[[Rayman]] collecting [[crown]]s in [[Razoff]]'s mansion. | |||
Rayman3 2002demo4.jpeg|Third stage of [[the Tower of the Leptys]] from the E3 2002 [[List of Rayman demos|demo]]. | |||
Rayman3 2002demo5.jpeg|Third stage of [[the Tower of the Leptys]]. | |||
Rayman3 2002demo17.jpeg|Third stage of [[the Tower of the Leptys]]. | |||
Rayman3 2002demo6.jpeg|[[The Bog of Murk]] from the E3 2002 [[List of Rayman demos|demo]]. | |||
Rayman3 2002demo7.jpeg|[[The Bog of Murk]]. | |||
Rayman3 2002demo9.jpeg|[[Rayman]] fights [[Bégoniax]]. | |||
Rayman3 2002demo23.jpeg|[[The Bog of Murk]]. | |||
</gallery> | |||
==2002 development build== | |||
[[Rayman Pirate-Community]] user DandyGuy dumped a ''[[Rayman 3]]'' PlayStation 2 development disc online and it appears to be built on October 27, 2002. This build contains six levels each having a simple debug name and the build contains a few differences closely resembling the final game. | |||
The level 'Intro. 10' is the first section of [[the Fairy Council]] with [[Murfy]] carrying [[Rayman]] with no arms, this version of the sections has a different voice for [[Murfy]] and he had different lines. | |||
* Instead of "End Of Cinematic, Now it's time for some action" he says "You're Too Heavy, I'm Not Going To Hold Out Much Longer!", | |||
* Instead of "Grab Those Red Things Okay?" he says "Grab The Red Lums, They're Bursting With Energy!" | |||
* Instead of "Oh, No Here Comes Numbskull Again", he says "Ah Ha! A Hoodlum!" | |||
* Instead of "Oooh, this place is crawlin’ with them." and "Aaah! They’re shootin’ at us! How original of them." he says "I Saw Everything, It's Their Chef, Andre, He Turns the Red Lums Into Hoodlums" and "If We Don't Stop Him, We'll Be Invaded!" | |||
* Instead of "Ok, you did a little better, I'm going to reward you with your first parachute jump, parachute not included!" he says "We Shook Them Off, I'll See You On The Ground" | |||
'SK8.00' is the debug name for the first [[Teensie Highway]] which has some minor differences compared to the final game. | |||
* The landing sound effect when jumping from platform to platform uses the generic 'Boing!' sound. | |||
* When jumping from platform to platform using 'X' the player gets rewarded with a bonus and a 'X2' score multiplier followed by the [[Shock Rocket]] sound effect playing in a loop. | |||
* [[Rayman]] cheers on saying "Woohoo!" when jumping on platforms | |||
* Some instruments in the soundtrack for the [[Teensie Highway]] are either missing or are raised or lowered in volume from the other instruments | |||
* The final segment of the [[Teensie Highway]] has an ending music track that still remains in the final game but was left unused. | |||
'Wood. 19' Contains two segments of [[Clearleaf Forest]], the first being the segment that introduces the player to the [[Shock Rocket]], and the following segment involving the same segment that was used in the 2002 demo. | |||
* The [[Shock Rocket]] segment is missing cutscenes for finding the secret gems under the trap door and for opening each of the 3 steel doors. Instead [[Rayman]] just stays still for a couple of seconds. | |||
* The hitting target sound effects uses those from [[Hoodlum Headquarters]] for [[Rayman]] and [[Globox]] in the final game instead of a wood breaking sound effect. | |||
'MOOR. 60' Contains a segment from [[The Land of the Livid Dead (Rayman 3)|the Land of the Livid Dead]] where [[Rayman]] must free the 3 [[Teensie]]s and open the door to access the second [[Teensie doctor]]. | |||
* The level reuses ''[[Rayman 2]]'' fire textures | |||
* The [[plum]] music is slightly altered containing more instruments | |||
* The [[Teensie]]s had different voice actors and their dialogue was also shown in text. | |||
* The level is also missing some music in the third quarter of the level | |||
* The [[Hoodoo]]'s theme was completely different sounding dark and dramatic | |||
* The [[Hoodstormer]] theme is also different sounding a bit silly | |||
'Flash. 10' Contains the final segment of [[the Longest Shortcut]] | |||
* The level shows an empty message box at the beginning | |||
* [[Globox]] uses both French and English voices at the same time | |||
* The entire level is missing music | |||
* The cutscene involving the three [[Teensie doctor]]s is missing voices | |||
'Tower .30' contains the final section of [[the Tower of the Leptys]] and is almost exactly similar to its 2002 demo counterpart. | |||
<gallery widths="320px" heights="240px"> | |||
R3 Dev Main Menu.png|thumb|This is the level select screen when choosing out of the five levels offered | |||
R3 Different Text Window.png|thumb|When playing the intro level, [[Murfy]] and the text references the HP orbs as [[Red Lum]]s | |||
R3 Teensie Highway Dev Build.png|thumb|Jumping with cross enables a score multiplier | |||
R3 TLOTLD 1.png|thumb|When freeing the second [[Teensie]], his dialogue is in a text box, possibly as a placeholder | |||
R3 TLOTLD 2.png|thumb|Second of the [[Teensie]]'s dialogue in a text box | |||
R3 TLOTLD 3.png|thumb|Outside the tower, the posts are using unmodified ''[[Rayman 2]]'' fire textures | |||
</gallery> | |||
=== Unused textures === | |||
Several unused textures can be found in the files. | |||
<gallery> | |||
R3 Unused - Manual.png|An early design for [[the Manual]]. | |||
R3 Unused - Murfy.png|An early design for [[Murfy]], resembling his ''[[Rayman 2]]'' design. | |||
R3 Unused - Early Murfy + manual in raymap.png | |||
</gallery> | |||
The following textures are for an unused early menu, resembling that seen in the [[Rayman 3 (Game Boy Advance)|GameBoy Advance version of ''Rayman 3'']]. | |||
<gallery> | |||
R3 Unused - Menu1.png | |||
R3 Unused - Menu2.png | |||
R3 Unused - Menu3.png | |||
R3 Unused - Menu4.png | |||
</gallery> | |||
Here are the same menu textures, but with the alpha channel removed. | |||
<gallery> | |||
R3 Unused - Menu1 (no alpha).png | |||
R3 Unused - Menu2 (no alpha).png | |||
R3 Unused - Menu3 (no alpha).png | |||
R3 Unused - Menu4 (no alpha).png | |||
</gallery> | </gallery> | ||
==2002 [[List of Rayman demos|demo]]== | ==2002 [[List of Rayman demos|demo]]== | ||
[[File:R3HH-BETADemo-PC-LoadingScreen.png|320px|thumb|right|Several of the enemies in ''[[Rayman 3]]'' including the scrapped [[Xowar]] appeared on this early PC version loading screen.]] | [[File:R3HH-BETADemo-PC-LoadingScreen.png|320px|thumb|right|Several of the enemies in ''[[Rayman 3]]'' including the scrapped [[Xowar]] appeared on this early PC version loading screen.]] | ||
In 2002, some platinum copies of ''[[Rayman Revolution]]'' were bundled with a [[List of Rayman demos|demo]] disc of ''[[Rayman 3]]'' and these were identified with a sticker in the front cover. There were other [[Rayman (series)|''Rayman'' games]] games for PC that bundled the same [[List of Rayman demos|demo]] too, along with a few other [[List of Rayman demos|demos]] featuring different levels than the ones seen in the PlayStation 2 version. This [[List of Rayman demos|demo]] featured some differences: | In 2002, some platinum copies of ''[[Rayman Revolution]]'' were bundled with a [[List of Rayman demos|demo]] disc of ''[[Rayman 3]]'' and these were identified with a sticker in the front cover. There were other [[Rayman (series)|''Rayman'' games]] games for PC that bundled the same [[List of Rayman demos|demo]] too, along with a few other [[List of Rayman demos|demos]] featuring different levels than the ones seen in the PlayStation 2 version. This [[List of Rayman demos|demo]] featured some differences: | ||
* The [[List of Rayman demos|demo]] features an earlier trailer with different music and some gameplay footage with notable differences, like fire textures from ''[[Rayman 2]]'' and [[Rayman]] with the ''[[Rayman 2]]'' design in [[ | * The [[List of Rayman demos|demo]] features an earlier trailer with different music and some gameplay footage with notable differences, like fire textures from ''[[Rayman 2]]'' and [[Rayman]] with the ''[[Rayman 2]]'' design in the [[Leptys]] cutscene. | ||
* The loading screens of the PC version is an earlier version of "The Usual Suspects", featuring [[Count Razoff]] and an older design of the [[Knaaren]], the [[Hoodboom]] and the [[Muddibog]]. | * The loading screens of the PC version is an earlier version of "The Usual Suspects", featuring [[Razoff|Count Razoff]] and an older design of the [[Knaaren]], the [[Hoodboom]] and the [[Muddibog]]. | ||
* The loading screen of the PlayStation 2 version features a slot machine with a rotating 3D model of a [[Hoodmonger]]. A similar style of loading screen was used in the final version of ''[[Rayman M]]'' for the PlayStation 2. | * The loading screen of the PlayStation 2 version features a slot machine with a rotating 3D model of a [[Hoodmonger]]. A similar style of loading screen was used in the final version of ''[[Rayman M]]'' for the PlayStation 2. | ||
* In Dangerous Game, the old appearance of the [[ | * In Dangerous Game, the old appearance of the [[Porkibank|pigpots]] can be seen. | ||
* [[Rayman]] yells like Tarzan when he grabs a [[flying hook]] with the [[ | * [[Rayman]] yells like Tarzan when he grabs a [[flying hook]] with the [[Lockjaw]]. | ||
* [[Globox]] and [[André]] have different voices than the ones used in [[Rayman 3|the final version]]. | * [[Globox]] and [[André]] have different voices than the ones used in [[Rayman 3|the final version]]. | ||
* The lock target image is different. | * The lock target image is different. | ||
| Line 201: | Line 344: | ||
* The points given by some actions are different, like for example, a [[Jewel|green gem]] rewards the player with 100 points instead of 1500. | * The points given by some actions are different, like for example, a [[Jewel|green gem]] rewards the player with 100 points instead of 1500. | ||
<gallery widths="320px" heights="240px"> | |||
<gallery | |||
R3 -Beta- Holy Sheet.jpg|When a player scores a number of points in the 2002 [[List of Rayman demos|demo]], the words "Holy sheet" would initially appear on the screen. | R3 -Beta- Holy Sheet.jpg|When a player scores a number of points in the 2002 [[List of Rayman demos|demo]], the words "Holy sheet" would initially appear on the screen. | ||
R3 -Beta- Lock Target .jpg|The design of the lock target in the 2002 [[List of Rayman demos|demo]]. | R3 -Beta- Lock Target .jpg|The design of the lock target in the 2002 [[List of Rayman demos|demo]]. | ||
R3 -Beta- Slot Machine.jpg|The PlayStation 2 loading screen from the 2002 [[List of Rayman demos|demo]] of ''[[Rayman 3]]''. | R3 -Beta- Slot Machine.jpg|The PlayStation 2 loading screen from the 2002 [[List of Rayman demos|demo]] of ''[[Rayman 3]]''. | ||
R3 -Beta- Flag.jpg|This flag has been replaced by [[:File:HoodFlag.png|this one]] who represents the most common enemies from the game: the [[Hoodmonger]]s. | R3 -Beta- Flag.jpg|This flag has been replaced by [[:File:HoodFlag.png|this one]] who represents the most common enemies from the game: the [[Hoodmonger]]s. | ||
Pigpot.jpg|The previous design of the [[ | Pigpot.jpg|The previous design of the [[Porkibank|pigpots]]. | ||
</gallery> | </gallery> | ||
===Dangerous Game=== | ===Dangerous Game=== | ||
This game mode is available in the ''[[Rayman 3]]'' [[List of Rayman demos|demo]], released in 2002. It contains a sequence of the third section of the | This game mode is available in the ''[[Rayman 3]]'' [[List of Rayman demos|demo]], released in 2002. It contains a sequence of the third section of the [[Clearleaf Forest]]. Many differences can be found between this version and the level of the final version. Some additional differences appear in the PlayStation 2 version. Like the musics played when [[Rayman]] is in fight with the [[Hoodlum]]s. | ||
Before the first secret entrance of this sequence, it was initially expected that | Before the first secret entrance of this sequence, it was initially expected that a flag representing the [[Hoodlum]] camp appeared, but it was instead replaced by a flag representing a [[Hoodmonger]]. In the PC version of the [[List of Rayman demos|demo]], the [[Porkibank|pigpots]]' previous design is used. | ||
===[[Special Invaders]]=== | ===[[Special Invaders]]=== | ||
[[File:SpecialInvaders-Arcade-R3HH-PC-TitleScreen.jpg|320px|thumb|right|[[Special Invaders]], as seen in the final version of ''[[Rayman 3]]''.]] | [[File:SpecialInvaders-Arcade-R3HH-PC-TitleScreen.jpg|320px|thumb|right|[[Special Invaders]], as seen in the final version of ''[[Rayman 3]]''.]] | ||
This game mode is also available in the ''[[Rayman 3]]'' [[List of Rayman demos|demo]]. It contains the third section of [[the Tower of the Leptys]]. Between the beta and final version of this section, the most striking differences are the sounds and musics. Some dialogs had not yet been added to the game, such as those of [[Globox]] and [[Rayman]] during the cinematic of the section. [[Globox]] does not call [[Rayman]] to get aboard his [[Armaguiddon]] but honk to get him. Also, he doesn't say anything about the enemies and do not compliment the buildings. But he is frightened at the sight of the stone gaps, when he's with [[Rayman]] in the room where they are located, [[Globox]] yells : "Ah! A mixer!". The name given to this game mode was finally used for a mini-game in the final version of ''[[Rayman 3]]''. The name of this game mode refers to a classic, '' Space Invaders'. | This game mode is also available in the ''[[Rayman 3]]'' [[List of Rayman demos|demo]]. It contains the third section of [[the Tower of the Leptys]]. Between the beta and final version of this section, the most striking differences are the sounds and musics. Some dialogs had not yet been added to the game, such as those of [[Globox]] and [[Rayman]] during the cinematic of the section. [[Globox]] does not call [[Rayman]] to get aboard his [[Armaguiddon]] but honk to get him. Also, he doesn't say anything about the enemies and do not compliment the buildings. But he is frightened at the sight of the stone gaps, when he's with [[Rayman]] in the room where they are located, [[Globox]] yells : "Ah! A mixer!". The name given to this game mode was finally used for a mini-game in the final version of ''[[Rayman 3]]''. The name of this game mode refers to a classic, '' Space Invaders'. | ||
| Line 225: | Line 367: | ||
<gallery> | <gallery> | ||
Dangerous Game.png|The logo for Dangerous Game. | |||
Special Invaders.png|The logo for [[Special Invaders]]. | |||
Trailer.png|The logo for the trailer. | |||
</gallery> | |||
=== Assets === | |||
Some early game assets have been found in the files of the demos. | |||
<gallery> | |||
Rayman 3 Early Logo.png|An early logo. | |||
R3ddlogo.png|Early version of the US logo. | |||
Rayman 3 Early Medallion 1.png|An orange medallion. | |||
Rayman 3 Early Medallion 2.png | |||
Rayman 3 Unused Arcade Menu Icon.png|Unused arcade menu icon. | |||
Rayman 3 Unused Secret Icons.png|Unused secrets menu icons. | |||
R3 Unused - Early Menu.png|This early menu is from the PlayStation 2 demo. | |||
</gallery> | |||
==Press kit from ''rayman3.com''== | |||
* [https://raymanpc.com/wiki/script-en/images/7/75/Voiceovers_Release_Final.pdf Press release, December, 2002] | |||
* [https://raymanpc.com/wiki/script-en/images/2/25/DECreleaseFINAL.pdf Press release, December, 2003] | |||
* [https://raymanpc.com/wiki/script-en/images/b/b1/Anatomy_of_a_Hero.pdf Anatomy of a Hero] | |||
* [https://raymanpc.com/wiki/script-en/images/f/f1/FAQfinal-12-6.pdf FAQ] | |||
===Logos included in the press kit=== | |||
<gallery> | |||
R3 LOGOBETA3.png | |||
R3 FNL.png | |||
</gallery> | |||
===Images=== | |||
<gallery> | |||
BlackLumFAQ.png | |||
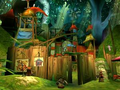
ClearleafFAQ.png|[[Clearleaf Forest]]. Interestingly, the old design of the [[Hoodboom]] is found here. | |||
DoctorFAQ.png|Early design for [[Roméo Patti]]. | |||
GloboxFAQ.png | |||
HoodstylerFAQ.png|[[Hoodmonger Soldier]] with early textures. | |||
RefluxFAQ.png|Other early design for [[Reflux]], now with white eyes. | |||
</gallery> | |||
== Unused minigames == | |||
In the PAL version of the GameCube version there exists unused Game Boy Advance ROMs for the minigames which would have the player connect their GameCube to their Game Boy Advance to play them. There are 3 of these ROMs, with the first one being an early version of the [[Mad Trax]] and [[Wheelis]] minigames, with early sprite artwork. The other two are completely unused and feature a different map and sprites. | |||
<gallery widths="240px" heights="160px"> | |||
R3 GCN - Unused GBA Minigame 1.png|The second minigame map | |||
R3 GCN - Unused GBA Minigame 2.png|The third minigame map | |||
R3 GCN - Early Mad Trax controls info.png|An early controls screen sprite for the first minigame | |||
R3 GCN - Unused GBA Minigames controls info.png|The controls screen sprite for the second and third minigames | |||
</gallery> | </gallery> | ||
==''[[Rayman 3 HD]]''== | ==''[[Rayman 3 HD]]''== | ||
''Rayman 3 HD'' contains upscaled old textures from the E3 2002 archives. | |||
<gallery> | <gallery> | ||
R3HD Cinematic 1.jpg|Possible placeholder, showing [[Rayman]] and [[Globox]] riding on a [[Wooglah]]. | R3HD Cinematic 1.jpg|Possible placeholder, showing [[Rayman]] and [[Globox]] riding on a [[Wooglah]]. | ||
| Line 236: | Line 426: | ||
R3HD Cinematic 3.jpg|Possible placeholder, showing some scenery in [[the Desert of the Knaaren]]. | R3HD Cinematic 3.jpg|Possible placeholder, showing some scenery in [[the Desert of the Knaaren]]. | ||
R3HD Cinematic 4.jpg|Possible placeholder, showing [[Gumsi]] seemingly playing with [[Rayman]], [[Globox]] and [[Murfy]]. | R3HD Cinematic 4.jpg|Possible placeholder, showing [[Gumsi]] seemingly playing with [[Rayman]], [[Globox]] and [[Murfy]]. | ||
R3HD Cinematic 5.jpg|Possible placeholder, showing [[Reflux]] obtaining the power of [[the Leptys]]. | R3HD Cinematic 5.jpg|Possible placeholder, showing [[Reflux]] obtaining the power of the [[Leptys]]. | ||
R3 HD Unused Texture 1.png|[[Rayman]] with his ''[[Rayman 2]]'' design. | |||
R3 HD Unused Texture 2.png|An early design for [[Globox]], resembling his ''[[Rayman 2]]'' design. | |||
R3 HD Unused Texture 3.png|An early design for the [[Hoodmonger]]. | |||
R3 HD Unused Texture 4.png | |||
</gallery> | |||
==Screenshots== | |||
<gallery> | |||
R3-EarlyScreenshot1.jpg | |||
R3-EarlyScreenshot2.jpg | |||
R3-EarlyScreenshot3.jpg | |||
R3-EarlyScreenshot4.jpg | |||
Rayman3 GC Fireball.jpg | |||
R3-EarlyScreenshot5.jpg | |||
R3-EarlyScreenshot6.jpg | |||
R3-EarlyScreenshot7.jpg | |||
R3-EarlyScreenshot8.jpg | |||
R3-EarlyScreenshot9.jpg | |||
R3-EarlyScreenshot10.jpg | |||
EarlyFC.jpg|An early screenshot of [[the Fairy Council]]. | |||
R3HH-FairyCouncil.jpg|An early version of [[the Fairy Council]]. | |||
Rayman3TheFairyCouncilBeta2.jpg|The second stage of [[the Fairy Council]]. | |||
EarlyDOTK.jpg|[[Rayman]] fighting a [[Hoodmonger]] in [[the Desert of the Knaaren]]. | |||
HHearly.jpg|The [[Hoodlum Headquarters]]. | |||
HHearly2.jpg|The shooting range in [[Hoodlum Headquarters]]. | |||
HHearly3.jpg|[[Rayman]] fighting a [[Heckler]] in [[Hoodlum Headquarters]]. | |||
Raymanfly.jpeg|[[Murfy]] with [[Rayman]] in [[the Fairy Council]]. | |||
EarlyR3-FairyCouncil.jpg|[[Podocrock]]s in [[the Fairy Council]]. | |||
Go fish.jpg|[[The Bog of Murk|Bog of Murk]] screenshot which shows a map on the tree that was replaced with a wanted poster in the final version. | |||
R3 ScrappedBog.jpg|A [[The Bog of Murk|Bog of Murk]] screenshot that features an early [[Stumbleboom]] design. | |||
R3-Hoodblasters-attack-Rayman-from-airship.jpg|The second stage of [[Clearleaf Forest]]. | |||
Drinky.jpg|A screenshot of [[Clearleaf Forest]] that shows 3 [[Porkibank|pigpots]] that are missing from the final game. | |||
TOLearly.jpg|[[The Tower of the Leptys|Tower of the Leptys]] screenshot that features an early [[Hoodmonger]] design. | |||
TeensieHighwayBeta1.jpg|The first [[Teensie Highway]], located in [[the Fairy Council]]. | |||
TeensieHighwayBeta2.jpg|[[Rayman]] in the [[Teensie Highway]]. | |||
TeensieHighwayBeta3.jpg|The first [[Teensie Highway]]. | |||
TeensieHighwayBeta4.jpg|Another look of the [[Teensie Highway]]. | |||
TeensieHighwayBeta5.jpg|The middle part of the first [[Teensie Highway]]. | |||
TeensieHighwayBeta6.jpg|[[Rayman]], a [[Teensie]], and [[Globox]] in the [[Teensie Highway]]. | |||
TeensieHighwayBeta7.jpg|[[Rayman]] collecting [[Jewel|yellow gems]] in the [[Teensie Highway]]. | |||
TeensieHighwayBeta8.jpg|The transition to the third part of the first [[Teensie Highway]]. | |||
TeensieHighwayBeta9.jpg|The third part of the [[Teensie Highway]]. | |||
TeensieHighwayBeta10.jpg|More [[Jewel|yellow gems]] in the [[Teensie Highway]]. | |||
TeensieHighwayBeta11.jpg|The final part of the first [[Teensie Highway]]. | |||
</gallery> | </gallery> | ||
==Artwork== | ==Artwork== | ||
* [[Media:Rayman 3 Art Book.pdf|''Rayman 3'' art book]] | |||
<gallery> | <gallery> | ||
Concept 1.jpeg | Concept 1.jpeg | ||
Concept 2.jpeg | Concept 2.jpeg | ||
Concept 3.jpeg | Concept 3.jpeg | ||
RTASvehicles.png | |||
EarlyAeropolis.png | |||
RTASvehicles2.png | |||
RTAS Flying vehicle.jpg | |||
Rayman on a flying veichle.JPG | |||
Quartier chinois 01.jpg | |||
Concept 4.jpeg | Concept 4.jpeg | ||
Concept 5.jpeg | Concept 5.jpeg | ||
Concept 6.jpeg | Concept 6.jpeg | ||
Chez les Ptizetres 01.jpg | |||
Concept | Concept 11.jpeg | ||
Rayman Concepts 07b.jpg | |||
Concept 10.jpeg | Concept 10.jpeg | ||
Test pub 1.jpeg | Test pub 1.jpeg | ||
Test pub 2.jpeg | Test pub 2.jpeg | ||
| Line 257: | Line 498: | ||
R3HH-EarlyKnaarenConceptArt.jpg | R3HH-EarlyKnaarenConceptArt.jpg | ||
EarlyPowerupConceptArt.jpg | EarlyPowerupConceptArt.jpg | ||
Rayman3 conceptart1.jpg | |||
Crystal.png | Crystal.png | ||
Concept Forest 1.jpg | Concept Forest 1.jpg | ||
| Line 266: | Line 506: | ||
Concept Forest 5.jpg | Concept Forest 5.jpg | ||
Concept Forest 6.jpg | Concept Forest 6.jpg | ||
Les bizarreries.jpg | |||
Concept Forest 7.jpg | |||
Concept Forest 8.jpg | |||
Arbre magique 01.jpg | |||
La pagode des nuages 01.jpg | |||
Waterfall.png | Waterfall.png | ||
Concept LOTLD 1.jpg | Concept LOTLD 1.jpg | ||
| Line 271: | Line 516: | ||
Concept LOTLD 3.jpg | Concept LOTLD 3.jpg | ||
Concept LOTLD 4.jpg | Concept LOTLD 4.jpg | ||
Concept Forest 4.jpg | |||
Concept Forest 3.jpg | |||
Concept Forest 3 Colorless.png | Concept Forest 3 Colorless.png | ||
Razoff Fireplace.png | Razoff Fireplace.png | ||
| Line 278: | Line 523: | ||
Cathedral.jpg | Cathedral.jpg | ||
R3DOTKartwork.png | R3DOTKartwork.png | ||
R3DOTKartwork2.png | |||
Concept DOTK 1.jpg | |||
Concept DOTK 2.jpg | |||
Destiny Arena Concept Art.png | Destiny Arena Concept Art.png | ||
Knaaren Architecture.png | Knaaren Architecture.png | ||
Concept DOTK 3.jpg | Concept DOTK 3.jpg | ||
Crop4.jpg | |||
Concept HHQ 1.jpg | Concept HHQ 1.jpg | ||
Concept HHQ 2.jpg | Concept HHQ 2.jpg | ||
| Line 290: | Line 537: | ||
Concept HHQ 6.jpg | Concept HHQ 6.jpg | ||
Concept HHQ 7.jpg | Concept HHQ 7.jpg | ||
R3HH-FightingHoodmongers-ConceptArt.jpg | |||
Flapoteur.jpg | |||
Concepthoodlums1.jpg | |||
R3HH-Hoodmonger-DevelopmentConceptArt-1.jpg | |||
R3HH-Hoodmonger-DevelopmentConceptArt-2.jpg | |||
R3HH-Hoodmonger-DevelopmentConceptArt-3.jpg | |||
Concepthoodlums2.jpg | |||
Concept Hoodlums Machines.jpg | |||
GloboxConceptArt.jpg | GloboxConceptArt.jpg | ||
RaymanNewDesign1.jpg | RaymanNewDesign1.jpg | ||
RaymanNewDesign2.jpg | RaymanNewDesign2.jpg | ||
RaymanNewDesign3.jpg | RaymanNewDesign3.jpg | ||
RaymanNewDesign7.jpg | |||
RaymanNewDesign4.jpg | RaymanNewDesign4.jpg | ||
RaymanNewDesign9.png | |||
RaymanNewDesign5.jpg | RaymanNewDesign5.jpg | ||
RaymanNewDesign6.jpg | RaymanNewDesign6.jpg | ||
RaymanNewDesign8.jpg | |||
Raymanpose2.jpeg | Raymanpose2.jpeg | ||
Raymanpose1.jpeg | Raymanpose1.jpeg | ||
RaymanOnAGiantFruit.jpg | RaymanOnAGiantFruit.jpg | ||
Monde-aqua01.jpg | |||
Monde-aqua02.jpg | |||
Monde-aqua03.jpg | |||
ZaqConceptArt-Monde-aqua04.jpg | |||
Rayman3us cover sketch.jpg | |||
</gallery> | |||
==Magazine scans== | |||
<gallery> | |||
Joystick Issue 136 (April 2002).png|Initial announcement for ''[[Rayman 3]]'' in ''Joystick'' | |||
Joystick Issue 141 (October 2002).png|Exclusive feature, showing early versions of levels | |||
Joystick 141 (October 2002)-2.png|Preview article for ''[[Rayman 3]]'' | |||
Joystick Issue 143 (December 2002).png|Preview article for ''[[Rayman 3]]'' | |||
Joystick Issue 145 (Feburary 2003) Cover.png|Exclusive cover for ''[[Rayman 3]]'' in ''Joystick #145'' | |||
Joystick Issue 145 (Feburary 2003)-1.png | |||
Joystick Issue 145 (Feburary 2003)-2.png | |||
Joystick Issue 145 (Feburary 2003)-3.png | |||
Joystick Issue 145 (Feburary 2003)-4.png | |||
Joystick Issue 145 (Feburary 2003)-5.png | |||
Joystick Issue 145 (Feburary 2003)-6.png | |||
Electronic Gaming Monthly Issue 155 (June 2002).png|Preview article in ''Electronic Gaming Monthly'', showing different versions of levels and an early version of [[Rayman]]'s model | |||
GamePro Issue 173 (February 2003).png|Sneak preview of the PlayStation 2 version of ''[[Rayman 3]]'' | |||
Play Magazine Issue 16 - Front.png|''Play Magazine'' issue 16 cover featuring ''[[Rayman 3]]'' | |||
Play Magazine-1.jpg|Developer interview article for ''[[Rayman 3]]'' in an exclusive feature by ''Play Magazine'' | |||
Play Magazine-2.jpg|Interview section with producer, Ahmed Boukhelifa | |||
Play Magazine-3.jpg|Interview section with lead designer, Michael Janod | |||
Play Magazine-4.jpg|Section with Olivier Dauba (lead gameplay programmer), and another with Céline Tellier (art and technical director) higlighting the artistic direction of the project | |||
Play Magazine-5.jpg|More interviews: Stan Metter (lead animator), François Queinnec (PlayStation 2 graphics programmer) and John Leguizamo (voice of [[Globox]]) | |||
Play Magazine-6.jpg|John Leguizamo interview continued | |||
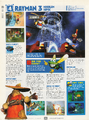
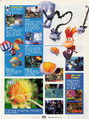
Le Journal De Mickey 1.jpg|An exclusive preview article of the game in ''Le Journal de Mickey'' | |||
Le Journal de Mickey 2.jpg | |||
Le Journal De Mickey 3.jpg | |||
Le Journal De Mickey 4.jpg | |||
EarlyPowerupConceptArt.jpg | |||
Playstation 2 Official Magazine Issue 9 (AU) (December 2002).png | |||
EDGE Magazine Issue 123 (May 2003).png | |||
GameNow Issue 17 (March 2003) (1).png | |||
GameNow Issue 17 (March 2003) (2).png | |||
</gallery> | </gallery> | ||
| Line 323: | Line 619: | ||
*[https://tcrf.net/Rayman_3_(GameCube) TCRF Page noting leftover beta content] | *[https://tcrf.net/Rayman_3_(GameCube) TCRF Page noting leftover beta content] | ||
*[https://www.youtube.com/watch?v=_FBIwLDP3pc&list=PLHOgtLRdYgt9CRIYkmrXal5rgsSefdLBj A playlist with IGN videos from unpublic demo] | |||
==References== | |||
<references /> | |||
{{Rayman 3|collapsed=Y}} | |||
{{Rayman series}} | {{Rayman series}} | ||
{{Early production}} | {{Early production}} | ||
Latest revision as of 12:55, 3 June 2026


Rayman 3 underwent numerous changes during its development. This page notes findings in regards to said changes in development, and early visual items, such as screenshots and artwork.
Early development
Rayman 2000
Main article: Rayman 2000
Rayman 2000 was a video game project that would serve as a direct sequel to Rayman 2.
Its development began shortly after the release of Rayman 2, but was canceled. Several of its concepts were reused for Rayman 3.
Early designs


During the early production stage of Rayman 3, early footage, screenshots and artwork show that development initially began with Rayman utilizing his design from Rayman 2, as opposed to the new redesign that debuted with the final game. He also appeared in a design similar to that of Rayman 2, with a yellow scarf and new shoes, and a design similar to that of Rayman 3, with a yellow hood and his Rayman 2 shoes, until he got to his final design.
Other early elements include unused areas, such as an underwater level, and differences with the HUD, which resembles the HUD of Rayman 2 in some early screenshots. Some screenshots appear fairly similar to the final game, but still show some differences in aesthetic and lighting. There was also several kinds of Hoodlums that were going to appear, but got scrapped from the final game.
Ghost levels
The third and fourth parts of the Bog of Murk appear to have originally been the same map, but ended up being separated. Both parts retained a prototype copy of the other where only a few gems are present, elements like meadowscrews are non-functional, and there are no enemies or cages. These areas can be accessed in-game with hacks or glitches.
Cut Leptys statue behaviour
As seen in the promotional video included in the final game, the Leptys statue in the second part of the Desert of the Knaaren was meant to attack Rayman with lightning, adding difficulty to this platforming section. The code for this behaviour is still present in the game's files and can be reactivated on PC.[1]


Debugging features
There are two debugging features mistakenly left in the GameCube version of the game. The first one is in the first part of the Fairy Council: holding R + Start will cause Murfy to stop flying until the player lets go. The second is in the fourth part of the Desert of the Knaaren: pressing the same buttons will cause the text "Salle 01" (French for "Room 01") to appear in the bottom left of the screen. If the player then holds the R button and presses Up or Down on the D-Pad, the number can be changed up to 05. Holding R and pressing Left on the D-Pad will then cause Rayman to be teleported to a specific location, depending on what number was displayed.
-

-
 The Hoodlum Headquarters.
 -
 A screenshot of Hoodlum Headquarters that features an early Hoodmonger design.
 -

-

-

-

-

-
-
 Debug mode.
 -

-

-

-

-

-
 Rayman in an early version of the Summit Beyond the Clouds.
 -

-
 Screenshots of an unknown area that was scrapped.
 -
 Screenshots of an early build of the game.


.jpg)


Scrapped story
According to scrapped dialogues found in the beta demo's game files,[2] the early plot differed significantly from that of the final game. Notable differences are, among others:
- Murfy stayed with Rayman for a longer period.
- A character called Ludivine also provided advice to Rayman and Globox. She could have been a Ludiv.
- Clark appeared in the game.
- Hoodlums could talk.
- Bontons appeared in the game; one could be used to destroy a wooden door.
- Rayman had to get to the top of a volcano to obtain a Silver Lum. An early version of the flying hook, called the Lum Ring, was required to cross a stream and continue towards the mountain.
- Rayman and Globox use a gigantic bird called the wooglah to go to the Clearleaf Forest to the Land of the Livid Dead. But when they fly over the Bog of Murk, the wooglah becomes injured, forcing them to land. Globox decides to stay with the wooglah while Rayman seeks the able antidote to treat him. Murfy comes to meet Rayman and advises him to go ask Bégoniax to help him. Bégoniax has seen the wooglah when he was injured thanks to her magic mirror. She agrees to cure the wooglah, provided Rayman brings her a beauty elixir that is hidden in the swamps.
- During the final battle, Rayman had to free the Leptys from Reflux's control by breaking the mirrors directing magic rays towards him, and then destroy the sceptre by redirecting the four rays towards it.
- Plums could be destroyed with a fully charged shot, spilling sticky juice around and allowing Rayman to climb onto otherwise slippery surfaces.
- Permanent powers were obtained through Silver Lums. Those powers included charging Rayman's fists faster, shooting with both fists (bestowed by the ambidextrous Silver Lum), strafing, and a power called the Razibus allowing Rayman to shoot his fists further as well as hit multiple enemies (in order to use this power, Rayman had to shoot his fist when crouching).
- The super helicopter power was obtained was obtained through super helicopter Lums.
- An early version of the Shock Rocket was obtained through Snipe Lums.
Scrapped levels
Aquatic world

Main article: Aquatic world
There were plans to have a level included in the game known as the Aquatic world. It was scrapped before its official name could be revealed.
Chess minigame
Main article: Chess minigame
There were two minigames that were cut from the final version. One is called the Chess minigame. It was scrapped before its real title name could be revealed.
Xowar minigame
Main article: Xowar minigame
The other minigame, which also can be found by examination of the game's disc, is called the Xowar minigame. Like the previous minigame, it was scrapped before its real title name could be revealed.
Scrapped characters

Bonton
Main article: Bonton
A Bonton appears in the Xowar secret in the Tower of the Leptys.
Clark
Main article: Clark
Clark was originally intended to appear according to L'Histoire de Rayman.
Glute
Main article: Glute
A glute also appears in the Xowar secret in the Tower of the Leptys.
Goaty

Main article: Goaty
A Goaty was originally going to appear in the game, but it was scrapped to avoid overloading the universe with creatures. Despite this, the Goaty makes a cameo as a statue in Razoff's mansion.
Gunslinger Hoodlum
Main article: Gunslinger Hoodlum
One of several scrapped Hoodlums, the Gunslinger Hoodlum was planned to appear in the game.
Hoodloon
Main article: Hoodloon
Another of the scrapped Hoodlums, Hoodloons do appear in the game as background objects in the Summit Beyond the Clouds.
Hoover
Main article: Hoover
A carnivorous plant called Hoover, was planned to be an enemy in the game. It was cut for unknown reasons.
Kagoubinôme
Main article: Kagoubinôme
A variety of Hoodlums that were supposed to be in the game called the Kagoubinôme were scrapped from the final release.
Ly
Main article: Ly
Ly makes a cameo appearance in the Longest Shortcut, though the presence of concept art showing a redesign might imply an intended larger role.
Muddibog

Main article: Muddibog
Originally called Mudis, the Muddibogs appear as enemies in the final game, although with a different appearance and an attack to throw rocks instead of the substance which they are covered in. A giant variant with an attack to slam the ground was scrapped.
Murkin
Main article: Murkin
Murkins eventually appear in Rayman: Hoodlums' Revenge.
Scaleman
Main article: Scaleman
Scaleman appears in the Game Boy Advance version of Rayman 3.
Conjoined Hoodlum
Main article: Conjoined Hoodlum
A pair of twin Hoodlums, referred to as Conjoined Hoodlums, was completely removed from the game.
Snoot
Main article: Snoot
A background creature called Snoot was supposed to appear, but was scrapped like the Goaty and Snorty, to avoid overloading the universe with creatures.
Snorty
Main article: Snorty
The third of the creatures that were cut from the game to avoid overloading the universe with creatures, is called Snorty.
Wooglah
Main article: Wooglah
A Wooglah would have appeared in the game as a helper to Rayman and Globox in terms of advancing to other worlds, but it was scrapped for unknown reasons.
Xowar

Main article: Xowar
The Xowar appears in the Xowar secret.
Zaq
Main article: Zaq
The Zaqs were supposed to be in the game, but was later cut due to time constraints.
Scrapped objects
Lav-O-Matic
Main article: Lav-O-Matic
The Lav-O-Matic was intended to appear in the Aquatic world along with the Zaqs, but all were scrapped due to the levels 'lacked rhythm' compared to other levels.
-
 Concept designs for the Lav-O-Matic.
 -
 Concept designs for the Lav-O-Matic.


Plum container
An unused object that appeared to contain a plum was discovered by hacking the game.
-
 A beta object which could contain plums.
 -


Prototype videos
On May 6th 2026, Yann Masson, a gameplay programmer for Rayman 3, uploaded two videos on his YouTube channel featuring many scrapped features:
-
 Rayman originally had the ability to use both of his fists at the same time.
 -
 The scrapped Xowar boss fight


E3 2002 prototype

On March 18, 2021, thanks to Project Deluge, many PlayStation 2 prototypes were found and leaked, including the 2002 E3 prototype of Rayman 3 dated May 17, 2002.
The preservation website Hidden Palace played this prototype on its Twitch channel along with other prototypes,[3] and later made them available for download on its website.[4]
Through the use of export tools, several files have been discovered:
- Preliminary cinematics, including "The idyll of Bégoniax and Razoff", "Gumsi's grandeur", "André tempts Reflux", "The Hoodlums get organized" and "The Power of Leptys", all of them with Rayman using his Rayman 2 design.
- Sound files including old voices from Bégoniax, Razoff, Globox, Rayman and the Hoodlums.
- Textures dated to May 2002, including textures from Hoodlums that did not make it to the final game, such as Kagalpha or Kagoubinôme.
- Alternative Rayman textures using his second early design.
- Textures reminiscent of Rayman 2, including textures of effects, worlds, Ly, Clark, Sam and Murfy.
- Textures dated November 2000, including textures from the early Hoodlum designs, scrapped character textures and even scrapped world textures.
Screenshots
-
 Second stage of the Land of the Livid Dead from the E3 2002 demo.
 -
 Second stage of the Land of the Livid Dead.
 -
 Second stage of the Land of the Livid Dead.
 -
 Second stage of the Land of the Livid Dead.
 -
 Second stage of the Land of the Livid Dead.
 -
 Second stage of the Land of the Livid Dead.
 -
 Second stage of the Land of the Livid Dead.
 -

-
 Razoff's mansion.
 -
 Razoff's mansion.
 -
 Razoff's mansion.
 -
 Razoff's mansion.
 -

-
 Razoff's mansion.
 -
 Razoff's mansion.
 -
 Razoff's mansion.
 -

-
 Third stage of the Tower of the Leptys from the E3 2002 demo.
 -
 Third stage of the Tower of the Leptys.
 -
 Third stage of the Tower of the Leptys.
 -
 The Bog of Murk from the E3 2002 demo.
 -

-

-


2002 development build
Rayman Pirate-Community user DandyGuy dumped a Rayman 3 PlayStation 2 development disc online and it appears to be built on October 27, 2002. This build contains six levels each having a simple debug name and the build contains a few differences closely resembling the final game.
The level 'Intro. 10' is the first section of the Fairy Council with Murfy carrying Rayman with no arms, this version of the sections has a different voice for Murfy and he had different lines.
- Instead of "End Of Cinematic, Now it's time for some action" he says "You're Too Heavy, I'm Not Going To Hold Out Much Longer!",
- Instead of "Grab Those Red Things Okay?" he says "Grab The Red Lums, They're Bursting With Energy!"
- Instead of "Oh, No Here Comes Numbskull Again", he says "Ah Ha! A Hoodlum!"
- Instead of "Oooh, this place is crawlin’ with them." and "Aaah! They’re shootin’ at us! How original of them." he says "I Saw Everything, It's Their Chef, Andre, He Turns the Red Lums Into Hoodlums" and "If We Don't Stop Him, We'll Be Invaded!"
- Instead of "Ok, you did a little better, I'm going to reward you with your first parachute jump, parachute not included!" he says "We Shook Them Off, I'll See You On The Ground"
'SK8.00' is the debug name for the first Teensie Highway which has some minor differences compared to the final game.
- The landing sound effect when jumping from platform to platform uses the generic 'Boing!' sound.
- When jumping from platform to platform using 'X' the player gets rewarded with a bonus and a 'X2' score multiplier followed by the Shock Rocket sound effect playing in a loop.
- Rayman cheers on saying "Woohoo!" when jumping on platforms
- Some instruments in the soundtrack for the Teensie Highway are either missing or are raised or lowered in volume from the other instruments
- The final segment of the Teensie Highway has an ending music track that still remains in the final game but was left unused.
'Wood. 19' Contains two segments of Clearleaf Forest, the first being the segment that introduces the player to the Shock Rocket, and the following segment involving the same segment that was used in the 2002 demo.
- The Shock Rocket segment is missing cutscenes for finding the secret gems under the trap door and for opening each of the 3 steel doors. Instead Rayman just stays still for a couple of seconds.
- The hitting target sound effects uses those from Hoodlum Headquarters for Rayman and Globox in the final game instead of a wood breaking sound effect.
'MOOR. 60' Contains a segment from the Land of the Livid Dead where Rayman must free the 3 Teensies and open the door to access the second Teensie doctor.
- The level reuses Rayman 2 fire textures
- The plum music is slightly altered containing more instruments
- The Teensies had different voice actors and their dialogue was also shown in text.
- The level is also missing some music in the third quarter of the level
- The Hoodoo's theme was completely different sounding dark and dramatic
- The Hoodstormer theme is also different sounding a bit silly
'Flash. 10' Contains the final segment of the Longest Shortcut
- The level shows an empty message box at the beginning
- Globox uses both French and English voices at the same time
- The entire level is missing music
- The cutscene involving the three Teensie doctors is missing voices
'Tower .30' contains the final section of the Tower of the Leptys and is almost exactly similar to its 2002 demo counterpart.
-
 This is the level select screen when choosing out of the five levels offered
 -

-
 Jumping with cross enables a score multiplier
 -
 When freeing the second Teensie, his dialogue is in a text box, possibly as a placeholder
 -
 Second of the Teensie's dialogue in a text box
 -
 Outside the tower, the posts are using unmodified Rayman 2 fire textures


Unused textures
Several unused textures can be found in the files.
-
 An early design for the Manual.
 -

-


The following textures are for an unused early menu, resembling that seen in the GameBoy Advance version of Rayman 3.


Here are the same menu textures, but with the alpha channel removed.
.png)
.png)
.png)
.png)
2002 demo

In 2002, some platinum copies of Rayman Revolution were bundled with a demo disc of Rayman 3 and these were identified with a sticker in the front cover. There were other Rayman games games for PC that bundled the same demo too, along with a few other demos featuring different levels than the ones seen in the PlayStation 2 version. This demo featured some differences:
- The demo features an earlier trailer with different music and some gameplay footage with notable differences, like fire textures from Rayman 2 and Rayman with the Rayman 2 design in the Leptys cutscene.
- The loading screens of the PC version is an earlier version of "The Usual Suspects", featuring Count Razoff and an older design of the Knaaren, the Hoodboom and the Muddibog.
- The loading screen of the PlayStation 2 version features a slot machine with a rotating 3D model of a Hoodmonger. A similar style of loading screen was used in the final version of Rayman M for the PlayStation 2.
- In Dangerous Game, the old appearance of the pigpots can be seen.
- Rayman yells like Tarzan when he grabs a flying hook with the Lockjaw.
- Globox and André have different voices than the ones used in the final version.
- The lock target image is different.
- There is different music and sound effects than in the final version.
- The points given by some actions are different, like for example, a green gem rewards the player with 100 points instead of 1500.
-
 When a player scores a number of points in the 2002 demo, the words "Holy sheet" would initially appear on the screen.
 -
 The design of the lock target in the 2002 demo.
 -

-
 This flag has been replaced by this one who represents the most common enemies from the game: the Hoodmongers.
 -
 The previous design of the pigpots.


Dangerous Game
This game mode is available in the Rayman 3 demo, released in 2002. It contains a sequence of the third section of the Clearleaf Forest. Many differences can be found between this version and the level of the final version. Some additional differences appear in the PlayStation 2 version. Like the musics played when Rayman is in fight with the Hoodlums. Before the first secret entrance of this sequence, it was initially expected that a flag representing the Hoodlum camp appeared, but it was instead replaced by a flag representing a Hoodmonger. In the PC version of the demo, the pigpots' previous design is used.
Special Invaders

This game mode is also available in the Rayman 3 demo. It contains the third section of the Tower of the Leptys. Between the beta and final version of this section, the most striking differences are the sounds and musics. Some dialogs had not yet been added to the game, such as those of Globox and Rayman during the cinematic of the section. Globox does not call Rayman to get aboard his Armaguiddon but honk to get him. Also, he doesn't say anything about the enemies and do not compliment the buildings. But he is frightened at the sight of the stone gaps, when he's with Rayman in the room where they are located, Globox yells : "Ah! A mixer!". The name given to this game mode was finally used for a mini-game in the final version of Rayman 3. The name of this game mode refers to a classic, Space Invaders'.
Trailer
The trailer of the demo is different in the final version of Rayman 3.
For example, in the trailer of the demo, the old design of the Hoodmonger Officers is used. Their design looks like the Hoodmonger's one, but they wore chain mail and a kind of metal bulletproof vest.
-
 The logo for Dangerous Game.
 -
 The logo for Special Invaders.
 -
 The logo for the trailer.


Assets
Some early game assets have been found in the files of the demos.
-
 An early logo.
 -
 Early version of the US logo.
 -
 An orange medallion.
 -

-
 Unused arcade menu icon.
 -
 Unused secrets menu icons.
 -
 This early menu is from the PlayStation 2 demo.


Press kit from rayman3.com
Logos included in the press kit


Images
-

-
 Clearleaf Forest. Interestingly, the old design of the Hoodboom is found here.
 -
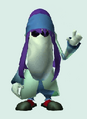 Early design for Roméo Patti.
 -
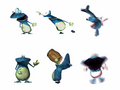
-
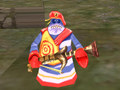 Hoodmonger Soldier with early textures.
 -
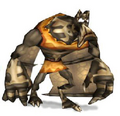 Other early design for Reflux, now with white eyes.


Unused minigames
In the PAL version of the GameCube version there exists unused Game Boy Advance ROMs for the minigames which would have the player connect their GameCube to their Game Boy Advance to play them. There are 3 of these ROMs, with the first one being an early version of the Mad Trax and Wheelis minigames, with early sprite artwork. The other two are completely unused and feature a different map and sprites.
-
 The second minigame map
 -
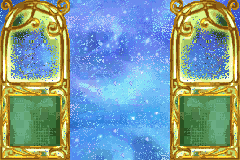 The third minigame map
 -
 An early controls screen sprite for the first minigame
 -
 The controls screen sprite for the second and third minigames


Rayman 3 HD
Rayman 3 HD contains upscaled old textures from the E3 2002 archives.
-

-
 Possible placeholder, showing a beta design for Bégoniax.
 -
 Possible placeholder, showing some scenery in the Desert of the Knaaren.
 -

-

-

-

-
 An early design for the Hoodmonger.
 -


Screenshots
-

-

-

-

-
-

-

-

-

-
-
-
 An early screenshot of the Fairy Council.
 -
 An early version of the Fairy Council.
 -
 The second stage of the Fairy Council.
 -

-
 The Hoodlum Headquarters.
 -
 The shooting range in Hoodlum Headquarters.
 -

-

-

-
 Bog of Murk screenshot which shows a map on the tree that was replaced with a wanted poster in the final version.
 -
 A Bog of Murk screenshot that features an early Stumbleboom design.
 -
 The second stage of Clearleaf Forest.
 -
 A screenshot of Clearleaf Forest that shows 3 pigpots that are missing from the final game.
 -
 Tower of the Leptys screenshot that features an early Hoodmonger design.
 -
 The first Teensie Highway, located in the Fairy Council.
 -
 Rayman in the Teensie Highway.
 -
 The first Teensie Highway.
 -
 Another look of the Teensie Highway.
 -
 The middle part of the first Teensie Highway.
 -

-

-
 The transition to the third part of the first Teensie Highway.
 -
 The third part of the Teensie Highway.
 -
 More yellow gems in the Teensie Highway.
 -
 The final part of the first Teensie Highway.


Artwork


Magazine scans
-
 Initial announcement for Rayman 3 in Joystick
 -
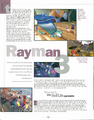 Exclusive feature, showing early versions of levels
 -
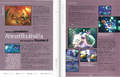 Preview article for Rayman 3
 -
 Preview article for Rayman 3
 -
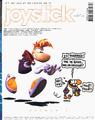 Exclusive cover for Rayman 3 in Joystick #145
 -

-

-

-

-

-
-
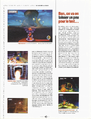
 Preview article in Electronic Gaming Monthly, showing different versions of levels and an early version of Rayman's model
 -
 Sneak preview of the PlayStation 2 version of Rayman 3
 -
 Play Magazine issue 16 cover featuring Rayman 3
 -
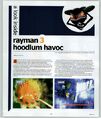 Developer interview article for Rayman 3 in an exclusive feature by Play Magazine
 -
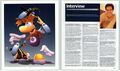 Interview section with producer, Ahmed Boukhelifa
 -
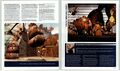 Interview section with lead designer, Michael Janod
 -
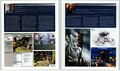 Section with Olivier Dauba (lead gameplay programmer), and another with Céline Tellier (art and technical director) higlighting the artistic direction of the project
 -
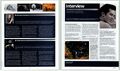 More interviews: Stan Metter (lead animator), François Queinnec (PlayStation 2 graphics programmer) and John Leguizamo (voice of Globox)
 -
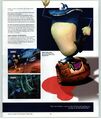 John Leguizamo interview continued
 -
 An exclusive preview article of the game in Le Journal de Mickey
 -

-

-

-

-

-

-
-
.png)
.png)
-2.png)
.png)
_Cover.png)
-1.png)
-2.png)
-3.png)
-4.png)
-5.png)
-6.png)
.png)
.png)


_(December_2002).png)
.png)
_(1).png)
_(2).png)
Music
In the PlayStation 2 version of the beta in Dangerous Game, only the first music of the Hoodmonger Soldiers is used.
- The old music of the Hoodmongers.
- The old music of the Hoodmonger Soldiers.
- The second old music of the Hoodmonger Soldiers.
- The old music of the Hoodmonger Officers.
- The old music of the snipers.
- The old music of the snipers.
- The old music of the snipers.
External links
- The 2002 demo's playthrough at YouTube (PS2 version - Dangerous Game)
- The 2002 demo's playthrough at YouTube (PS2 version - Special Invaders)
- The 2002 demo's playthrough at YouTube (PS2 version - Trailer)
- The 2002 demo's playthrough at YouTube (PC version - Dangerous Game)
- The 2002 demo's playthrough at YouTube (PC version - Special Invaders)
- The 2002 demo's playthrough at YouTube (PC version - Trailer)
- TCRF Page noting leftover beta content
References
- ↑ YouTube, Rayman 3 - Unused Leptys Statue Lightning Behaviour, https://www.youtube.com/watch?v=vJPNu0FE8IU
- ↑ Rayman Pirate-Community discussion forums, Rayman 3 - Scrapped Story, https://raymanpc.com/forum/viewtopic.php?f=13&t=6766&p=542889
- ↑ Twitch, Highlight: Project Deluge: Rayman 3: Hoodlum Havoc, https://www.twitch.tv/videos/957243402
- ↑ Hidden Palace, Rayman 3: Hoodlum Havoc (May 17, 2002 prototype), https://hiddenpalace.org/Rayman_3:_Hoodlum_Havoc_(May_17,_2002_prototype)
|
|
Early production of Rayman games |

